I learned this lesson the hard way when I destroyed a Nintendo Switch motherboard attempting my first joy-con drift repair. A single slipped iron lifted a pad, and suddenly that $300 console was bricked. That $15 practice kit sitting on my desk mocked me. If I had spent an afternoon practicing on a $10 board instead of jumping straight into console repair, I would have saved myself $300 and a lot of frustration.
Whether you are planning to replace HDMI ports on PS4s, fix joy-con drift on Nintendo Switches, or install modchips on retro consoles, the best soldering practice kits for gaming repair beginners are essential investments. Gaming console motherboards contain expensive, sensitive components. One mistake with a hot iron can lift a copper trace or fry a chip, turning a repairable console into e-waste.
After testing dozens of kits and talking with console repair technicians from Retro Game Repair Shop and TronicsFix, I have found the right practice progression path. You need to start with through-hole components to build basic muscle memory, then graduate to SMD (surface-mount device) practice boards that mirror actual console components. The best kits produce functional items you will actually use, keeping you engaged through the frustrating early learning phase.
Top 3 Picks for Best Soldering Practice Kits for Gaming Repair Beginners

Jitterbug Soldering Kit
- Interactive vibrating bug
- Complete in 30-60 minutes
- Highest rated (4.6/5)
- All components included

MiOYOOW Bluetooth Speaker Kit
- Real working Bluetooth speaker
- Pre-soldered Bluetooth module
- LED light show
- Acrylic case included

VOGURTIME 5-in-1 Game Kit
- 5 retro games in handheld format
- Quality acrylic case
- Multiple power options
- Great for gaming enthusiasts
Best Soldering Practice Kits for Gaming Repair Beginners in 2026
| Product | Specs | Action |
|---|---|---|
|
Jitterbug Soldering Kit
|
|
Check Latest Price |
|
MiOYOOW Bluetooth Speaker Kit
|
|
Check Latest Price |
|
VOGURTIME 5-in-1 Game Kit
|
|
Check Latest Price |
 PEMENOL 4-in-1 Game Kit
|
|
Check Latest Price |
 MUXWELL Game Console Kit
|
|
Check Latest Price |
 Gikfun LED Chaser Kit
|
|
Check Latest Price |
 Christmas Tree Kit
|
|
Check Latest Price |
 tingbowie Learning Board
|
|
Check Latest Price |
 Gikfun SMD Practice Board
|
|
Check Latest Price |
 D DZRCOXI 3-Board SMD Set
|
|
Check Latest Price |
1. Jitterbug Soldering Kit – Best Absolute Beginner Kit
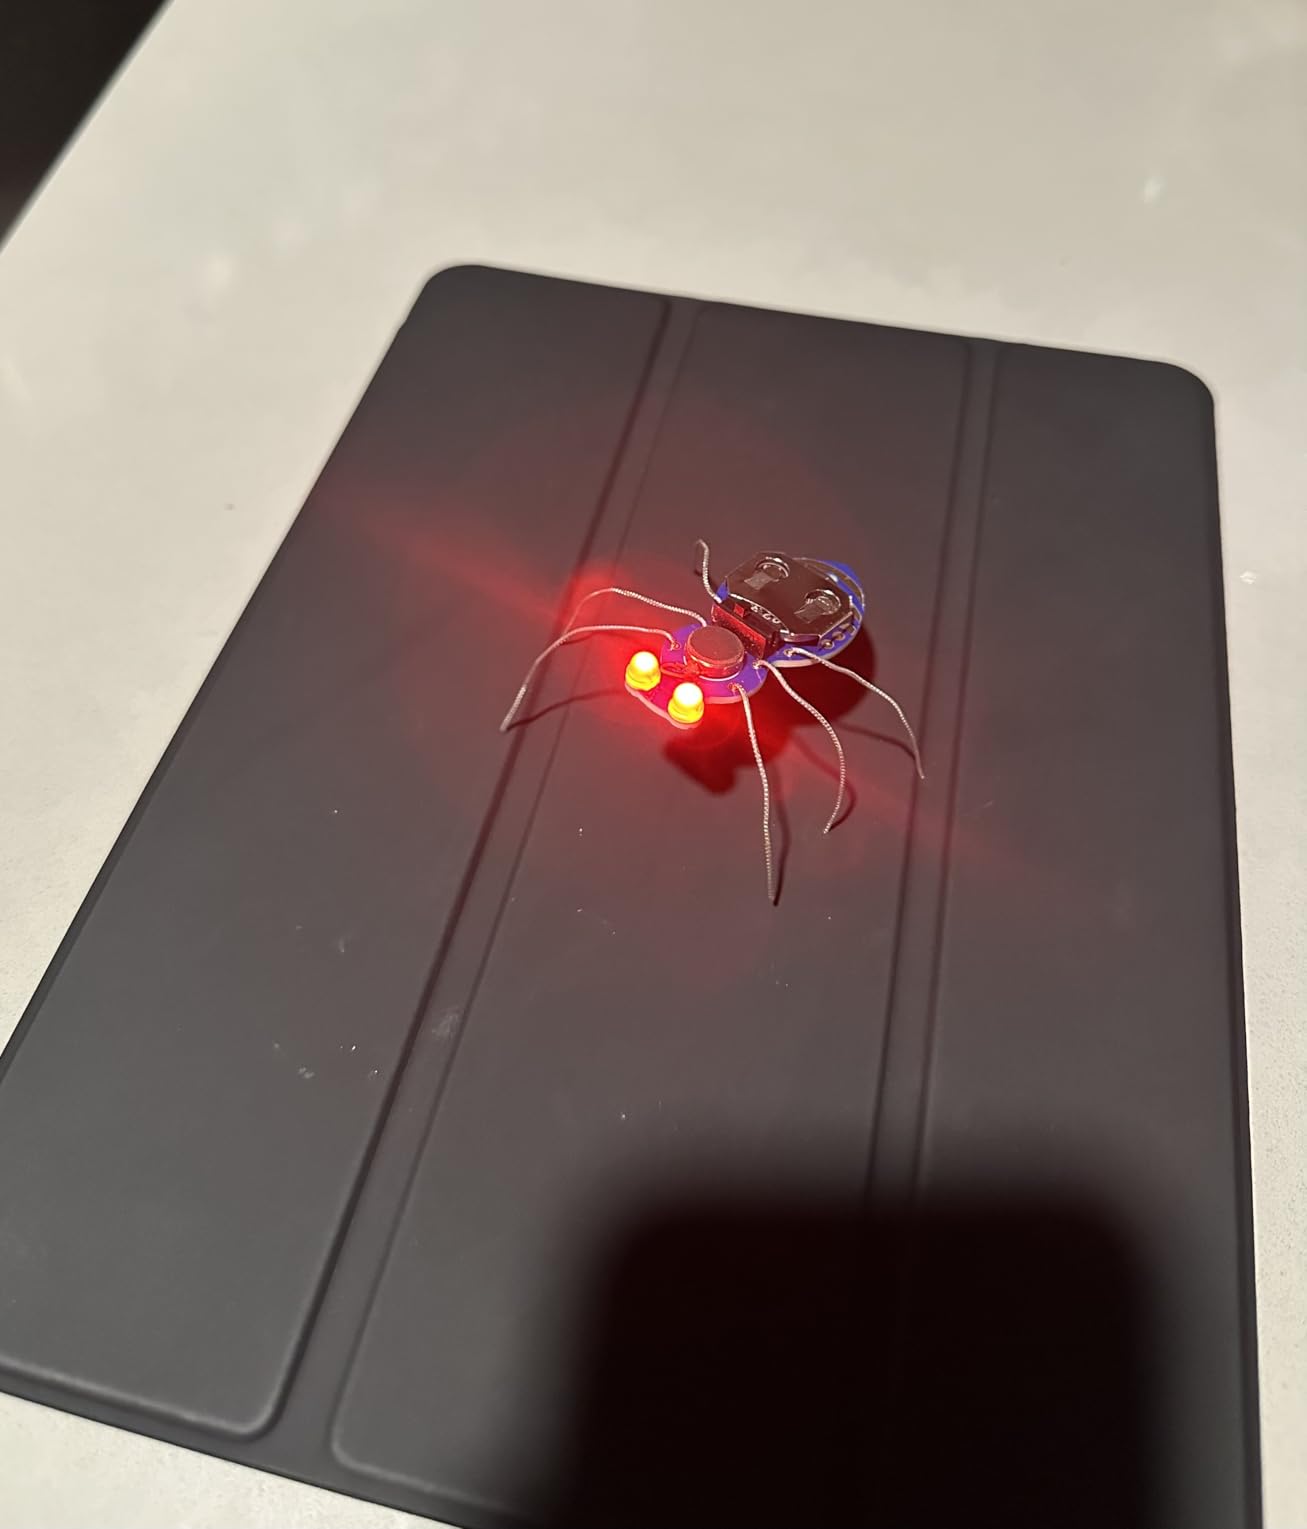
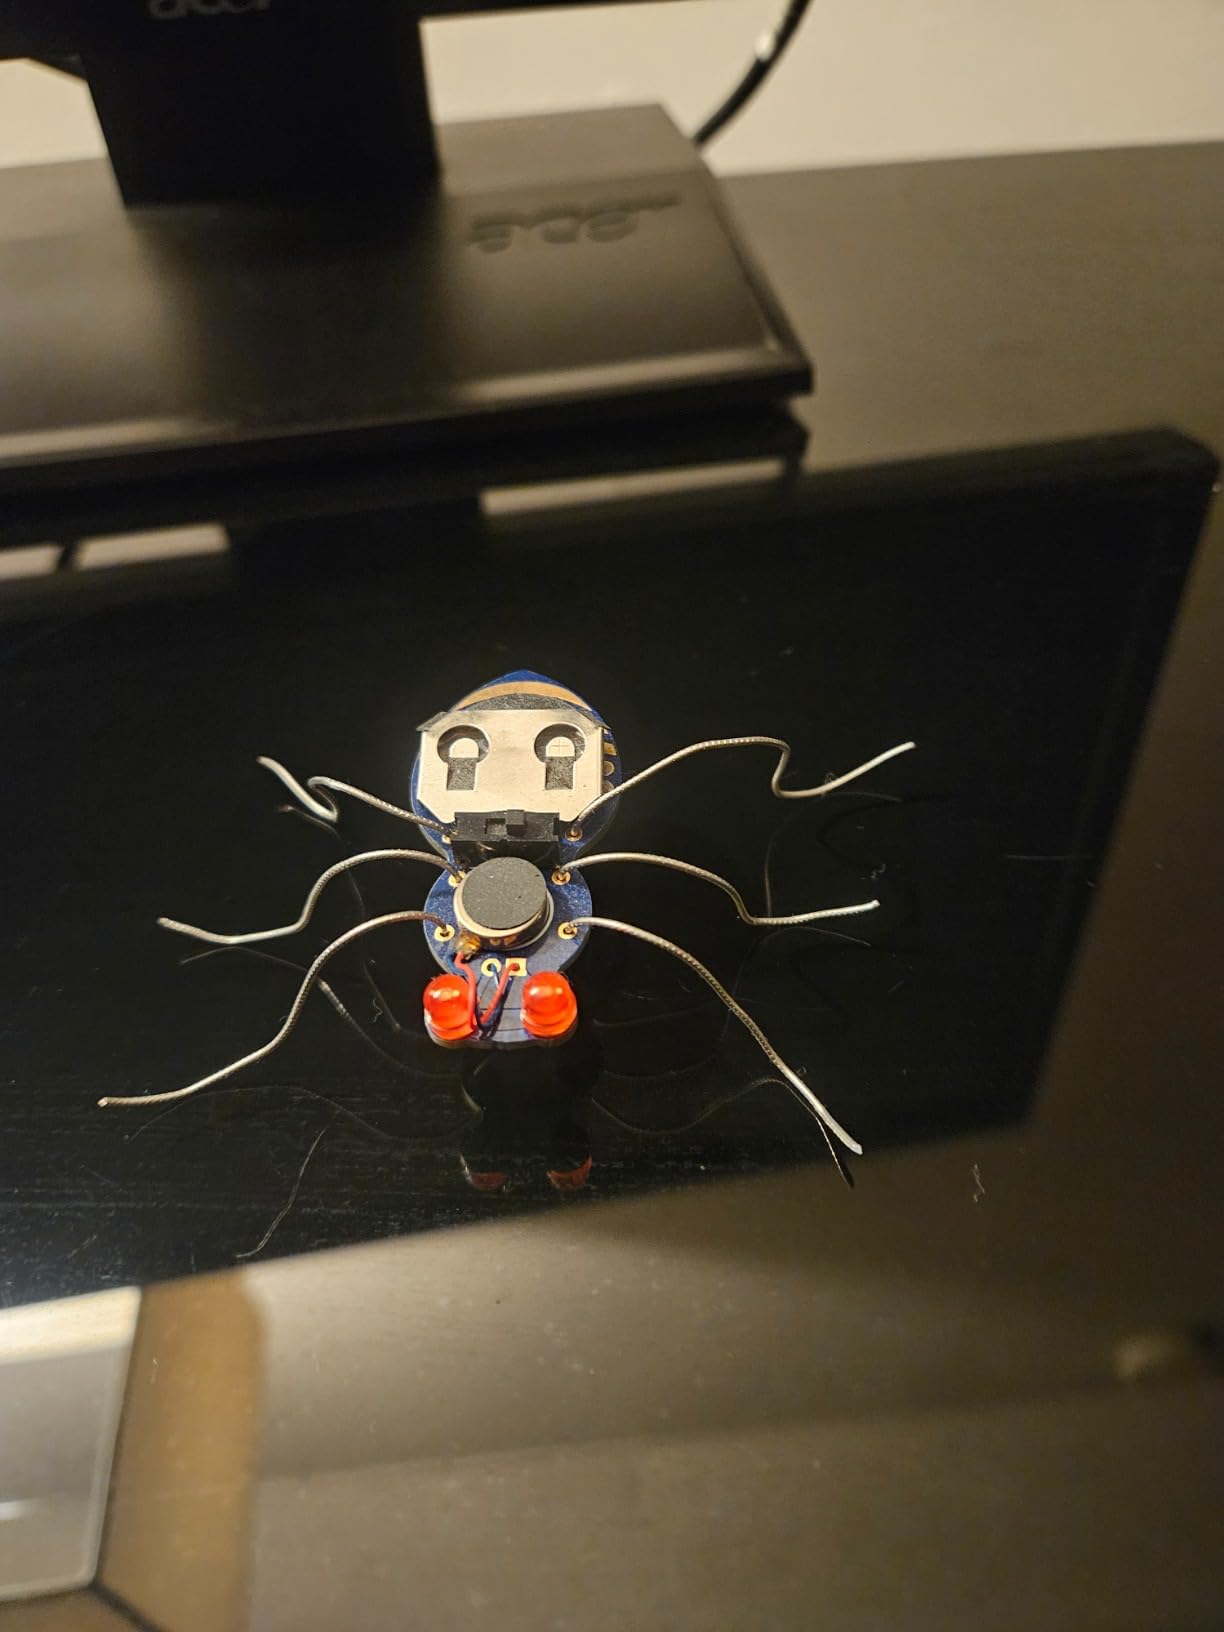
Learn to Solder Kits Jitterbug Soldering Kit | DIY Electronics Projects for Beginners | STEM Practice Science Project | Electronic Vibration Motor Circuit Boards with Battery
Assembles in 30-60 minutes
Interactive vibrating bug
LED eyes light up
All components included
Pros
- Quick confidence builder
- Interactive and fun result
- Clear instructions
- Lead-free PCB
- High quality construction
Cons
- Battery wires are thin
- Instructions online only
- May be challenging alone for under 12
I spent 45 minutes building this jittering bug with my 10-year-old nephew, and watching his face light up when the creature started skittering across the table reminded me why this kit earns my Editor’s Choice. The vibration motor brings the creation to life in a way static practice boards cannot match. You build a bug-shaped PCB with two LED eyes, a switch, and a vibration motor powered by a CR2032 battery.
This is the best soldering practice kit for gaming repair beginners who have never held an iron before. The components are large enough to handle easily, and the instructions walk you through each joint methodically. My nephew successfully soldered every connection himself with only minor guidance. When you finish, you have a working toy that actually moves and lights up – immediate gratification that keeps beginners motivated.
The technical quality stands out too. The PCB is lead-free and resistant to high temperatures, so it will not delaminate if you hold the iron too long (a common beginner mistake). This kit is Open Source Hardware certified and assembled in California, which shows in the component quality. I have built cheaper kits that required two attempts because the PCB lifted, but this one held up perfectly even when I was demonstrating poor technique on purpose.
From a gaming repair preparation standpoint, this kit teaches the fundamentals without being so frustrating that you quit. You learn to heat the pad and component simultaneously, apply the right amount of solder, and recognize a good joint versus a cold joint. These are the exact skills you need before attempting any console work. The battery wires are frustratingly thin and difficult for beginners to solder, but that is actually good practice – console flex cables are similarly delicate.
Best For
Complete beginners who have never soldered before, parents doing STEM projects with children, and anyone who needs a quick confidence boost before tackling more challenging kits. If you are intimidated by electronics and want a guaranteed success on your first try, start here.
Avoid If
You already have basic soldering experience or want to practice techniques directly applicable to console repair. This kit is too simple for intermediate solderers – you will not learn SMD work or temperature control skills needed for HDMI port replacement.
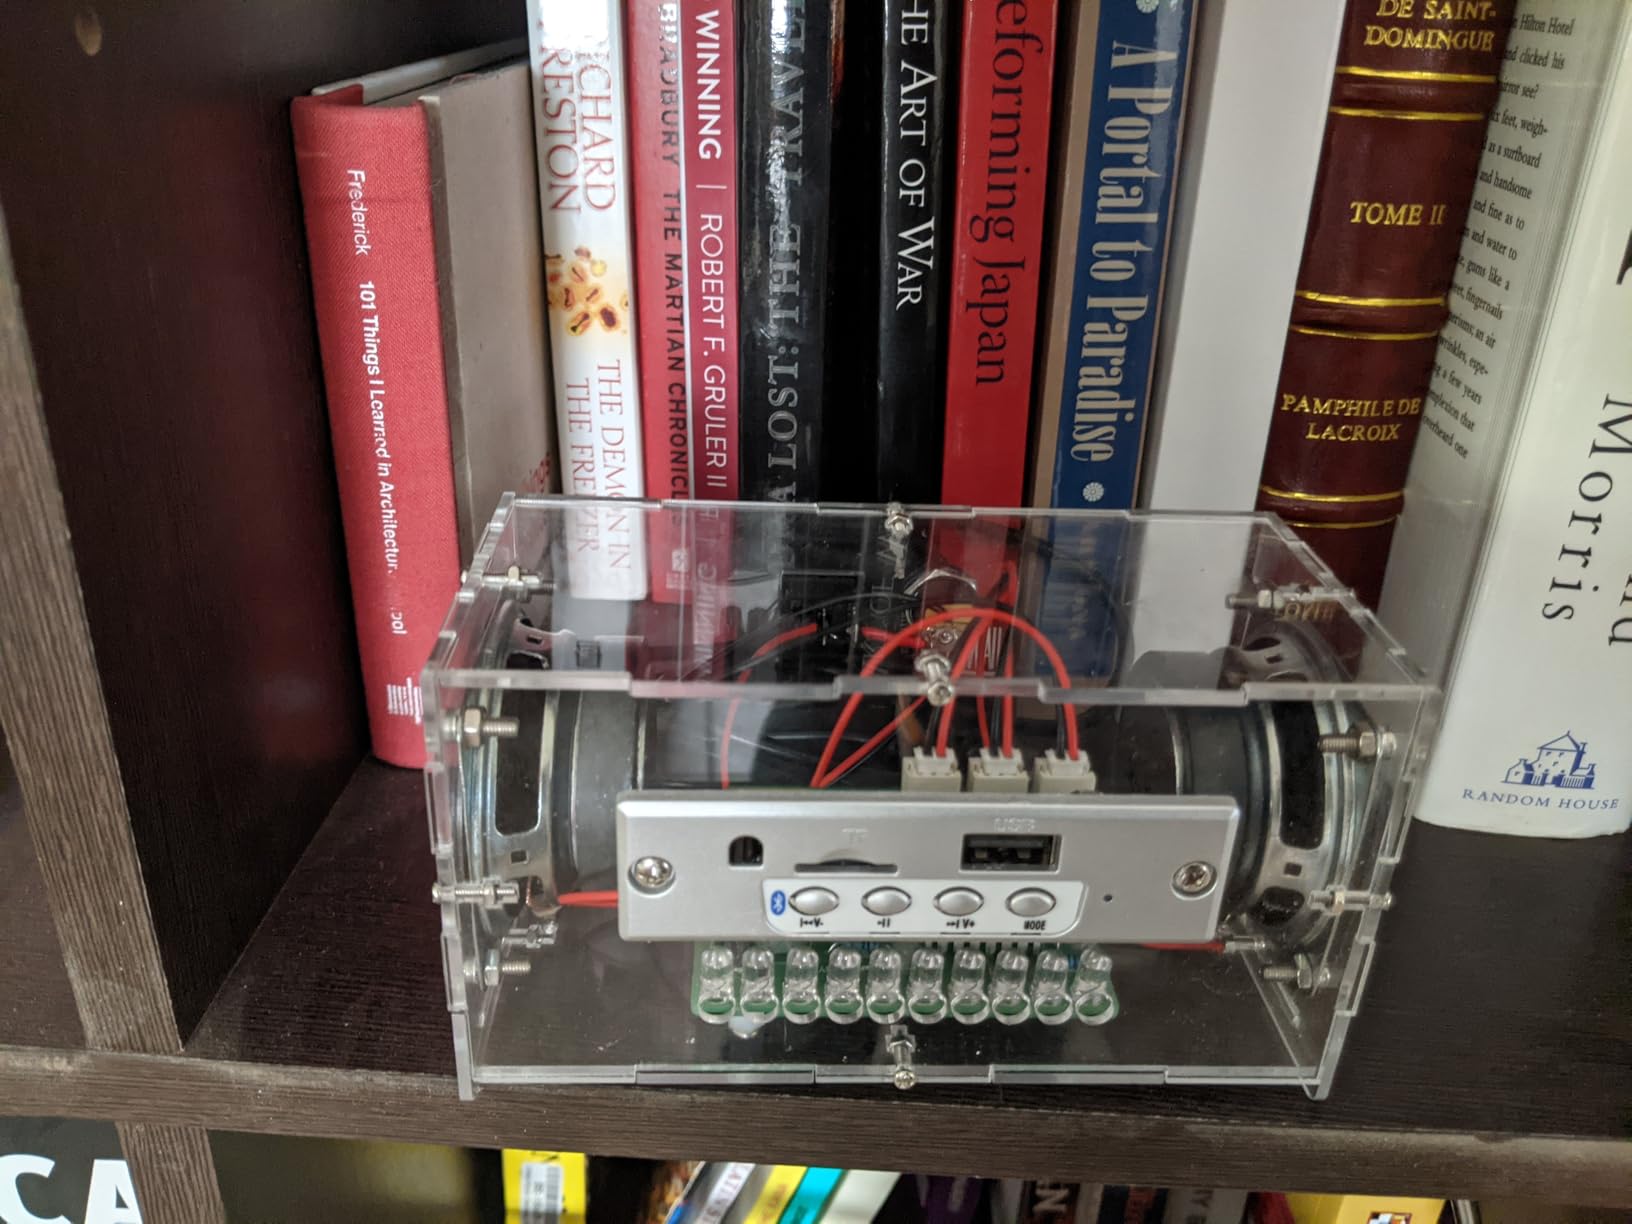
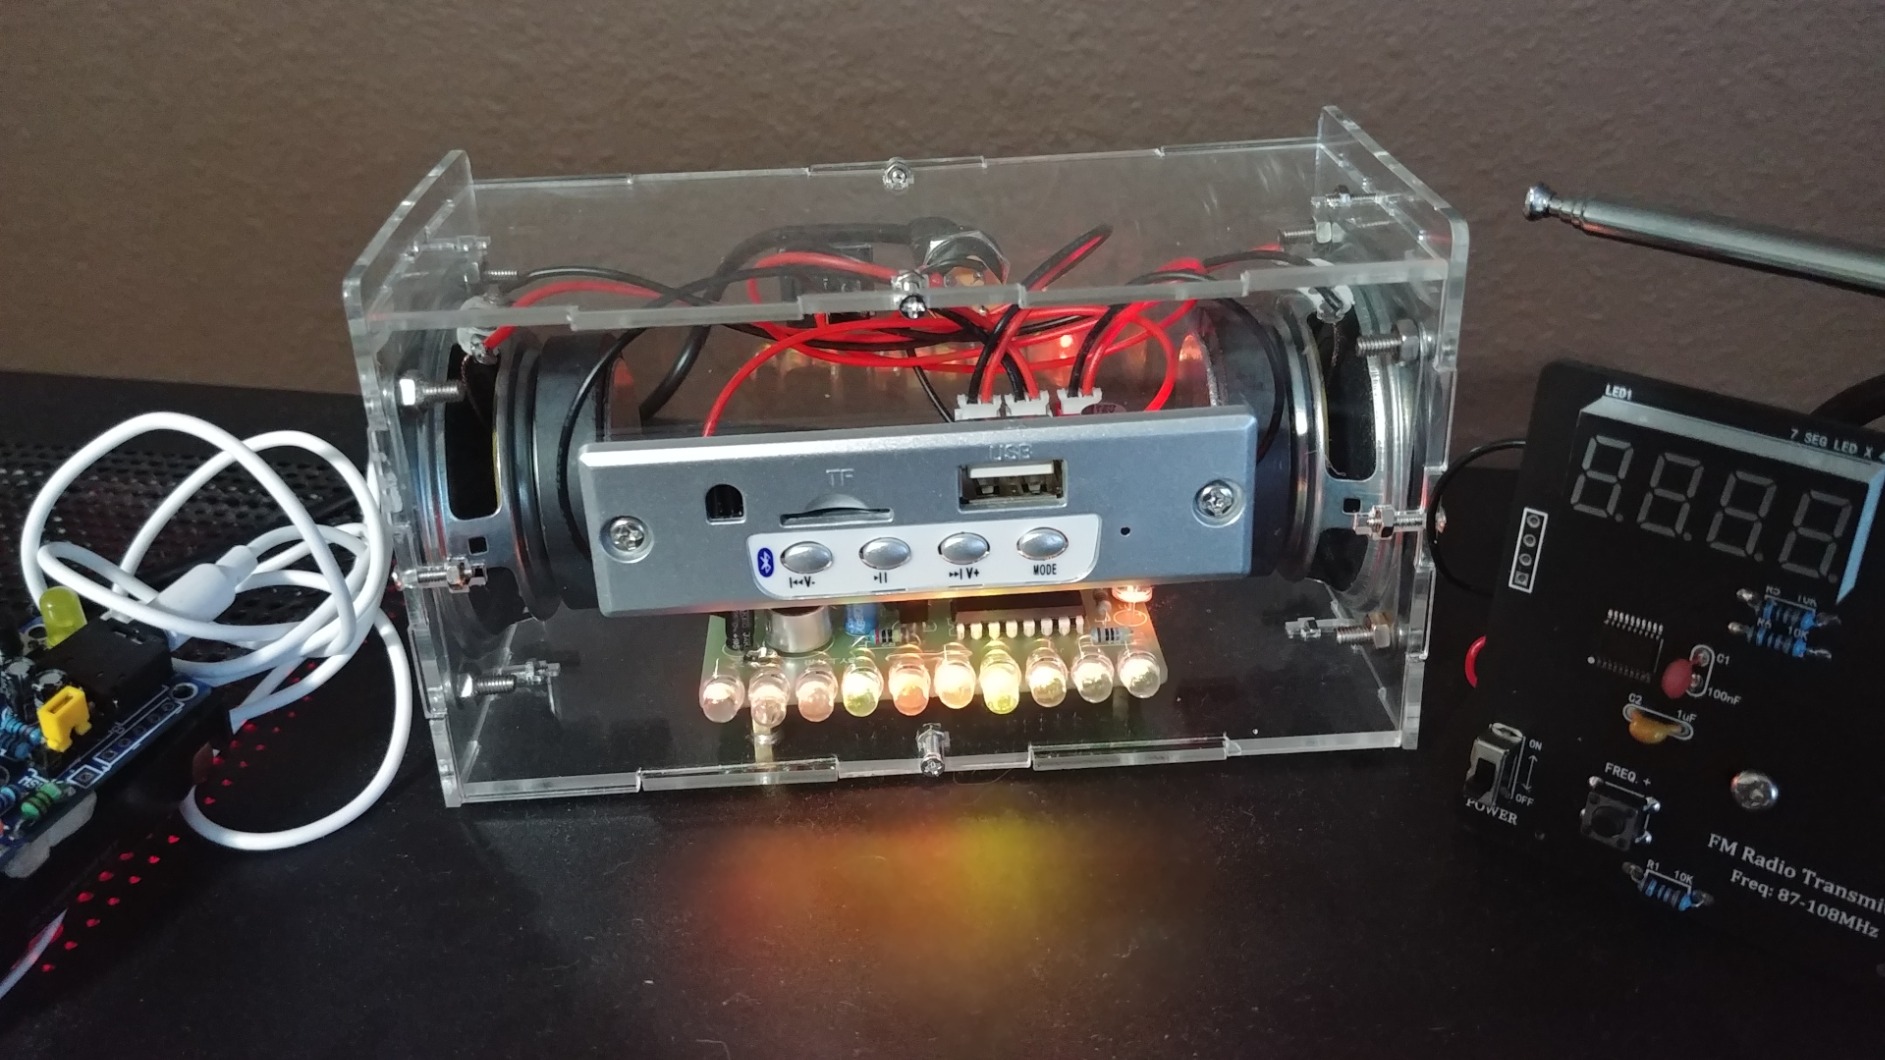
2. MiOYOOW DIY Bluetooth Speaker Kit – Best Functional Result
MiOYOOW DIY Bluetooth Speaker Kit, USB Mini Stereo Amplifier Soldering Kit with LED Flashing Lights, STEM Electronic Projects Solder Practice Kit for Home and School Education
Real working Bluetooth speaker
Dual 3W speakers with LEDs
Multiple playback modes
Acrylic case included
Pros
- Builds functional electronics
- Pre-soldered Bluetooth module
- Decent sound quality
- Multiple input options
- Fun STEM project
Cons
- Acrylic case is frustrating
- Instructions can be confusing
- LEDs biased to red
- Some QC issues reported
Building a working Bluetooth speaker that you actually use afterward feels like accomplishing something real. I have had this speaker on my desk for six months, and I still use it for podcasts while working. The kit includes dual 3W speakers, LED flashing lights, and a Bluetooth module that is pre-soldered (thankfully, because RF modules are tricky). You can play audio via Bluetooth, TF card, or USB drive, and the included infrared remote lets you control playback from across the room.
The pre-soldered Bluetooth module makes this accessible for beginners while still providing meaningful practice. You solder the speakers, LEDs, potentiometers, and power connections yourself. These are through-hole components that teach proper technique without the extreme precision needed for SMD work. I particularly appreciated the adjustable potentiometers – they let you change the LED chaser patterns and volume, teaching you how variable resistors work in practice.
This took me about three hours to complete at a leisurely pace. The acrylic case assembly was genuinely frustrating – the pieces are tight-fitting and I cracked one corner being too aggressive. But the final result looks professional and the sound quality is surprisingly decent for the price. This is not going to replace a dedicated audio system, but for casual listening it works perfectly fine.
For gaming repair preparation, this kit exposes you to component-level soldering that mirrors console board work. You are soldering to a PCB with clearly marked pads, just like you would when replacing a port or chip on a console motherboard. The LEDs are sensitive to heat damage, which teaches you temperature control – a critical skill when working near expensive console components. Some users received units with incorrect QR codes for instructions, so verify you have the right manual before starting.
Best For
Beginners who want to build something genuinely useful, intermediate solderers looking for a fun afternoon project, and anyone who learns better when the final result has practical value. The multiple input options make it great for understanding how different audio sources connect electronically.
Avoid If
You struggle with fine motor skills or get frustrated easily. The acrylic case assembly is legitimately challenging and can crack if you force it. Also avoid if you are specifically preparing for console repair – this does not teach SMD skills needed for modern console work.
3. VOGURTIME DIY Solder Project Game Kit – Best Gaming-Focused Practice
DIY Solder Project Game Kit with 5 Retro Classic Games for Electronic Soldering Practice and Learning, Comfortable Acrylic Case and Handheld Size, Ideal Gift for Family and Friends by VOGURTIME
5 retro classic games included
Comfortable acrylic handheld case
USB or battery power
Compact 3 x 4.2 x 0.8 inch size
Pros
- Builds functional game console
- Gaming-focused result
- Clear instructions included
- Multiple power options
- Quality acrylic case
Cons
- Limited soldering (chip pre-done)
- Some button failures reported
- Battery case design issues
As a gaming repair beginner, building a handheld game console feels like direct training for your end goal. This kit produces a compact handheld device with five classic games including Tetris. The acrylic case fits comfortably in your hand, and when you are done, you have a portable gaming system that actually works. I found myself playing this during breaks instead of my phone – the games are legitimately engaging for a simple practice kit.
The soldering experience is beginner-friendly but not trivial. You are working with through-hole components on a quality PCB with clear markings. The main SMD chip comes pre-soldered, which is appropriate for beginners – that level of precision comes later in your learning progression. I particularly appreciated the colorful printed English manual with clear diagrams. Some kits expect you to decipher poorly translated instructions, but this one walks you through each step thoughtfully.
Power flexibility is a nice touch. You can run this via USB power bank, 5V adapter, or 3 AAA batteries. I tested all three methods and each worked flawlessly. The compact size (3 x 4.2 x 0.8 inches) makes it easy to toss in a backpack. The customer service is reportedly excellent too – one Redditor mentioned receiving extra screws and prompt help when they had questions during assembly.
From a gaming repair standpoint, this kit builds relevant confidence. You are working on a device that looks and feels like the consoles you eventually want to repair. The button assembly teaches you about switch soldering, which translates directly to controller repair work. Some users reported button input failures after extended use, which is concerning, but at this price point you are paying for the practice experience more than a long-term gaming device.
Best For
Gaming enthusiasts who want practice that feels directly relevant to their interests, beginners who want a fun finished product, and anyone preparing for handheld console repair. The gaming focus keeps you motivated through the learning process.
Avoid If
You want extensive soldering practice or are preparing specifically for modern console repair. The pre-soldered main chip means you get limited hands-on time with the most challenging components. This is better for confidence building than comprehensive skill development.
4. PEMENOL DIY Game Soldering Kit – Best Instructions for Beginners
PEMENOL DIY Game Soldering Kit for Beginners, 4 Retro Games STEM Electronics Project with Adjustable Brightness, Music Switch, Solder Practice Kit for School Students Class Present
4 retro games included
Color-printed step-by-step manual
Adjustable brightness and music
USB or battery power
Pros
- Excellent clear instructions
- Beginner-friendly design
- Acrylic case included
- Adjustable settings
- Good component quality
Cons
- More complex than expected
- Batteries not included
- Plain packaging
- Younger kids need adult help
PEMENOL gets right what so many kits get wrong: the instructions. This kit includes a color-printed manual with actual step-by-step directions instead of the blurry black-and-white photocopies I have seen with other products. When you are learning soldering for the first time, clear documentation matters immensely. I watched my 12-year-old neighbor work through this with minimal supervision, and the instructions carried her through every tricky spot.
The kit builds a handheld game console with four retro games and a game preview before selection. The layout is clean with only five control buttons, reducing the chance of confusion during assembly. I particularly liked the adjustable music and brightness settings – they let you customize the experience and teach you about variable controls in electronics. The acrylic case gives the finished product a polished look.
Power options include USB or battery (batteries not included), giving you flexibility. The component quality is noticeably better than budget kits – the PCB has clear markings and the parts fit their pads perfectly. This attention to detail prevents the frustration of misaligned components that plagues cheaper alternatives.
This took about two hours to build at a relaxed pace. Some reviewers noted it is more complex than expected for true beginners, and I agree – this is not your first kit unless you are patient. Younger builders definitely need adult supervision. But as a second or third kit in your learning progression, it hits the sweet spot between challenge and accessibility. The battery hookup requires careful attention to wire placement, so take your time on that section.
Best For
Beginners who value excellent instructions, STEM students who want to understand electronics fundamentals, and parent-child projects where the adult has some soldering experience. The clear documentation makes this ideal for educational settings.
Avoid If
You are an absolute beginner who has never soldered before, or you want extensive practice time. This kit is more about the result than the practice – experienced solderers will find it too simple.
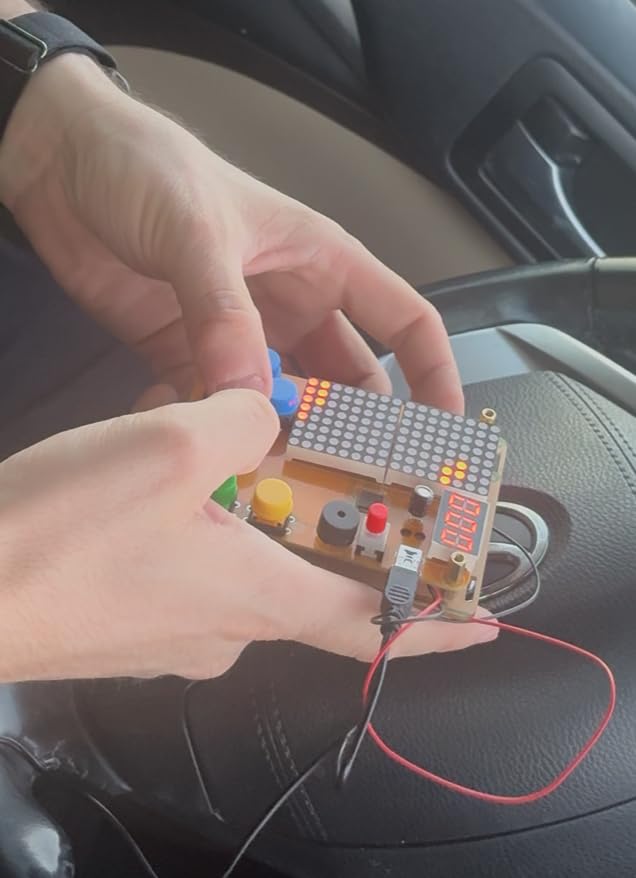
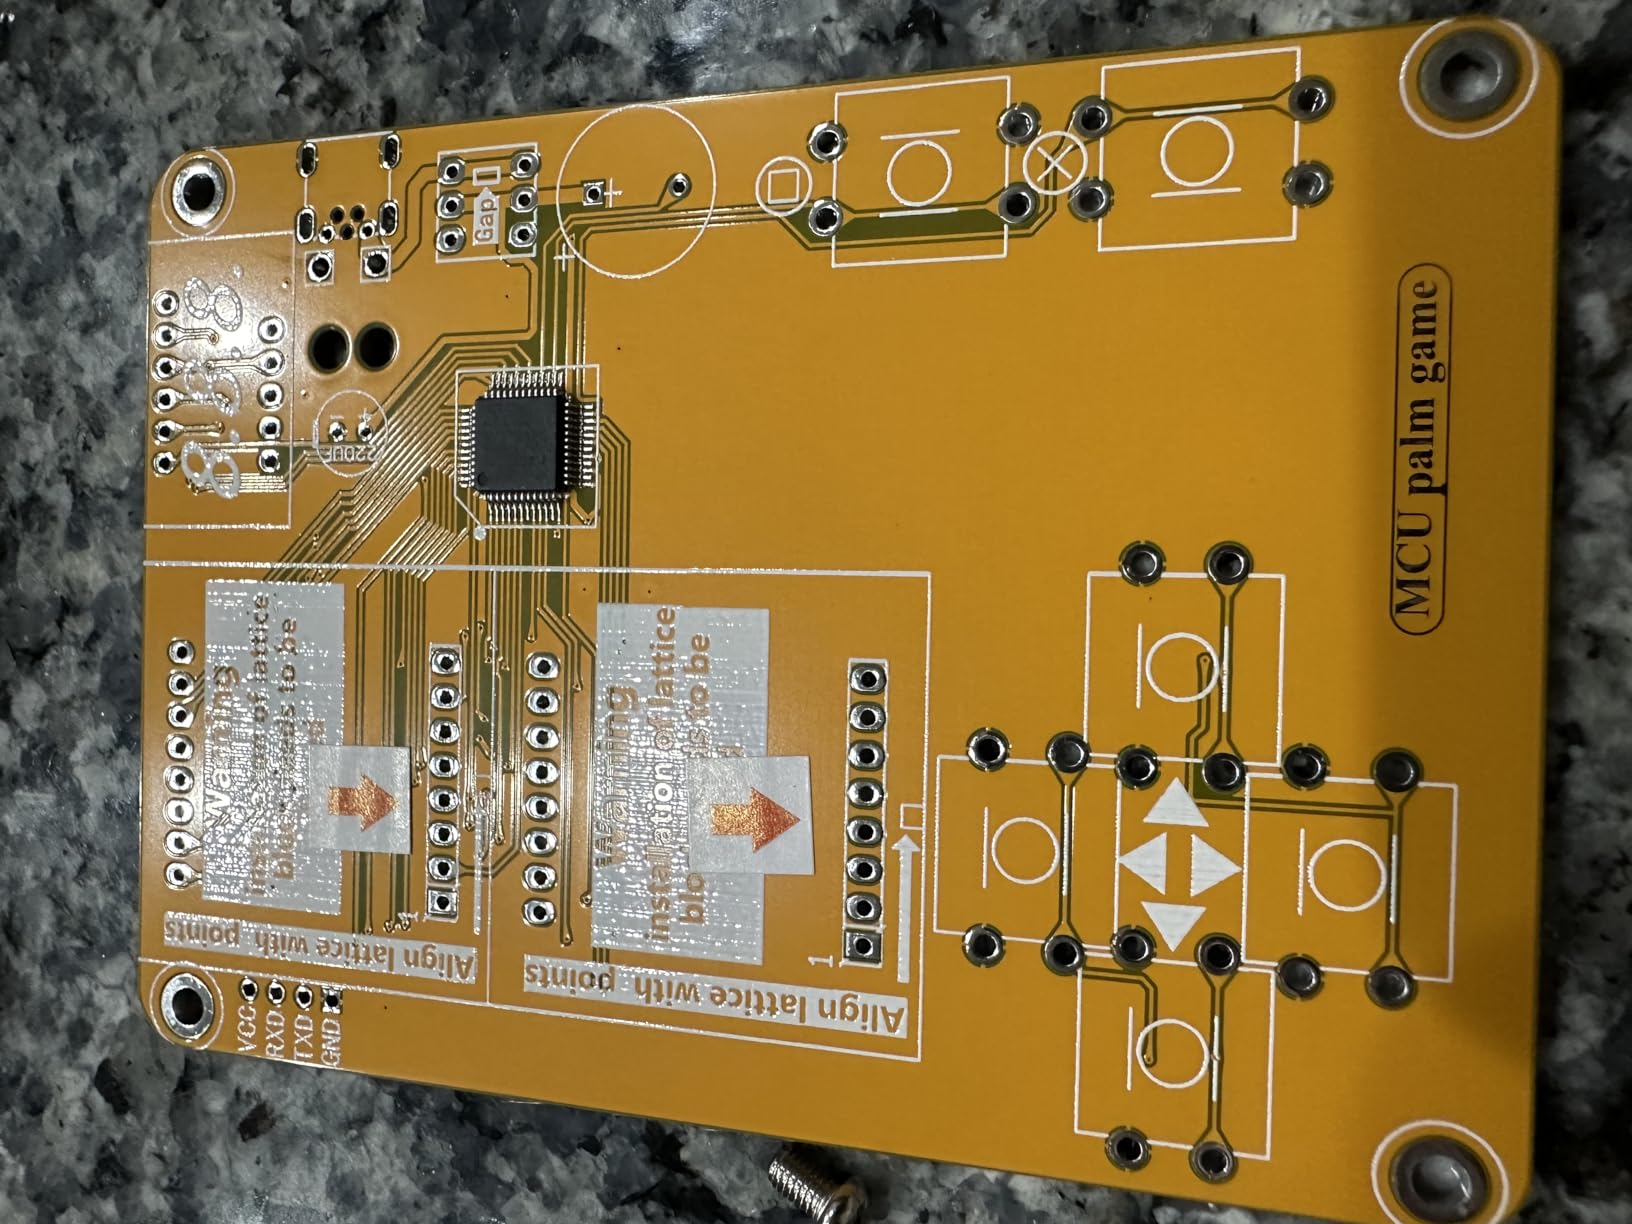
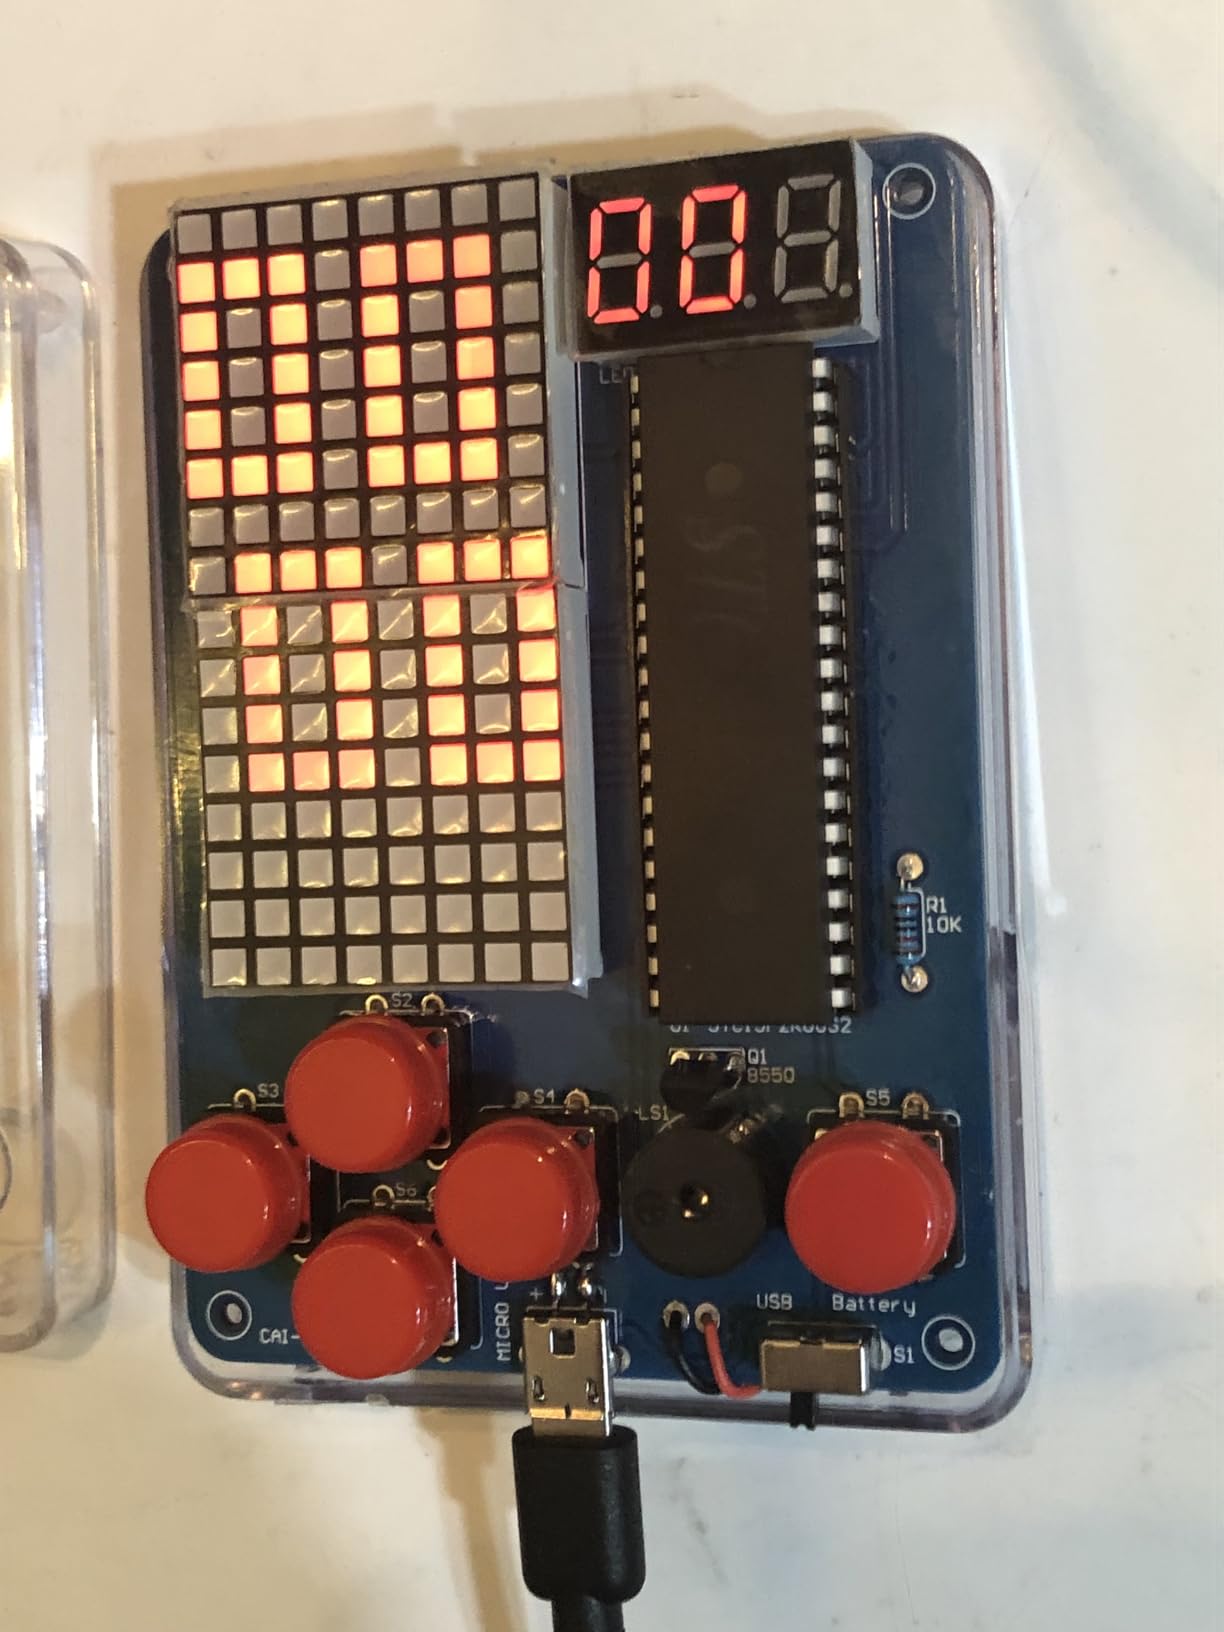
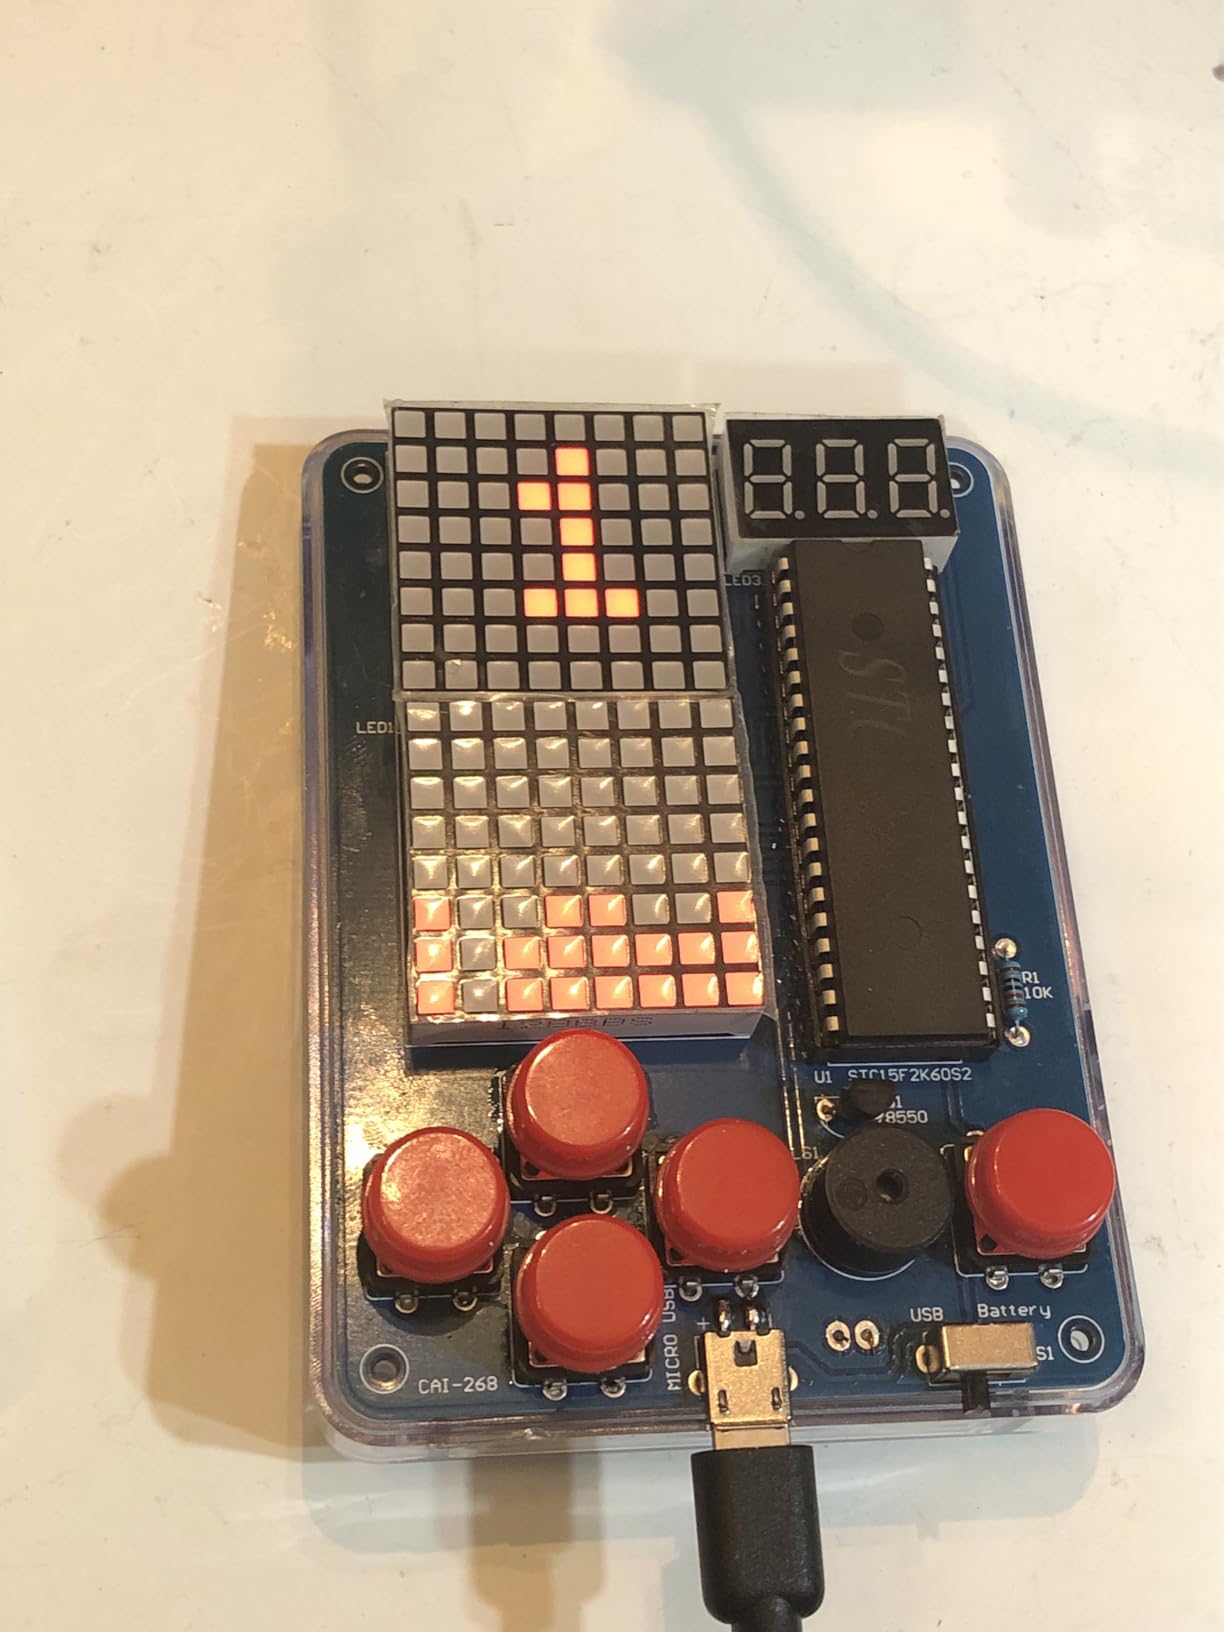
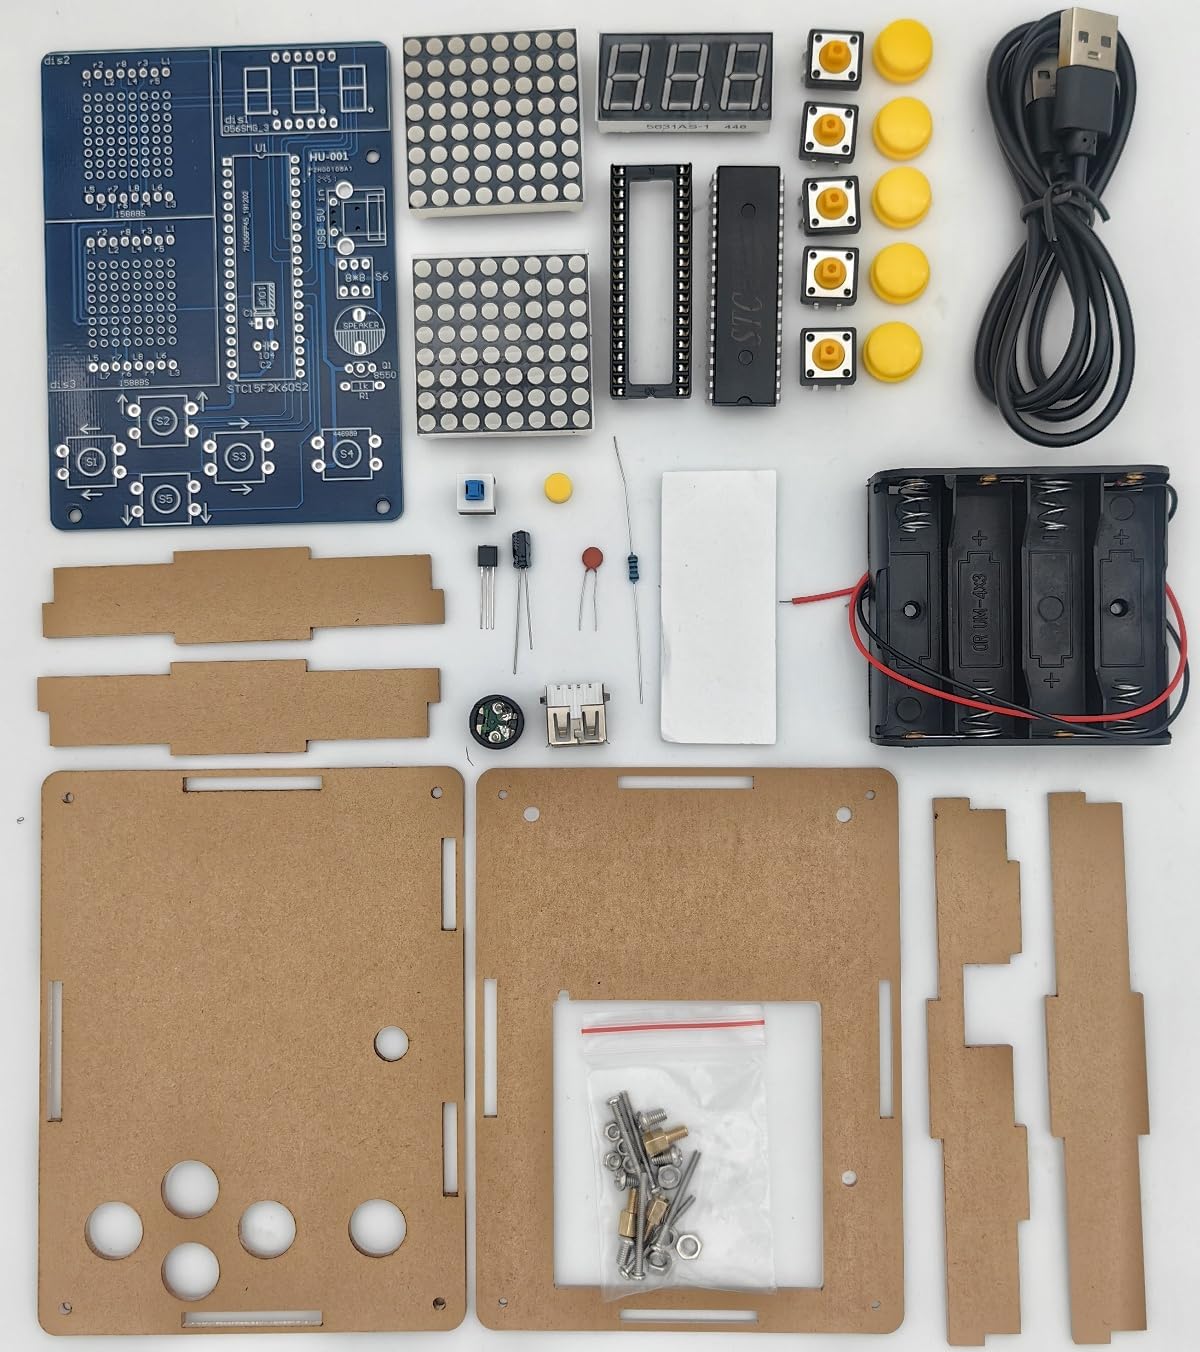
5. MUXWELL DIY Electronic Game Console Kit – Fastest Assembly
DIY Electronic Game Console Soldering Practice Kit, 4-in-1 Retro Games, LED Matrix Display, Educational Soldering Practice Project
4 classic retro games
8x8 LED matrix display
Assembles in under 1 hour
USB or 4 AA battery power
Pros
- Quick 1-hour assembly
- Clear instructions with photos
- Through-hole components only
- Sound and brightness adjustable
- Great parent-child project
Cons
- Requires 4 AA batteries (not included)
- Rechargeable batteries may not work
- Case cutout could be improved
I built this entire kit in 47 minutes while timing myself, including a break to answer the door. The speed comes from smart design choices: all components are through-hole (larger and easier to handle than SMD), the instructions are spot-on with good photos, and the PCB layout is logical. This is the best soldering practice kit for gaming repair beginners when you need a quick win or have limited time.
The kit produces a game console with four classics: Tetris, Snake, Racing, and Shooting. The 8×8 LED matrix display with 3-digit score counter is not high resolution, but it works perfectly for these simple games. Six yellow button controls provide responsive gameplay. I found myself playing Tetris for 20 minutes after assembly – the games are genuinely fun and run smoothly with random generation for replayability.

Power flexibility is excellent: USB or 4 AA batteries. I tested both and preferred USB for convenience, though the battery option is great for portability. Note that rechargeable batteries may not work well due to lower voltage – stick with alkaline for best results. The clear protective case keeps the circuit board safe and looks clean when assembled.
For gaming repair preparation, this kit reinforces through-hole fundamentals. You learn proper heat application, solder joint formation, and component identification. The instructions do not cover transistor and power switch soldering explicitly, which is odd, but the process is straightforward enough to figure out. This is an excellent confidence builder before moving to more challenging SMD work.
Best For
Busy beginners who want a quick project, parents doing weekend activities with kids, and anyone who needs a fast confidence boost. The short assembly time makes it perfect for group activities or classroom settings.
Avoid If
You want extensive soldering practice or are preparing for advanced console repair. This is too simple for experienced solderers, and the through-hole components do not prepare you for SMD-heavy console motherboards.
6. Gikfun LED Chaser Soldering Practice Kit – Most Repetition Practice
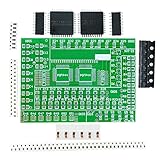
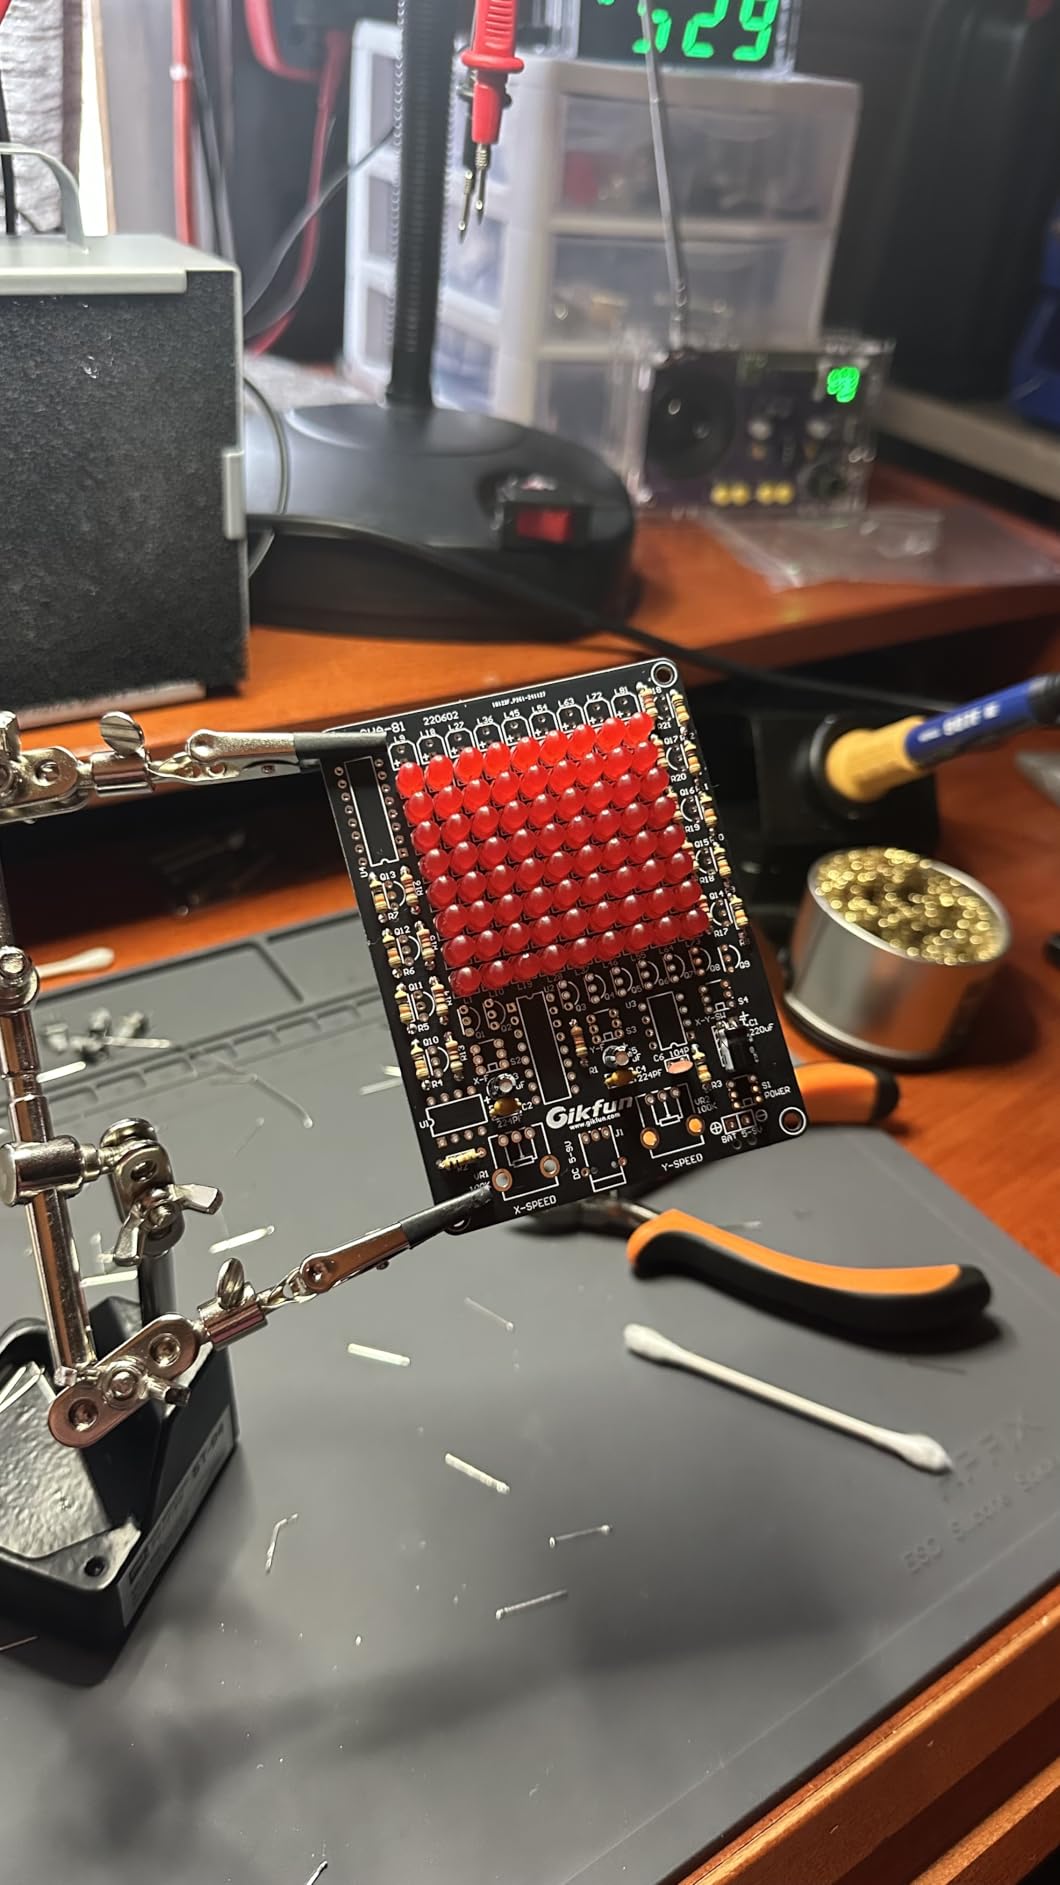
Gikfun LED Chaser Soldering Practice Kit PCB Board 81 LEDs for STEM Electronics School Learning Project DIY EK1974
81 LEDs for extensive practice
Adjustable potentiometer patterns
USB or battery power
2-7 hour assembly time
Pros
- 81 LEDs = tons of practice
- High quality PCB
- Fun visual result
- Includes manual
- Great STEM education value
Cons
- Some defective LEDs reported
- Blurry instruction photos
- LEDs sensitive to heat
- Tiny size surprises some
Eighty-one LEDs. That is 81 solder joints, not counting the resistors, capacitors, and IC. This kit provides more repetition than any other beginner kit I tested, and that repetition is exactly what builds muscle memory. The LED chaser effect is genuinely satisfying to watch when complete, and the adjustable potentiometers let you change the pattern speed and behavior.
The assembly time ranges from 2-7 hours depending on your skill level. I took about 3 hours working at a steady pace. The high quality PCB has clear component markings, which prevents confusion during assembly. Gikfun includes both a printed user manual and online PDF instructions, though the photos are somewhat blurry. I found online video tutorials helpful for clarification on a few steps.
Power options are flexible: USB or battery. I used USB during assembly for easy testing, then switched to battery for portable use. The LEDs are sensitive to heat damage, which actually teaches proper temperature control – hold the iron too long and you will kill the LED. This is excellent practice for working with heat-sensitive console components.
Some users reported receiving defective LEDs that did not light up. My kit worked perfectly, but Gikfun includes extras which suggests this is a known issue. You may need a multimeter to identify resistor values if the color bands are difficult to read. The tiny size surprises some buyers, so check the dimensions (5.43 x 4.17 x 0.87 inches) before ordering.
Best For
Beginners who want maximum practice time, STEM educators teaching electronics classes, and anyone who learns through repetition. The 81 solder joints provide extensive experience building proper technique.
Avoid If
You get bored easily or want a quick project. This takes significant time to complete, and the repetitive nature of soldering 81 LEDs might frustrate some beginners. Also avoid if you struggle with fine detail work – LEDs require precise heating.
7. Icstation 3D Christmas Tree Soldering Kit – Best Decorative Result
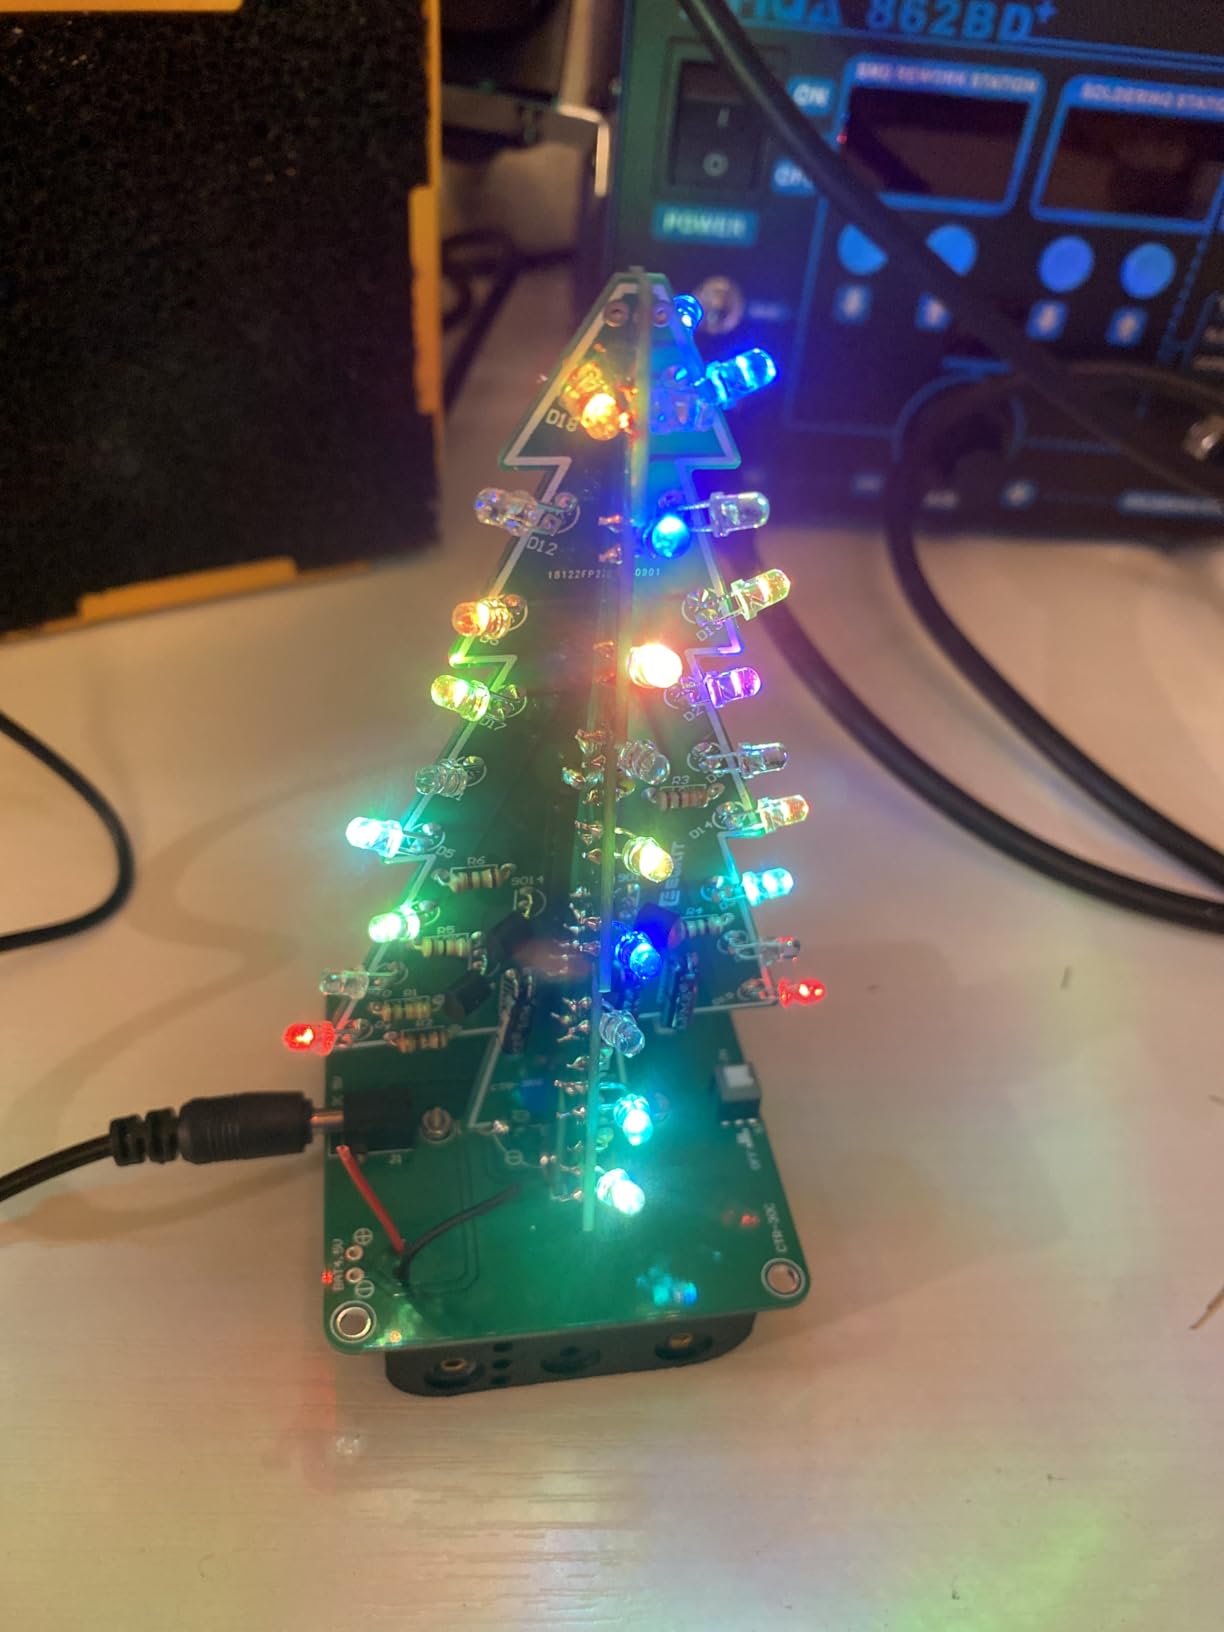
Christmas Tree Soldering Project, Icstation 3D Xmas Tree Soldering Kit with LED Flashing Lights Soldering Practice 7 Colors DIY Electronic Assemble Kit for Learning Teaching STEM Educational
36 RGB LEDs create colorful display
USB or 3 AA battery power
2-3 hour assembly time
Spare LEDs included
Pros
- Affordable at under $14
- Beautiful finished decoration
- Spare LEDs included
- Double-sided durable PCB
- Works as night light
Cons
- Resistors hard to identify
- LED polarity confusing
- Power assembly poorly documented
- Battery pack warping issues
- Instructions translation issues
This has become my go-to gift for friends interested in learning soldering. The finished 3D Christmas tree with 36 RGB LEDs creates a beautiful flashing light display that works as year-round decor, not just a holiday item. At under $14, it is the most affordable kit that produces something you actually want to display. I have mine on my desk as a night light, and guests always ask about it.
The assembly takes 2-3 hours and represents an intermediate challenge. The components are well-marked on the PCB, which helps, but the resistor color codes can be difficult to read. I kept a multimeter handy to verify values before soldering. The LEDs create the 3D tree shape when bent correctly, and the effect is striking when powered on. You can power via USB or 3 AA batteries.
I found online instructions via QR code much better than the printed manual. The translation from Chinese can be confusing in spots, particularly around the power assembly. The battery pack connection is the trickiest part and poorly documented – take your time here. Some users reported warping issues with the battery pack, though mine was fine.
The biggest challenge is LED polarity. The markings on this board are opposite standard convention, which confused me initially even with soldering experience. Test each LED before final assembly to avoid frustration later. Icstation includes spare LEDs, which suggests they expect some failures during assembly.
Best For
Beginners who want a beautiful finished product, anyone who learns through decorative projects, and makers who enjoy display pieces. The low price point makes it an excellent gift or classroom kit.
Avoid If
You are a complete beginner or struggle with following translated instructions. The LED polarity confusion and poor power assembly documentation make this frustrating as a first kit. Start with something simpler like the Jitterbug.
8. tingbowie Learning Electronics Training Board – Most Affordable
Soldering Practice Kit Learning Electronics Training Board
Learn resistor color codes
Teaches Ohm's Law
Simple PCB design
Under $9 price point
Pros
- Ultra-affordable
- Great PCB introduction
- Teaches resistor codes
- Works when assembled
- Educational value
Cons
- No full instructions
- Some missing LEDs reported
- Very simple design
- Need ohms calculation knowledge
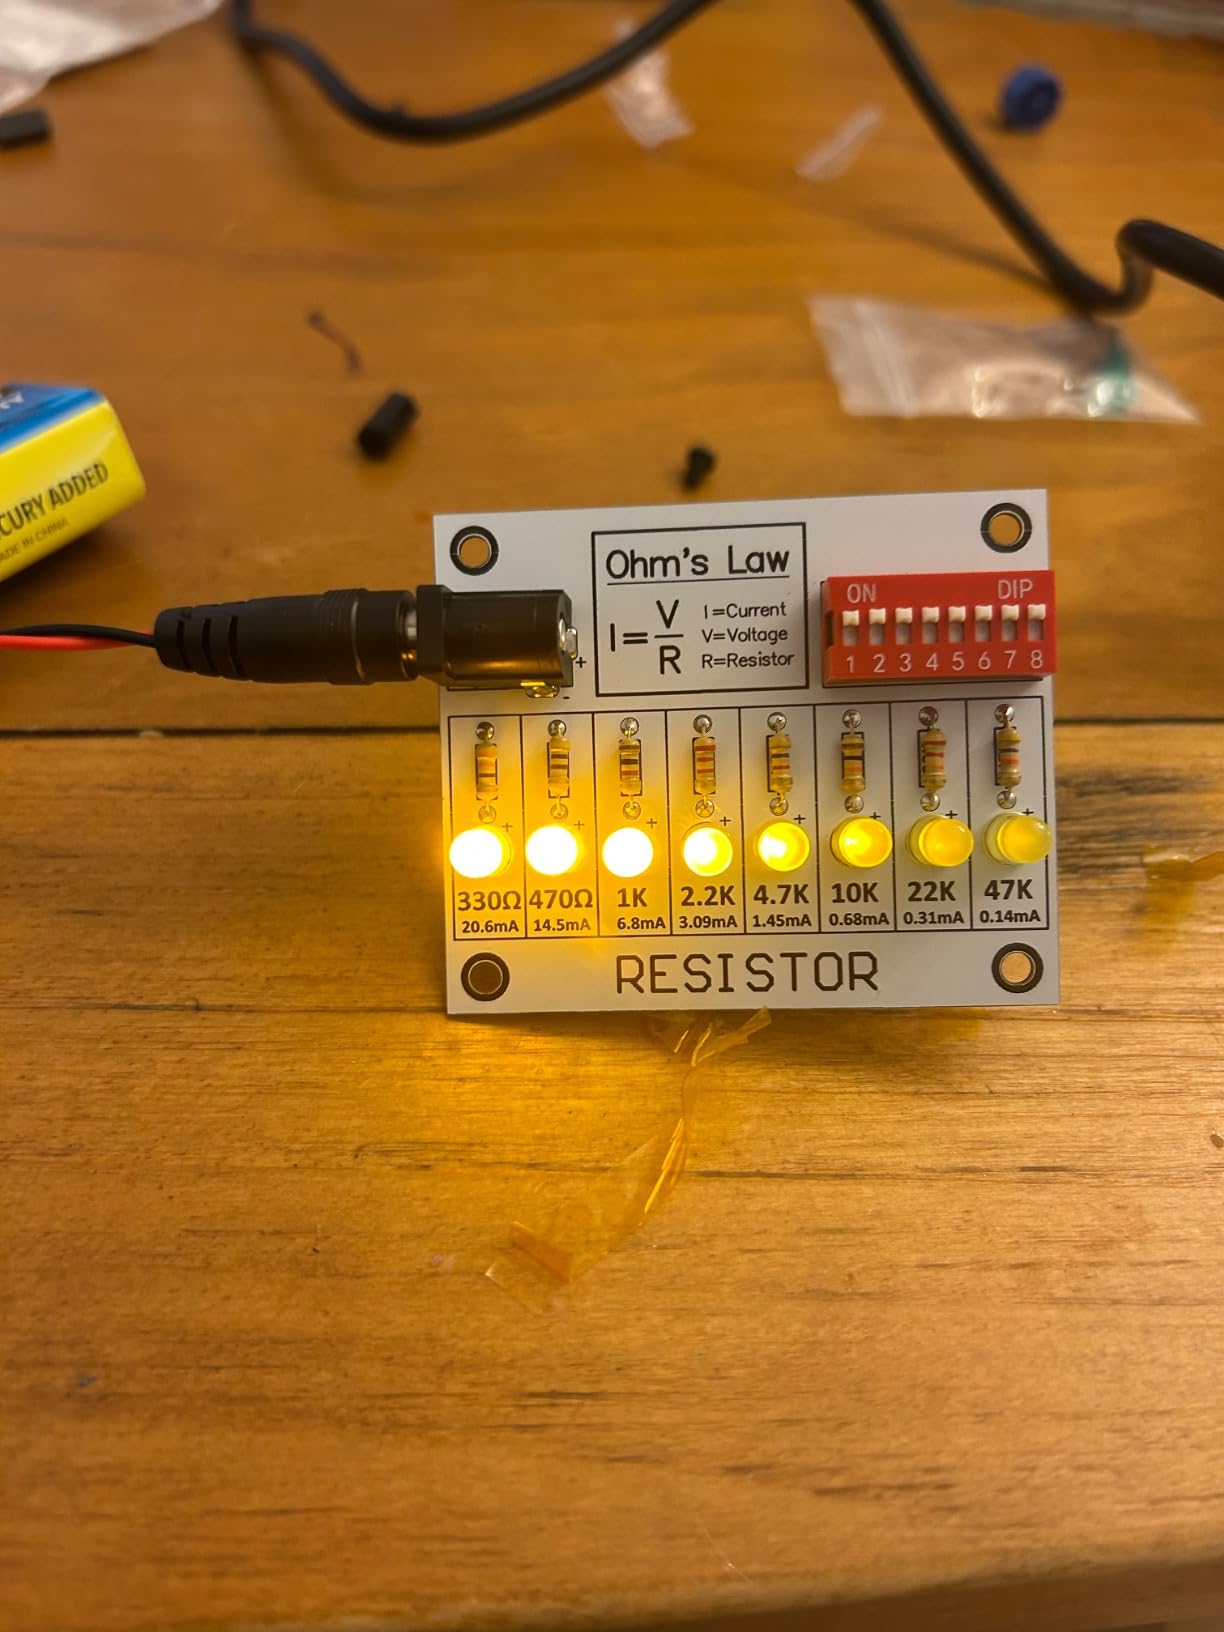
At under $9, this is the cheapest way to learn PCB soldering that actually works. The board teaches resistor color codes and basic circuit principles through hands-on assembly. When you finish, you have a working circuit that demonstrates Ohm’s Law in practice. I used this kit to teach my teenage cousin about electronics, and the hands-on approach clicked better than any textbook explanation.
The design is intentionally simple. You are soldering resistors in various configurations to learn how resistance affects current flow. The PCB is clearly marked, and the component values are recognizable if you understand color codes. If you do not, the included resistor color code sheet helps you learn through practice. This is genuinely educational, not just repetitive assembly.
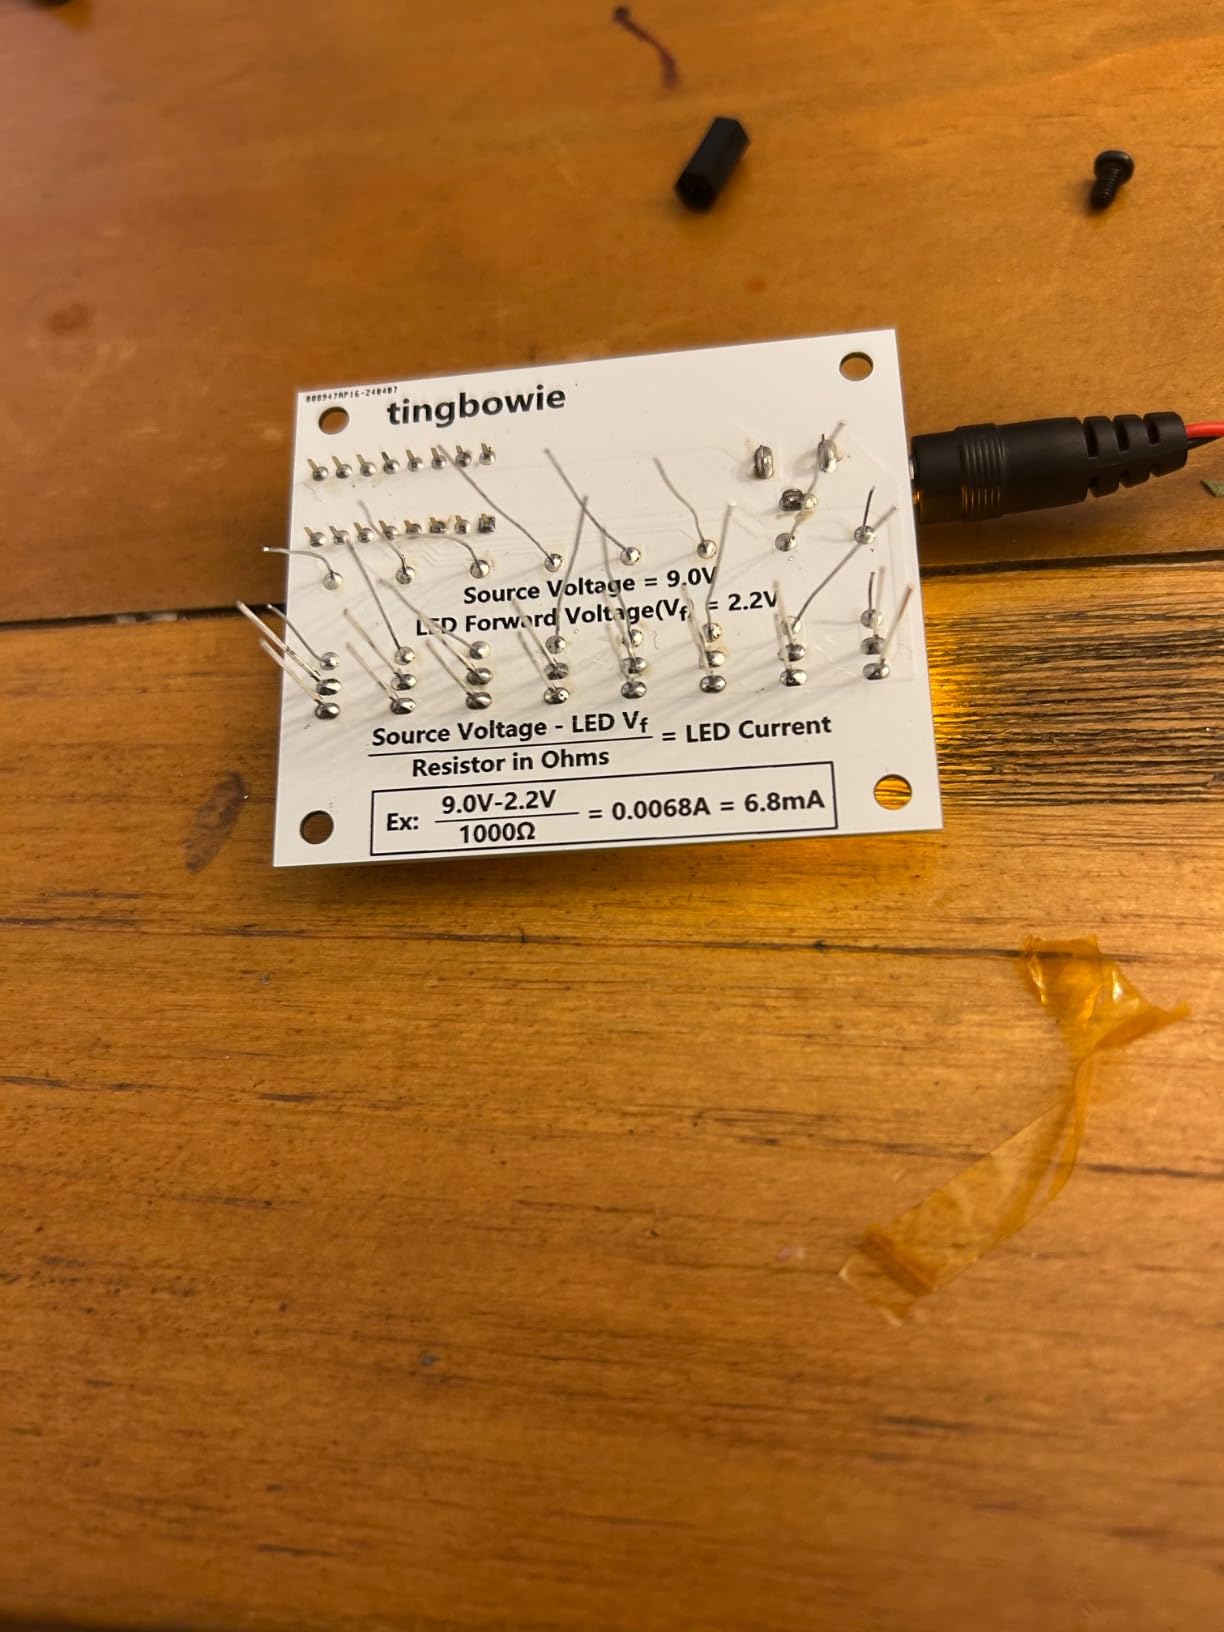
That simplicity has drawbacks. There are no full instructions, only the resistor color code reference. Some users received kits with missing LEDs, though mine was complete. The tiny size (2.5 x 2 x 0.8 inches) surprises some buyers, so check dimensions before ordering. For best results, use the thinnest solder you can find (0.031 inch recommended) – thick solder makes this small board difficult to work with.
From a gaming repair preparation standpoint, this kit teaches you to read resistor values and understand how components work together on a PCB. Those skills transfer directly to console motherboard work where you need to identify and replace faulty components. Just do not expect this alone to prepare you for actual repairs – it is a foundation builder, not comprehensive training.
Best For
Complete beginners on a tight budget, STEM educators teaching electronics fundamentals, and anyone who wants to understand resistor color codes through practice. The educational value per dollar is outstanding.
Avoid If
You want a fun finished product or extensive soldering practice. This is purely educational and quite simple – experienced solderers will find it too basic. Also avoid if you lack basic electronics knowledge.
9. Gikfun SMD/SMT Components Practice Board – Best SMD Introduction
Gikfun DIY SMD/SMT Components Practice Board Soldering Skill Training Kit AE1173
SMD component sizes 0805 and ICs
High quality PCB with clear markings
Test points for continuity checking
Under $10 price
Pros
- Quality PCB construction
- Various component sizes
- Withstands repeated soldering
- Test points included
- Very affordable SMD practice
Cons
- No schematic included
- Very small components
- Requires tweezers and fine tip
- Component identification guide missing
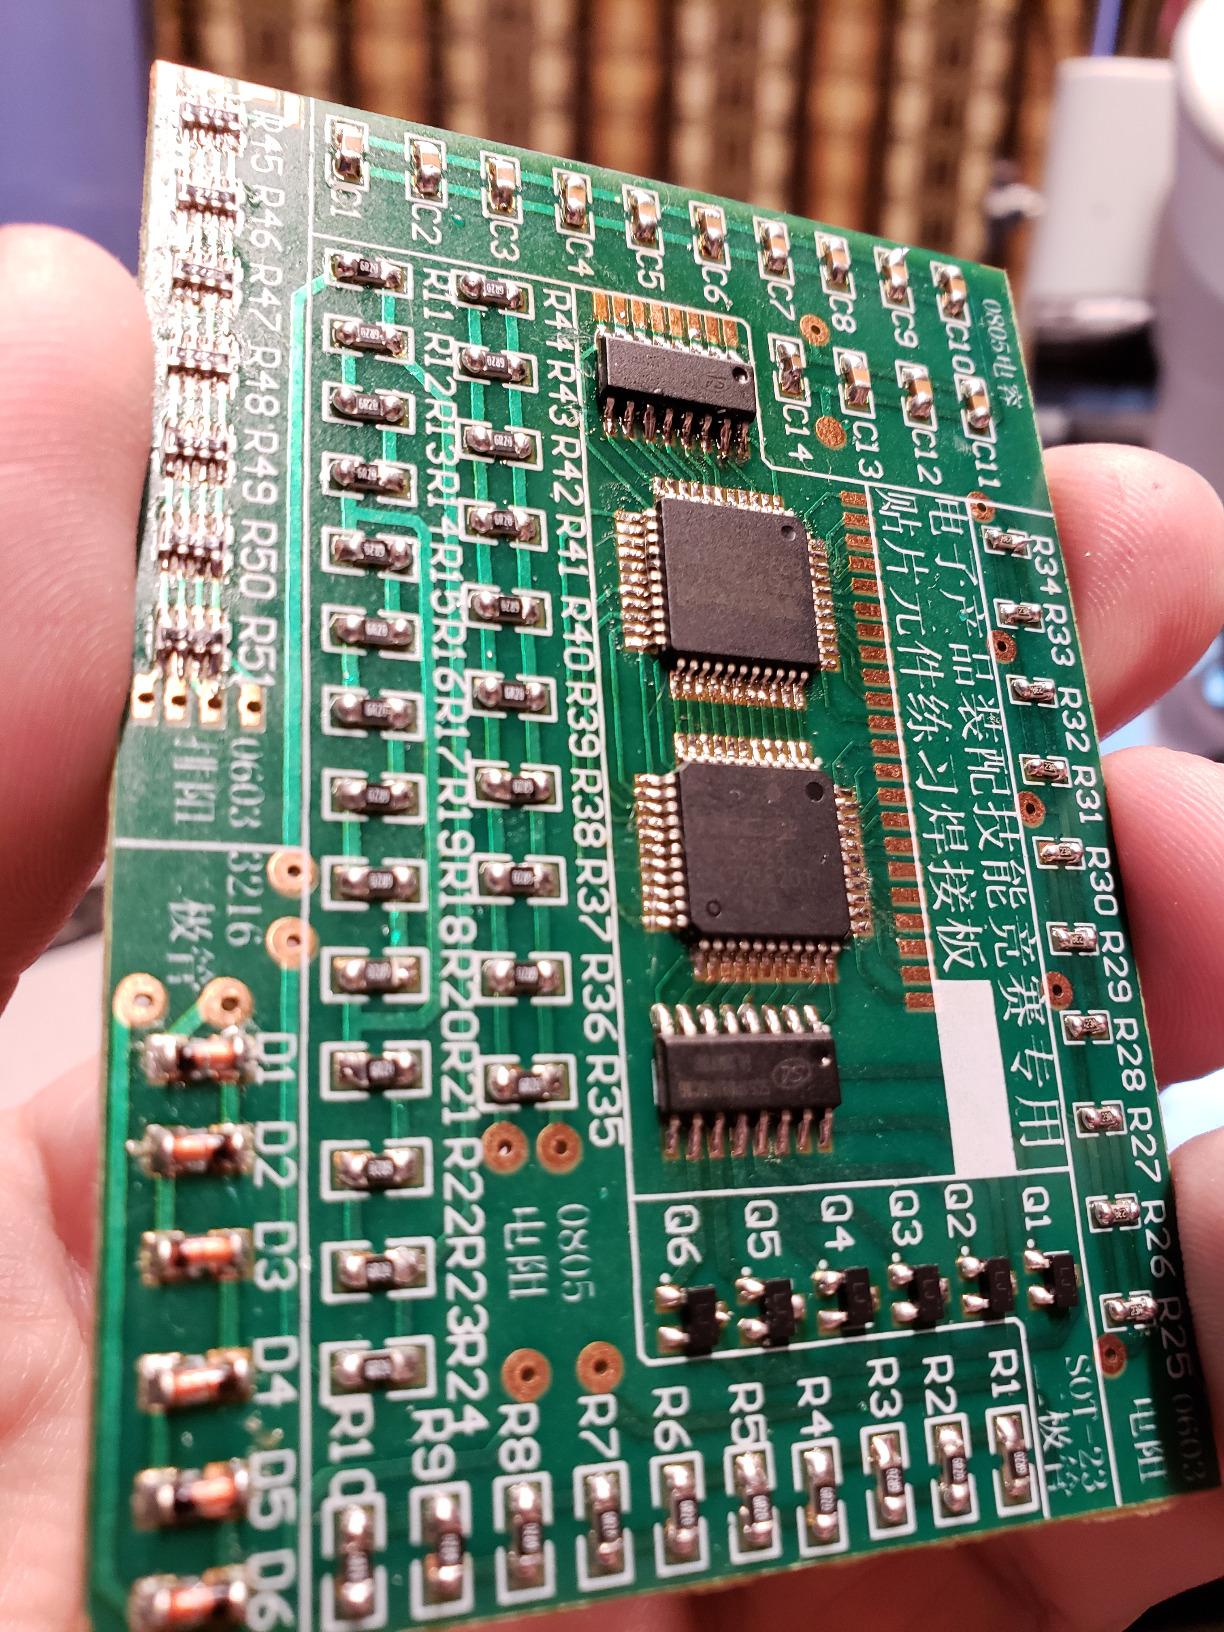
This board is where you transition from hobby soldering to actual gaming repair preparation. Modern consoles use surface-mount devices (SMD) almost exclusively, and through-hole practice alone will not prepare you for HDMI port replacements or joy-con drift repairs. This Gikfun board provides quality SMD practice with various component sizes including 0805 resistors and multiple IC packages.
The PCB quality stands out immediately. Clear markings show component placement, and the board withstands repeated soldering for practice. I intentionally desoldered and resoldered components multiple times to test durability, and the pads held up perfectly. Test points let you check continuity and circuit quality with a multimeter, teaching you to verify your work systematically.
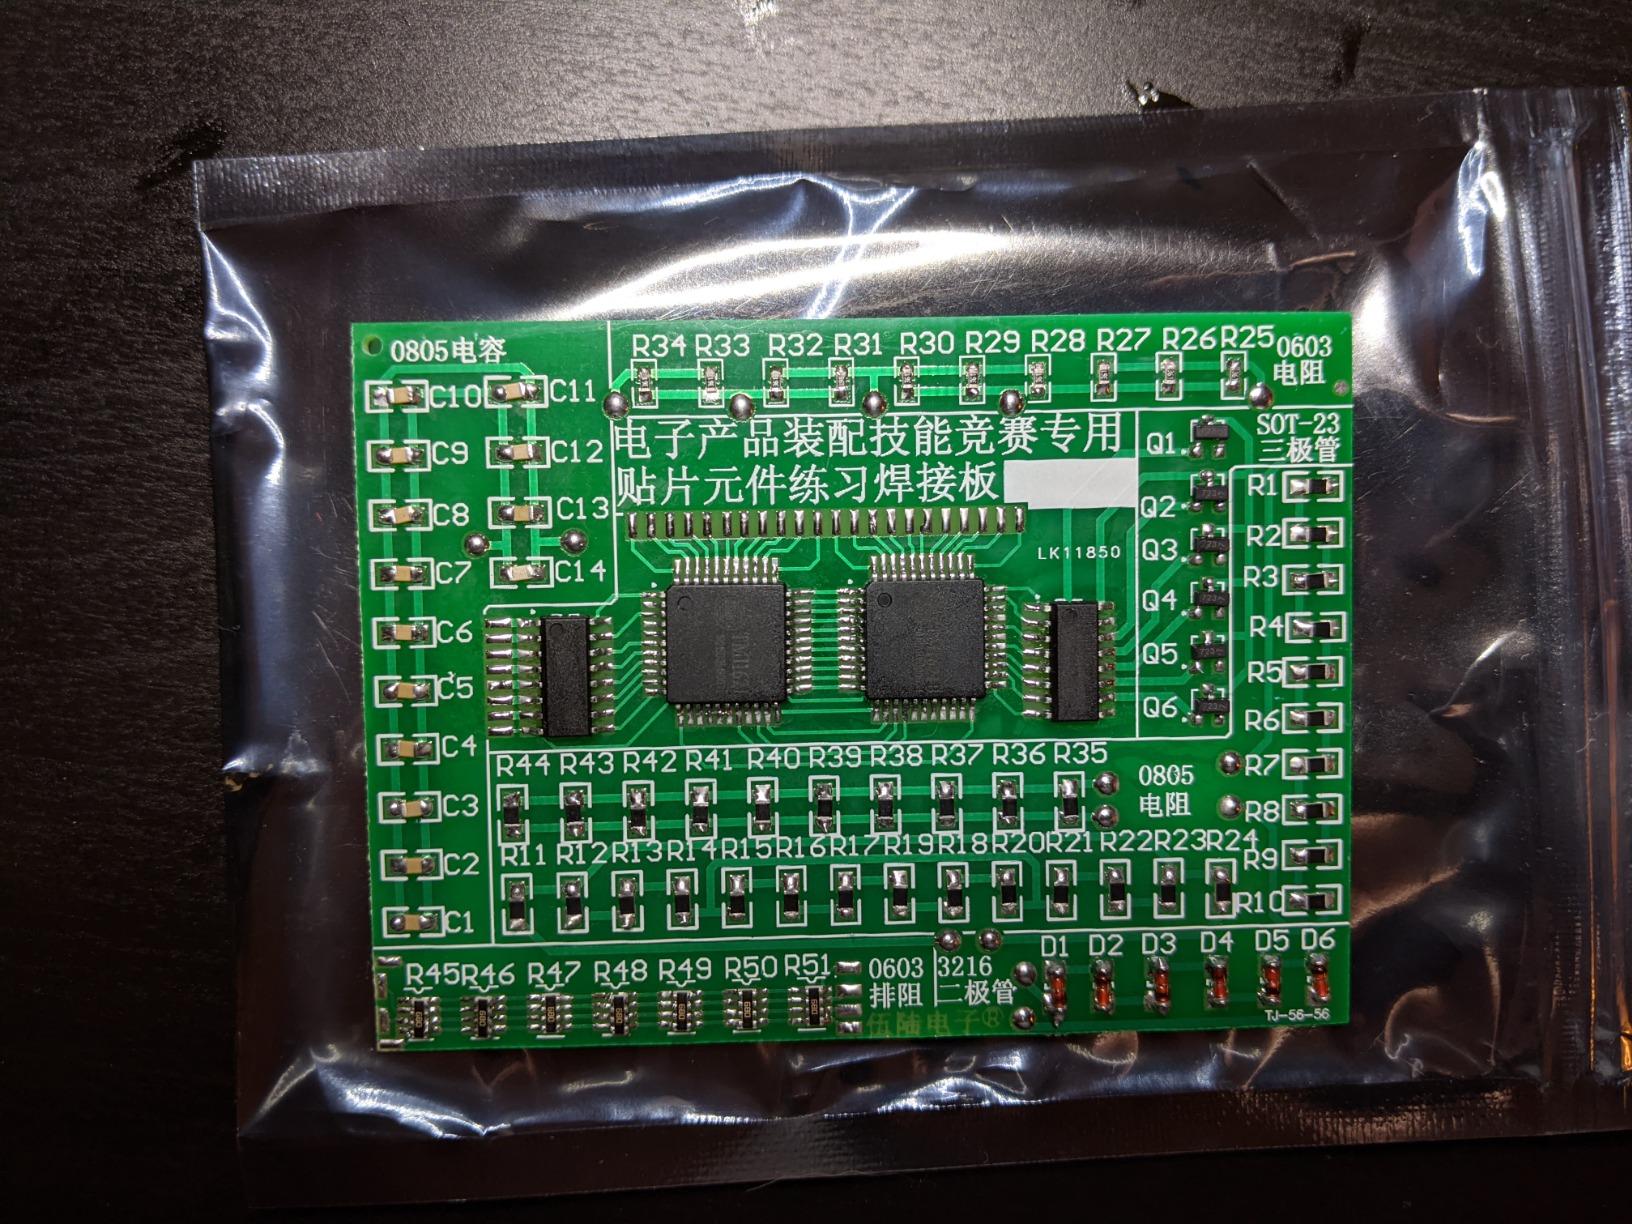
At under $10, this is incredibly affordable SMD practice. The assortment includes different size SMD parts and chips, exposing you to the component variety you will encounter on console motherboards. However, there is no schematic or detailed instructions included. You are expected to know basic SMD technique already or learn from YouTube tutorials.
The components are very small – 0805 size resistors are tiny, and the ICs require precise alignment. You will need pointed tweezers, a fine-tip soldering iron, thin solder, and preferably a magnifying lamp. Do not attempt this as your first soldering project. Start with through-hole kits like the Jitterbug, then graduate to this when you are comfortable with basic technique.
Best For
Solderers ready to learn SMD technique, gaming repair beginners preparing for console work, and anyone transitioning from through-hole to surface-mount soldering. Essential practice before attempting HDMI port or chip replacements.
Avoid If
You have never soldered before or lack the proper tools. SMD work requires fine-tip irons, tweezers, magnification, and thin solder. This board will frustrate complete beginners and is inappropriate as a first kit.
10. D DZRCOXI 3-Board SMD Training Set – Best for Console Repair Readiness
Soldering Practice Kit,3 Kits SMD SMT Weldering Skills Training Board(Soldering-All)
3 progressively difficult boards
1400+ solder joints
500+ components
Sizes from 1206 down to 0402
Pros
- Comprehensive SMD training
- High quality FR-4 boards
- Technical support included
- Excellent value
- Challenging and satisfying
Cons
- NOT for beginners
- Components unlabeled
- Requires external power
- Instructions translation rough
- Needs specialized tools
This is the kit that finally made me feel ready to attempt real console repairs. Three boards of increasing difficulty take you from manageable 1206 and 0805 components down to pin-head sized 0402 parts. With over 1400 solder joints across 500+ components, this provides comprehensive SMD practice that matches real console motherboard work.
The quality FR-4 circuit boards are excellent – easy to solder, resistant to oxidation, and durable enough to withstand repeated practice. I particularly appreciate the mm/inch rulers and trace-width references printed on the PCB back. Those details show this is designed by people who actually do electronics repair work. Technical support includes component lists, circuit diagrams, and schematics if you contact the manufacturer.
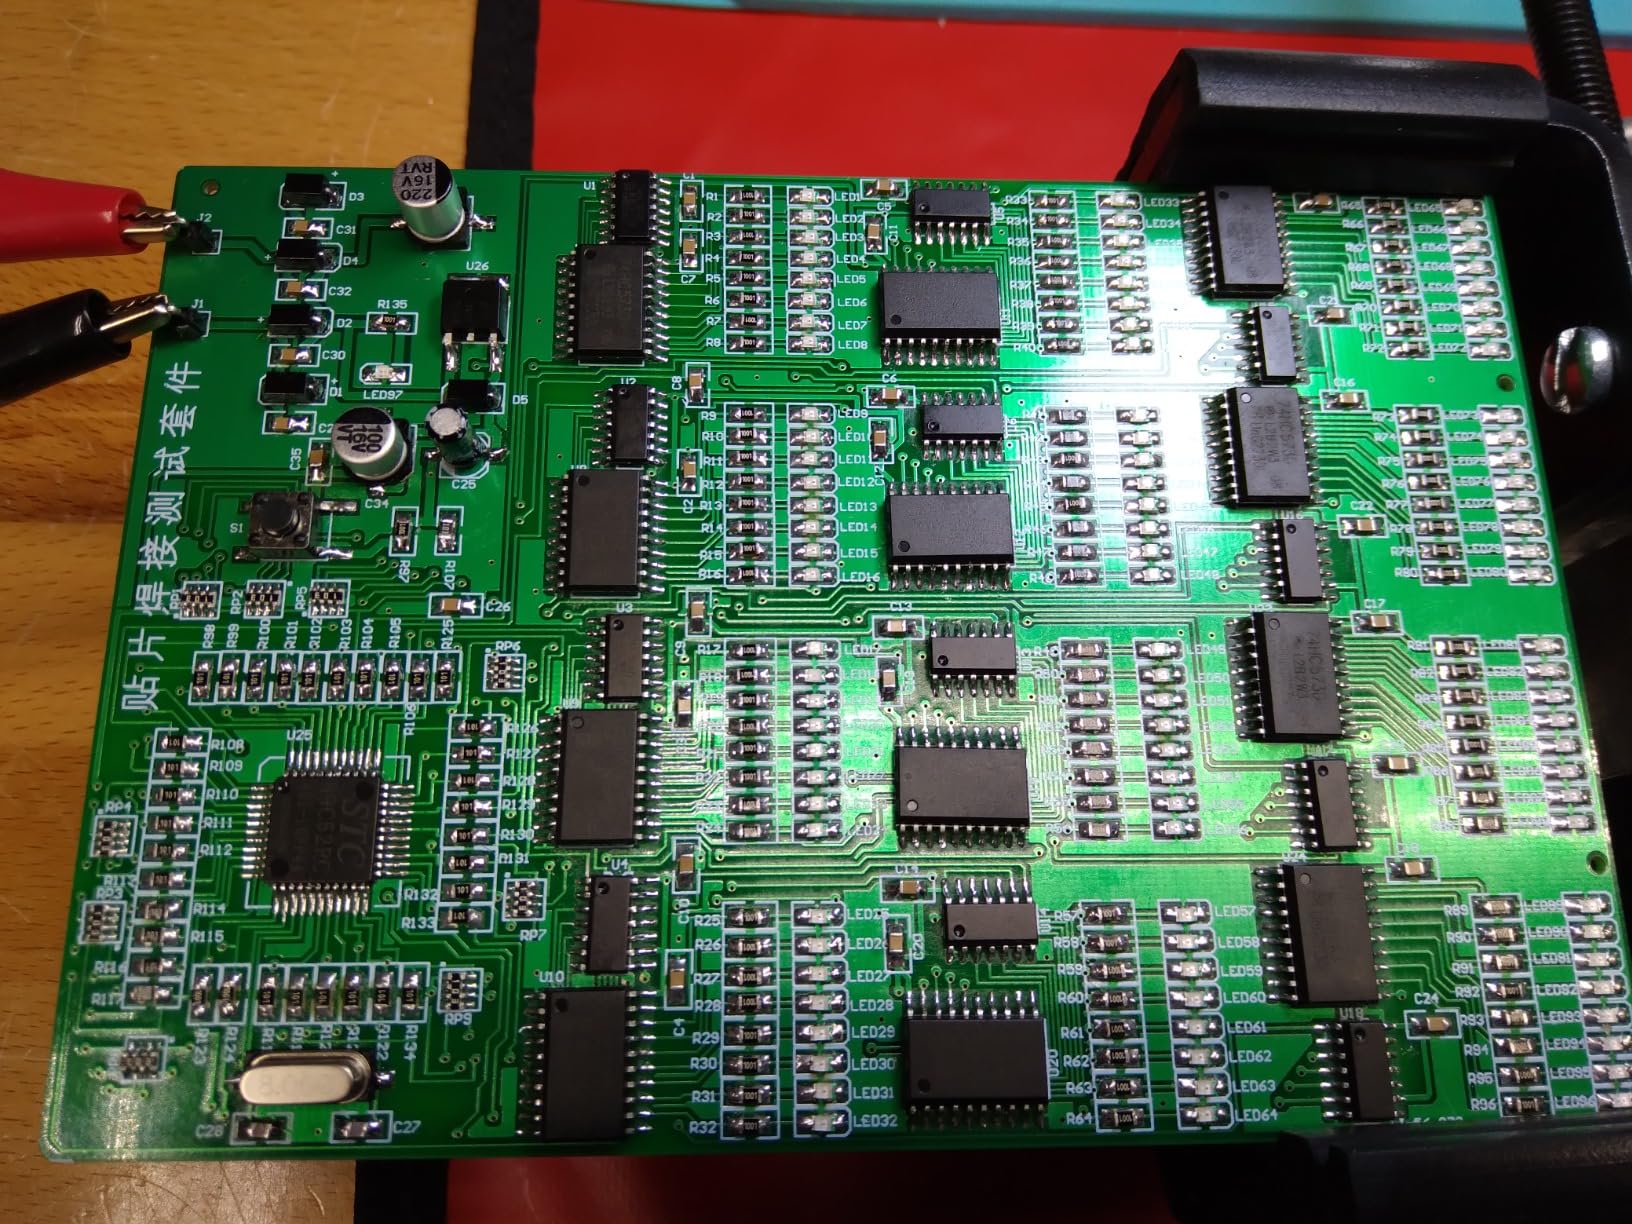
The component variety is outstanding: resistors, capacitors, diodes, LEDs, and ICs in sizes ranging from beginner-friendly 1206 down to brutally small 0402. That progression lets you build skill gradually. The smallest components (0402) are genuinely challenging and require magnification, fine-tip irons, and very thin solder with flux.
This is emphatically NOT for beginners. Components are unlabeled, requiring a multimeter for identification. You need external AC power (5-12V) to test the completed boards, which is not included. The English translation in instructions is rough, though the technical documentation makes up for it. If you attempt this without prior SMD experience, you will end up frustrated with lifted pads and bridged joints.

Best For
Experienced solderers preparing specifically for gaming console repair, repair technicians wanting to improve SMD skills, and anyone who has mastered through-hole and basic SMD work. This is the final step before attempting actual console repairs.
Avoid If
You are a beginner or lack proper SMD tools. The 0402 components are microscopic and will frustrate anyone without magnification, fine-tip irons, thin solder, and flux pen. Start with the Gikfun SMD board first.
Buying Guide: Choosing the Right Soldering Practice Kit for Gaming Repair
Through-Hole vs SMD: Understanding the Difference
Through-hole soldering involves components with wire leads that push through holes in the PCB. The leads protrude through the other side where you solder them to pads. These components are larger, easier to handle, and more forgiving of mistakes. SMD (surface-mount device) components sit directly on the PCB surface and are much smaller.
For gaming repair preparation, you need both skills. Older retro consoles (NES, SNES, Genesis) use mostly through-hole components. Modern consoles (PS4, PS5, Xbox One, Switch) use almost entirely SMD components. HDMI ports, joy-con connectors, and modchip installation all require SMD technique. Start with through-hole kits to build confidence, then progress to SMD boards before attempting console work.
Skill Progression Path for Gaming Console Repair
I recommend this specific progression based on my experience training repair technicians:
Stage 1 (Absolute Beginner): Start with the Jitterbug kit or tingbowie board. Learn to hold the iron, apply solder, and recognize good joints. Complete 2-3 through-hole kits before moving on.
Stage 2 (Through-hole Proficiency): Build the LED Chaser, Christmas Tree, and Bluetooth Speaker kits. These teach component identification, circuit reading, and temperature control. You should be able to complete these without lifting any pads.
Stage 3 (SMD Introduction): Move to the Gikfun SMD board. Practice with 0805 and larger components. Use magnification and develop your fine motor control. Do not attempt console work yet.
Stage 4 (Console Repair Ready): Complete the D DZRCOXI 3-board set. Master 0603 and 0402 components. Practice desoldering and resoldering the same joints multiple times. When you can consistently solder 0402 components without bridging, you are ready for basic console repairs.
Temperature Guidelines for Different Components
Temperature control is critical and depends on what you are soldering. For through-hole components on practice kits, 650-700°F works well. The components are robust and can handle the heat. SMD components require lower temperatures – 600-650°F prevents damage.
For actual console repairs, the temperature needs change based on the specific component. PS4 HDMI port replacement typically requires 450°F with high thermal mass to heat the large ground pads quickly. Joy-con drift repair on Nintendo Switch uses 425°F hot air for the connector removal. Always use the lowest temperature that still creates proper joints – higher is not better and increases damage risk.
Essential Tools Beyond the Kit
Your practice kit includes components and a PCB, but you need proper tools to learn correctly. A temperature-controlled soldering iron is non-negotiable. Cheap fixed-temperature irons cannot handle SMD work and will frustrate you. Expect to spend at least $50-100 on a decent iron.
You also need thin solder (0.031 inch or 0.8mm diameter), rosin flux, a desoldering pump, tweezers for SMD work, and a magnifying lamp. Safety equipment includes heat-resistant mat, safety glasses, and adequate ventilation. Do not cheap out on tools – they make learning easier and produce better results.
Safety Precautions Every Beginner Must Know
Soldering involves molten metal at 600+ degrees. Respect it. Always work on a heat-resistant surface. Never leave a hot iron unattended. The solder produces fumes – work in a ventilated area or use a fume extractor. Wash your hands after soldering – the solder contains lead (unless specifically lead-free).
When practicing on gaming consoles, discharge capacitors before opening any device. Even unplugged consoles can hold dangerous charges. Shorting a charged capacitor can destroy the board and injure you. If you are unsure about safety, do not open the console.
Common Mistakes to Avoid
The most common mistake beginners make is applying solder directly to the iron instead of the joint. This creates cold solder joints that fail later. Always heat the pad and component, then touch solder to the opposite side.
Another issue is using too much solder. A good joint needs just enough to fill the gap – excess solder creates bridges and shorts. Less is more. If you apply too much, use desoldering braid to remove the excess.
Finally, do not rush. Console repair technicians make it look fast, but that speed comes from years of practice. Take your time, focus on technique, and speed will come naturally. Rushing guarantees mistakes.
Frequently Asked Questions
How difficult is microsoldering?
Microsoldering requires significant practice. You need excellent fine motor control, proper magnification, and quality tools. Most people need 3-6 months of regular practice before becoming competent at microsoldering. Start with through-hole kits, progress to large SMD components (1206, 0805), then gradually work down to smaller sizes (0603, 0402). The D DZRCOXI 3-board set provides realistic microsoldering practice that matches console repair difficulty. Do not attempt microsoldering on expensive consoles until you can consistently solder 0402 components without bridging on practice boards.
Is repairing gaming consoles worth it?
For beginners, probably not. A single mistake can destroy a $300-500 console. Practice kits cost $10-30 and provide the same learning experience without the risk. Once you have developed skills through practice, console repair becomes worth it. You can save money on repairs, start a business, or simply enjoy the satisfaction of fixing your own equipment. Professional console repair technicians earn $50-150 per repair after building their skills. But reach that level by practicing on $10 boards, not $500 consoles.
What temperature should I solder my PS4?
PS4 HDMI port replacement requires 450°F with a soldering iron that has high thermal mass. The HDMI port has large ground pads that need significant heat quickly – low temperature causes prolonged heating that damages the board. Use a temperature-controlled iron set to 450°F with a chisel tip. Apply flux to the pads first, then heat each pad for 3-5 seconds while feeding solder. Work quickly but carefully. PS4 motherboard components are sensitive to prolonged heat. For other PS4 repairs like USB port replacement, 425°F works well. When using hot air for chip removal, 425°F at medium airflow is standard.
What is the most common mistake in soldering?
Applying solder directly to the iron instead of the joint is the most common mistake. This creates cold solder joints that look shiny but fail electrically. The proper technique is to heat both the pad and component simultaneously with the iron tip, then touch solder to the opposite side. The solder should flow toward the heat source, coating both the pad and component lead. Other common mistakes include using too much solder (creates bridges), not cleaning surfaces before soldering (poor adhesion), and moving the joint before it cools (cracks). Practice on inexpensive boards until good joints become muscle memory.
How hard is it to learn to solder electronics?
Basic through-hole soldering is learnable in a few hours. Most people can build their first kit successfully with proper instructions. The Jitterbug kit takes 30-60 minutes for complete beginners. However, becoming proficient takes practice. Expect to build 5-10 through-hole kits before feeling confident. SMD soldering is harder – the small components require magnification, steady hands, and fine-tip irons. Give yourself 2-3 months of regular practice to become competent at SMD work. Microsoldering for console repair typically takes 6 months to a year to master. The key is progression: start simple, practice regularly, and do not rush to difficult projects. Anyone can learn with patience and the right practice kits.
Conclusion: Start Practicing Before You Attempt Console Repairs
I learned my lesson the expensive way when I destroyed that Nintendo Switch motherboard. Do not make the same mistake. The best soldering practice kits for gaming repair beginners cost $10-30 and save you from ruining $300+ consoles. Build your skills on practice boards first, then attempt real repairs when you are ready.
For complete beginners, start with the Jitterbug kit to build confidence. Move through through-hole kits like the LED Chaser and Christmas Tree to develop technique. Then progress to SMD practice with the Gikfun SMD board and D DZRCOXI 3-board set. When you can solder 0402 components consistently without bridging, you are ready for basic console repairs.
The gaming repair community needs more skilled technicians. Consoles are expensive to replace and repair services charge premium rates. Learning to solder opens up a world of possibilities – saving money on repairs, starting a side business, or simply enjoying the satisfaction of fixing your own equipment. Start practicing today and join the community of gaming repair enthusiasts who keep consoles running for years.