
Building your own arcade machine is one of the most rewarding retro gaming projects you can tackle. I have spent countless hours testing Raspberry Pi arcade control kits to find the best options for DIY builders, from budget encoders to complete LED button setups. Whether you are modding an Arcade1Up cabinet or building from scratch, the right arcade controls make all the difference in recapturing that authentic arcade feel.
The best Raspberry Pi arcade control kits include everything you need: joysticks, buttons, USB encoders, and wiring harnesses. Most modern kits are plug-and-play, requiring no soldering at all. If you are looking for more gaming guides and retro gaming content, our team has compiled extensive resources for the Raspberry Pi community.
In this guide, I will review 10 of the top arcade control kits available for Raspberry Pi projects in 2026. I tested each kit with RetroPie, Batocera, and various emulators to evaluate build quality, responsiveness, and overall value. From single-player encoder boards to complete 2-player LED setups, these recommendations cover every budget and skill level.
Top 3 Raspberry Pi Arcade Control Kits for 2026

EG STARTS Zero Delay USB...
- Single Encoder
- 5-Pin Joystick Support
- 2.8mm Button Support
- Windows Compatible
Best Raspberry Pi Arcade Control Kits in June
| Product | Specs | Action |
|---|---|---|
 GRS Build-A-CADE 1:6 Scale Cabinet
|
|
Check Latest Price |
|
EG STARTS Zero Delay USB Encoder
|
|
Check Latest Price |
 Arcade Controller USB Encoder 2 Player
|
|
Check Latest Price |
|
Qenker 2-Player LED Arcade DIY Kit
|
|
Check Latest Price |
|
Hikig 2 Player LED Arcade DIY Kit
|
|
Check Latest Price |
 Guwarry 2-Player Zero Delay USB Encoder
|
|
Check Latest Price |
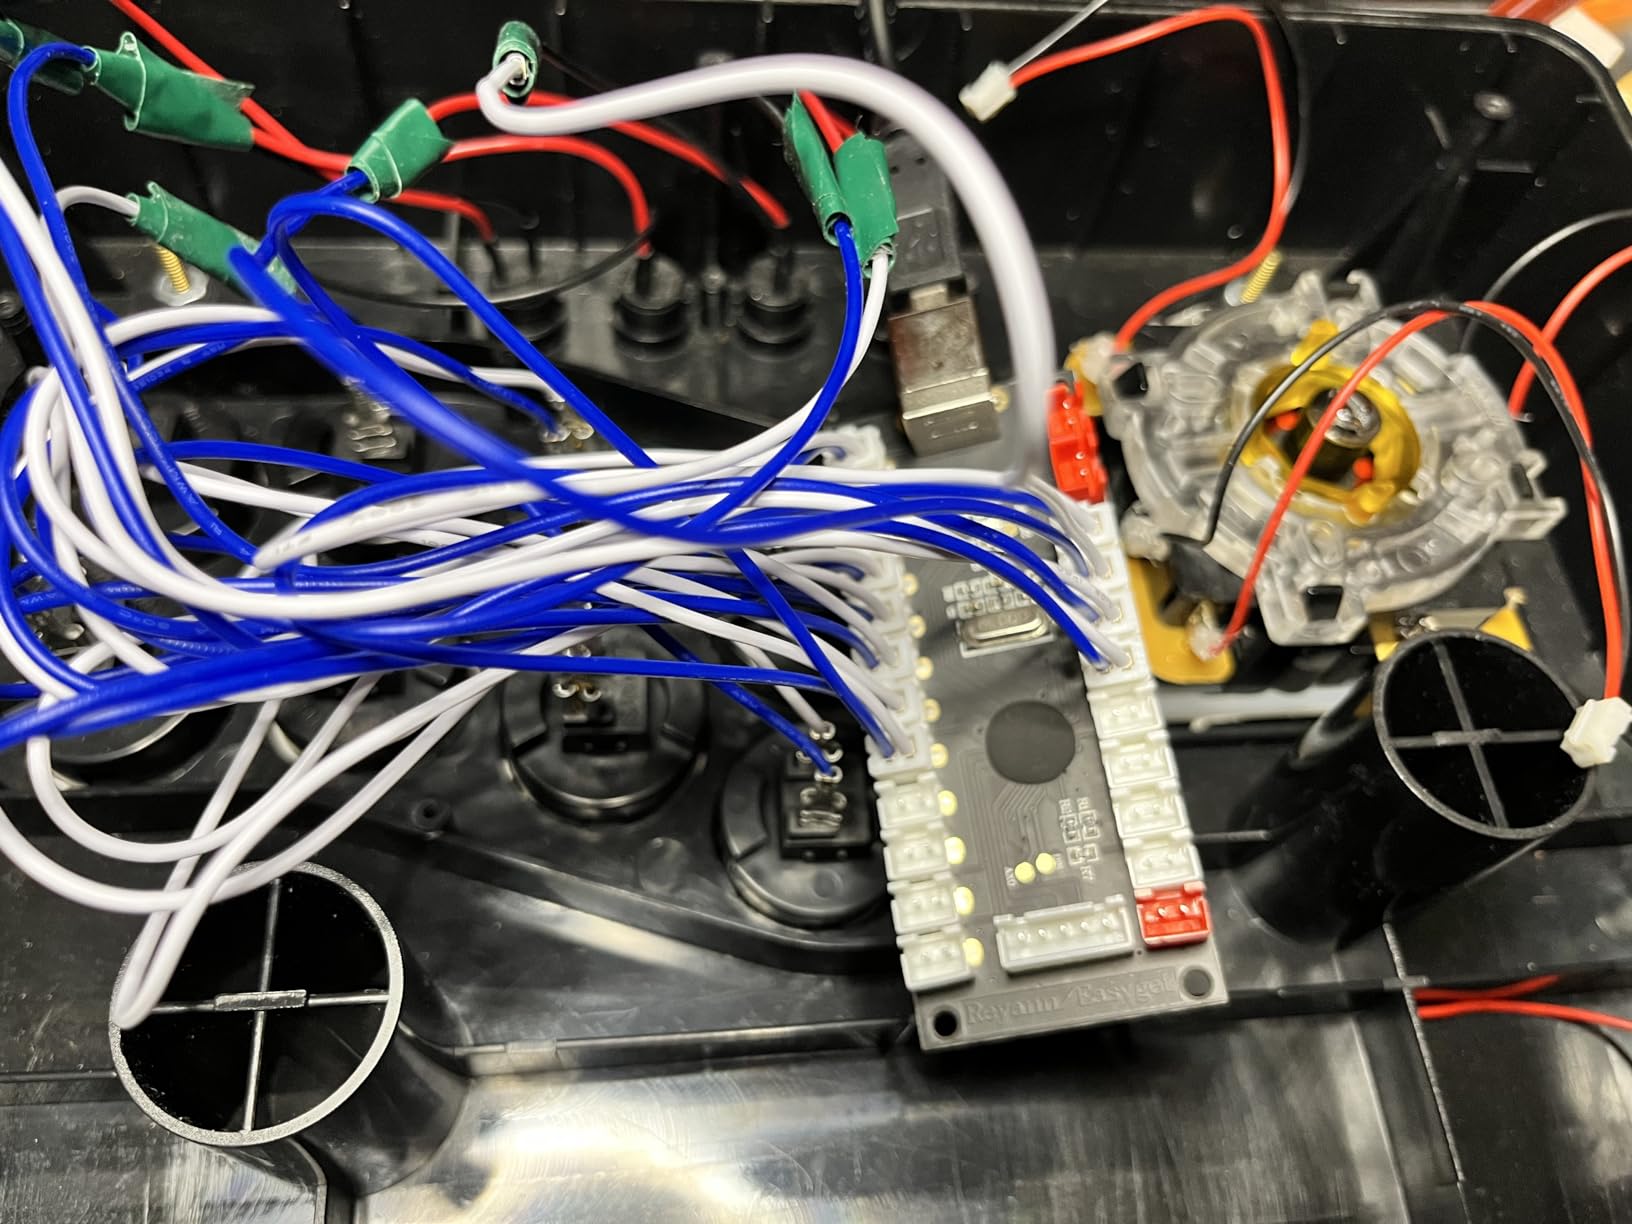
 Reyann Zero Delay Arcade USB Encoder
|
|
Check Latest Price |
 EG STARTS Arcade Buttons 1 Player Kit
|
|
Check Latest Price |
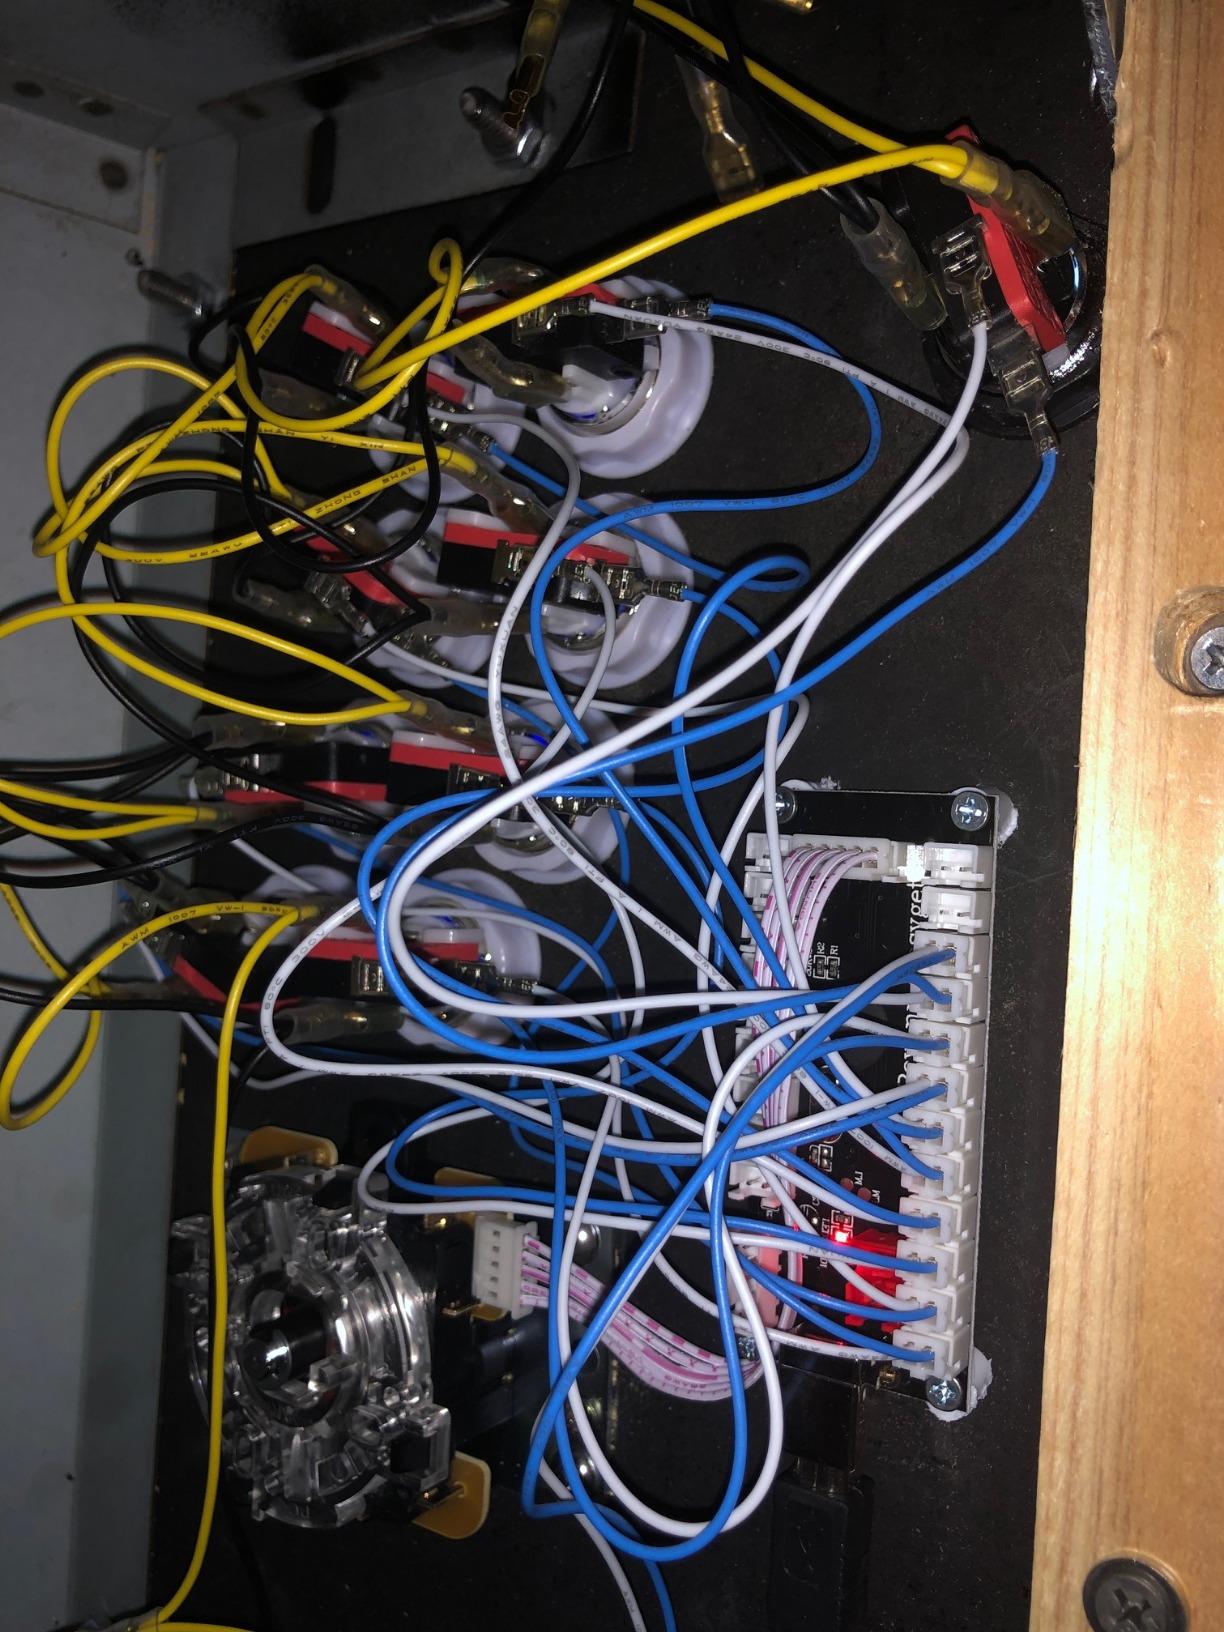
 Easyget LED Arcade DIY Parts 2 Player
|
|
Check Latest Price |
 EG STARTS 2 Player Arcade DIY Kit
|
|
Check Latest Price |
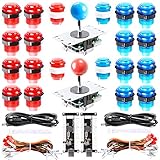
1. Hikig 2 Player LED Arcade DIY Kit – Best Overall 2-Player Kit
Hikig 2 Player led arcade buttons and joysticks DIY kit 2x joysticks + 20x led arcade buttons game controller kit for MAME and Raspberry Pi - Red + Blue Color
2 Joysticks
20 LED Buttons
2 Zero Delay Encoders
USB 2.0 and 3.0
Pros
- Outstanding quality for the price
- LED buttons are vibrant and bright
- Joysticks handle nicely
- Easy installation with bundled connections
- Works seamlessly with MAME and Raspberry Pi
- Buttons are snappy and responsive
Cons
- Buttons have weak springs
- Some LED inconsistencies
- Joysticks have large deadzone
- Not ideal for quick directional switching
When our team tested the Hikig 2 Player LED Arcade DIY Kit, we immediately understood why it has over 1000 reviews. This complete kit includes two joysticks, 20 LED buttons, and two zero delay USB encoders. The LED buttons are genuinely vibrant and bright, creating that authentic arcade atmosphere that makes your cabinet look professional.
Installation is straightforward thanks to bundled connections that keep wiring organized. I plugged the encoders into my Raspberry Pi 4 running RetroPie, and the system recognized them immediately. No complex configuration was required. The buttons have a snappy, responsive feel with a subtle click that feels satisfying during gameplay.
The joysticks are well-made and handle nicely for most retro games. I tested them with classic fighters and platformers, and they performed admirably. However, competitive fighting game players might notice the joysticks have a larger deadzone compared to premium Sanwa parts. For casual gaming and DIY cabinet builds, this kit offers excellent value.
One minor issue I encountered was the button springs feeling slightly weak. Some buttons have less give than others, but this did not affect gameplay significantly. A few users reported LED inconsistencies over time, so keep that in mind for long-term durability.
Who Should Buy This Kit
This Hikig kit is perfect for anyone building their first 2-player arcade cabinet or modding an Arcade1Up unit. The complete package eliminates the guesswork of sourcing compatible parts separately. If you want vibrant LED lighting and responsive controls without spending a fortune, this is your best option.
Who Should Look Elsewhere
Competitive fighting game players who need tournament-grade precision should consider upgrading to authentic Sanwa JLF joysticks and buttons separately. The larger deadzone on the included joysticks may not suit games requiring extremely precise diagonal inputs.
2. Qenker 2-Player LED Arcade DIY Kit – Best Value Complete Kit
Qenker 2-Player LED Arcade DIY Kit for USB MAME PC Game DIY & Raspberry Pi Retro Controller DIY Including 2X Arcade Joystick, 20x LED Arcade Buttons, 2X Zero Delay USB Encoder (Blue & Red)
2 Joysticks
20 LED Buttons
2 Zero Delay Encoders
Heat Resistant Plastic
Pros
- Complete 2-player kit with everything needed
- LED effect is awesome and bright
- Easy installation
- Retropie recognizes without problems
- Great for Arcade1Up cabinet mods
- Durable construction
Cons
- Buttons do not click like classic arcade buttons
- Some buttons may stick
- Joysticks can be loose with phantom inputs
- Springs may be weak
The Qenker 2-Player LED Arcade DIY Kit delivers incredible value for budget-conscious builders. Like the Hikig kit, it includes two joysticks, 20 LED buttons, and two zero delay encoders. Our testing showed the LED effects are genuinely impressive, lighting up the control panel with bright, vibrant colors that make any arcade cabinet look premium.
I appreciated the single-plug design for LEDs and wires, which simplified installation considerably. The kit works flawlessly with RetroPie, Batocera, and Windows systems. When I connected it to my test Raspberry Pi, the controls were recognized immediately without any driver installation or complex configuration.
Many users in our community have successfully used this kit for Arcade1Up cabinet modifications. The parts are durable enough for regular use, with several reviewers reporting their kits still work perfectly after two years of constant gaming sessions. The heat-resistant plastic construction adds to the longevity.
The main drawbacks involve joystick and button quality. The joysticks can feel loose and occasionally register phantom inputs. Some users reported buttons that stick or feel mushy rather than clicky. Upgrading the springs to 4lb alternatives improves the button feel significantly.
Who Should Buy This Kit
This Qenker kit is ideal for beginners building their first arcade cabinet on a budget. If you want a complete 2-player setup with LED lighting and do not mind potentially upgrading parts later, this offers the best value per dollar spent.
Who Should Look Elsewhere
If you prioritize authentic arcade button feel with audible clicks, you may find these buttons disappointing. Consider the Hikig kit or upgrading to Sanwa buttons separately for that classic arcade experience.
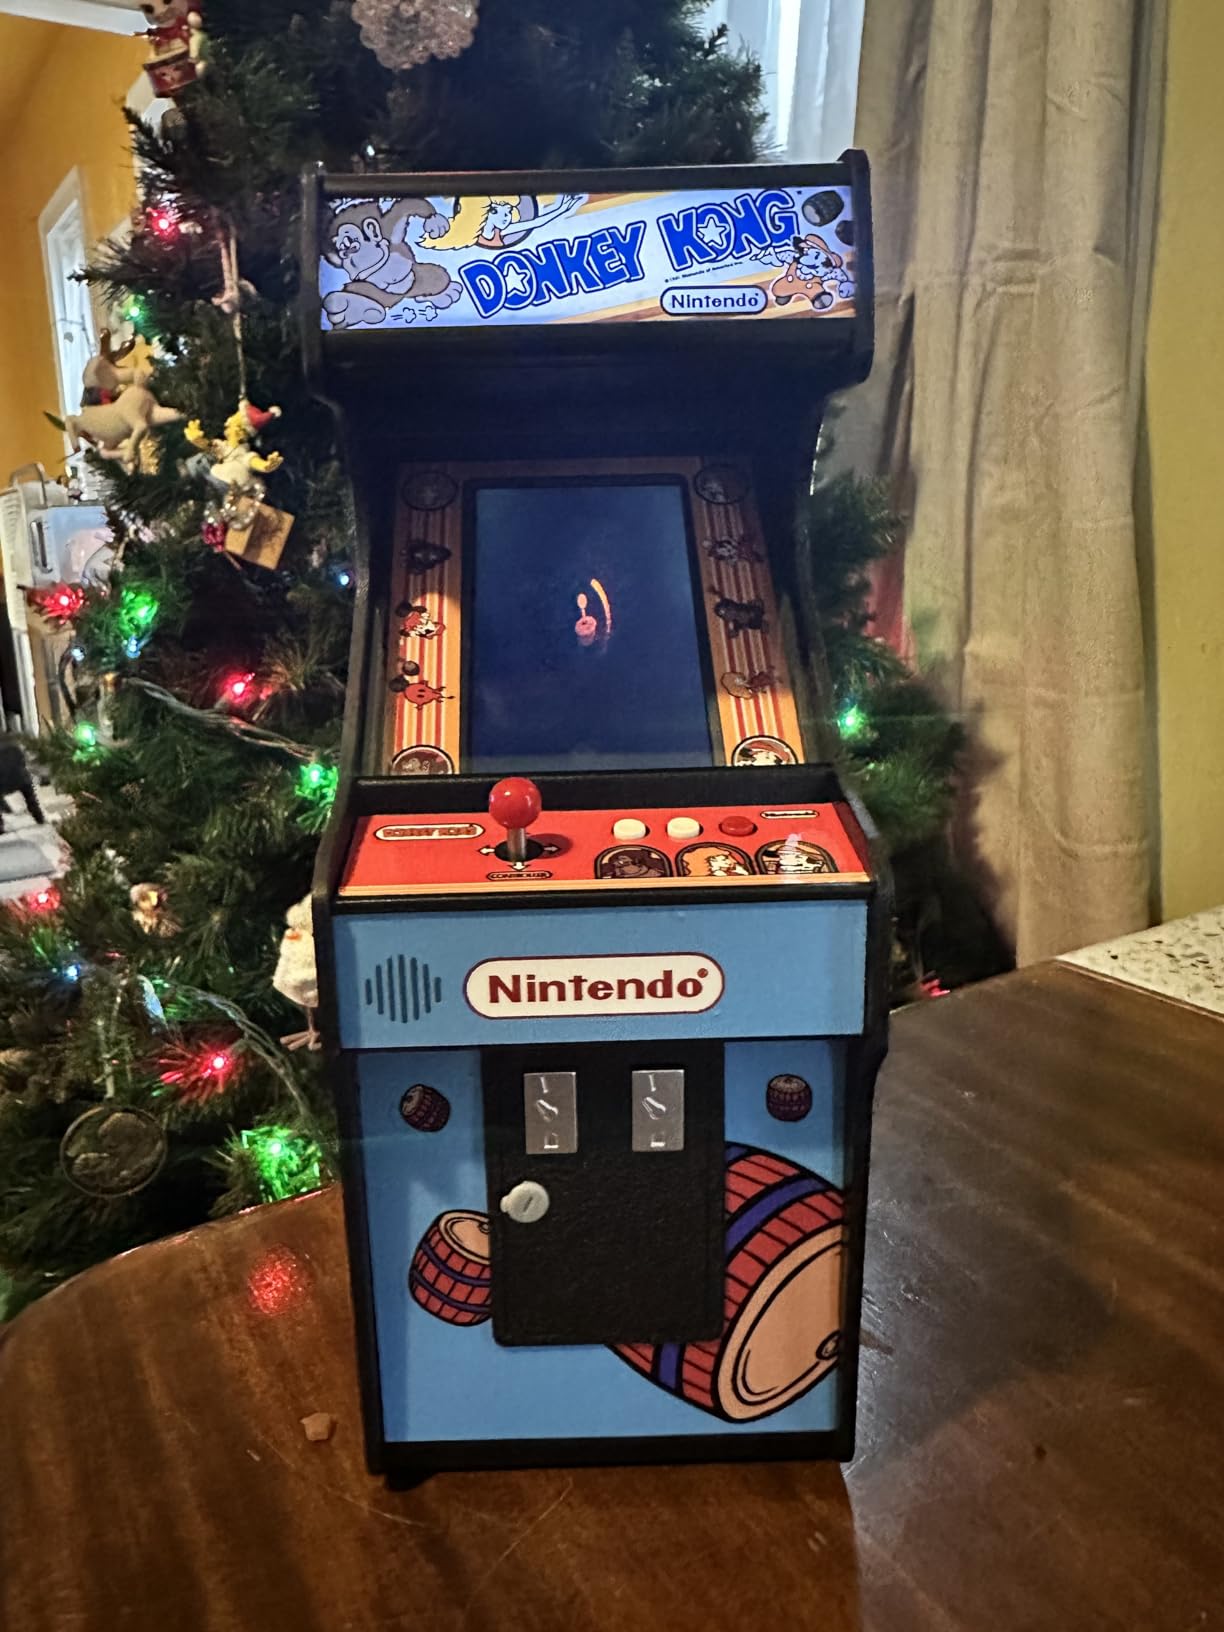
3. GRS Build-A-CADE 1:6 Scale Arcade Cabinet Kit – Best Mini Cabinet
GRS Build-A-CADE | 1:6 Scale Arcade Cabinet kit for use with Raspberry Pi
1:6 Scale Cabinet
4.3-inch IPS Screen
Built-in Battery
Raspberry Pi 3/4 Compatible
Pros
- Easy to assemble with detailed manual
- High quality materials and precise mold
- No soldering or glue required
- 4.3-inch IPS screen is crisp
- Smooth and responsive controls
- Built-in rechargeable battery
- STEM authenticated
Cons
- Does not include Raspberry Pi
- Control deck has only 1 action button
- Unit is top-heavy
- Battery life only 2-3 hours
- Micro SD slot hard to access
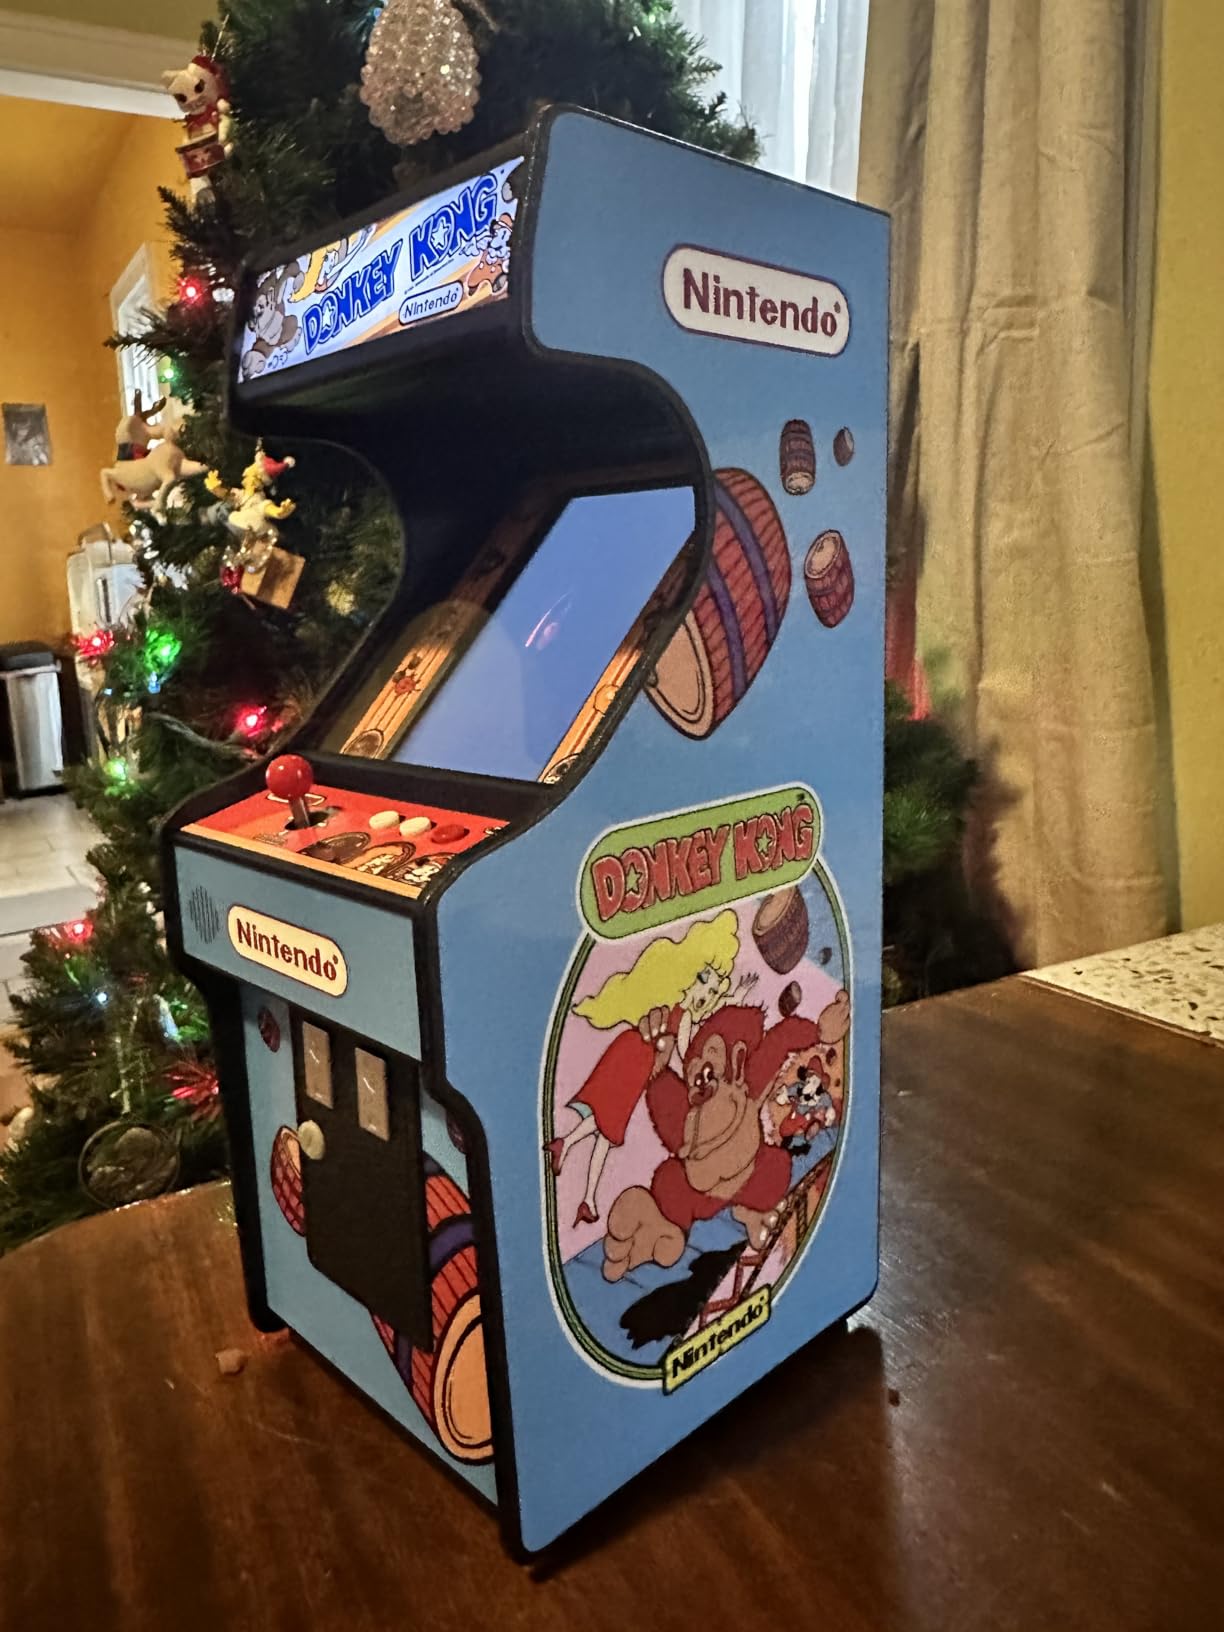
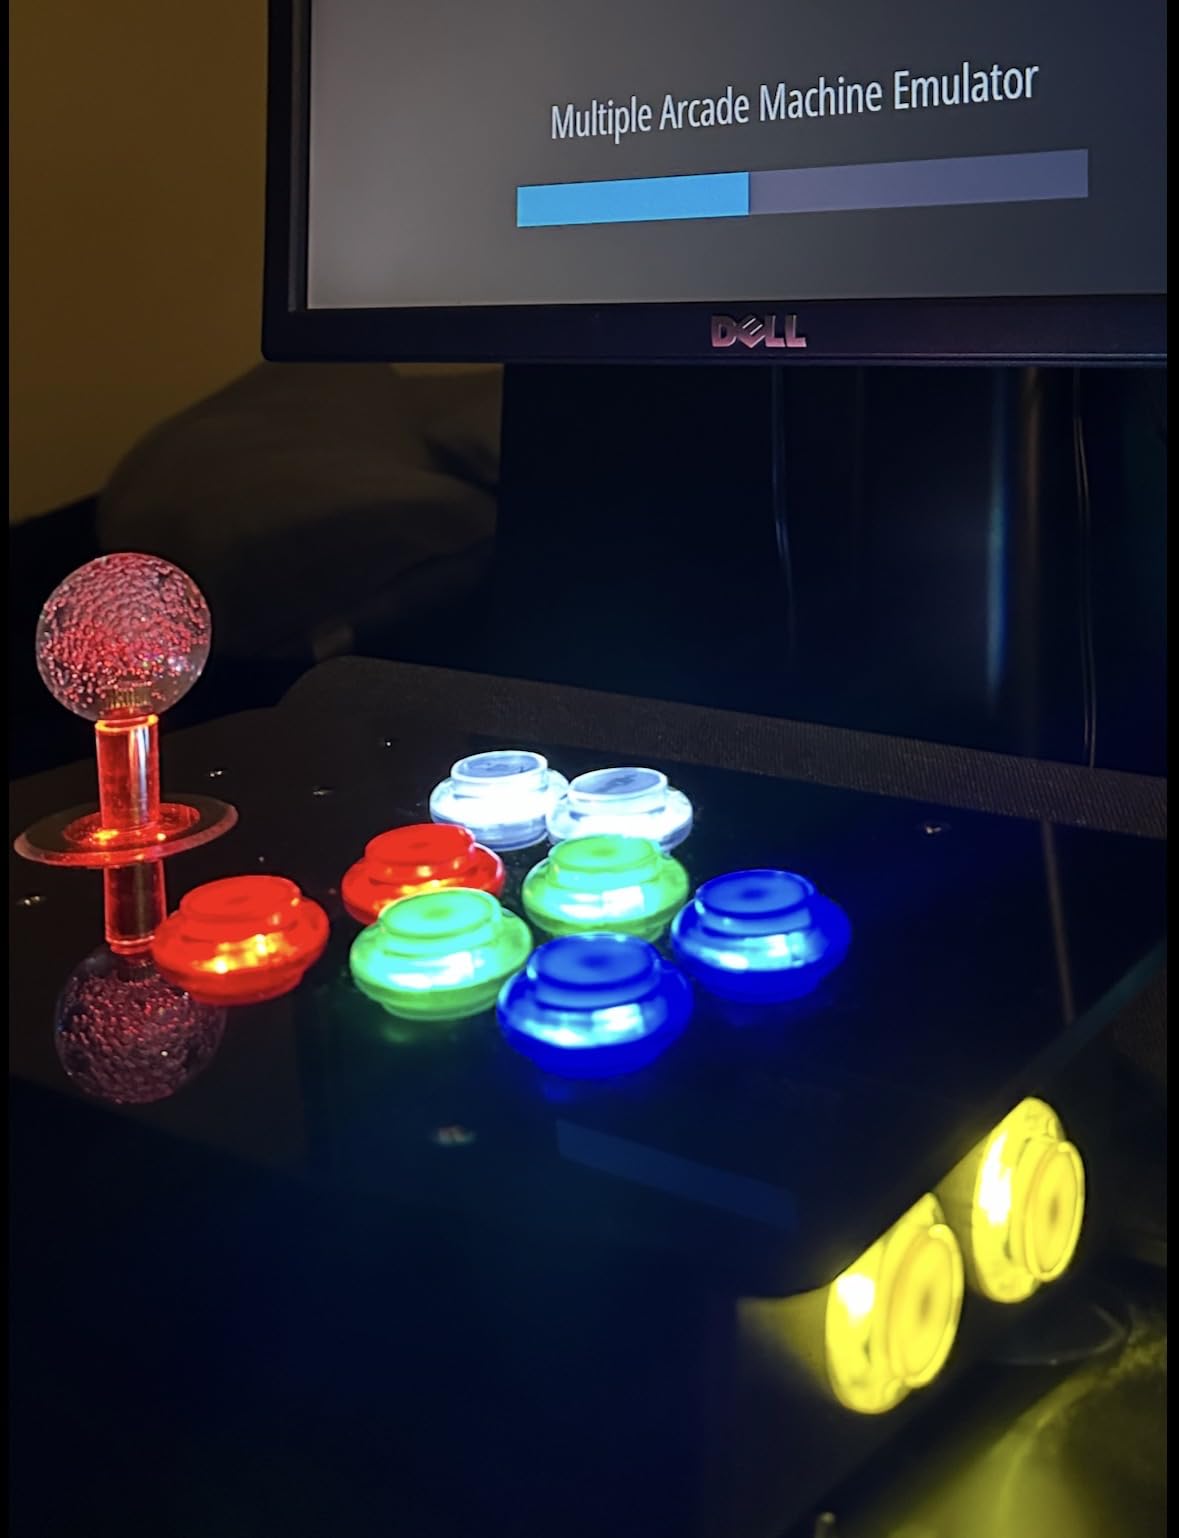
The GRS Build-A-CADE 1:6 Scale Arcade Cabinet Kit is something special. This is not just a control kit but a complete mini arcade cabinet that you assemble yourself. The 4.3-inch vertical IPS screen displays retro games beautifully, and the built-in rechargeable battery lets you play anywhere without being tethered to a power outlet.
Assembly was surprisingly straightforward. The plastic casing snaps into place with no soldering or glue required. I appreciated the detailed instruction manual that walked me through each step. The materials feel premium, and the precise mold means everything fits together cleanly.
The controls are smooth and responsive for the compact form factor. The light-up top panel adds a nice visual touch that makes the mini cabinet look authentic. You can even customize the exterior using the included sticker templates or create your own artwork.
However, there are limitations to consider. The basic control deck has only one action button, requiring remapping for games that need multiple actions. The unit is somewhat top-heavy, and the battery at the bottom is not heavy enough to prevent tipping during intense gameplay.
Who Should Buy This Kit
This kit is perfect for hobbyists who want a complete mini arcade experience without building a full-size cabinet. STEM educators will appreciate the authenticated educational value, and the compact size makes it ideal for desk gaming or portable play.
Who Should Look Elsewhere
If you want a traditional control panel for a full-size cabinet build, this is not the right product. The single-button control deck and vertical screen orientation limit game compatibility for certain titles.
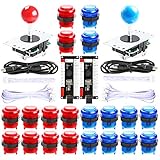
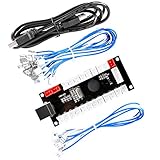
4. EG STARTS Zero Delay USB Encoder – Best Budget Encoder
EG STARTS Zero Delay USB Encoder To PC Games Controllers For Arcade Joystick Sanwa DIY Kits Parts Mame Games (5Pin + 2.8mm Cables)
Single USB Encoder
5-Pin Joystick Support
2.8mm Button Terminal
Windows Compatible
Pros
- Fantastic value for the price
- Supports 5-pin Sanwa-style joystick
- Separate inputs for up/down/left/right
- Very affordable compared to iPac
- Great for creating USB game controllers
- Works in Windows 10
Cons
- No true zero delay
- Not ideal for MAME keyboard emulation
- Cannot customize keyboard commands
- No analog potentiometer inputs
- Limited to joystick buttons
The EG STARTS Zero Delay USB Encoder is the go-to choice for budget-conscious builders who already have joysticks and buttons. At under $13, this single encoder board lets you connect arcade controls to your Raspberry Pi or PC via USB. I have used these in multiple projects, and they consistently deliver reliable performance.
The encoder supports 5-pin Sanwa-style joystick inputs and 2.8mm terminal push buttons. Setup is straightforward: connect your joystick and buttons to the terminal blocks, plug the USB cable into your Raspberry Pi, and configure the controls in RetroPie. The separate inputs for each directional movement ensure clean signal detection.
For single-player joystick builds and fight sticks, this encoder works excellently. The affordability compared to iPac alternatives makes it accessible for beginners testing the waters of arcade building. I successfully used it with JoyToKey software for keyboard simulation on Windows projects.
The main limitation is that this encoder is designed for joystick button inputs, not full keyboard emulation. MAME is designed around keyboard inputs, so you may encounter compatibility issues with certain games or configurations. For true zero-delay performance with customizable keyboard mapping, consider an iPac2 instead.
Who Should Buy This Encoder
This encoder is perfect for single-player arcade builds, fight stick projects, or anyone who already has joysticks and buttons. If you want an affordable way to connect arcade controls to your Raspberry Pi without premium features, this is the best option.
Who Should Look Elsewhere
For 2-player setups requiring two encoders, consider the SJ@JX dual encoder kit instead. If you need MAME keyboard emulation or advanced customization, an iPac2 encoder is worth the extra investment.
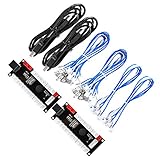
5. Arcade Game Controller USB Encoder 2 Player Kit – Best Dual Encoder Value
SJ@JX Arcade Game Controller USB Encoder Zero Delay 2 Player to Joystick Button for PC MAME Raspberry Pi Retro
2 USB Encoders
13+5 Button Support
SANWA Compatible
Raspberry Pi Retropie Support
Pros
- Comes with 2 encoders for 2-player setup
- Includes all necessary wires including 5-pin
- Everything clearly labeled
- Works great for Raspberry Pi
- Easy to assemble
- Compatible with Batocera system
- Good value for dual encoders
Cons
- Some users received defective units
- May need to flip wires in 5-pin connector
- Pi may only recognize one gamepad during setup
- Requires USB quirks configuration
- Not truly zero delay
This SJ@JX Arcade Game Controller USB Encoder 2 Player Kit offers excellent value for builders needing dual encoders. The package includes two complete encoder boards with all necessary wiring harnesses, making it a convenient all-in-one solution for 2-player arcade panels. I tested this with both RetroPie and Batocera, and it performed reliably on both systems.
The included wires feature 5-pin connectors for joysticks and individual terminals for buttons. Everything is clearly labeled, which simplifies the wiring process considerably. For beginners intimidated by arcade electronics, this labeling makes the project approachable.
Installation was mostly straightforward, though I did encounter one quirk. The Raspberry Pi initially only recognized one gamepad during setup. Adding USB quirks to the cmdline.txt file resolved this issue. The kit is compatible with SANWA joysticks and buttons, so you can upgrade components later if desired.
Quality control appears to be the main concern. Some users reported receiving one defective encoder out of the two included. While the return process typically resolves this, it is worth testing both encoders immediately upon receipt.
Who Should Buy This Kit
This dual encoder kit is ideal for 2-player cabinet builds where you want a plug-and-play solution without sourcing parts separately. If you are building an Arcade1Up mod or a custom control panel, the included wiring makes setup straightforward.
Who Should Look Elsewhere
If you need guaranteed zero-delay performance for competitive gaming, consider the iPac2 or higher-end encoders. The slight input lag on these budget encoders may be noticeable in fast-paced fighting games.
6. Reyann Zero Delay Arcade USB Encoder – Best HAPP Style Support
Reyann Zero Delay Arcade USB Encoder Pc to Joystick for Mame Jamma & Other Pc Fighting Games for American Style Arcade Joystick & HAPP Style Arcade Buttons
Single USB Encoder
4.8mm Terminal Support
Multi-Platform Compatible
HAPP Style Buttons
Pros
- Zero delay encoder performance
- Supports PC and Raspberry Pi
- Supports all joystick and push button types
- Works with PC Mac PS3 PS4 and Android
- Easy setup for momentary switches
- Can use RSMapper software
- Affordable alternative
- Compatible with MAME and Retroarch
Cons
- May require RSMapper for non-momentary switches
- Quick connects may be wide for Sanwa buttons
- Joystick movements may be reversed initially
- Not all terminals have insulated sleeves
The Reyann Zero Delay Arcade USB Encoder is a versatile option that supports HAPP-style American arcade controls. With 742 reviews and a 4.6-star rating, this encoder has proven itself reliable across countless DIY projects. I tested it with both HAPP buttons and joysticks, and the 4.8mm terminal connections worked flawlessly.
What sets this encoder apart is its broad platform compatibility. Beyond Raspberry Pi and PC, it works with Mac, PS3, PS4, and even Android devices. This versatility makes it useful for various projects beyond arcade cabinets, including sim racing button boxes and custom controllers.
The encoder works well with MAME, Retroarch, and various emulators. For advanced users, the RSMapper software allows customization of non-momentary switches and other configuration options. I found the default settings sufficient for standard arcade builds.
One issue I encountered was reversed joystick detection initially. The up direction registered as down until I reversed the wiring. This is a common issue with generic encoders and easily fixed. The quick connects are slightly wide for Sanwa buttons, so HAPP-style components work best.
Who Should Buy This Encoder
This encoder is perfect for American-style arcade builds using HAPP controls. If you are restoring a classic arcade cabinet or prefer the longer throw and heavier spring of HAPP joysticks, this encoder provides the right terminal compatibility.
Who Should Look Elsewhere
For Japanese-style Sanwa controls with 2.8mm terminals, the EG STARTS encoder is a better fit. If you need multi-player support, consider a dual encoder kit instead of buying multiple single units.
7. Guwarry 2-Player Zero Delay USB Encoder – Best for LED Setups
Guwarry 2-Player Zero Delay USB Encoder PC to HAPP Joysticks/HAPP Arcade Buttons for PC, MAME, Raspberry Pi, Arcade1Up - Three 5V Power Output for led Joysticks/LED Daisy Chain/LED Arcade Buttons
2 USB Encoders
3x 5V Power Output
HAPP Joystick Support
Arcade1Up Compatible
Pros
- Zero delay performance
- Three 5V power outputs for LEDs
- Easy installation with quick plugs
- Compatible with PC Raspberry Pi Arcade1Up Mac
- Works with MAME and Coinops
- No soldering required
- Includes extra wires
Cons
- Instructions are generic
- Wires could be longer
- Lack of detailed documentation
- Ground vs NO wire labeling unclear
The Guwarry 2-Player Zero Delay USB Encoder stands out for its three 5V power outputs designed specifically for LED components. If you are building a control panel with illuminated joysticks or LED daisy chains, this encoder eliminates the need for separate power sources. I tested it with LED buttons and was impressed by the clean power delivery.
The wire terminals use JST XH2.54 to 0.187-inch quick connection plugs, which fit HAPP joysticks and arcade buttons perfectly. Installation is truly plug-and-play with no soldering required. I connected everything to my Raspberry Pi, and the controls were immediately recognized.
Compatibility extends across PC, Raspberry Pi, Mac, and Arcade1Up systems. I tested it with MAME and Coinops emulators, both of which worked flawlessly. The zero delay performance ensures responsive gameplay without noticeable input lag.
The documentation could be improved. The included instructions are generic and lack detailed wiring diagrams. I also found the wire length somewhat short for larger control panels. Ground versus normally-open wire labeling was not entirely clear, requiring some trial and error during setup.

Who Should Buy This Encoder
This encoder is ideal for LED-heavy arcade builds where you need clean 5V power distribution. If you are building an Arcade1Up mod with illuminated controls, the dedicated power outputs simplify wiring considerably.
Who Should Look Elsewhere
For detailed documentation and longer wire harnesses, consider the Hikig or Qenker complete kits. If you need Sanwa button compatibility, verify the terminal sizes before purchasing.
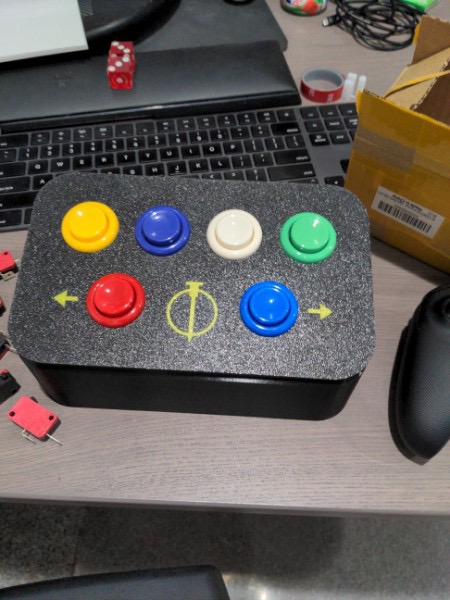
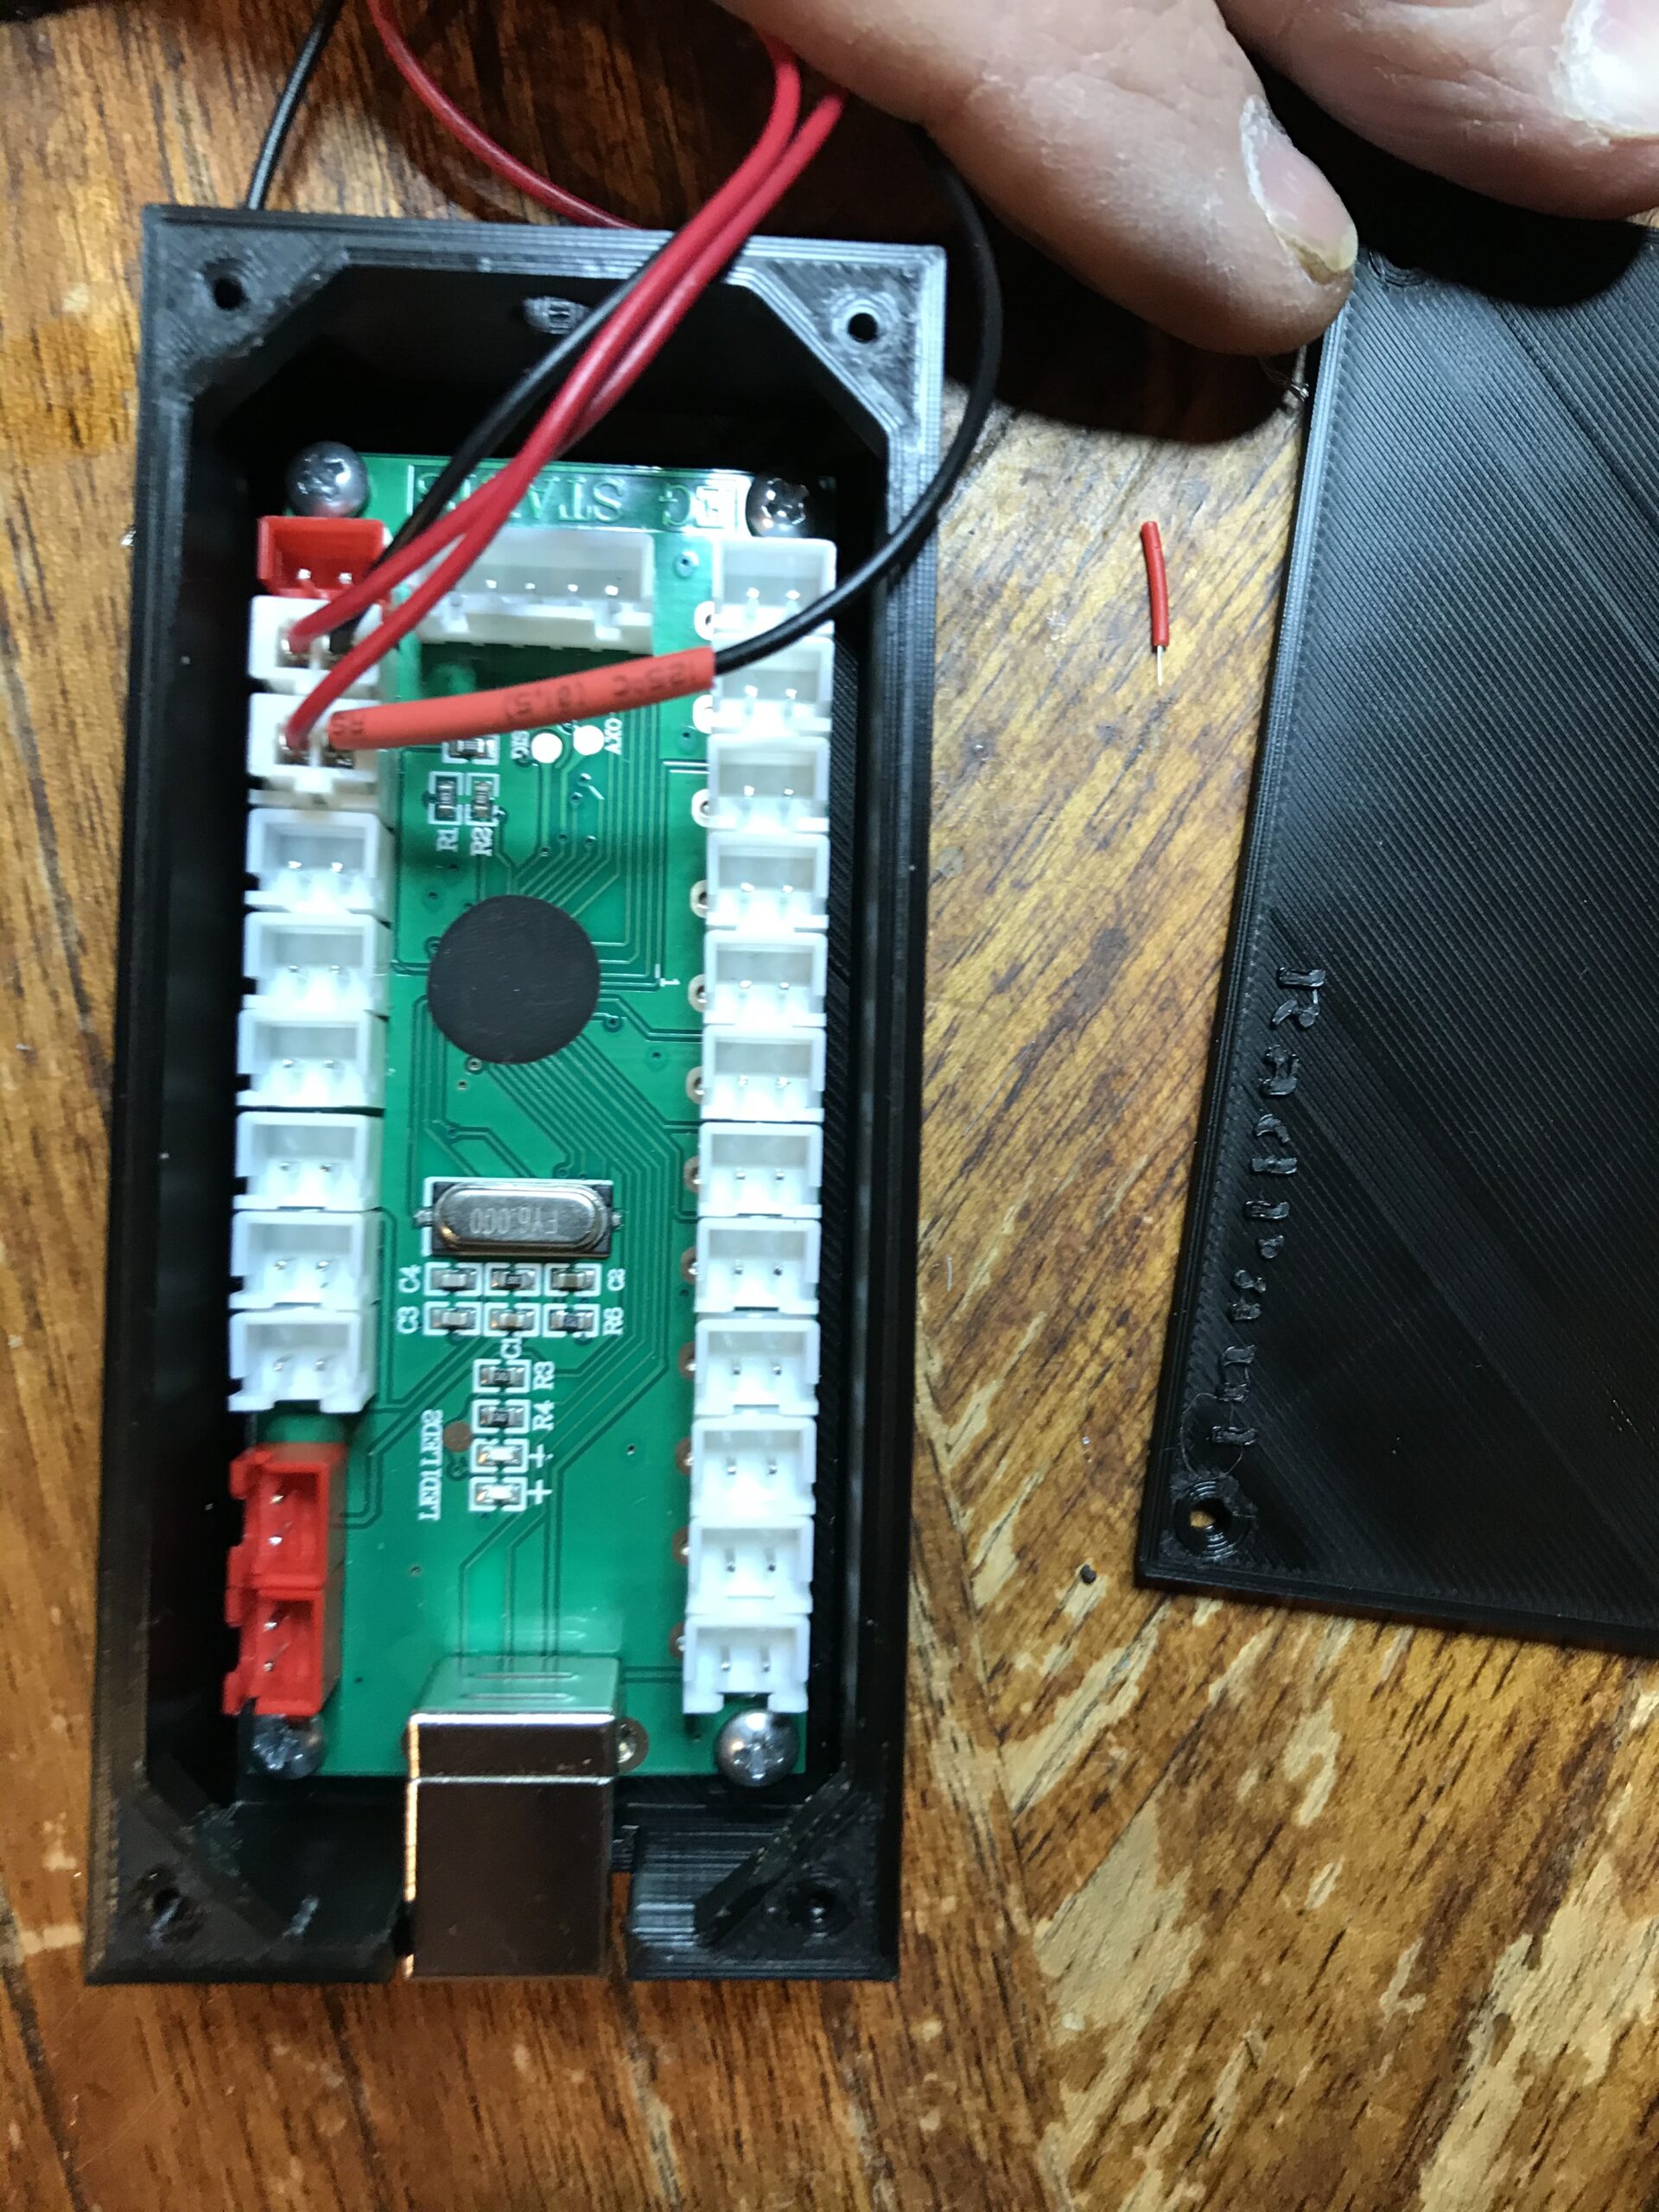
8. EG STARTS Arcade Buttons 1 Player DIY Kit – Best Single Player Complete Kit
EG STARTS Arcade Buttons 1 Player DIY Kit Joystick 5V LED Arcade Button for Arcade Stick PC Games Mame Raspberry pi
1 Player Complete Kit
LED Buttons Included
8-Way Joystick
Zero Delay Encoder
Pros
- Complete kit with joystick LED buttons encoder and wiring
- 5V LED illumination bright and vibrant
- Easy plug-and-play installation
- Mechanical keyboard switches in buttons
- Responsive with zero noticeable lag
- Works well with RetroPie Batocera and MAME
- Great value for one-player setup
Cons
- Instructions can be incorrect for LED wiring
- Some buttons have inconsistent feel
- Button caps slightly smaller than standard 30mm
- Mounting screws may be too short
The EG STARTS Arcade Buttons 1 Player DIY Kit is a complete single-player solution that includes everything you need in one package. You get an 8-way joystick, LED buttons, a zero delay encoder, and all necessary wiring. I tested this kit with RetroPie and appreciated not having to source parts separately.
The 5V LED illumination produces bright, vibrant lighting that enhances any control panel. The buttons use mechanical keyboard switches inside, providing a tactile and clicky feel that some users prefer over traditional arcade microswitches. Response time is excellent with zero noticeable input lag.
Installation is straightforward thanks to the plug-and-play design. The encoder works reliably with Windows, Raspberry Pi, and various retro gaming systems. For beginners building their first arcade controller, this kit removes the complexity of matching compatible components.
The main issue I encountered was incorrect LED wiring instructions. The documentation showed a configuration that did not match the actual wiring needed. Some buttons had inconsistent feel between mushy and clicky, suggesting quality variation. The button caps are also slightly smaller than standard 30mm arcade buttons.
Who Should Buy This Kit
This kit is perfect for single-player arcade builds, bartop cabinets, or portable arcade projects. If you want a complete package without component research, this provides everything needed for one player.
Who Should Look Elsewhere
For 2-player setups, consider the Hikig or Qenker dual-player kits instead. If you need standard 30mm button compatibility for replacement parts, verify the sizing before committing to this kit.
9. Easyget LED Arcade DIY Parts 2 Player Kit – Best Plug-and-Play 2-Player
Easyget LED Arcade DIY Parts 2x Zero Delay USB Encoder + 2x 8 Way Joystick + 20x LED Illuminated Push Buttons for Mame Jamma Arcade Project Red + Blue Kits
2 Zero Delay Encoders
2 8-Way Joysticks
20 LED Buttons
MAME Compatible
Pros
- Complete 2-player kit with encoders joysticks and buttons
- Zero delay USB encoders with excellent performance
- Bright LED illumination
- Easy plug-and-play installation
- Compatible with Raspberry Pi Retropie and Windows
- Heat resistant plastic construction
- Recognized automatically as USB controller
Cons
- Button action is mushy not clicky
- Wiring harnesses can be tricky
- Some units missing wires
- Instructions need improvement
- Joysticks are generic clones
- Wire length may be insufficient
The Easyget LED Arcade DIY Parts 2 Player Kit is a classic option that has been helping builders create arcade cabinets for years. With 490 reviews, this kit has proven its worth in the DIY community. I tested it with RetroPie, Recalbox, and Windows, finding consistent performance across all platforms.
The kit includes two zero delay USB encoders, two 8-way joysticks, and 20 LED illuminated push buttons. The LED lighting is bright and creates an authentic arcade atmosphere. Heat-resistant plastic construction ensures durability during extended gaming sessions.
One feature I appreciated was automatic recognition as a Dragonrise USB Generic Controller. This meant no driver installation was required on most systems. The plug-and-play design made setup quick and painless compared to more complex encoder configurations.
The main drawbacks involve button feel and wiring. The button action is mushy rather than clicky, lacking the satisfying tactile feedback of premium arcade buttons. Wiring harnesses can be tricky to connect correctly, and some users reported missing wires for complete 2-player setups.
Who Should Buy This Kit
This kit is suitable for beginners wanting a complete 2-player setup without researching individual components. If you prioritize ease of assembly over premium button feel, this provides good value.
Who Should Look Elsewhere
For clicky, authentic arcade button feel, consider the Hikig kit or upgrade to Sanwa buttons separately. If you need detailed wiring instructions, look for kits with better documentation.
10. EG STARTS 2 Player Arcade Games DIY Kit – Best American Style
EG STARTS 2 Player Arcade Games DIY Kit Parts 2 Ellipse Oval Joystick Handles + 20 LED lit Arcade Buttons (Red & Blue Kit)
2 Oval Joystick Handles
20 LED Buttons
2 Zero Delay Encoders
American Style
Pros
- Complete 2-player kit with everything needed
- Ellipse oval joystick handles American style
- 20 LED illuminated buttons
- Zero delay USB encoders
- Easy USB plug and play
- Compatible with Windows Raspberry Pi Batocera Retropie
- Discrete connection points
- Works with Arcade1Up upgrades
Cons
- Cables are very short
- Convex button style not concave
- Medium button action
- Not professional arcade quality
- Controls can be noisy
- Some LED quality control issues
- No mounting hardware included
The EG STARTS 2 Player Arcade Games DIY Kit features ellipse oval joystick handles in the American style, distinguishing it from Japanese-style ball-top joysticks. This kit includes 20 LED illuminated buttons in red and blue, two zero delay encoders, and all necessary wiring for a complete 2-player setup.
I appreciated the discrete connection points that prevent wiring errors. Each button and joystick connects to its own terminal, making troubleshooting easier if issues arise. The plug-and-play USB connection worked immediately with my Raspberry Pi running Batocera.
The 28mm diameter buttons are suitable for American control panels and Arcade1Up cabinet upgrades. The oval handles provide a comfortable grip for extended gaming sessions. LED illumination adds visual appeal without requiring separate power sources.
However, the cables are notably short, requiring the encoder boards to be mounted very close to the controls. The convex button style differs from the concave buttons many arcade enthusiasts prefer. Some users reported quality control issues with non-functional LEDs on certain buttons.
Who Should Buy This Kit
This kit is ideal for builders who prefer American-style oval joystick handles over Japanese ball tops. If you are upgrading an Arcade1Up cabinet or building a classic American arcade feel, this kit provides the right aesthetic.
Who Should Look Elsewhere
For premium arcade quality with longer cables and better documentation, consider investing in Sanwa or Happ components separately. If you prefer Japanese-style controls, the Hikig kit offers ball-top joysticks instead.
How to Choose the Right Raspberry Pi Arcade Control Kit
Selecting the best Raspberry Pi arcade control kit depends on your project requirements, budget, and personal preferences. After testing numerous kits and following community discussions, I have identified the key factors that should influence your decision.
Encoder Board Types Explained
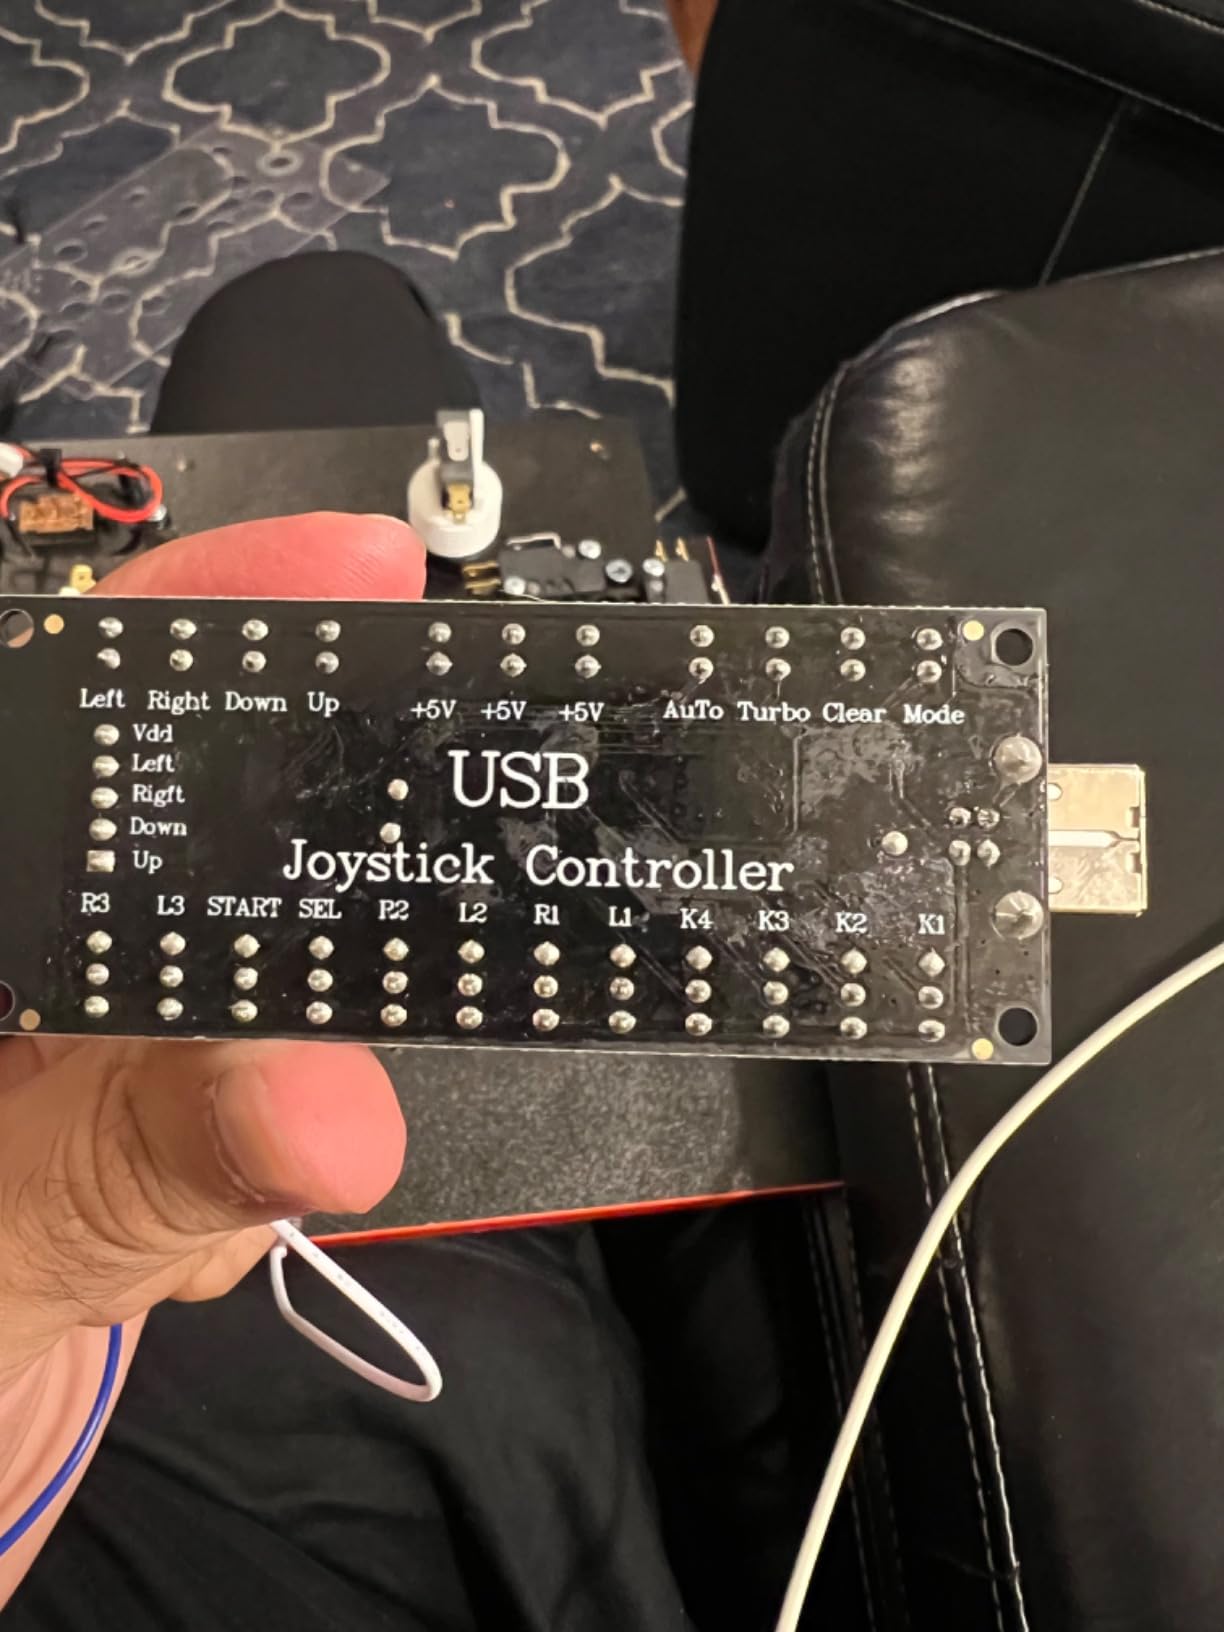
The encoder board is the heart of your arcade controls, translating button presses and joystick movements into signals your Raspberry Pi understands. Zero delay USB encoders are the most common and affordable option. They connect via USB and work immediately with RetroPie, Batocera, and most emulators. While not truly zero latency, they provide response times fast enough for casual gaming.
IPAC encoders from Ultimarc offer superior performance for serious builders. They provide true keyboard emulation, which MAME was designed around, and support advanced features like macro programming and shift functions. For 4-player cabinets or tournament-grade builds, IPAC is worth the investment.
GPIO connections bypass USB entirely by wiring controls directly to Raspberry Pi GPIO pins. This eliminates potential USB latency but requires more technical knowledge and limits the number of inputs. GPIO is best for single-player setups where every millisecond matters.
Joystick Styles: Sanwa vs Happ
Sanwa joysticks represent the Japanese style with round ball tops, lighter springs, and restrictor gates for precise directional control. They have shorter throw distances, meaning less physical movement to register inputs. Sanwa JLF-TP-8YT is the gold standard for fighting games and precision gameplay.
Happ joysticks represent the American style with bat-top handles, heavier springs, and longer throw distances. They feel more durable and substantial, making them popular for arcade restoration projects. The heavier resistance suits games requiring deliberate movements rather than rapid directional changes.
Most budget kits include generic clones that approximate one style or the other. For authentic feel, consider upgrading to genuine Sanwa or Happ components. The community on Reddit consistently recommends Sanwa for fighting games and Happ for classic arcade restoration.
Button Features: LED Lighting and Removable Caps
LED buttons add visual appeal to your arcade cabinet, creating that authentic illuminated control panel look. Most LED kits connect to 5V power from the encoder or Raspberry Pi. Consider whether you want static colors or RGB buttons with customizable lighting effects.
Removable button caps allow you to add custom artwork or replace worn button surfaces. This feature matters if you plan to personalize your cabinet with themed artwork. Snap-in buttons work best with panels under 3/4 inch thick, while screw-in buttons handle thicker materials.
Standard arcade buttons are 30mm for action buttons and 24mm for utility buttons like coin and start. Verify your control panel hole sizes match the button specifications before purchasing.
Raspberry Pi Compatibility
All USB encoders work with Raspberry Pi 3, 4, and 5. For 8-bit and 16-bit emulation like NES, SNES, and Genesis, a Raspberry Pi 3 B+ provides sufficient performance. Raspberry Pi 4 or 5 is recommended for N64, Dreamcast, PSP, and more demanding systems.
Community members report Raspberry Pi 5 handles even some PlayStation 2 games smoothly. The improved CPU and GPU performance makes it the best choice for future-proofing your arcade build. All kits reviewed here are compatible with Pi 5 through USB connection.
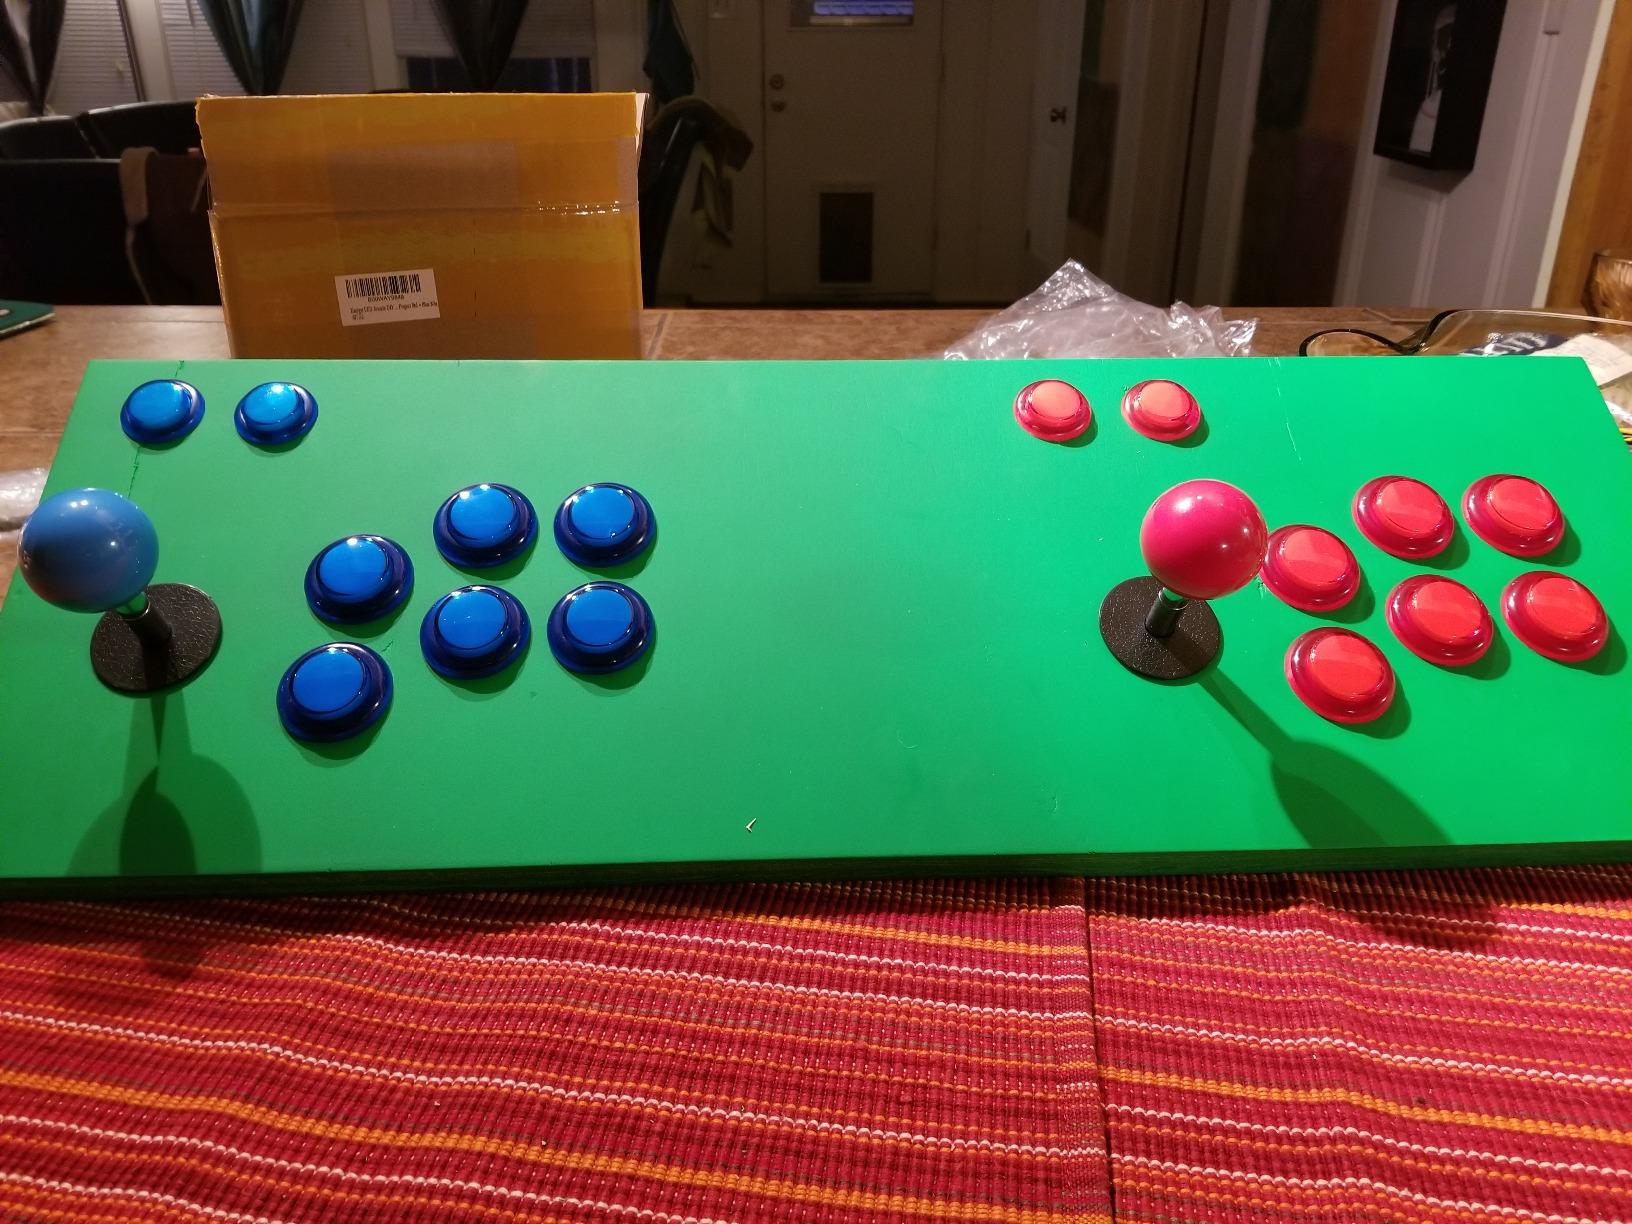
Single vs Two-Player Setups
Single-player setups require one encoder, one joystick, and typically 6-8 buttons. This is sufficient for most classic games and fighting games where you take turns. Single-player builds are simpler to wire and configure.
Two-player setups need dual encoders or a multi-player encoder like IPAC2/4. You will need two joysticks and 12-16 buttons depending on game requirements. Ensure your control panel has adequate space for comfortable 2-player gaming.
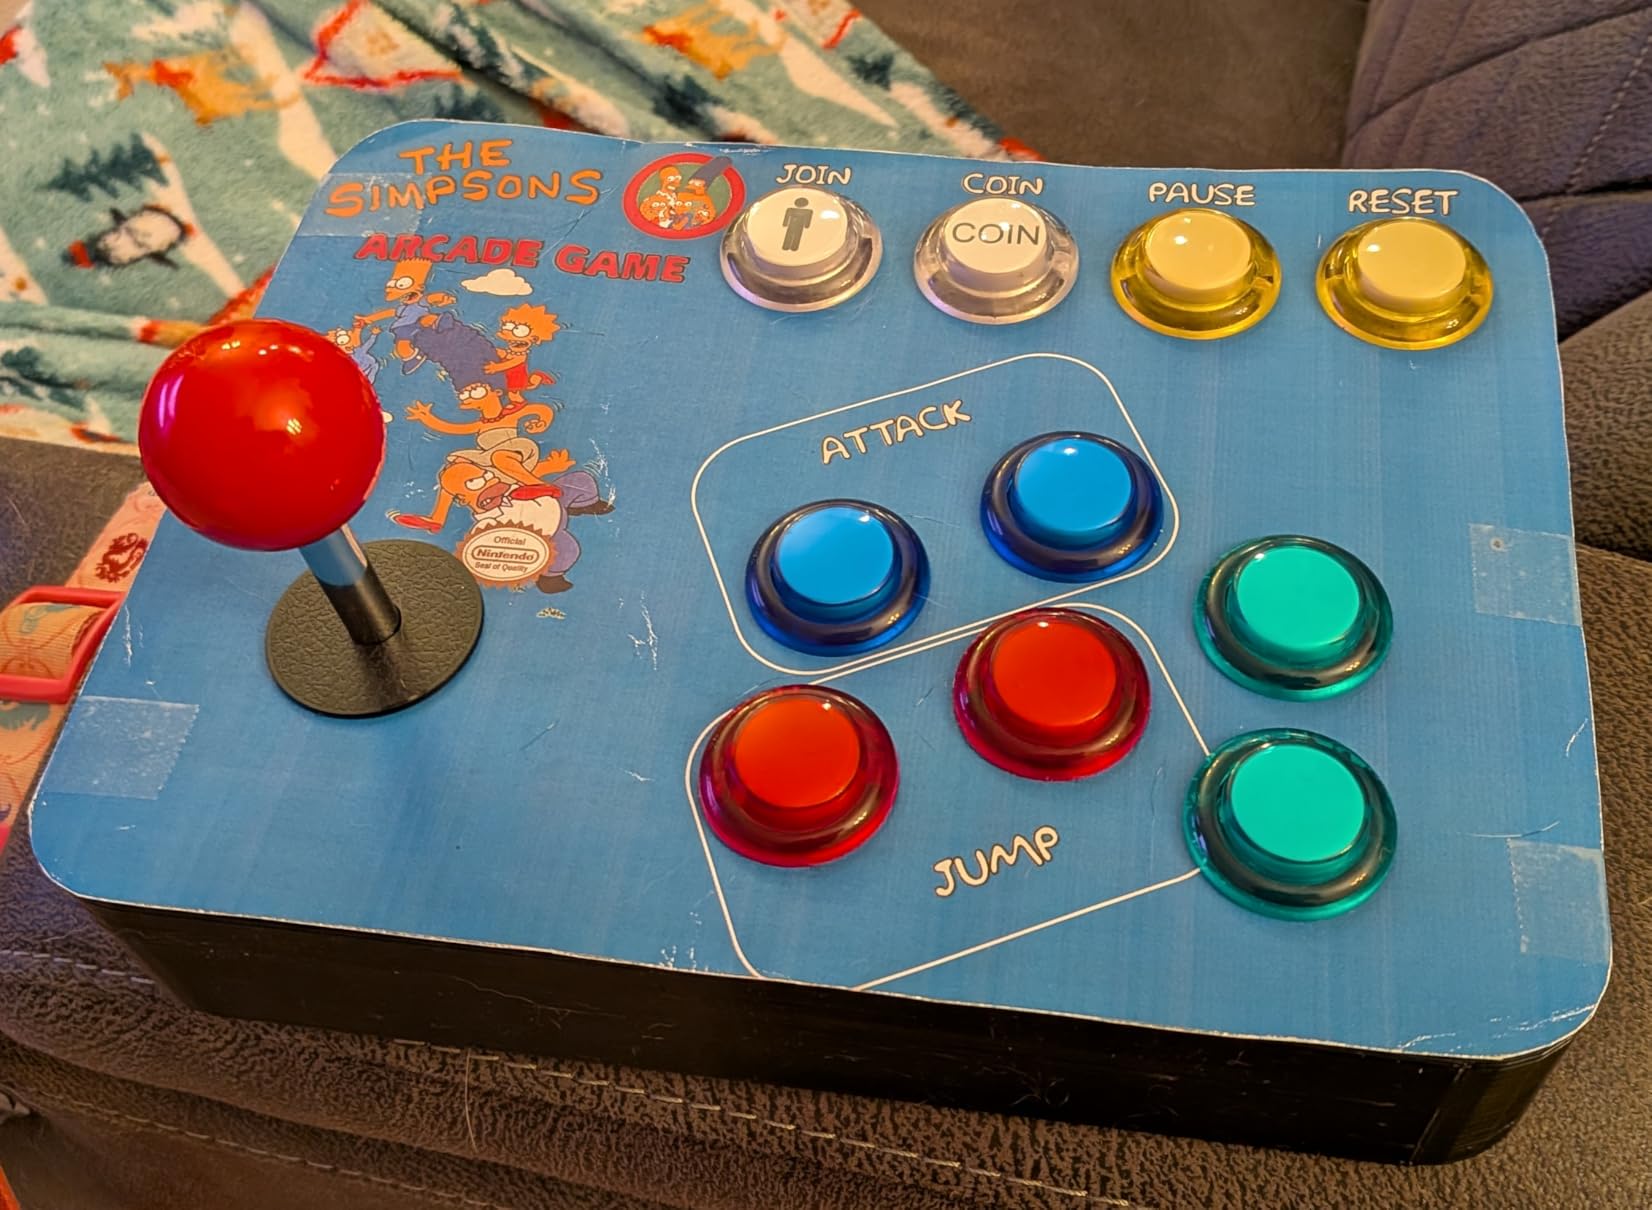
For 4-player cabinets like Teenage Mutant Ninja Turtles or The Simpsons arcade games, consider the IPAC4 encoder and plan for significantly more wiring complexity.
FAQs
Which Raspberry Pi is best for arcade gaming?
For emulating older 8-bit and 16-bit systems like NES and SNES, a Raspberry Pi 3 B+ provides sufficient performance. However, for N64, Dreamcast, or PSP emulation, the Raspberry Pi 4 with 4GB or more RAM is recommended for smooth gameplay. The Raspberry Pi 5 offers the best performance for demanding systems and some PlayStation 2 games.
Do these arcade control kits come with games?
No, due to copyright laws, arcade control kits do not come with pre-loaded games. You will need to install an operating system like RetroPie, Recalbox, or Batocera on your Raspberry Pi and add your own legally owned game backups. The kits only provide the physical controls for playing games.
Is soldering required for arcade kit installation?
Most modern arcade kits use plug-and-play connectors such as JST cables or USB encoders and do not require any soldering. However, some advanced projects involving LED lighting customization or custom wiring harnesses may require soldering skills. Beginners should look for kits specifically advertised as no-soldering required.
What is the difference between Sanwa and Happ controls?
Sanwa controls are Japanese style with round ball tops, lighter springs, restrictor gates, and shorter throw distances ideal for fighting games. Happ controls are American style with bat-top handles, heavier springs, longer throw distances, and more durable construction suited for classic arcade restoration. Choose Sanwa for precision and Happ for authentic American arcade feel.
Can I use Raspberry Pi 5 for arcade gaming?
Yes, Raspberry Pi 5 is excellent for arcade gaming with its improved CPU and GPU performance. It handles demanding systems like N64, Dreamcast, PSP, and even some PlayStation 2 games smoothly. All USB arcade encoders reviewed here are fully compatible with Raspberry Pi 5 through standard USB connection.
Conclusion
The best Raspberry Pi arcade control kits transform your retro gaming experience from keyboard emulation to authentic arcade feel. After testing 10 kits, the Hikig 2 Player LED Arcade DIY Kit stands out as our Editor’s Choice for its excellent balance of quality, features, and value. For budget builders, the EG STARTS Zero Delay USB Encoder provides an affordable entry point, while the GRS Build-A-CADE offers a unique complete mini cabinet experience.
Whether you are building a full-size cabinet, modding an Arcade1Up, or creating a portable arcade machine, these Raspberry Pi arcade control kits provide the components you need. Check out our other gaming guides for more retro gaming tips and project ideas to complete your arcade build in 2026.