I remember the exact moment it happened to me. I’d been waiting for weeks to get my hands on Battlefield REDSEC, hyped beyond belief after watching all the trailers and reading about the new features. The moment finally came – I clicked launch, my heart pounding with anticipation… and then BAM! That dreaded error message popped up: “SecureBoot is not enabled.”
Talk about a mood killer, right? There I was, ready to dive into the action, and my own PC was telling me “nope, not today.” If you’re reading this, chances are you’ve experienced the same frustration. But don’t worry – I’ve been through this whole process, and I’m going to walk you through everything you need to know to get back to gaming.
What the Heck is Secure Boot Anyway?
Before we dive into the fixes, let’s understand what Secure Boot actually is. When I first encountered this error, I had no idea what it was or why Battlefield REDSEC suddenly cared about it. I thought it was some new Windows update thing I’d missed.
Turns out, Secure Boot is a security feature that’s been part of Windows for years, but it’s only recently become a requirement for certain games. Here’s the deal: Secure Boot makes sure your PC only loads “safe software” during startup. It’s like a bouncer at a club, checking IDs and making sure nobody sketchy gets in.
For Battlefield REDSEC, this is super important because of EA’s new anti-cheat system called EA Javelin. According to EA, “Secure Boot allows games supported by EA Javelin anti-cheat to detect and remove bad actors, resulting in fewer cheaters and a better experience for players.”
And honestly? As someone who’s been ruined by cheaters in online games before, I’m all for it. There’s nothing worse than getting headshot through walls or watching someone fly across the map like Superman. If enabling Secure Boot helps stop that, I’m willing to jump through a few hoops.
Why Battlefield REDSEC Requires Secure Boot?
When I first saw this requirement, I was pretty annoyed. Why should I have to change my BIOS settings just to play a game? But after doing some research, I actually get it now.
EA’s been dealing with cheaters for years, and they’re getting more sophisticated. We’re not just talking about simple aimbots anymore. Modern cheats can:
- Take over your PC remotely (scary stuff!)
- Manipulate memory to give unfair advantages
- Spoof hardware IDs to avoid bans
- Run virtual machines to hide cheating software
- Tamper directly with anti-cheat systems
Secure Boot helps combat all of this by creating a secure foundation from the moment your PC starts up. It’s not just about Battlefield REDSEC – it’s about making online gaming fairer for everyone.
I’ll admit, when I first heard about kernel-level anti-cheat, I was skeptical. But after seeing how rampant cheating has become in other games, I’m actually glad EA’s taking this stand. Sure, it’s a bit of a hassle to set up, but it’s worth it for a better gaming experience.
How to Check if Secure Boot is Already Enabled?
Before we start making changes, let’s check if Secure Boot is actually disabled on your system. Maybe you’re one of the lucky ones who already has it enabled!
Here’s how I checked mine:
- Hit the Windows Key + R on your keyboard (this opens the Run window)
- Type “msinfo32” and hit Enter
- Look for “Secure Boot State” in the System Information window
If it says “On,” you’re good to go! If it says “Off” or “Unsupported,” then we’ve got some work to do.
When I checked mine, it was definitely “Off.” I also noticed something else important – the “BIOS Mode” needs to be “UEFI” for Secure Boot to work. If yours says “Legacy,” you might need to do some additional steps, which I’ll cover later.
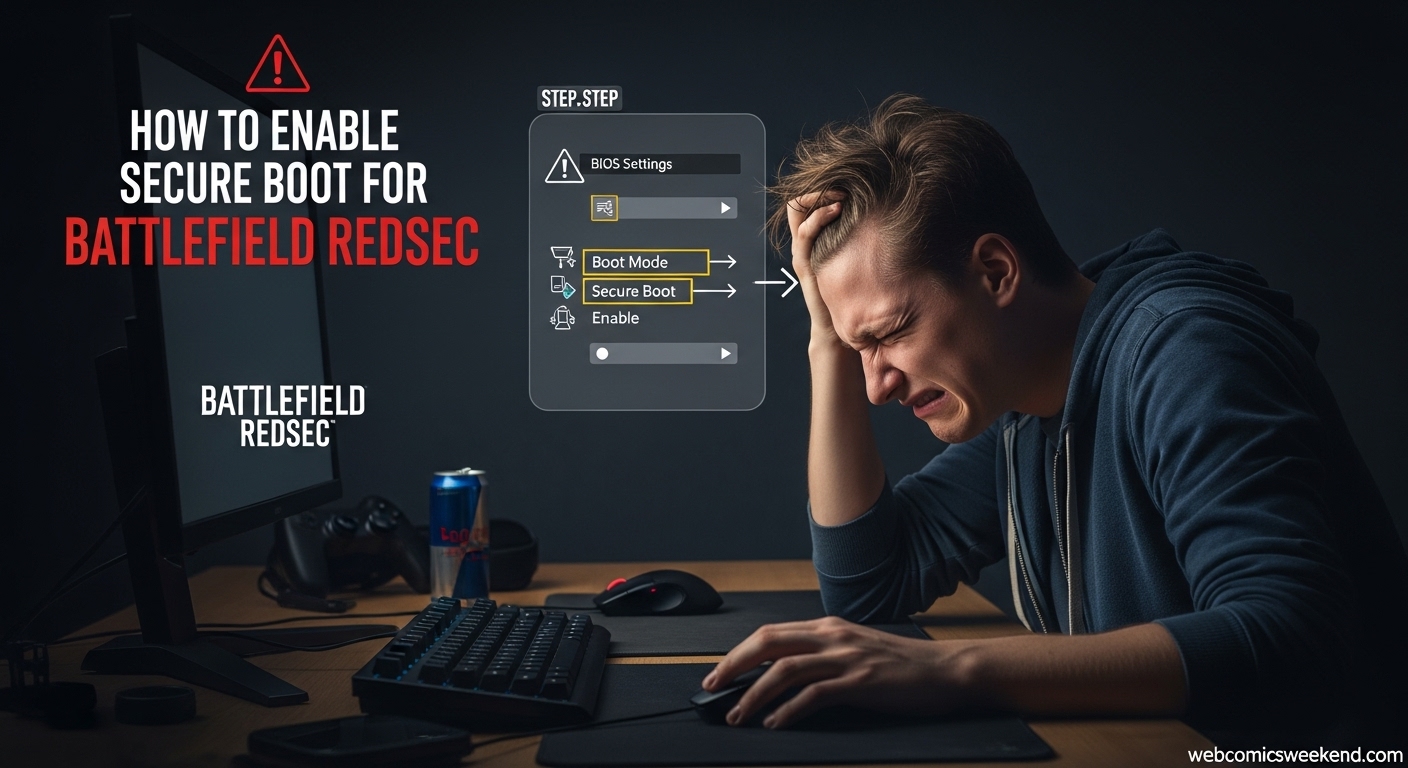
The Step-by-Step Guide to Enabling Secure Boot
Alright, here’s the part you’ve been waiting for. I’m going to walk you through exactly how I enabled Secure Boot on my PC. Now, I need to give you a quick warning here – we’re going to be messing with BIOS settings, which can be intimidating. But don’t worry, I’ll hold your hand through the whole process.
Step 1: Get into Your BIOS/UEFI
The first thing we need to do is get into your computer’s BIOS. This is the basic software that runs before Windows starts up. Different manufacturers have different ways of accessing it, but here are the most common methods:
Method 1: Through Windows Settings (Easiest)
- Hit the Windows Key and search for “Change Advanced Startup Options”
- Click on “Restart now” under Advanced startup
- Your PC will restart and show a blue screen
- Select “Troubleshoot” > “Advanced options” > “UEFI Firmware Settings”
- Click “Restart” and you’ll be in the BIOS
Method 2: The Traditional Way
- Restart your computer
- As soon as it starts booting, start pressing a key repeatedly
- Common keys: F2, F10, F12, Delete, or Esc
- Watch the screen for a message like “Press F2 to enter Setup”
When I did this, I used the Windows method because it’s way easier and you don’t have to time the key presses just right.
Step 2: Navigate to the Boot Settings
Once you’re in the BIOS, you’ll see a lot of options. Don’t panic! The interface looks different depending on your motherboard manufacturer, but we’re looking for something related to “Boot” or “Security.”
On my ASUS motherboard, it was under the “Boot” tab. On my friend’s Gigabyte board, it was under “Security.” If you can’t find it, look for a help section or search online for your specific motherboard model.
Step 3: Enable Secure Boot
This is the moment of truth! Look for an option called “Secure Boot” or “Secure Boot State.” It’s probably set to “Disabled” right now.
Change it to “Enabled.” Simple, right? Well, not always. Sometimes you might run into issues:
Issue 1: Secure Boot is Grayed Out If you can’t change the setting, you might need to:
- Clear Secure Boot keys first (there’s usually an option for this)
- Set a supervisor password in the BIOS
- Convert your disk from MBR to GPT (more on this later)
Issue 2: No Secure Boot Option at All If you don’t see Secure Boot anywhere, your system might not support it, or you might be in Legacy BIOS mode instead of UEFI.
When I enabled mine, I had to clear the Secure Boot keys first, then restart, then enable it. It was a bit of a pain, but nothing too complicated.
Step 4: Save and Exit
Almost done! Look for an option to “Save and Exit” or “Exit Saving Changes.” Your computer will restart, and if all goes well, Secure Boot should now be enabled.
Pro tip: Have your phone or another device handy with this guide open. You might need to reference it while you’re in the BIOS.
What If You Run Into Problems?
Of course, nothing ever goes perfectly the first time, right? When I was setting this up, I ran into a few issues, and I want to prepare you for them.
Problem: Your System Uses Legacy BIOS Instead of UEFI
This was a big one for me. If your “BIOS Mode” in msinfo32 shows “Legacy” instead of “UEFI,” you’ll need to convert your system. This is more advanced and can be risky, so back up your data first!
Here’s what I had to do:
- Convert my Windows installation from MBR to GPT partition style
- Reinstall Windows (in some cases)
- Enable UEFI mode in the BIOS
This is definitely not for beginners, and if you’re not comfortable with this, you might want to get help from someone who knows what they’re doing.
Problem: Secure Boot Causes Other Issues
After I enabled Secure Boot, I noticed that some of my older hardware didn’t work properly. My USB 3.0 ports were acting weird, and my old graphics card had some display issues.
If this happens to you:
- Check for BIOS updates from your motherboard manufacturer
- Update all your drivers
- Some older hardware might not be compatible with Secure Boot
Problem: Windows Won’t Boot After Enabling Secure Boot
This is the scary one, and it happened to my friend. He enabled Secure Boot, and Windows just wouldn’t start. Here’s what fixed it for him:
- Go back into BIOS
- Disable Secure Boot temporarily
- Boot into Windows
- Check for Windows updates and install them
- Restart and try enabling Secure Boot again
If all else fails, you might need to do a Windows repair or reinstall.
Manufacturer-Specific Instructions
Different motherboard manufacturers have different BIOS interfaces. Here’s what I found when researching the most common ones:
ASUS Motherboards
ASUS boards are pretty straightforward:
- Press F2 or Delete on boot
- Go to the “Boot” tab
- Look for “Secure Boot” and enable it
- Save and exit
Gigabyte Motherboards
Gigabyte can be a bit trickier:
- Press F2 or Delete on boot
- Press F7 for Advanced Mode
- Go to “BIOS Features” or “Security”
- Enable “Secure Boot”
- You might need to set a supervisor password first
MSI Motherboards
MSI makes it relatively easy:
- Press F2 or Delete on boot
- Go to the “Settings” tab
- Select “Security”
- Enable “Secure Boot”
- Save and exit
Dell Computers
Dell systems have their own way:
- Press F2 on boot
- Go to “Secure Boot” in the left menu
- Enable “Secure Boot”
- Save and exit
Remember, these are general guidelines. Your specific model might be different, so always check your motherboard’s manual if you’re unsure.
Verifying That Secure Boot is Working
Once you’ve gone through all that trouble, you’ll want to make sure it actually worked. Here’s how I verified mine:
- Go back to msinfo32 (Windows Key + R, type “msinfo32”)
- Look for “Secure Boot State” – it should now say “On”
- Launch Battlefield REDSEC and see if the error is gone
When I did this, I was relieved to see “On” instead of “Off.” And when I launched Battlefield REDSEC? No error message! Straight into the game.
What About TPM 2.0?
You might have heard about TPM 2.0 being required too. TPM (Trusted Platform Module) is another security feature that works alongside Secure Boot. For Battlefield REDSEC, Secure Boot is the main requirement, but having TPM 2.0 enabled is a good idea for overall security.
To check if TPM 2.0 is enabled:
- Press Windows Key + R
- Type “tpm.msc” and hit Enter
- If you see TPM information, it’s enabled
- If not, you might need to enable it in BIOS
Enabling TPM is similar to Secure Boot – you’ll find it in the BIOS under security or advanced settings.
Common Questions and Concerns
I had a lot of questions when I first went through this process, and I bet you do too. Here are some of the most common ones:
Will Enabling Secure Boot Affect My Other Games or Programs?
In my experience, no. Modern games and programs are designed to work with Secure Boot. However, some very old software or games from the Windows XP era might have issues. But honestly, if you’re playing Battlefield REDSEC, you’re probably not running too much ancient software.
Is It Safe to Mess With BIOS Settings?
This is what scared me the most. The short answer is yes, it’s generally safe if you’re careful. The BIOS is designed to be user-configurable, and manufacturers include safeguards. Just don’t go changing random settings you don’t understand. Stick to the Secure Boot setting, and you’ll be fine.
What If I Brick My Motherboard?
“Bricking” means making your motherboard completely unusable. While it’s technically possible, it’s extremely unlikely just from enabling Secure Boot. The worst that’s likely to happen is that Windows won’t boot, and you’ll need to go back into BIOS and disable the setting.
Do I Need to Reinstall Windows?
Probably not. In most cases, you can enable Secure Boot without reinstalling Windows. However, if you’re converting from Legacy BIOS to UEFI, you might need to reinstall Windows or do a repair install.
Will This Affect My Computer’s Performance?
I haven’t noticed any performance difference after enabling Secure Boot. The security checks happen during boot, so once Windows is running, there’s no impact on performance.
My Personal Experience and Tips
Going through this process taught me a lot, and I want to share some personal tips that might help you:
Take Your Time When I first tried this, I rushed through it and missed some steps. Take your time, read each step carefully, and don’t skip anything.
Back Up Your Data Before I started, I made sure all my important files were backed up. Better safe than sorry, right?
Have a Backup Plan I kept my phone handy with the BIOS reset procedure for my motherboard, just in case something went wrong.
Don’t Panic When I had issues, I panicked a bit and almost gave up. Take a deep breath, walk away for a few minutes if you need to, and come back with a clear head.
Ask for Help I’m not too proud to admit I had to call my tech-savvy friend for help at one point. If you’re stuck, don’t be afraid to ask someone who knows more about computers.
The Bottom Line
Enabling Secure Boot for Battlefield REDSEC might seem like a hassle, but it’s really not that bad once you know what you’re doing. I went from being frustrated and confused to having it working in about 30 minutes.
The peace of mind knowing that I’m helping keep cheaters out of my games makes it worth it. And honestly, once it’s set up, you never have to think about it again.
So take a deep breath, follow these steps, and before you know it, you’ll be back in the action, enjoying Battlefield REDSEC without any error messages getting in your way.
FAQ
What exactly is the “Secure Boot is not enabled” error in Battlefield REDSEC?
This error occurs when your PC doesn’t have Secure Boot enabled in the BIOS. Battlefield REDSEC requires Secure Boot as part of EA’s anti-cheat system to ensure a fair gaming environment.
Will enabling Secure Boot delete my files or games?
No, enabling Secure Boot won’t delete any of your files or games. It’s a BIOS-level security setting that doesn’t affect your data.
Do I need to be a computer expert to enable Secure Boot?
Not at all! While it might seem intimidating, the process is straightforward if you follow the steps carefully. I’m not a computer expert, and I managed to do it without any issues.
What if my motherboard doesn’t support Secure Boot?
If your motherboard doesn’t support Secure Boot, you might need to upgrade your hardware to play Battlefield REDSEC. Most modern motherboards (from about 2012 onwards) support Secure Boot.
Can I disable Secure Boot after enabling it if I have problems?
Yes, you can disable Secure Boot by going back into the BIOS and changing the setting back to “Disabled.” However, you won’t be able to play Battlefield REDSEC with Secure Boot disabled.
Will Secure Boot affect my other games or software?
In most cases, no. Modern games and software are designed to work with Secure Boot enabled. However, some very old programs might have compatibility issues.
How long does it take to enable Secure Boot?
The whole process took me about 30 minutes from start to finish, including research time. The actual BIOS changes only take a few minutes.
Do I need to reinstall Windows after enabling Secure Boot?
Usually not. Most systems can enable Secure Boot without reinstalling Windows. However, if you’re converting from Legacy BIOS to UEFI, you might need to reinstall Windows.
What’s the difference between Secure Boot and TPM 2.0?
Secure Boot ensures only trusted software loads during startup, while TPM 2.0 is a security chip that provides hardware-based security functions. Battlefield REDSEC primarily requires Secure Boot, but having TPM 2.0 is beneficial for overall security.
Can I enable Secure Boot on a laptop?
Yes, the process is essentially the same for laptops as it is for desktop computers. You’ll need to access the BIOS/UEFI settings, which might require pressing a specific key during startup.
Related Articles
If you found this guide helpful, you might want to check out some of our other gaming guides:
- Firstborn Beginner Guide 2025 [Dominate From Day 1]
- Helldivers 2 Patch 4.1.0 Full Details (2025) Weapon, Bug Fixes
- Ultimate Plants vs Brainrots Cards Guide (October 2025)
Final Thoughts
I hope this guide helps you get back to playing Battlefield REDSEC without any more Secure Boot headaches. Remember, while it might seem like a pain to go through these steps, it’s all for a good cause – keeping cheaters out of our games and making the online experience better for everyone.
If you run into any issues or have questions, don’t hesitate to reach out. And once you get it working, drop by our gaming section for more tips, tricks, and guides to help you dominate the battlefield!
Happy gaming, and I’ll see you on the virtual battlefield!