Hey there, future elite player! I’m so excited to share this comprehensive Firstborn beginner guide with you. When I first started playing Rise of Firstborn, I was completely overwhelmed by all the systems, heroes, and strategies. But after months of trial and error, countless hours of research, and learning from the best players in the game, I’ve put together everything you need to know to start strong and dominate from day one.
Trust me, I’ve made all the mistakes so you don’t have to. From wasting resources on the wrong buildings to leveling heroes inefficiently, I’ve learned the hard way. But now, I’m going to share all those lessons with you in this ultimate beginner guide.
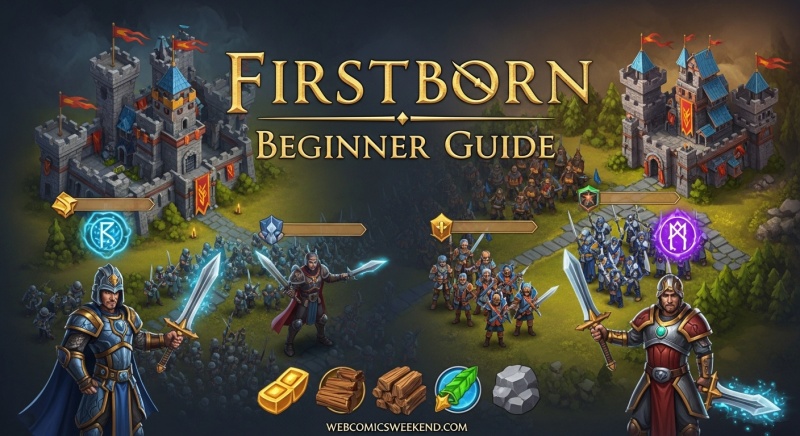
Getting Started – Your First Hours in Firstborn
When you first download Rise of Firstborn, the game will walk you through a basic tutorial. Pay attention to it, but don’t worry if you feel overwhelmed – that’s completely normal. I remember feeling lost when I started, but following this guide will make everything much clearer.
The Absolute Basics
Before we dive into the detailed leveling guide, let’s cover some fundamental concepts that will make your journey much smoother:
Your Citadel is Everything: Your Citadel is the heart of your kingdom. Every upgrade unlocks new buildings, features, and capabilities. Focus on leveling your Citadel first – everything else follows from there.
Resources Are King: You’ll need four main resources – Wood, Stone, Food, and Silver. Plus, you’ll need Gold for special purchases and speed-ups. Always keep your resource production buildings busy and upgraded.
Heroes Make the Difference: Your heroes aren’t just for show – they provide massive bonuses to everything you do. From construction speed to research to combat, having the right heroes in the right positions is crucial.
Alliances Matter: Join an active alliance as soon as possible. The benefits are enormous – from protection to resources to special events. I learned this the hard way after getting attacked repeatedly while playing solo.
Shields Are Your Best Friend: Peace Shields protect your castle from attacks. Use them wisely, especially when you’re sleeping or away from the game. I’ll show you exactly when and how to use them throughout this guide.
Complete Leveling Guide – Citadel 1 to 15
Now let’s get into the meat of this guide. I’ll walk you through exactly what you need to build and upgrade at each Citadel level. This is the same progression I wish I had when I started – it would have saved me weeks of inefficient gameplay.
Citadel Level 1: Your First Steps
This is the easiest level you’ll encounter. The tutorial walks you through everything, but here’s exactly what you need to do:
What to Build:
- Complete the tutorial (Citadel Level 1)
- Recruit and appoint your first Hero
- Clear the forest area
- Build your first Farm
Rewards:
- Basic starting resources
- Your first Hero
Pro Tip: Don’t worry about making perfect decisions here. Just follow the tutorial and get familiar with the interface. The real strategy begins at higher levels.
Citadel Level 2: Getting Protected
What to Build:
- Upgrade Citadel to Level 2 (tutorial will guide you)
Rewards:
- 24-hour Peace Shield (EXTREMELY valuable!)
Why This Matters: That 24-hour Peace Shield is your first real protection. Use it wisely – I recommend activating it when you’re going to sleep or be away from the game for an extended period. This single shield can save you from early-game attacks that would set you back days.
Citadel Level 3: Expanding Your Foundation
What to Build:
- Quarry (Level 1)
- Farm (Level 1)
- Silver Mine (Level 1)
- Lumberyard (Level 1)
- Barracks (Level 1)
- Hospital (Level 1)
- Wall (Level 2)
- Citadel (Level 3)
Rewards:
- Premium Teleport
Strategy: This is where you start building your foundation. Focus on getting all these basic buildings to Level 1 first, then upgrade your Wall to Level 2 before upgrading your Citadel. The Premium Teleport is valuable for relocating your castle later – don’t waste it!
Citadel Level 4: First Real Gear
What to Build:
- Training Grounds (Level 2)
- Archery Range (Level 2)
- Iron Mine (Level 3)
- Forge (Level 3)
- Wall (Level 3)
- Citadel (Level 4)
Rewards:
- Architect’s Armor
- Architect’s Dagger
Important: Immediately equip the Architect’s Armor and Architect’s Dagger to your Architect hero. This gear specifically boosts construction speed, which will help you build faster as you progress. I made the mistake of not equipping this gear right away and wasted hours of slower construction time.
Citadel Level 5: Unlocking New Features
What to Build:
- Stable (Level 2)
- Siege Workshop (Level 2)
- Iron Mine (Level 4)
- Wall (Level 4)
- Citadel (Level 5)
Rewards:
- Unlock Dimensional Battle
Why Dimensional Battle Matters: Dimensional Battle is one of the best features for early-game progression. It provides amazing rewards including War Trumpets, Speed Ups, and Gear Chests. Make sure to complete Dimensional Battle episodes daily – I’ve gotten some of my best early-game gear from here.
Citadel Level 6: Building Momentum
What to Build:
- Training Grounds (Level 3)
- Archery Range (Level 3)
- Stable (Level 3)
- Siege Workshop (Level 3)
- Warehouse (Level 5)
- Iron Mine (Level 5)
- Forge (Level 5)
- Wall (Level 5)
- Citadel (Level 6)
Rewards:
- Architect’s Helm
Strategy: You’re getting into the rhythm now. Make sure to equip that Architect’s Helm as soon as you get it – it completes your Architect set and provides significant construction speed bonuses. At this level, you should also start thinking about your resource production balance.
Citadel Level 7: Halfway There
What to Build:
- Command Center (Level 3)
- Quarry (Level 6)
- Training Grounds (Level 4)
- Archery Range (Level 4)
- Barracks (Level 6)
- Hospital (Level 6)
- Iron Mine (Level 6)
- Forge (Level 6)
- Wall (Level 6)
- Citadel (Level 7)
Rewards:
- Architect’s Shield
- AP Potions
Pro Tips:
- Equip the Architect’s Shield to complete your Architect set
- Use the AP Potions for Monster and Chaotic Hunting – they give you temporary attack boosts
- You’re halfway to Level 15, so start thinking about your long-term strategy
Citadel Level 8: Unlocking Town Mode
What to Build:
- Stable (Level 4)
- Siege Workshop (Level 4)
- Academy (Level 7)
- Iron Mine (Level 7)
- Forge (Level 7)
- Wall (Level 7)
- Citadel (Level 8)
Rewards:
- Unlock Town Mode
Town Mode is Game-Changing: Town Mode is one of the most important features you’ll unlock. It provides:
- Daily boosts you can set for specific goals
- Quests that give valuable building and maintenance items
- Significant resource generation opportunities
I recommend setting aside time each day to complete Town Mode stories. The resources and gear you get from here are essential for progression.
Citadel Level 9: Continuing the Climb
What to Build:
- Command Center (Level 5)
- Training Grounds (Level 6)
- Archery Range (Level 6)
- Iron Mine (Level 8)
- Forge (Level 8)
- Wall (Level 8)
- Citadel (Level 9)
Strategy: At this point, you should have a good rhythm going. Focus on keeping your resource production buildings upgraded and don’t neglect your military buildings. The balance between economy and military becomes more important at this stage.
Citadel Level 10: Protection and Progress
What to Build:
- Stable (Level 6)
- Siege Workshop (Level 6)
- Quarry (Level 9)
- Barracks (Level 9)
- Iron Mine (Level 9)
- Forge (Level 9)
- Wall (Level 9)
- Citadel (Level 10)
Rewards:
- Three 24-hour Peace Shields
Shield Management: Getting three Peace Shields at once is huge! Here’s how I recommend using them:
- Activate one immediately for protection
- Save one for when you sleep
- Keep one as backup for emergencies
Peace Shields are your most valuable defensive asset, especially in the early game. Don’t waste them!
Citadel Level 11: Lord Development
What to Build:
- Command Center (Level 7)
- Quarry (Level 10)
- Training Grounds (Level 10)
- Archery Range (Level 10)
- Iron Mine (Level 10)
- Forge (Level 10)
- Wall (Level 10)
- Citadel (Level 11)
Rewards:
- Lord XP
Lord Skill Strategy: When you get Lord XP, focus on Construction and Research skills first. These will help you progress faster through the levels. I made the mistake early on of spreading my Lord skills too thin – focus on these two areas initially for maximum efficiency.
Citadel Level 12: Combat Gear
What to Build:
- Quarry (Level 11)
- Training Grounds (Level 11)
- Archery Range (Level 11)
- Watchtower (Level 11)
- Iron Mine (Level 11)
- Forge (Level 11)
- Wall (Level 11)
- Citadel (Level 12)
Rewards:
- Full set of Gladiator Armor
- Unlock Battle Royale
Gladiator Armor Strategy: The Gladiator Armor set is excellent for hunting monsters and chaotic strongholds. Equip it to your main attack hero to boost your monster-killing capabilities. This will help you gather more resources and gear faster.
Battle Royale: Battle Royale is a fun game mode that provides great rewards. Participate whenever possible – the gold and gear you can earn here will significantly boost your progression.
Citadel Level 13: Hunter’s Gear
What to Build:
- Stable (Level 11)
- Siege Workshop (Level 11)
- Temple (Level 12)
- Iron Mine (Level 12)
- Forge (Level 12)
- Wall (Level 12)
- Citadel (Level 13)
Rewards:
- Hunter King’s Gear
- Battle Rune of Agility
- Battle Rune of Bravery
Gear and Runes: The Hunter King’s Gear is specifically designed for monster hunting, making it even better than the Gladiator set for this purpose. The Battle Runes provide additional stats when attacking – equip them to your main attack hero for maximum effectiveness.
Citadel Level 14: Team Deathmatch
What to Build:
- Command Center (Level 9)
- Quarry (Level 13)
- Training Grounds (Level 13)
- Archery Range (Level 13)
- Warehouse (Level 13)
- Iron Mine (Level 13)
- Forge (Level 13)
- Wall (Level 13)
- Citadel (Level 14)
Rewards:
- More troops
- Unlock Team Deathmatch
Team Deathmatch Strategy: Team Deathmatch is one of the best sources of gold in the early game. You’ll earn at least 500 Gold per match, with more rewards based on performance. Participate daily – the gold you earn here will be essential for your continued progression.
Citadel Level 15: Major Milestone
What to Build:
- Stable (Level 13)
- Siege Workshop (Level 13)
- Temple (Level 14)
- Iron Mine (Level 14)
- Forge (Level 14)
- Wall (Level 14)
- Citadel (Level 15)
Congratulations! You’ve reached Citadel Level 15, which is a major milestone in your Firstborn journey. At this point, you have:
- Unlocked all major game modes
- Established a solid foundation for your kingdom
- Gained valuable experience with game mechanics
- Acquired decent gear for your heroes
Hero System Deep Dive
Now that you have the leveling progression down, let’s dive deep into the hero system. Heroes are arguably the most important aspect of Firstborn, and understanding how to use them effectively will make or break your gameplay.
Understanding Hero Basics
When I first started, I treated heroes like simple stat boosters. Big mistake! Heroes are complex systems that require careful management and strategic thinking. Here’s what I’ve learned:
Hero Recruitment: You can recruit heroes through several methods:
- Dimension Battles (best free method)
- Events
- Packs (paid option)
- Special promotions
Free vs. Paid Heroes: Some heroes are free (marked with a green banner), while others cost money. As a beginner, focus on free heroes first – they’re more than capable of carrying you through the early and mid-game.
Hero Appointments – The Key to Success
This is where most beginners go wrong. Your heroes need to be appointed to specific roles to provide their bonuses. Here are all the appointments and what they do:
1. Guard Captain and Deputy
- Purpose: Castle defense
- Why it matters: These heroes defend your castle when attacked
- Best heroes for this role: Heroes with high defense and HP stats
- Pro tip: Keep your best defensive heroes appointed here at all times
2. Architect
- Purpose: Construction speed
- Why it matters: Faster building means faster progression
- Best heroes for this role: Heroes with construction speed bonuses
- Pro tip: This should be one of your first appointments – construction speed is crucial early on
3. Scholar
- Purpose: Research speed
- Why it matters: Faster research means faster access to better troops and technologies
- Best heroes for this role: Heroes with research speed bonuses
- Pro tip: Research is often the bottleneck in progression, so a good Scholar is essential
4. Treasurer
- Purpose: Resource production and management
- Why it matters: More resources mean faster everything
- Best heroes for this role: Heroes with resource production bonuses
- Pro tip: Don’t neglect this role – resources are the foundation of your kingdom
5. Drill Sergeant
- Purpose: Troop training
- Why it matters: Faster troop training means stronger military faster
- Best heroes for this role: Heroes with training speed bonuses
- Pro tip: Military power becomes increasingly important as you progress
6. Infirmary Officer
- Purpose: Troop healing and management
- Why it matters: Reduces losses and speeds up recovery after battles
- Best heroes for this role: Heroes with healing and HP bonuses
- Pro tip: This role becomes crucial when you start participating in PvP
7. Master Craftsman
- Purpose: Equipment crafting and trap production
- Why it matters: Better gear means stronger heroes and troops
- Best heroes for this role: Heroes with crafting speed bonuses
- Pro tip: Good gear can make a huge difference in combat effectiveness
Hero Gear and Engraving
Gear is where heroes really shine, but the engraving system can be confusing. Let me break it down:
Basic Gear System: Each hero can equip multiple gear pieces that provide various stats. Better gear equals better performance.
Engraving Mechanics: This is where it gets interesting – and where many players make mistakes. When you engrave gear, the stats apply ONLY to the hero that was wearing it when you engraved it.
Why This Matters: I learned this the hard way. I engraved a great piece of gear on one hero, then tried to move it to another hero, only to discover the engraving bonuses didn’t transfer. If you want to move engraved gear, you need to use engraving removal stones and then re-engrave it on the new hero.
Pro Strategy: Before engraving expensive gear, make sure it’s on the hero you want it to be on permanently. Engraving stones are valuable, so use them wisely.
House Power System
House Power is one of the most powerful (and most misunderstood) systems in Firstborn. Here’s what you need to know:
What is House Power?: House Power provides additional stats to your heroes based on their “house” or lineage. There are currently 6 different types of House Power.
Why It Matters: Good House Power can significantly boost your heroes’ performance, making them much more effective in their roles.
Strategy: You’re limited on House Gemstones, so you need to prioritize carefully. Focus on House Powers that complement your main heroes’ roles and your overall strategy.
Pro Tip: Don’t spread your House Gemstones too thin. It’s better to fully develop one or two House Powers that support your main strategy than to have multiple underdeveloped ones.
Hero Progression Strategy
Leveling heroes effectively is crucial for long-term success. Here’s the strategy I’ve developed:
Early Game (Citadel 1-10):
- Focus on leveling your Architect and Scholar first
- These will speed up your construction and research
- Keep other heroes at moderate levels
Mid Game (Citadel 11-20):
- Start leveling your military heroes (Guard Captain, Drill Sergeant)
- Continue developing your economic heroes
- Begin working on your Infirmary Officer
Late Game (Citadel 20+):
- Balance hero levels based on your current needs
- Focus on heroes that support your primary strategy (offense, defense, or economy)
Research Priorities – What to Research When?
Research is another area where beginners often make costly mistakes. I’ve spent countless hours analyzing the research tree and testing different priorities. Here’s what works best:
Early Game Research Priorities (Citadel 1-15)
1. Construction Speed Research
- Why first: Faster construction means faster Citadel leveling
- Impact: Reduces building time by up to 50% at higher levels
- Priority: Maximum priority until you reach Citadel 15
2. Research Speed Research
- Why second: Research is often the bottleneck in progression
- Impact: Faster research means faster access to better technologies
- Priority: High priority after construction speed
3. Resource Production Research
- Why third: More resources mean faster everything
- Impact: Increases resource generation significantly
- Priority: Medium priority, but don’t neglect it
4. Basic Troop Training Research
- Why fourth: You need troops for monsters and basic defense
- Impact: Unlocks better troop types and training speed
- Priority: Medium priority, becomes more important later
Mid Game Research Priorities (Citadel 15-25)
1. Troop Training Research
- Why first: Now available and crucial for military power
- Impact: Unlocks T4+ troops and training speed bonuses
- Priority: Maximum priority
2. Battle Training Research
- Why second: Essential for PvP and monster hunting
- Impact: Increases troop attack, defense, and HP
- Priority: High priority
3. Hero Training Research
- Why third: Heroes become more important at this stage
- Impact: Improves hero effectiveness and bonuses
- Priority: High priority for your second and third heroes
4. Crafting Research
- Why fourth: Better gear means better heroes
- Impact: Improves crafting success rates and gear quality
- Priority: Medium priority
Late Game Research Priorities (Citadel 25+)
1. Titan Research
- Why first: Titans become game-changers at higher levels
- Impact: Unlocks and improves your Titan abilities
- Priority: Maximum priority until Titan Level 4+
2. Advanced Troop Research
- Why second: T6+ troops are essential for late-game content
- Impact: Unlocks highest tier troops and significant bonuses
- Priority: High priority
3. Enhanced Battle Research
- Why third: PvP becomes more competitive
- Impact: Provides significant combat advantages
- Priority: High priority
4. Economic Research
- Why fourth: Late-game costs are enormous
- Impact: Reduces costs and increases resource generation
- Priority: Medium priority, but don’t neglect it
Resource Management – The Foundation of Success
I can’t stress this enough: resource management is the foundation of everything in Firstborn. Without proper resource management, you’ll struggle to progress, no matter how good your other strategies are.
The Four Main Resources
1. Wood
- Primary use: Building construction and upgrades
- Sources: Lumberyards, gathering, events, raids
- Strategy: Always keep lumberyards upgraded and busy
2. Stone
- Primary use: Building construction and upgrades
- Sources: Quarries, gathering, events, raids
- Strategy: Stone is often the bottleneck – prioritize quarries
3. Food
- Primary use: Troop maintenance and training
- Sources: Farms, gathering, events, raids
- Strategy: Food is easier to obtain, but don’t neglect it
4. Silver
- Primary use: Research, advanced upgrades, hero recruitment
- Sources: Silver mines, gathering, events, raids
- Strategy: Silver becomes crucial later – keep mines upgraded
Advanced Resource Strategies (2025)
1. Hourly Events
- What they are: Events that rotate every hour
- Why they matter: Provide significant resources and gold
- Strategy: Hit Tier 3 in every hourly event possible
- Pro tip: Set alarms for events you don’t want to miss
2. Town Mode Resources
- What it is: Special quests in Town Mode
- Why it matters: Provides consistent resource flow
- Strategy: Complete Town Mode stories daily
- Pro tip: Focus on stories that give resources you need most
3. Chaotic and Defiled Strongholds
- What they are: Special monster locations
- Why they matter: Provide gear and resources
- Strategy: Hit them regularly with appropriate gear
- Pro tip: Use hero attack gear and boosts for best results
4. Farming
- What it is: Gathering resources from map tiles
- Why it matters: Primary resource generation method
- Strategy: Send troops to gather when you’re not using them
- Pro tip: Focus on high-yield tiles and use gathering speed boosts
Gold Management
Gold is the premium currency in Firstborn, and managing it effectively is crucial. Here’s my strategy:
Sources of Gold:
- Hourly events (Tier 3+)
- Team Deathmatch
- Special events
- Packs (if you choose to spend)
Best Uses for Gold:
- Speed-ups: Essential for rapid progression
- Peace Shields: Protection when you need it most
- Hero recruitment: For key heroes you’re missing
- Resource packs: When you’re completely stuck
What NOT to Spend Gold On:
- Basic resource packs (usually not worth it)
- Low-tier gear (you’ll get better from events)
- Decorative items (purely cosmetic)
Monster Hunting – Gear, Strategy, and Rewards
Monster hunting is one of the most important activities in Firstborn, especially for beginners. It provides gear, resources, and essential progression items. Here’s everything you need to know:
Understanding Monsters
Monster Types: There are various monster types in Firstborn, each with different characteristics and rewards. When you tap on a monster, you can see what rewards it gives.
Why Monster Hunting Matters:
- Provides essential gear chests
- Gives resources and materials
- Helps level your heroes and lord
- Prepares you for PvP combat
Monster Hunting Gear Strategy
This is where I see most beginners struggle. You can’t just use any gear for monster hunting – you need specific gear optimized for it.
Best Monster Hunting Gear:
- Hunter King’s Set: Specifically designed for monster hunting
- Gladiator Set: Good alternative early on
- Mixed Attack Gear: Sometimes mixing gear pieces works better
Key Stats for Monster Hunting:
- Hero Attack (most important)
- Troop Attack
- Monster-specific bonuses
- March speed (for efficiency)
Enhancement Strategy:
- Focus on enhancing attack gear first
- Don’t be afraid to mix and match gear pieces
- Use Town Mode boosts set to Hero Attack
Advanced Monster Hunting Techniques
1. Lord Skill Presets
- Create a specific Lord skill preset for monster hunting
- Focus on monster-related skills
- Switch to this preset when hunting
2. Hero Attack Runes
- Use Hero Attack runes on your main attack hero
- Enhance these runes to Level 5, 10, and 15 for additional bonuses
- Fuse runes to try for better ones
3. VIP Shop Boosts
- Buy 35% Hero Attack boosts from the VIP shop
- Use these during intensive monster hunting sessions
- Coordinate with other boosts for maximum effect
4. Pet System
- Assign pets that boost hero attack
- Level these pets for better bonuses
- Focus on economic and battle pets
Specific Monster Strategies
Level 40+ Monsters:
These require specific strategies and gear:
- Enhance your attack gear to high levels
- Use Guardian gear (works well for monster hunting)
- Don’t be afraid to mix and match gear pieces
- Spin Town Mode boosts to Hero Attack
- Use VIP shop boosts
- Apply Hero Attack runes
- Skill your Lord specifically for monster hunting
Resource-Focused Monsters:
Target these when you need specific resources:
- Check what materials each monster gives
- Focus on monsters that drop materials you need
- Prioritize equipment chest monsters for gear progression
PvP and Combat Basics
While monster hunting is important, PvP (Player vs. Player) combat is where the real competition lies. Here’s what beginners need to know about combat in Firstborn.
Understanding Combat Mechanics
Basic Combat Principles:
- Higher CP (Combat Power) doesn’t always guarantee victory
- Hero quality and gear matter significantly
- Troop composition and levels are crucial
- Research and technology provide important bonuses
Combat Phases:
- Preparation: Gear selection, hero appointments, troop composition
- Engagement: The actual battle
- Recovery: Healing troops, analyzing results
Troop Composition Guide
Troop Types:
- Infantry: Balanced attack and defense
- Archers: High attack, low defense
- Cavalry: Fast, good for raids
- Siege: High attack against buildings
Basic Composition Strategies:
- Balanced Approach: Equal mix of all types (good for beginners)
- Attack-Focused: More archers and siege (for aggressive players)
- Defense-Focused: More infantry and cavalry (for defensive players)
Advanced Composition:
- Counter enemy compositions
- Adapt to specific situations
- Consider hero bonuses for specific troop types
Defense Strategies
Castle Defense Setup:
- Appointments: Keep strong defensive heroes appointed
- Troops: Maintain a good defensive garrison
- Wall: Keep wall upgraded and enhanced
- Traps: Produce and upgrade traps regularly
Peace Shield Management:
- Use shields strategically when vulnerable
- Keep emergency shields for unexpected situations
- Coordinate shield usage with alliance members
Reinforcement Strategy:
- Work with alliance members for mutual reinforcement
- Position yourself near strong alliance members
- Be available to reinforce allies when needed
Alliance System – Why You Need One
I can’t emphasize this enough: joining a good alliance is one of the most important things you can do in Firstborn. Here’s why alliances matter and how to make the most of them.
Benefits of Joining an Alliance
1. Protection
- Alliance members can reinforce your castle
- Mutual defense against attackers
- Psychological deterrent to potential attackers
2. Resources
- Alliance gifts provide regular resources
- Alliance help speeds up construction and research
- Shared resources during emergencies
3. Information
- Access to experienced players’ knowledge
- Coordination for events and strategies
- Early warning about threats and opportunities
4. Events
- Alliance events provide exclusive rewards
- coordinated participation yields better results
- Team-based strategies for maximum efficiency
Finding the Right Alliance
What to Look For:
- Activity Level: Active members and regular chat
- Experience: Mix of experienced and new players
- Goals: Alliance should match your playstyle
- Leadership: Good leadership makes a huge difference
Red Flags to Avoid:
- Inactive alliance (no chat, no help)
- Toxic environment or drama
- Unreasonable requirements for new members
- Leadership that doesn’t communicate
Being a Good Alliance Member
Basic Expectations:
- Participate: Join alliance events and activities
- Communicate: Use alliance chat regularly
- Help: Send help requests and assist others
- Contribute: Donate to alliance projects when possible
Advanced Alliance Play:
- Coordinate attacks and defenses
- Share strategies and information
- Mentor newer players
- Participate in diplomacy and politics
F2P (Free-to-Play) Strategy Guide
One of the most common questions I get is: “Can I succeed as a free-to-play player?” The answer is absolutely yes! I’ve been primarily F2P since I started, and I’ve been very successful. Here’s how to do it.
F2P Mindset
Understanding the Reality:
- You will progress slower than paying players
- You need to be more strategic with resources
- Patience and consistency are key
- Focus on efficiency over speed
Advantages of F2P:
- Forces you to learn game mechanics deeply
- More satisfying progression
- Better understanding of strategy
- No pressure to spend money
Essential F2P Strategies
1. Event Participation
- Why: Events provide the best F2P rewards
- How: Participate in every event you can
- Focus: Hit minimum requirements for good rewards
- Pro tip: Some events are better than others – prioritize wisely
2. Resource Management
- Why: Resources are your lifeblood as F2P
- How: Never waste resources, always have a plan
- Focus: Keep production buildings busy and upgraded
- Pro tip: Use resources before you lose them to caps
3. Strategic Spending
- Why: Every resource decision matters
- How: Plan purchases carefully, avoid impulse buys
- Focus: Invest in things that provide long-term benefits
- Pro tip: Save gold for essential speed-ups and shields
4. Alliance Benefits
- Why: Alliance benefits multiply your F2P efforts
- How: Join an active, helpful alliance
- Focus: Give and receive help regularly
- Pro tip: Good alliances are worth their weight in gold
F2P Progression Timeline
First Month (Citadel 1-15):
- Focus on following the leveling guide
- Join a good alliance immediately
- Participate in every event
- Learn basic game mechanics
- Build solid foundation
Months 2-3 (Citadel 15-25):
- Develop your hero system
- Focus on research priorities
- Participate in alliance events
- Start basic PvP
- Build military power
Months 4-6 (Citadel 25-35):
- Advanced hero management
- Focus on titan development
- Regular PvP participation
- Leadership roles in alliance
- Strategic resource management
Beyond 6 Months (Citadel 35+):
- Competitive with moderate spenders
- Alliance leadership potential
- Advanced strategy development
- Mentor newer players
- Enjoy endgame content
Advanced Tips and Pro Strategies (2025)
Now that we’ve covered all the basics, let me share some advanced tips and strategies that I’ve learned from top players. These will give you an edge over other beginners.
Optimization Strategies
1. Building Enhancement
- Use Orbs strategically on key buildings
- Focus on buildings that provide the best bonuses
- Don’t spread Orbs too thin
- Prioritize: Citadel > resource production > military
2. Research Queue Management
- Always keep research queues full
- Plan research ahead of time
- Focus on one research tree at a time
- Use research speed boosts during long research projects
3. Hero Management
- Create hero presets for different situations
- Switch heroes based on current needs
- Keep heroes properly appointed
- Level heroes strategically based on your goals
Combat Optimization
1. Gear Optimization
- Mix and match gear for best results
- Enhance gear strategically
- Focus on key stats for your playstyle
- Don’t be afraid to experiment
2. Rune Management
- Enhance runes to key breakpoints (5, 10, 15)
- Fuse runes strategically
- Focus on runes that complement your strategy
- Keep backup runes for different situations
3. Lord Skill Optimization
- Create multiple Lord skill presets
- Switch presets based on current activity
- Focus on key skills for your main strategy
- Re-spec skills when your strategy changes
Resource Optimization
1. Production Optimization
- Keep all production buildings busy
- Upgrade buildings strategically
- Use production boosts wisely
- Focus on bottleneck resources
2. Gathering Optimization
- Send troops to gather whenever possible
- Focus on high-yield tiles
- Use gathering speed boosts
- Coordinate gathering with other activities
3. Event Optimization
- Plan for major events
- Save resources for event spending
- Focus on events with best F2P rewards
- Learn event mechanics for maximum efficiency
Common Beginner Mistakes to Avoid
I’ve made plenty of mistakes in my Firstborn journey. Let me share the most common ones so you can avoid them.
Mistake #1: Neglecting Resource Production
- What happens: You focus too much on military and neglect your resource buildings.
- Why it’s bad: You’ll constantly run out of resources and stall your progression.
- How to avoid: Always keep resource production buildings upgraded and busy.
Mistake #2: Spreading Resources Too Thin
- What happens: You try to upgrade everything at once.
- Why it’s bad: You’ll make slow progress in all areas instead of fast progress in key areas.
- How to avoid: Focus on one or two key areas at a time.
Mistake #3: Ignoring Alliance Benefits
- What happens: You try to play solo or join an inactive alliance.
- Why it’s bad: You miss out on huge benefits and protection.
- How to avoid: Join an active alliance and participate regularly.
Mistake #4: Poor Hero Management
- What happens: You don’t appoint heroes properly or level them inefficiently.
- Why it’s bad: Your heroes provide minimal benefits.
- How to avoid: Learn the hero system and manage heroes strategically.
Mistake #5: Wasting Premium Currency
- What happens: You spend gold on trivial things.
- Why it’s bad: You won’t have gold when you really need it.
- How to avoid: Plan gold spending carefully and save for essentials.
FAQ’s
I’ve compiled the most common questions I get from beginners. If you have questions not covered here, feel free to ask in the comments!
What’s the best way to get gold as a F2P player?
Answer: The best F2P gold sources are hourly events (hit Tier 3+), Team Deathmatch, and special events. Focus on these consistently and you’ll accumulate plenty of gold over time. I get most of my gold from these sources and rarely feel limited.
Should I focus on offense or defense first?
Answer: As a beginner, I recommend focusing on balanced development. However, if you must choose, lean slightly toward offense early on. This will help you with monster hunting and resource gathering, which are crucial for early progression. Defense becomes more important as you grow and become a target.
How do I know which heroes are best for me?
Answer: The “best” heroes depend on your playstyle and strategy. Generally, focus on free heroes first and look for ones with high stats in areas important to you (construction, research, attack, defense). Check the hero stats and choose ones that complement your main strategy.
What’s the most important research to focus on?
Answer: For early game, construction speed and research speed are most important. These will speed up your overall progression. Mid-game, focus on troop training and battle research. Late-game, prioritize titan research and advanced troop technologies.
How do I protect my resources from being raided?
Answer: The best protection is a combination of peace shields, strong alliance membership, and keeping your resources low by spending them regularly. Join an active alliance for reinforcement, use peace shields strategically, and never let resources sit at max capacity.
Should I join a big alliance or a small one?
Answer: As a beginner, I recommend joining a medium-sized active alliance. Big alliances can be overwhelming and may not give you personal attention, while very small alliances may not provide enough benefits. Look for alliances with active chat, regular events, and helpful members.
How often should I play?
Answer: Firstborn is designed for regular play, but you don’t need to be online 24/7. I recommend checking in at least 3-4 times per day to collect resources, start new construction/research, and participate in events. Set alarms for important events if needed.
What’s the fastest way to level my Citadel?
Answer: The fastest way is to follow the leveling guide in this article, focus on construction speed research, use construction speed boosts, and keep your queue full. Join an active alliance for construction help, and participate in events that give speed-ups.
Final Thoughts and Next Steps
Congratulations on making it through this comprehensive Firstborn beginner guide! You now have more knowledge than most players who have been playing for months. Remember, success in Firstborn comes from consistent application of good strategies, not from finding secret tricks or exploits.
Your First Week Action Plan
To help you get started, here’s a simple action plan for your first week:
- Day 1: Follow the leveling guide to Citadel Level 5, join an alliance, learn basic controls
- Day 2: Reach Citadel Level 10, set up basic hero appointments, start regular resource gathering
- Day 3: Reach Citadel Level 15, unlock all major features, participate in your first Team Deathmatch
- Day 4: Focus on hero development, start regular monster hunting, enhance your first gear pieces
- Day 5: Develop research strategy, participate in alliance events, optimize resource production
- Day 6: Focus on military development, start basic PvP, join alliance attacks
- Day 7: Review progress, adjust strategy, plan for second week, set long-term goals
Staying Updated
Firstborn is constantly evolving with new features, heroes, and balance changes. To stay current, I recommend:
- Following official game social media
- Joining the game community (Discord, Reddit, etc.)
- Reading patch notes carefully
- Being willing to adapt your strategy
Join the Community
The Firstborn community is one of the best parts of the game. I’ve made great friends and learned so much from other players. Don’t be afraid to:
- Ask questions in alliance chat
- Participate in community discussions
- Share your own tips and experiences
- Help newer players when you can
Remember to Bookmark This Guide!
This guide will be your companion throughout your Firstborn journey. Bookmark it now so you can easily reference it as you progress. I’ll be updating it regularly with new strategies, tips, and information as the game evolves.
Your journey to becoming a Firstborn elite starts now. Follow this guide, stay consistent, and most importantly – have fun! I’ll see you on the battlefield.