Hey there, fellow Raiders! If you’re anything like me, you’ve probably been scratching your head trying to figure out the Straight Record quest in ARC Raiders. When I first got this quest from Celeste, I’ll admit I was pretty confused about where to go and what to do. But don’t worry – I’ve spent hours figuring this out so you don’t have to!
Let me walk you through everything you need to know to complete the Straight Record quest like a pro. I’ve gathered all the tips and tricks from my own experience, plus I’ve done some serious research to make sure this guide is more comprehensive than anything else out there.
What Is the Straight Record Quest?
Before we dive into the nitty-gritty, let me give you some context about what this quest is all about. The Straight Record quest comes from Celeste, one of the traders you’ll meet in ARC Raiders. She told me about this trap she and her squad built back during the First Wave – they overloaded a generator and turned it into a makeshift ARC trap out by the Dam.
Now, apparently, other Raiders are using this trap to cut communications and set up ambushes on each other. Celeste needs someone to shut it down, and that’s where we come in! When I heard this backstory, it made me feel like I was really part of the game’s world, you know?
Quest Objectives at a Glance
Let me break down exactly what you need to do for this quest:
| Objective | Status | Difficulty |
|---|---|---|
| Reach Victory Ridge | Required | Medium |
| Find the old EMP trap | Required | Medium |
| Disable the first power switch | Required | Easy |
| Disable the second power switch | Required | Medium |
| Disable the third power switch | Required | Easy |
| Shut down the EMP trap | Required | Easy |
What You’ll Get for Completing This Quest?
I always like to know what I’m working toward, so let me tell you about the rewards upfront. When I completed this quest, Celeste hooked me up with some pretty sweet loot:
- 5x Medium Gun Parts – Perfect for upgrading your weapons
- 3x Advanced Mechanical Components – Great for crafting and repairs
Plus, you’ll get some temporary items to help you during the quest:
- 1x Binoculars – Super useful for scouting ahead
- 1x Defibrillator – Could save your life in a tight spot
Finding Victory Ridge – The First Challenge
Okay, here’s where things get tricky. Victory Ridge isn’t marked on your map like other locations, which can be super frustrating. I spent way too much time wandering around trying to find it when I first started this quest.
Here’s what you need to know: Victory Ridge is located in the Dam Battlegrounds map, specifically in the area between the West Broken Bridge and Ruby Residence. When I finally found it, I realized it’s in the northern part of the map – you’ll only see the name “Victory Ridge” when you fully zoom out on your map.
Pro tip: Look for the area where two big roads connect just above the Hydroponic Dome Complex. That’s your landmark for getting close to Victory Ridge.
Locating the Old EMP Trap
Once you’ve made it to Victory Ridge, your next task is to find the old EMP trap. I remember feeling pretty overwhelmed when I first got to this area because there’s a lot of ground to cover.
Here’s exactly where to look:
The EMP trap is actually an electric pole with a yellow glow – you can’t miss it once you know what you’re looking for. It’s located roughly to the southwest of the West Broken Bridge area and north of the Hydroponic Dome Complex.
When I found it, I noticed there was debris on the ground leading right to it. Follow that debris trail, and you’ll spot the glowing pole. Just interact with it to get the next part of the quest started.
Warning: This area can be pretty dangerous! I ran into quite a few ARC enemies, including some drone ARCs that can really mess you up if you’re not careful. I’d recommend going in with a free loadout to reduce your risk of losing your good gear.
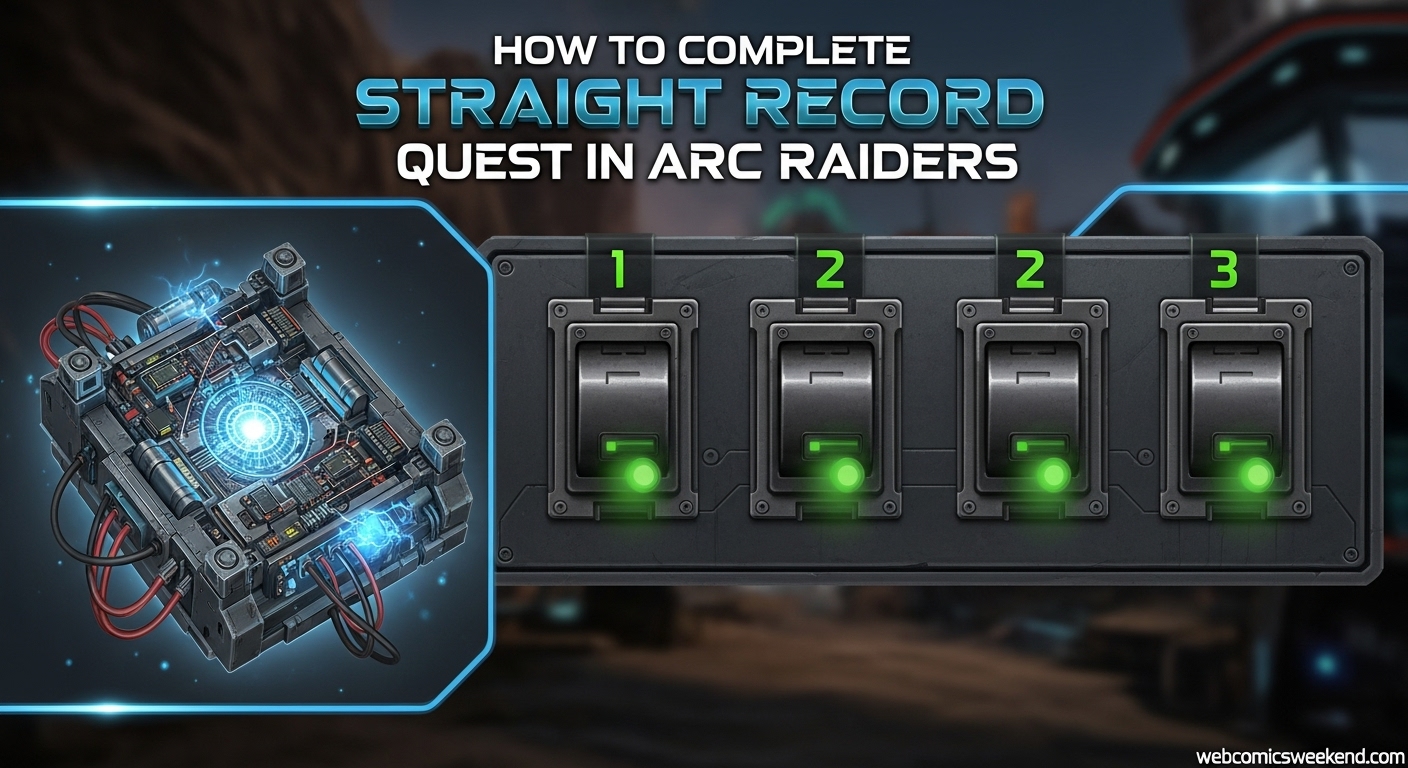
The Power Switch Puzzle – Step by Step
After you interact with the EMP trap, you’ll discover that you need to disable three power switches to shut it down completely. This is where the quest gets interesting – it’s like a little puzzle!
What’s cool is that you can actually see all three switches from the EMP trap if you look in the right directions. Let me break down exactly where each one is.
Power Switch #1 – The Northern Switch
The first switch is probably the easiest to find. From the EMP trap, look toward the northern direction. You’ll see a small cliff that you can climb up.
When I did this, I could see the white part of the switch right from the EMP trap location. Just climb up that small cliff, and you’ll find the yellow switch box. Interact with it to disable the first switch.
My experience: This one was pretty straightforward, but I did have to deal with a couple of ARC drones that were patrolling the area. Keep your eyes peeled!
Power Switch #2 – The Building Switch
The second switch is a bit more challenging to reach. From the EMP trap, look toward the east-southeast direction. You’ll see some ruined buildings in that area.
Here’s the tricky part: the switch is on top of the red building. To get there, you’ll need to:
- Find the generator to the left of the white building
- Use it to climb up to the second floor
- The switch is hidden inside a room in the back
I’ll be honest – this one took me a few tries to figure out. The climbing mechanics can be a bit finicky, so take your time and make sure you’re positioned correctly before jumping.
Power Switch #3 – The Southern Switch
The final switch is actually the farthest from the EMP trap, but I found it to be the most interesting to locate. From the EMP trap, head directly south toward the Hydroponic Dome Complex.
As you’re moving south, keep an eye out for another big pole with a wire attached to it. This wire is your guide! Just follow the wire along the ground, and it will lead you right to the third switch, which is located beside a tree.
When I found this one, I thought it was pretty clever how the game uses the wire as a visual guide. It makes you feel like you’re really solving a puzzle rather than just following waypoints.
Shutting Down the EMP Trap
Once you’ve disabled all three power switches, it’s time to head back to the EMP trap and shut it down for good. This part is simple – just interact with the trap one more time, and you’ll complete the main objective.
I remember feeling pretty satisfied when I finally shut it down. It’s one of those moments where you feel like you’ve actually accomplished something meaningful in the game world.
Extracting and Claiming Your Rewards
After you’ve shut down the EMP trap, you’re not quite done yet. You need to safely extract back to Speranza to claim your rewards from Celeste.
When I extracted, I made sure to take my time and clear out any remaining enemies in the area. The last thing you want is to get taken out right before completing the quest!
Once you’re back at Speranza, find Celeste and she’ll give you your well-deserved rewards: those 5x Medium Gun Parts and 3x Advanced Mechanical Components I mentioned earlier.
Tips and Tricks I Learned the Hard Way
I want to share some additional tips that I picked up while doing this quest. These aren’t in the official objectives, but they’ll make your life much easier:
Combat Preparation
- Bring a free loadout: I can’t stress this enough. The area around Victory Ridge can be pretty dangerous, and you don’t want to lose your good gear.
- Watch out for drone ARCs: These guys are sneaky and can deal a lot of damage quickly. I learned this the hard way when one caught me off guard while I was trying to disable a switch.
- Clear the area first: Before you start disabling switches, take some time to clear out any enemies in the vicinity. Trust me, it’s worth the extra effort.
Navigation Tips
- Use the debris trails: The game actually gives you visual clues in the form of debris on the ground. Follow these trails to find your way more easily.
- Look for the yellow glow: The EMP trap and switches all have a distinctive yellow glow. Once you know what to look for, they’re much easier to spot.
- Take your time: This quest isn’t timed, so there’s no rush. I found that taking my time and exploring the area carefully made the whole experience more enjoyable.
Resource Gathering
- Keep an eye out for mushrooms: The area around the Hydroponic Dome has mushrooms that you’ll need for upgrading Scrappy. I collected quite a few while doing this quest.
- Check for supply drops: You might find some useful supplies in the area that can help you with other quests or upgrades.
Common Problems and How to Solve Them
Based on my experience and what I’ve seen other players struggle with, here are some common issues you might encounter and how to deal with them:
“I Can’t Find Victory Ridge!”
This is probably the most common issue players face. Remember, Victory Ridge isn’t marked on your map until you zoom all the way out. Look for the area between West Broken Bridge and Ruby Residence in the northern part of Dam Battlegrounds.
“The Switches Aren’t Spawning!”
If you can’t find the switches, make sure you’ve actually interacted with the EMP trap first. The switches won’t appear until you’ve started that part of the quest.
“I Keep Getting Killed by ARCs!”
The area can be pretty dangerous. I recommend using a free loadout and taking out enemies from a distance when possible. Also, don’t be afraid to retreat and regroup if things get too intense.
“I Can’t Reach the Second Switch!”
The second switch requires some climbing. Make sure you’re using the generator to climb up to the second floor of the ruined building. It might take a few tries to get the positioning right.
How This Quest Fits Into the Bigger Picture?
The Straight Record quest is part of a larger storyline in ARC Raiders. It’s actually the middle quest in a series:
- Previous Quest: Broken Monument
- Current Quest: Straight Record
- Next Quest: Keeping The Memory
I found it really helpful to understand this context because it made me feel more invested in what I was doing. Knowing that my actions were part of a larger story made the quest more meaningful to me.
My Personal Experience with This Quest
I want to share a bit about my personal experience with the Straight Record quest because I think it might help you. When I first started this quest, I was pretty frustrated. I spent about an hour just trying to find Victory Ridge because I didn’t realize it wasn’t marked on the map.
But once I figured that out, things started to click. I actually ended up really enjoying the puzzle aspect of finding the three switches. It felt like I was really exploring and discovering things rather than just following waypoints.
The most satisfying moment for me was when I finally shut down the EMP trap. There’s something really cool about knowing you’ve disabled a trap that was causing problems for other Raiders in the game world.
Final Thoughts
The Straight Record quest in ARC Raiders might seem a bit confusing at first, but it’s actually a really well-designed quest that rewards exploration and careful observation. I hope this guide helps you complete it more easily than I did!
Remember to take your time, enjoy the exploration, and don’t get too frustrated if things don’t go perfectly the first time. That’s part of what makes ARC Raiders such a great game – the challenge and the sense of accomplishment when you finally figure things out.
If you found this guide helpful, make sure to bookmark it for future reference, and feel free to share it with other Raiders who might be struggling with this quest. Happy raiding, and I’ll see you out there on the surface!
FAQ
How long does the Straight Record quest take to complete?
From my experience, it usually takes about 30-45 minutes if you know where you’re going. If you’re exploring for the first time, it might take closer to an hour or so.
Do I need to complete this quest in one session?
No, you don’t! The quest progress saves automatically, so you can take breaks and come back to it later. I actually did it over two sessions because I got tired of fighting ARCs!
What level should I be before attempting this quest?
I’d recommend being at least level 10-15 before trying this quest. The enemies in the area can be pretty tough if you’re underleveled.
Can I do this quest solo, or do I need a team?
You can definitely do this quest solo! I completed it by myself, and while it was challenging at times, it’s totally doable. Having a team might make it easier, but it’s not necessary.
What happens if I die during the quest?
If you die, you’ll respawn at the nearest safe point, and you’ll have to make your way back to where you were. The quest progress saves, so you won’t have to start over from the beginning.
Are there any secret rewards for completing this quest?
Not that I’ve found! The rewards are pretty straightforward – the gun parts and mechanical components from Celeste. But completing it does unlock the next quest in the series, which has its own rewards.
Can I replay this quest after completing it?
Unfortunately, no. Once you’ve completed the Straight Record quest, you can’t do it again. That’s why I recommend taking your time and enjoying the experience while you can!
What’s the best loadout for this quest?
I’d recommend a loadout with good mid-range weapons for dealing with the ARC enemies, plus some healing items. A sniper rifle can be really useful for taking out enemies from a distance while you’re working on the switches.
Is there a time limit for this quest?
Nope! Take all the time you need. The quest doesn’t have any time limits, so you can explore at your own pace and really soak in the atmosphere of the area.
What should I do with the rewards I get?
The Medium Gun Parts are great for upgrading your weapons, and the Advanced Mechanical Components are useful for crafting and repairs. I’d recommend saving them for when you really need them rather than using them right away.