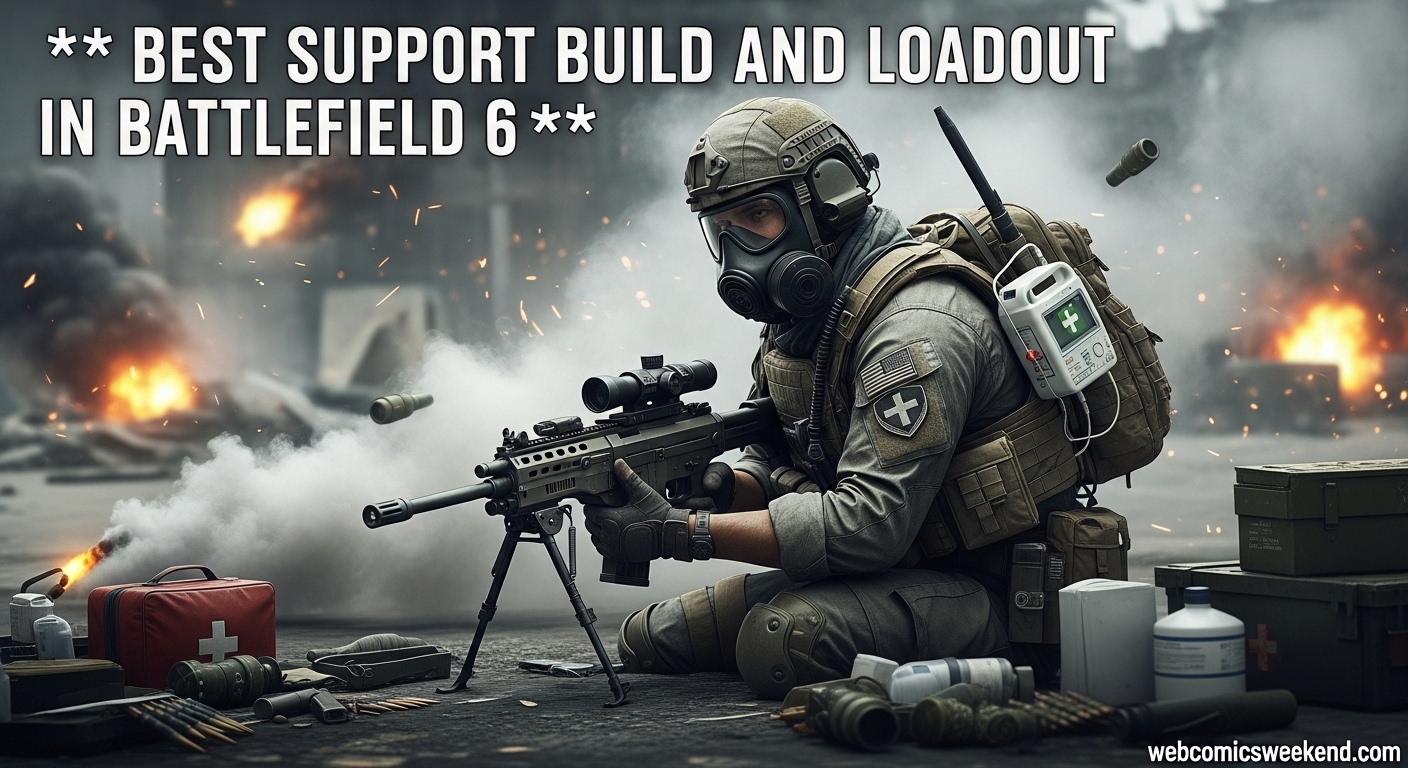
Let me tell you something straight up – if you’re not playing Support in Battlefield 6, you’re missing out on one of the most impactful roles in the game. I’ve spent countless hours as a Support player, and I’m here to share everything I’ve learned about dominating the battlefield while keeping my squad alive and well-supplied.
When I first started playing Battlefield 6, I’ll admit I was pretty overwhelmed by all the options. But after testing every weapon, gadget, and specialization combination imaginable, I’ve figured out what actually works. This isn’t just some copy-paste guide – this is the real deal from someone who’s been in the trenches, reviving teammates under heavy fire and laying down suppressive fire that turns the tide of battle.
Why Support Class is Your Secret Weapon in Battlefield 6?
Look, I know what you’re thinking. “Support is boring, I just want to shoot things.” But let me tell you, a good Support player can single-handedly win matches. I’ve seen it happen time and time again. While everyone else is chasing kills, you’re the one keeping the team alive, resupplying ammo, and creating opportunities for your squad to push objectives.
The Support class in Battlefield 6 is basically a combination of the classic medic and machine gunner roles from previous games. You get the best of both worlds – the ability to heal and revive teammates while also packing some serious firepower with LMGs and other heavy weapons.
What really sets Support apart in 2026 is that you don’t suffer from movement penalties when using heavy weapons. That means you can run around with an LMG like it’s a carbine, which is absolutely insane when you think about it. Plus, you have the fastest revive speed of any class, making you the go-to person when teammates go down.
My Top Support Loadouts for Every Playstyle
After hundreds of hours testing different combinations, I’ve narrowed it down to four distinct loadouts that cover every possible playstyle. Whether you like to be aggressive on the frontlines or hang back and provide fire support, I’ve got you covered.
Loadout 1: The Aggressive Combat Medic (My Personal Favorite)
This is the loadout I use 90% of the time, and for good reason – it just works. You’re basically playing as an Assault player but with the ability to revive teammates, which makes you invaluable to any team.
| Category | Choice | Why I Love It |
|---|---|---|
| Primary Weapon | M4A1 Carbine | Perfect balance of firepower and mobility |
| Secondary Weapon | P18 Pistol | Reliable sidearm for when things get tight |
| Gadget 1 | Defibrillator | Non-negotiable for any Support player |
| Gadget 2 | Supply Bag | Keeps everyone healed and resupplied |
| Throwable | Smoke Grenade | Creates cover for revives and pushes |
| Field Specialization | Combat Medic | Faster revives and better healing |
The M4A1 is my go-to primary because it handles like a dream while still packing enough punch to win most firefights. I run it with a Compensated Brake, 12.5″ Mid Barrel, Ribbed Stubby, 30RND Fast Mag, and Hollow Point rounds. This setup gives you excellent recoil control without sacrificing too much mobility.
What makes this loadout so deadly is your ability to push objectives with your team, revive anyone who goes down, and still hold your own in firefights. I can’t tell you how many times I’ve saved a push by quickly reviving three teammates in a row while laying down suppressive fire.
Loadout 2: The Defensive Fire Support
Sometimes you need to hang back and let your team do the pushing while you provide covering fire. That’s where this loadout shines. I use this on larger maps or when my team already has plenty of aggressive players.
| Category | Choice | Why It Works |
|---|---|---|
| Primary Weapon | L110 LMG | Incredible suppression and area denial |
| Secondary Weapon | P18 Pistol | Same reliable sidearm |
| Gadget 1 | Maxguard 900 Deployable Cover | Creates instant cover for teammates |
| Gadget 2 | LWCMS Portable Mortar | Rain down hell from a safe distance |
| Throwable | Smoke Grenade | Alternative: Incendiary Grenade |
| Field Specialization | Fire Support | Better mounted weapon control |
For the L110, I run it with a Long Suppressor, Stippled Stubby, 100 RND Belt, 349mm Fluted Barrel, FMJ rounds, and a ST Prism 2.5x scope. This turns it into a laser beam that can lock down entire sections of the map.
The portable mortar is what really makes this loadout special. I can’t count how many times I’ve saved an objective by raining down mortar fire on enemies trying to capture it. Plus, the deployable cover gives your team a safe spot to resupply and heal up.
Loadout 3: The Grenadier Specialist
This is for when you want to bring the chaos. I break this out when I’m feeling particularly spicy or when the enemy team is camping hard. It’s all about area denial and forcing enemies out of cover.
| Category | Choice | The Chaos Factor |
|---|---|---|
| Primary Weapon | DRS-IAR LMG | Mobile LMG for aggressive play |
| Secondary Weapon | P18 Pistol | Trusty backup |
| Gadget 1 | Defibrillator | Still need to revive teammates |
| Gadget 2 | SICH G1 WP | Incendiary launcher for area denial |
| Throwable | Smoke Grenade | Cover for your advances |
| Field Specialization | Combat Medic | Healing while burning enemies |
The SICH G1 WP is an absolute beast. It lets you create instant chokepoints and force enemies out of cover. I love using it to flush campers out of buildings or to prevent enemies from reviving their own teammates.
What’s really nice about this loadout is that you can use your Supply Bag to replenish your own grenades and launcher ammo. Just drop it, wait a few seconds, and you’re ready to bring more fire and brimstone to the battlefield.
Loadout 4: The Long-Range Support
For those big, open maps where you need to reach out and touch someone from a distance. This loadout turns you into a force multiplier for your team, providing covering fire from positions other classes can’t effectively operate from.
| Category | Choice | Why It Dominates at Range |
|---|---|---|
| Primary Weapon | M/60 General Purpose Machine Gun | 32% more damage than other LMGs |
| Secondary Weapon | P18 Pistol | Close-range protection |
| Gadget 1 | Defibrillator | Always bring the defibs |
| Gadget 2 | Compact Mortar System | Indirect fire support |
| Throwable | Smoke Grenade | Cover for repositioning |
| Field Specialization | Fire Support | Enhanced mounted weapon performance |
The M/60 is a monster at range. It has a slower rate of fire than other LMGs, but it hits like a truck. When I’m set up with this thing on a bipod, I can lock down entire lanes of approach. The 32% damage increase over 5.56mm LMGs means enemies think twice before peeking their heads out.
Pair this with the mortar system, and you become a one-person army. I’ve single-handedly stopped entire enemy advances by alternating between laying down suppressive fire with the M/60 and dropping mortar rounds on their position.
Essential Support Class Perks and Specializations
Now that I’ve covered my favorite loadouts, let’s talk about the perks and specializations that make the Support class so versatile. These are the backbone of any good Support build, and choosing the right ones can make or break your effectiveness on the battlefield.
Must-Have Support Perks
After testing every perk available, these are the ones I find myself coming back to time and time again:
Steady Aim: This perk is a game-changer for LMG users. It greatly improves your accuracy when firing from mounted or bipod positions, which is where you’ll spend a lot of time as a Support player. I can’t tell you how many firefights I’ve won simply because I had this perk equipped and my opponent didn’t.
Explosives Resistant: Reduces incoming explosive damage by 25%. In a game where grenades and launchers are everywhere, this perk has saved my life more times than I can count. It’s especially valuable when you’re playing the Defensive Fire Support loadout and enemies are trying to flush you out with explosives.
Revive Recovery: This is my personal favorite. It grants you 1 second of invulnerability and health regeneration after each revive. This tiny window of invulnerability has allowed me to pull off some incredible multi-revive sequences that would have been impossible otherwise. When I’m in the middle of reviving three teammates under heavy fire, this perk is what keeps me alive long enough to get everyone back in the fight.
Training Paths: Combat Medic vs Fire Support
The Support class has two main training paths, and choosing the right one depends entirely on your playstyle. I’ve spent significant time with both, and here’s my take on each:
Combat Medic Training Path: This is the path I use most often. It speeds up your revives and improves your healing and medical tool effectiveness. If you’re running any of the aggressive loadouts I mentioned earlier, this is the path you want. The faster revive speed means you can get teammates back in the fight quicker, and the improved healing efficiency means your Supply Bag and other medical tools are more effective.
Fire Support Training Path: This path boosts your mounted weapon control and resupply efficiency. It’s perfect for the Defensive Fire Support and Long-Range Support loadouts. The improved mounted weapon control makes your LMGs laser-accurate when deployed, and the better resupply efficiency means your gadgets recharge faster, allowing you to provide more consistent support to your team.
Advanced Support Tactics That Win Matches
Having the right loadout is only half the battle. Knowing how to use it effectively is what separates good Support players from great ones. Here are some advanced tactics I’ve picked up that will take your Support game to the next level.
Positioning is Everything
I can’t stress this enough – as a Support player, your positioning determines your effectiveness. You need to be close enough to the action to revive teammates and provide support, but not so close that you’re an easy target.
What I like to do is stay about 15-20 meters behind the frontline. This gives me enough distance to avoid most immediate threats while still being close enough to quickly revive anyone who goes down. I’m always looking for cover – walls, debris, buildings – anything that can provide me with some protection while I do my job.
The Art of the Quick Revive
Reviving teammates isn’t just about mashing the defibrillator button. There’s an art to it, and mastering this art will make you invaluable to any team.
Before I revive anyone, I quickly assess the situation:
- Is the area safe from immediate threats?
- Do I have cover to work with?
- Are there multiple teammates down that I can chain-revive?
- Will reviving this person put them (and me) in immediate danger?
If the area isn’t safe, I’ll often use a smoke grenade to create cover before attempting the revive. This simple trick has saved me countless times and allowed me to revive teammates in situations that would have been suicidal otherwise.
Ammo Management and Resupply Strategy
One thing many new Support players overlook is ammo management. Yes, you have a Supply Bag, but it’s not infinite, and you need to use it strategically.
I never drop my Supply Bag in the open where it can be easily destroyed. Instead, I look for covered areas near objectives or chokepoints where teammates are likely to congregate. This ensures my Supply Bag stays active longer and helps more people.
When it comes to my own ammo, I’m always mindful of how much I’m using. I try to keep at least 30% of my ammo in reserve at all times, just in case I need to lay down suppressive fire or defend myself while reviving someone.
Communication Makes You Ten Times More Effective
I can’t tell you how many matches I’ve turned around simply by communicating with my team. As a Support player, you have a unique overview of the battlefield, and sharing that information with your team can make a huge difference.
I’m constantly calling out:
- Enemy positions I spot
- When I’m dropping a Supply Bag
- When I’m about to revive someone
- Areas that need more attention
- When I’m using my mortar or other gadgets
This constant communication helps my team make better decisions and allows them to take advantage of the support I’m providing.
Weapon Attachments That Actually Make a Difference
After testing hundreds of attachment combinations, I’ve found that certain setups just work better than others. Here are my go-to attachment combinations for the most popular Support weapons.
M4A1 Carbine Setup (Aggressive Combat Medic)
| Attachment | Choice | Why It Works |
|---|---|---|
| Muzzle | Compensated Brake | Reduces recoil for better control |
| Barrel | 12.5″ Mid Barrel | Good balance of range and mobility |
| Underbarrel | Ribbed Stubby | Improves recoil control without hurting mobility |
| Magazine | 30RND Fast Mag | Quick reloads are crucial in firefights |
| Ammo Type | Hollow Point | Better damage against unarmored targets |
This setup turns the M4A1 into a laser beam that’s still mobile enough for aggressive play. The compensated brake and ribbed stubby work together to keep recoil manageable, while the fast mag ensures you’re not vulnerable during reloads.
L110 LMG Setup (Defensive Fire Support)
| Attachment | Choice | Why It Works |
|---|---|---|
| Muzzle | Long Suppressor | Keeps you off the minimap when firing |
| Underbarrel | Stippled Stubby | Improves accuracy for sustained fire |
| Magazine | 100 RND Belt | Less time reloading, more time suppressing |
| Barrel | 349mm Fluted Barrel | Better accuracy and range |
| Ammo Type | FMJ | Better penetration against cover |
| Optic | ST Prism 2.5x | Perfect for medium to long range engagements |
This setup maximizes the L110’s strengths as a suppressive weapon. The long suppressor keeps you hidden while you lay down fire, and the 100-round belt means you can maintain pressure on enemy positions for extended periods.
DRS-IAR LMG Setup (Mobile Support)
| Attachment | Choice | Why It Works |
|---|---|---|
| Muzzle | Flash Hider | Reduces muzzle flash for better visibility |
| Barrel | Lightweight Barrel | Improves mobility for aggressive play |
| Underbarrel | Angled Grip | Better ADS speed for quick engagements |
| Magazine | 40 RND Box | Good balance of capacity and reload speed |
| Ammo Type | Standard | Reliable damage in all situations |
| Optic | Holo Sight | Fast target acquisition for close to medium range |
This setup makes the DRS-IAR handle more like an assault rifle while still maintaining the advantages of an LMG. It’s perfect for when you need to be mobile but still want the suppressive capabilities of a machine gun.
Common Mistakes to Avoid as a Support Player
I’ve made plenty of mistakes in my time as a Support player, and I’ve seen others make them too. Here are the most common mistakes I see and how to avoid them.
Mistake 1: Playing Too Aggressively
Yes, I know I recommended aggressive loadouts, but there’s a difference between being aggressive and being reckless. I see too many Support players charging into the middle of firefights like they’re Assault players, only to get themselves killed and leave their team without support.
The key is to be aggressive in your support role, not in your combat role. Push with your team, but stay slightly behind the frontline. Be ready to revive and resupply, not just to get kills.
Mistake 2: Neglecting Your Support Duties
This is probably the biggest mistake I see. Players equip the Support class but then completely ignore their support duties. They’re too busy chasing kills to revive teammates or drop Supply Bags.
If you’re playing Support, your primary job is to support your team. Kills are secondary. I’ve had matches where I finished with a negative K/D ratio but still topped the scoreboard because of all the revives, resupplies, and objective play.
Mistake 3: Poor Gadget Management
Your gadgets are what make the Support class so powerful, but I see too many players either not using them enough or using them at the wrong times.
Don’t just drop your Supply Bag randomly – place it strategically where it will help the most people. Don’t use your defibrillator without checking if it’s safe first. And for the love of all that’s holy, don’t waste your mortar rounds on empty areas.
Mistake 4: Not Adapting to the Situation
Battlefield 6 is a dynamic game, and no single loadout works in every situation. I see too many players stick with one loadout regardless of the map, game mode, or what the enemy team is doing.
Be flexible. If you’re playing on a large, open map, switch to a long-range loadout. If the enemy team is camping hard, break out the Grenadier loadout. Adapt to what’s happening in the match.
FAQ: Everything You Need to Know About Support in Battlefield 6
What’s the best primary weapon for Support class?
In my experience, the M4A1 Carbine is the most versatile and effective primary weapon for Support players. It offers a perfect balance of firepower, accuracy, and mobility that allows you to be effective in both close and medium-range engagements. However, if you prefer a more traditional Support playstyle, the L110 LMG is an excellent choice for suppressive fire.
Should I always use the Defibrillator?
Absolutely. The Defibrillator is non-negotiable for any serious Support player. It’s what defines the class and provides the most value to your team. I’ve tried running other gadgets in that slot, but I always end up switching back to the Defibrillator because being able to instantly revive teammates is just too valuable to give up.
What’s the difference between Combat Medic and Fire Support specializations?
The Combat Medic specialization focuses on faster revives and better healing capabilities, making it ideal for aggressive players who like to stay close to the action. The Fire Support specialization enhances your mounted weapon control and resupply efficiency, making it better for players who prefer to hang back and provide covering fire. I personally use Combat Medic about 70% of the time because I find the faster revive speed more valuable in most situations.
How do I deal with vehicles as a Support player?
Let’s be honest – dealing with vehicles isn’t really the Support class’s strong suit. Your best bet is to use your gadgets to avoid vehicles (smoke grenades for cover) and focus on supporting your team’s Engineer players who can handle the vehicle threats. If you absolutely must engage vehicles, the M320A1 SMK smoke launcher can help create cover for your team to maneuver safely.
What’s the best way to level up the Support class?
The fastest way to level up Support is to focus on your support duties. Revive teammates, drop Supply Bags, and play the objective. You get a ton of XP for revives and resupplies, often more than you’d get for kills. I’ve found that focusing purely on support activities can level up the class surprisingly quickly, even if you’re not getting many kills.
How do I counter enemy Support players?
Enemy Support players can be incredibly annoying to deal with, especially if they’re good. The best counter is to focus on taking them out quickly and denying them the ability to revive their teammates. Use grenades and other explosives to flush them out of cover, and try to separate them from their team. If you can eliminate the enemy Support player, you significantly reduce the enemy team’s effectiveness.
Final Thoughts: Why Support is the Most Impactful Class in Battlefield 6
After everything I’ve shared, I hope you understand why I’m so passionate about the Support class in Battlefield 6. It’s not just about healing and resupplying – it’s about being the backbone of your team, the player everyone relies on when things get tough.
I’ve had matches where I single-handedly turned the tide of battle simply by being in the right place at the right time, reviving key players, and keeping my team supplied and ready to fight. There’s no better feeling in the game than pulling off a clutch revive that saves an objective, or laying down suppressive fire that allows your team to push through a chokepoint.
The Support class in 2026 is more versatile and powerful than ever before. With the right loadout and tactics, you can be a force multiplier for your team, turning losses into victories and making yourself indispensable in any match.
So give these loadouts a try, experiment with different tactics, and find what works best for you. And most importantly, remember that at the end of the day, Battlefield 6 is a team game, and the Support class is all about helping your team succeed.
Now get out there, start reviving those teammates, and show everyone why the Support class is the best class in Battlefield 6!