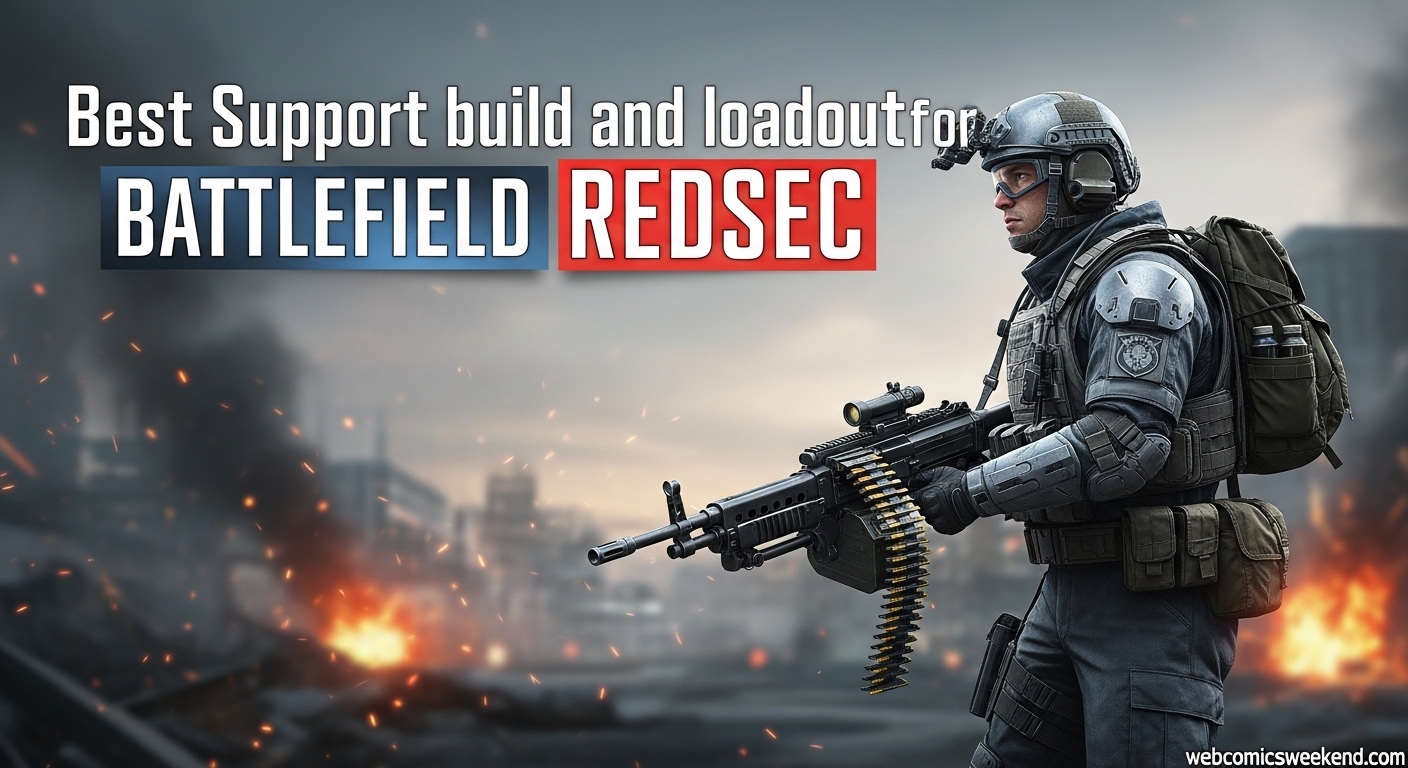
Hey there, fellow Battlefield enthusiast! If you’re anything like me, you’ve probably spent countless hours dropping into Fort Lyndon, trying to figure out the perfect loadout to help your squad secure those sweet victory royales. Well, I’m here to share everything I’ve learned about playing Support in Battlefield REDSEC – the class that can literally make or break your team’s chances of winning.
Let me tell you, when I first started playing REDSEC, I made the mistake of treating Support like just another ammo dispenser. Boy, was I wrong! After hundreds of matches and countless experiments with different loadouts, I’ve discovered that the Support class is actually the backbone of any winning squad. Stick with me, and I’ll show you exactly how to build your Support to carry your team to victory.
Why Support Class is My Go-To in Battlefield REDSEC?
Before we dive into the nitty-gritty of loadouts, let me explain why I’ve fallen in love with the Support class in REDSEC. Unlike other battle royales where everyone just runs and guns, Battlefield REDSEC actually rewards team play, and Support is at the heart of that.
I’ve found that playing Support isn’t just about dropping ammo bags (though that’s crucial). It’s about being the tactical anchor your team needs. You’re the one who can turn the tide of battle with well-timed resupplies, clutch revives, and strategic smoke deployments. When I’m playing Support, I feel like I’m conducting an orchestra of destruction, making sure everyone has what they need to keep pushing forward.
What really sold me on Support was how versatile it can be. You’re not stuck in one role – you can be an aggressive front-line fighter, a defensive anchor, or a tactical playmaker depending on how you build your loadout. And trust me, I’ve tried all the playstyles to find what works best.
My Top Support Primary Weapon Choices
Alright, let’s get to the good stuff – the weapons! After testing every LMG in the game, I’ve narrowed it down to my absolute favorites that’ll give you the best bang for your buck.
DRS-IAR/DRS-1AR – My Personal Favorite
This is hands-down my go-to weapon for Support class. What I love about the DRS-IAR (or DRS-1AR as some call it) is that it perfectly bridges the gap between an LMG and an Assault Rifle. You get the stopping power of an LMG without the usual drawbacks of slow handling and massive recoil.
My Optimal Loadout:
- Muzzle: Compensated Brake or Flash Hider
- Barrel: 20″ SDM-R
- Underbarrel: Bipod or 6H64 Vertical
- Magazine: 40 RND or 30rnd Fast Mag
- Optics: Baker 3.00X or Mini Flex 1.00X
- Ammo: Hollow Point
- Ergonomics: Match Trigger
Why this setup works so well for me: The 20″ SDM-R barrel gives you that sweet spot between accuracy and mobility. I’ve found that the bipod is absolute gold for those mid-to-long-range engagements where you need to pin down enemies. And don’t even get me started on Hollow Point ammo – it’s an absolute game-changer for those clutch headshots.
When I’m running this setup, I feel confident engaging targets at any range. Up close, it handles surprisingly well for an LMG, and at distance, it’s laser-accurate when you take your time. Plus, the 40-round magazine means you can lay down suppressive fire without constantly reloading.
KTS100 MK8 – The Alternative Option
While the DRS-IAR is my main squeeze, sometimes I switch things up with the KTS100 MK8, especially when I’m planning to be more aggressive.
My Aggressive Setup:
- Muzzle: CQB Suppressor
- Underbarrel: Ribbed Stubby
- Magazine: 45RND Fast Mag
- Optics: Mini Flex 1.00X
What I love about this setup is how mobile it keeps you. The CQB Suppressor keeps you off the minimap when you’re firing, which is crucial for those flanking maneuvers I like to pull off. The Ribbed Stubby really helps control the recoil, making it easier to stay on target during those intense close-quarters battles.
I typically switch to this when I’m playing with a squad that already has good long-range coverage, allowing me to focus on being that aggressive front-line Support player.
Secondary and Melee – Don’t Sleep on These!
You know what I see way too often? Support players who completely neglect their secondary and melee choices. Big mistake! These can be literal lifesavers in those clutch moments.
My Secondary Choice: P18
Look, I know it’s not the sexiest pistol in the game, but the P18 has saved my bacon more times than I can count. It’s reliable, has decent damage, and most importantly, it’s quick to pull out when your primary runs dry at the worst possible moment.
My P18 Setup:
- Muzzle: Standard Suppressor
- Magazine: Extended Mag if available
- Ammo: Hollow Point
I keep it simple with the P18 because, let’s be honest, you’re not going to be winning any long-range engagements with it. But for those panic moments when you need to finish off a weakened enemy or buy yourself time to reload your primary? It’s absolutely perfect.
Melee: Knife All the Way
This might seem like a no-brainer, but I can’t stress enough how important the knife is for Support class. Unlike other classes where you might want the sledgehammer for destruction, the knife gives you something much more valuable – mobility.
When I’m playing Support, I’m constantly moving around the map to support my team, and the knife lets me get around Fort Lyndon much faster than other melee options. Plus, there’s nothing quite as satisfying as sneaking up on an unsuspecting enemy and taking them out with a quick knife attack. It’s happened to me more times than I can count, and it never gets old!
Gadget Selection – Where Support Really Shines?
This is where the Support class truly separates itself from the others. Your gadget choices can make or break your effectiveness as a Support player. After countless matches, I’ve found the perfect combination that works in almost any situation.
Gadget 1: Supply Bag – Non-Negotiable
If you take nothing else away from this guide, remember this: ALWAYS run the Supply Bag. It’s not just an ammo resupply tool – it’s a multi-purpose lifesaver that can turn the tide of entire battles.
What makes the Supply Bag so amazing in REDSEC is that it does more than just resupply ammo. When I drop a Supply Bag, my allies automatically get ammo for their weapons, and here’s the kicker – they actually heal more efficiently while near it. I can’t tell you how many times my squad has been in a tough firefight, only to turn things around because I dropped a Supply Bag at the right moment.
The best part? Even when my teammates are under fire, the Supply Bag keeps them healing more efficiently. This creates incredible situations where my supply bag literally becomes the difference between winning and losing a firefight. I’ve had entire squads push through what should have been certain death just because I had a Supply Bag down.
Gadget 2: Smoke Grenade Launcher – My Tactical Choice
While some players might opt for other gadgets, I swear by the Smoke Grenade Launcher. It’s just too versatile to pass up, and I’ve found countless uses for it beyond just creating cover.
What I love about the Smoke Grenade Launcher is how it can completely change the dynamic of a firefight. Need to revive a downed teammate? Pop smoke. Need to cross open ground? Pop smoke. Need to confuse the enemy? You guessed it – pop smoke.
But here’s the pro tip I’ve learned: don’t waste your ammo! Unlike in the base Battlefield game, you can’t refill your Smoke Grenade Launcher ammo in REDSEC. I’ve made the mistake of using it too early in a match, only to find myself desperately needing it later. Trust me, conserve those smoke rounds for when they really matter.
The Smoke Grenade Launcher also has some interesting synergies with other abilities. When I’m running the Provisioner Training Path (more on that later), my smoke actually speeds up revives and provides health regen after a few seconds. It’s absolutely insane how much value you can get from proper smoke usage.
Training Path – Maximizing Your Support Potential
One thing that really sets REDSEC apart from other battle royales is the Training Path system. For Support class, there’s really only one choice in Season 1, but it’s an absolute game-changer.
Provisioner Training Path – The Only Way to Play
The Provisioner Training Path is, in my opinion, what makes the Support class truly overpowered in REDSEC. Every ability in this path is designed to make you a better team player, and I’ve leveraged each one to carry my squad to victory.
Supply Line This ability increases your armor and ammo carrying capacity. While it might not sound flashy, let me tell you – being able to carry more ammo means you can support your team for longer without having to scavenge for supplies. I’ve found that this allows me to stay in the fight longer and keep my team supplied even during extended engagements.
Urgent Aid This is where things get really interesting. Urgent Aid lets you drag downed soldiers faster and revive them quicker. I can’t stress how important this is in REDSEC. When I’m playing Support, I’m often the one who has to make those risky revives in the middle of firefights. Being able to revive faster means I can get my teammates back in the fight quicker, which often turns the tide of battle.
Hemostatic Smoke This ability takes the Smoke Grenade Launcher to a whole new level. Not only does it speed up revival for all classes, but it also provides health regen after several seconds and slows downed bleedout. I’ve used this to save teammates who would have otherwise bled out, and the health regen has kept my squad fighting fit during prolonged engagements.
Stockpile The final ability in the Provisioner path increases your class gadget resupply rate by 10% with each improvement. While it resets upon death, this ability is still incredibly valuable for longer matches. I’ve found that it allows me to use my Supply Bag more frequently, keeping my team constantly supplied with ammo and healing.
Signature Traits and Weapons – The Icing on the Cake
Beyond the Training Path, Support class has some unique signature traits and weapons that really set it apart from other classes.
Signature Weapon: LMG Mastery
The Support class signature weapon trait gives you faster transition to aim down sights (ADS) and no sprint speed penalty while carrying LMGs. This is absolutely huge and something I’ve leveraged to great effect.
What this means in practice is that I can be much more aggressive with my LMG than other classes. The faster ADS transition means I can win those quick peek battles, and the lack of sprint speed penalty means I can keep up with my squad without feeling weighed down by my heavy weapon.
Signature Trait: Field Sustainment
This is perhaps the most unique aspect of the Support class in REDSEC. Field Sustainment allows you to distribute health packs to teammates when they directly interact with you.
I’ve found this to be incredibly valuable, especially in the early game when med kits can be scarce. When I’m playing Support, I make sure to pick up as many health packs as I can, not just for myself, but to distribute to my teammates. It’s created so many situations where my squad has been able to push through fights that we should have lost, all because I was able to keep everyone healed up.
My Playstyle Tips and Strategies
Now that we’ve covered the loadout, let me share some of the playstyle tips I’ve picked up from hundreds of hours playing Support in REDSEC.
Stay With Your Team – But Not Too Close
This might sound obvious, but you’d be surprised how many Support players I see running off on their own. As Support, your entire purpose is to support your team, so you need to stay relatively close to them.
However, there’s a fine line here. I’ve found that if I’m too close to my squad, I become an easy target, and if I go down, my team loses their support. The sweet spot I’ve found is to stay about 10-15 meters from my nearest teammate – close enough to support them quickly, but far enough that I’m not an obvious target.
Positioning is Everything
When I’m playing Support, I’m constantly thinking about positioning. I want to be in a spot where I can:
- Cover my teammates with suppressive fire
- Quickly drop a Supply Bag when needed
- Use my Smoke Grenade Launcher to cover advances or revives
- Have good lines of sight for my LMG
My favorite positions are usually slightly elevated or behind good cover, with clear lines of sight to where the action is happening. I’ve found that rooftops or second-floor windows are often perfect for Support play, as long as I have good escape routes.
Know When to Fight and When to Support?
This is something I struggled with when I first started playing Support. I wanted to be at the top of the leaderboard with kills, but I quickly learned that sometimes the best thing I can do for my team is to hold back and provide support rather than chasing kills.
Now, I assess each situation:
- If my team is pushing and needs firepower, I’ll be right there with them, laying down suppressive fire
- If we’re holding a position, I’ll find a good spot to cover approaches and keep my team supplied
- If we’re in a defensive situation, I’ll focus on keeping everyone healed and supplied
Advanced Tactics for Support Players
Once you’ve mastered the basics, there are some advanced tactics I’ve learned that can really elevate your Support game.
The Supply Bag Revive
This is a tactic I’ve perfected that combines two of your most important abilities. When a teammate goes down in a dangerous position, I’ll first throw smoke to cover the area, then drop my Supply Bag near the downed teammate before reviving them.
What this does is create a healing zone that starts working the moment they get revived. I’ve saved countless teammates who would have immediately been downed again because they were revived with no health or armor. The Supply Bag gives them that instant healing they need to survive.
Smoke Grenade Pushes
I love using my Smoke Grenade Launcher to facilitate aggressive pushes. When my team needs to cross open ground or push into a building, I’ll lay down a line of smoke grenades to cover our advance.
The key here is communication. I always let my team know when I’m about to pop smoke so they can be ready to push through it. There’s nothing worse than wasting smoke grenades because your team wasn’t prepared to move.
Ammo Management
One thing many Support players overlook is ammo management. I’m constantly checking my ammo count and making sure I have enough to both fight and supply my team.
I’ve found that it’s better to be conservative with your ammo in the early game, saving it for crucial moments. There’s nothing worse than being in a final circle fight and realizing you don’t have enough ammo to support your team.
Team Synergy – Playing Well With Others
As a Support player, your effectiveness is directly tied to how well you work with your team. Here are some tips I’ve learned for maximizing team synergy.
Communicate Your Abilities
I make sure my team knows what I can do as a Support player. I’ll let them know:
- When my Supply Bag is available
- When I have smoke grenades ready
- When I’m in position to support a push
- When I need them to cover me while I revive someone
Good communication can turn a good Support player into a great one. I’ve found that when my team knows what I can do, they’re much more effective at leveraging my abilities.
Adapt to Your Team’s Composition
Every team is different, and I’ve learned to adapt my playstyle based on what my team needs. If I’m playing with aggressive players who like to push, I’ll focus on keeping them supplied and healed. If I’m playing with more defensive players, I’ll focus on holding positions and providing covering fire.
The key is to be flexible and understand what your team needs from you in any given situation.
2026 Common Mistakes to Avoid
After playing hundreds of matches, I’ve seen plenty of Support players make the same mistakes over and over. Here are the biggest ones to avoid.
Getting Isolated
This is probably the most common mistake I see Support players make. When you get isolated from your team, you lose most of your effectiveness. Your Supply Bag becomes useless if there’s no one around to use it, and you become an easy target for enemy squads.
I always make sure to stay within range of at least one teammate, and I’ll retreat if I find myself getting too far ahead or behind my squad.
Wasting Gadgets
I’ve mentioned this before, but it’s worth repeating – don’t waste your gadgets! I’ve seen so many Support players use their Smoke Grenade Launcher for minor situations, only to find themselves desperately needing it later.
I treat my Smoke Grenade Launcher like a precious resource, saving it for crucial moments like revives in dangerous positions or covering important pushes.
Neglecting Self-Sufficiency
While your main job is to support your team, you still need to be able to hold your own in a fight. I’ve seen too many Support players who focus so much on supporting others that they forget to take care of themselves.
Make sure you’re still looting good weapons and armor, and don’t be afraid to fight when you need to. A dead Support player can’t help anyone!
FAQ – Your Burning Support Questions Answered
What’s the best LMG for Support in REDSEC?
Based on my extensive testing, the DRS-IAR/DRS-1AR is the best choice for most situations. It offers the perfect balance of firepower, accuracy, and mobility. However, if you prefer a more aggressive playstyle, the KTS100 MK8 is also an excellent choice.
Should I always run the Supply Bag?
Yes, absolutely. The Supply Bag is non-negotiable for Support class. It’s not just about ammo resupply – the healing bonus it provides to nearby teammates is too valuable to pass up.
How do I balance fighting and supporting?
This comes down to situational awareness. I’m constantly assessing whether my team needs me to fight or to support. If we’re in a tight spot and need firepower, I’ll fight. If we’re in a good position but need supplies or healing, I’ll focus on supporting.
What’s the best way to use the Smoke Grenade Launcher?
I save my Smoke Grenade Launcher for crucial moments like reviving downed teammates in dangerous positions, covering advances across open ground, or creating confusion during firefights. Remember, you can’t refill it, so use it wisely!
How important is the Provisioner Training Path?
It’s absolutely essential. The Provisioner Training Path is what makes the Support class truly powerful in REDSEC. Every ability in the path is designed to make you a better team player, and I’ve leveraged each one to carry my squad to victory.
Conclusion – Why Support is My Favorite Class
After everything I’ve shared, I hope you can see why the Support class has become my favorite in Battlefield REDSEC. It’s not just about dropping ammo bags – it’s about being the tactical anchor your team needs to secure victory.
When I’m playing Support, I feel like I’m making a real difference in every match. Whether it’s saving a teammate with a well-timed revive, turning the tide of battle with a Supply Bag, or facilitating a crucial push with smoke grenades, I know that my actions are directly contributing to my team’s success.
So give the Support class a try with the loadout and strategies I’ve shared. I think you’ll be surprised at just how impactful you can be. And who knows – maybe you’ll fall in love with it like I have!
Remember, the key to being a great Support player is to always be thinking about how you can help your team. Stay close, communicate well, and don’t be afraid to adapt your playstyle to what your team needs.
Now get out there and show Fort Lyndon what a real Support player can do!
Looking for more gaming guides? Check out our Firstborn Beginner Guide for tips on dominating in Rise of Firstborn, or read our Helldivers 2 Patch 4.1.0 breakdown to stay on top of the latest meta changes. For more battle royale strategy, don’t miss our analysis of the Culling Game in Jujutsu Kaisen and how it compares to traditional battle royale mechanics.