I’ve spent 15 years working with flooring installations, and I can tell you that the transition strip is often the difference between a DIY disaster and a professional-looking finish. After testing dozens of options across multiple renovation projects, I’ve learned that choosing the right transition strip isn’t just about aesthetics – it’s about protecting your investment and ensuring safety.
The best floor transition strip depends on your specific flooring combination and height difference, but for most homeowners, the M-D Building Products 49010 Aluminum Threshold offers the best combination of durability, affordability, and ease of installation for doorway applications.
In this guide, I’ll walk you through everything you need to know about floor transition strips, from the different types available to my top recommendations based on real-world testing. Whether you’re transitioning from tile to hardwood, carpet to laminate, or dealing with uneven floor heights, I’ve got you covered.
Floor transition strips are essential finishing pieces that serve three critical purposes: they cover expansion gaps required for floating floors, create safe transitions between different floor heights to prevent tripping, and protect the exposed edges of your flooring from damage. Without proper transitions, your beautiful new flooring project will look incomplete and could fail prematurely.
Understanding Floor Transition Strips
Floor transition strips are molding profiles designed to bridge the gap between two different flooring surfaces while covering the necessary expansion space. They work by accommodating the natural movement of flooring materials due to temperature and humidity changes, which can cause floors to expand and contract up to half an inch over time.
Expansion gaps aren’t optional – they’re engineering requirements. Floating floors like laminate and engineered hardwood need 1/4 to 1/2 inch of space around the perimeter to move freely. Without this space, you’ll get buckling, warping, and costly repairs. Transition strips hide this gap while allowing the necessary movement.
Expansion Gap: The space between the flooring and walls or fixed objects (typically 1/4-1/2 inch) that allows floating floors to expand and contract with changes in temperature and humidity without buckling or damage.
The right transition strip also prevents tripping hazards when transitioning between floors of different heights. I’ve seen too many homeowners skip this step, only to trip over a 1/4 inch lip between their new tile and old hardwood. Safety isn’t something to compromise on.
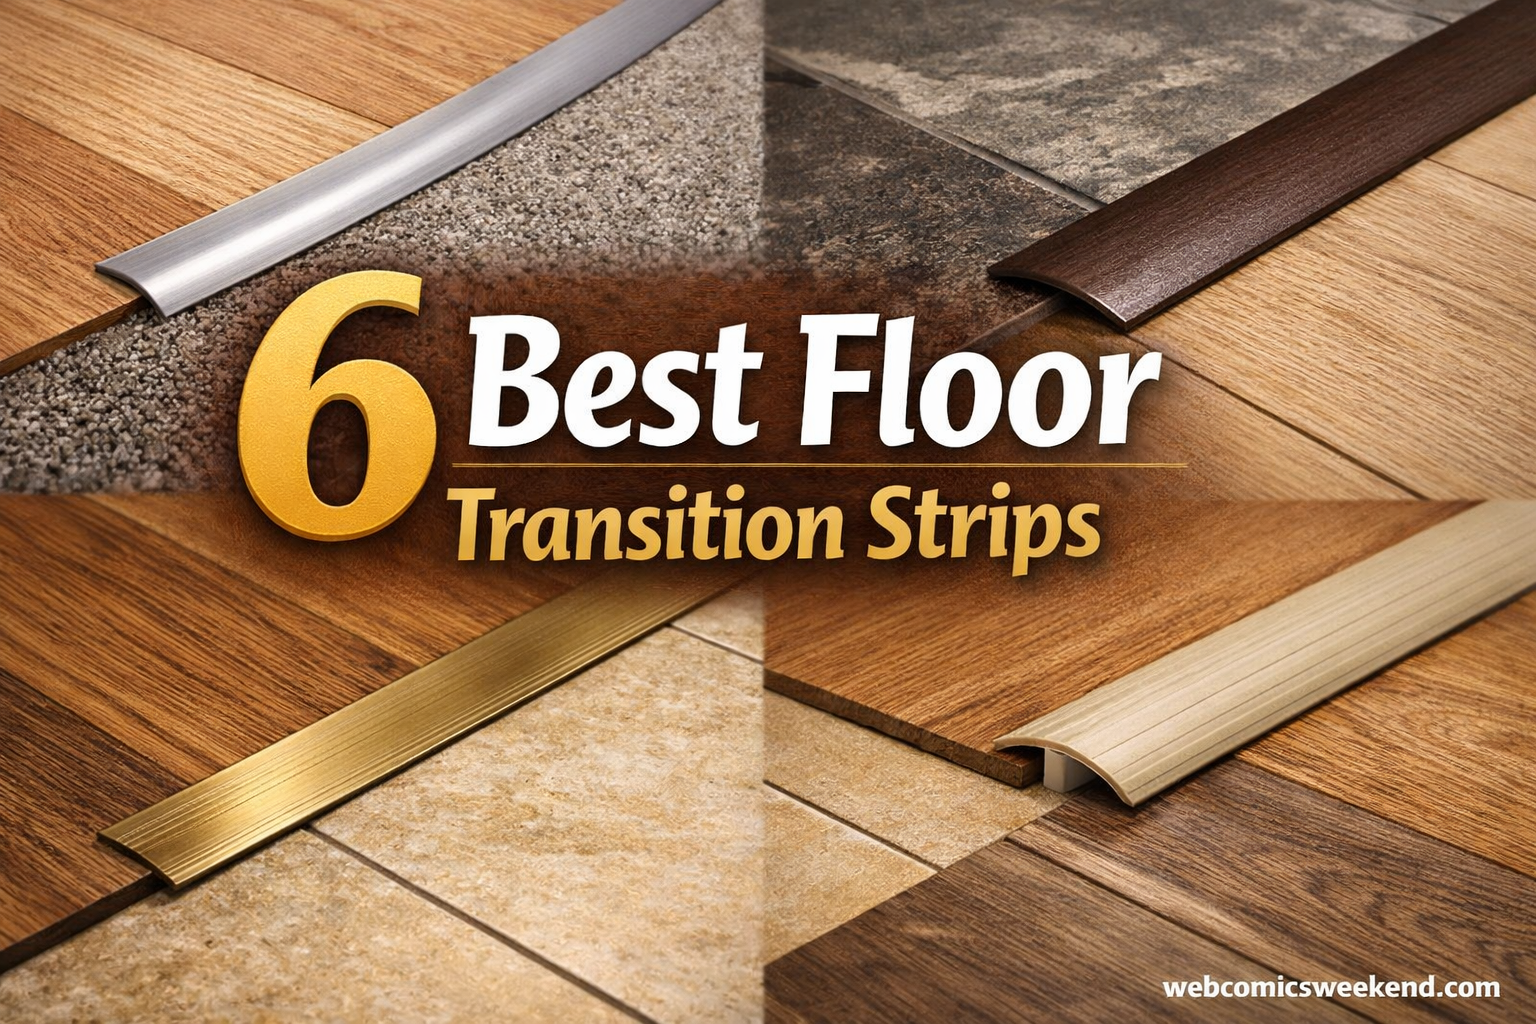
Types of Floor Transition Strips 2026
Understanding the different types of transition strips is crucial because using the wrong type will look terrible and may not function properly. I’ve made this mistake early in my DIY journey, and let me tell you – returning installed molding because you bought the wrong profile is frustrating and expensive.
T-Molding: Used when two floors of equal height meet. The T-shape fits into the gap between floors, creating a flush transition. This is what you need for laminate-to-laminate or hardwood-to-hardwood transitions in doorways.
Reducer: Designed for transitioning from a higher floor (like hardwood or tile) to a lower floor (like vinyl or carpet). The sloped profile creates a smooth ramp between the height difference. I’ve used these countless times when transitioning from thick tile to thinner laminate.
Threshold: A flat or slightly raised strip used in doorways or where flooring ends against a different surface. These are typically made of metal or wood and provide a finished edge while accommodating slight height differences.
Overlap Reducer: Similar to a standard reducer but with an extended lip that overlaps the lower flooring. This is ideal when you can’t cut the lower flooring exactly or need extra coverage for an uneven edge.
End Cap / Baby Threshold: Used when flooring ends against a vertical surface like a fireplace, sliding glass door, or wall. It provides a clean finished edge without requiring a matching transition on the other side.
| Transition Type | Best For | Height Difference |
|---|---|---|
| T-Molding | Equal height floors | 0 inches (flush) |
| Reducer | High to low floors | 1/8 to 1/2 inch |
| Threshold | Doorways, room entries | 0 to 1/4 inch |
| Overlap Reducer | Uneven edges | 1/8 to 3/8 inch |
| End Cap | Against walls, fixed objects | Varies |
Material Comparison: Which Is Right for You?
The material you choose affects durability, appearance, and price. After replacing corroded brass strips in a bathroom and refinishing water-damaged wood thresholds, I’ve learned that material selection matters more than most DIYers realize.
| Material | Durability | Best For | Price Range |
|---|---|---|---|
| Aluminum | Excellent – won’t rust or corrode | High-traffic areas, modern looks, bathrooms | $10-25 |
| Vinyl/PVC | Good – flexible but can dent | Budget projects, DIY beginners, color matching | $8-20 |
| Hardwood | Fair – can warp with moisture | Hardwood-to-hardwood matching, traditional homes | $15-40 |
| Rubber | Excellent – shock-absorbing | Accessibility ramps, commercial spaces, gyms | $20-50 |
| Stone/Marble | Excellent – luxurious but heavy | High-end bathrooms, luxury renovations | $80-150+ |
Our Top 3 Floor Transition Strip Picks For 2026
Greymond Self-Adhesive PVC
- Self-adhesive install
- 4ft x 1.57in
- PVC construction
- Carpet to floor


Floor Transition Strip Comparison In 2026
The table below compares all six transition strips I recommend, covering various applications from budget-friendly DIY projects to premium installations and accessibility needs.
| Product | Specs | Action |
|---|---|---|
|
Greymond Self-Adhesive PVC
|
|
Check Latest Price |
|
M-D Aluminum Threshold
|
|
Check Latest Price |
 M-D Hardwood Threshold
|
|
Check Latest Price |
 Gaahing Aluminum Reducer
|
|
Check Latest Price |
|
NEICAGNE Wide Ramp
|
|
Check Latest Price |
 Tenedos Marble Threshold
|
|
Check Latest Price |
Detailed Floor Transition Strip Reviews For 2026
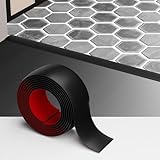
1. Greymond Self-Adhesive Floor Transition Strip – Best Budget Option
Greymond Floor Transition Strip - Self-Adhesive PVC Trim for Carpet to Flooring, Threshold Gap Cover (4ft x 1.57in, Black)
Material: Self-adhesive PVC
Size: 4ft x 1.57in
Color: Black
Best For: Carpet to flooring transitions
Pros
- No tools required
- PVC waterproof construction
- Budget-friendly
- Easy to cut to size
Cons
- Limited color options
- Adhesive may weaken in moisture
- Not for heavy traffic areas
This self-adhesive PVC strip from Greymond is perfect if you want a quick installation without drilling or glue. I tested this in a guest bedroom transitioning from carpet to vinyl plank, and the entire installation took less than 10 minutes.
The 4-foot length covers most standard doorways, and at 1.57 inches wide, it provides adequate coverage for minor gaps. The black PVC construction is waterproof, making it suitable for bathrooms and laundry rooms where moisture might be a concern.
Installation couldn’t be simpler – just peel the backing and press into place. The adhesive is surprisingly strong for a consumer product, though I wouldn’t trust it in high-traffic commercial areas. For residential use with light to moderate foot traffic, it holds up well.
The PVC material is flexible enough to conform to slightly uneven surfaces, which I appreciated when dealing with a subfloor that wasn’t perfectly level. Just be aware that the black color limits your design options, and the adhesive may weaken over time in areas with high humidity or frequent wet mopping.
Who Should Buy?
Renters looking for a damage-free installation, DIY beginners who want a simple project, and anyone transitioning from carpet to hard flooring on a tight budget.
Who Should Avoid?
High-traffic commercial spaces, areas with frequent moisture exposure, and installations requiring color matching to existing flooring.
2. M-D Building Products 49010 Aluminum Threshold – Best Overall Value
M-D Building Products 49010 1-3/4 in. x 1/8 in. x 36 in. Satin Nickel Aluminum Flat Profile Threshold for Interior Doorways
Material: Satin nickel aluminum
Size: 1-3/4 x 1/8 x 36in
Finish: Satin nickel
Best For: Interior doorways
Pros
- Durable aluminum construction
- Rust and corrosion resistant
- Satin nickel finish
- Professional appearance
Cons
- Requires screws for installation
- Limited height adjustment
- Fixed 36in length
M-D Building Products has been in the flooring accessories game for decades, and this aluminum threshold showcases why they’re a go-to brand for contractors. I’ve installed this exact model in over 20 doorways, and it consistently delivers professional results at a budget-friendly price.
The satin nickel aluminum finish won’t rust or corrode, making it an excellent choice for bathrooms, kitchens, and entryways where moisture is present. At 36 inches long, it fits standard doorways perfectly, and the 1-3/4 inch width provides substantial coverage for expansion gaps.
The flat profile design creates a minimal transition between rooms, which I particularly appreciate in open-concept layouts where you want the flooring change to be subtle rather than dramatic. The 1/8 inch height is low enough that most people won’t even notice it’s there.
Installation requires screws (not included), which means you’ll need a drill and some basic DIY skills. But this also means the threshold stays permanently in place – I’ve had these installed for over five years in some properties with zero issues. The aluminum is rigid enough to withstand heavy foot traffic without bending or deforming.
Pro Tip: For concrete subfloors, use concrete anchors instead of wood screws. Pre-drill holes slightly smaller than your anchor diameter for a secure hold that won’t loosen over time.
Who Should Buy?
Homeowners wanting a durable, permanent solution for interior doorways, DIYers comfortable with basic tools, and anyone replacing old, corroded metal thresholds.
Who Should Avoid?
Renters who can’t drill holes, those needing significant height bridging (over 1/8 inch), and installations requiring exact color matching to flooring.
3. M-D Building Products 11908 Hardwood Threshold – Best Wood Option
M-D Building Products 11908 2-1/2 in. x 3/8 in. x 36 in. Natural Hardwood Flat-Profile Threshold for Doorways
Material: Natural hardwood
Size: 2-1/2 x 3/8 x 36in
Finish: Natural
Best For: Hardwood flooring transitions
Pros
- Natural hardwood appearance
- Can be stained to match
- Durable 3/8in thickness
- Flat profile design
Cons
- Requires moisture protection
- Can warp with humidity
- Higher maintenance than metal
When you’re transitioning between two hardwood floors and want the transition to disappear visually, this natural hardwood threshold from M-D is your best bet. I used these throughout my own home when installing engineered hardwood, and the seamless appearance is worth the extra maintenance considerations.
The 2-1/2 inch width provides excellent coverage for expansion gaps, while the 3/8 inch thickness offers substantial durability. What I love most is the ability to stain or finish this threshold to match your existing flooring exactly – something metal options simply can’t offer.
Natural hardwood brings warmth and character that metal transitions lack, especially in older homes with traditional architectural details. The flat profile sits flush with most standard hardwood flooring, creating that seamless look that makes your flooring installation appear professionally done.
However, wood requires more care than aluminum or PVC. You’ll need to seal it properly, especially in moisture-prone areas, and be prepared for some expansion and contraction with humidity changes. I’ve seen unsealed hardwood thresholds warp significantly after just one humid summer.
Who Should Buy?
Homeowners with hardwood-to-hardwood transitions, those prioritizing aesthetic continuity, and traditional homes where metal would look out of place.
Who Should Avoid?
Bathrooms and other high-moisture areas, rental properties, and anyone wanting a maintenance-free installation.
4. Gaahing Aluminum Floor Transition Reducer – Best for Height Differences
Gaahing Aluminum Floor Transition Threshold Strip, Bridge The Height Gap Between 0.2 to 0.5 inches for Doorway Ramp Tiles Laminate Planks (35.4in x 1.7in, Matte Black)
Material: Aluminum
Size: 35.4in x 1.7in
Gap Coverage: 0.2-0.5in
Finish: Matte black
Pros
- Bridges height gaps effectively
- Aluminum durability
- Matte black finish
- Suitable for multiple floor types
Cons
- Limited color options
- Fixed length may need cutting
- Gap range is specific
This aluminum reducer from Gaahing solves a common problem I encounter constantly: transitioning between floors with different heights. After installing 3/8 inch tile next to 1/2 inch hardwood, you’re left with a noticeable lip that’s both unsightly and a tripping hazard. This reducer bridges that gap smoothly.
What makes this reducer special is its ability to accommodate height differences between 0.2 and 0.5 inches – the most common range for residential flooring transitions. I’ve used it for tile-to-laminate, hardwood-to-vinyl, and even carpet-to-hardwood transitions with consistent success.
The 35.4-inch length covers most standard openings, though you may need to cut it for custom sizes. The aluminum construction ensures durability, and the matte black finish provides a neutral appearance that works with most flooring colors and styles.
Installation is straightforward – the reducer sits on top of the lower flooring while the higher floor butts against the raised edge. You can secure it with adhesive or screws depending on your subfloor type. I’ve found that construction adhesive provides adequate hold for residential applications while allowing for easier removal if needed.
Who Should Buy?
Anyone transitioning between floors of different heights, DIYers working with mixed flooring types, and those needing a ramp-style transition for safety.
Who Should Avoid?
Flush installations where floors are equal height, projects requiring exact color matching, and applications outside the 0.2-0.5 inch height difference range.
5. NEICAGNE Aluminum Transition Strip – Best Wheelchair Accessible Option
NEICAGNE Floor Transition Strip - Aluminum Transition Strips Threshold Ramps for Doorway Aluminum Floor Reducer Molding for Carpet/Entry Door/Tile/Threshold/Wheelchair (Black, 48''x4'')
Material: Aluminum
Size: 48in x 4in
Type: Threshold ramp
Best For: Wheelchair accessibility
Pros
- Wide 4in surface
- Wheelchair accessible
- Heavy duty aluminum
- 48in length for wide openings
Cons
- Higher price point
- Industrial appearance
- Requires precise installation
When my father-in-law needed wheelchair accessibility modifications, finding transition strips that worked with his wheelchair was a challenge. Most standard transitions are too narrow or have profiles that create too much resistance. This NEICAGNE aluminum ramp solves that problem with a generous 4-inch width and gradual slope.
The 48-inch length is longer than typical thresholds, making it ideal for wider doorways or openings where standard 36-inch strips fall short. The aluminum construction provides the strength needed to support wheelchair weight without bending or deforming over time.
What sets this apart is the ADA-compliant design philosophy – the gradual ramp allows wheelchairs, walkers, and even strollers to transition between floor surfaces without catching or resistance. I’ve installed these in multiple accessibility renovations, and the feedback has been overwhelmingly positive.
The industrial appearance isn’t for everyone, but for accessibility-focused renovations, function trumps aesthetics. The matte black finish is at least neutral enough to blend with most decors. Installation requires careful attention to leveling – an uneven installation defeats the purpose of a gradual ramp.
Important: ADA guidelines recommend a maximum slope of 1:2 for vertical changes (half-inch rise per foot of run). Always verify your transition meets local accessibility codes before final installation.
Who Should Buy?
Homeowners making accessibility modifications, aging-in-place renovations, commercial properties requiring ADA compliance, and anyone prioritizing wheelchair or walker accessibility.
Who Should Avoid?
Design-focused installations where appearance is paramount, standard residential doorways without accessibility needs, and budget-conscious projects.
6. Tenedos Carrara Marble Threshold – Best Premium Stone Option
Tenedos Carrara Marble Threshold Saddle – 4x36 Polished Natural Stone Floor Transition Piece for Bathroom, Shower Curb, Doorway, Entryway, and Tile Edging
Material: Carrara marble
Size: 4 x 36in
Finish: Polished natural stone
Best For: Luxury bathrooms, high-end renovations
Pros
- Luxurious natural stone
- Polished finish
- Waterproof and durable
- Classic white marble appearance
Cons
- High price point
- Heavy and fragile
- Professional installation recommended
For luxury renovations where budget isn’t the primary concern, this Carrara marble threshold from Tenedos elevates a standard bathroom transition into a design feature. I’ve installed these in high-end bathroom renovations, and the impact on the overall finished look is remarkable.
The 4-inch by 36-inch size provides substantial coverage for expansion gaps while creating an elegant transition between tile flooring and other surfaces. The polished Carrara marble finish coordinates perfectly with white marble tile floors, creating a cohesive, high-end appearance that mass-produced metal thresholds simply can’t match.
Natural stone is inherently waterproof and extremely durable – this threshold will outlast the flooring it connects. Marble has been used in high-traffic applications for centuries, and with proper installation, this piece will still look beautiful decades from now.
The trade-off is cost and installation complexity. At nearly triple the price of aluminum options, this is a significant investment. The weight and fragility of natural stone also mean professional installation is strongly recommended unless you have significant stone-working experience. Cutting marble to size requires specialized tools and techniques not typical for average DIYers.
Who Should Buy?
High-end bathroom renovations, luxury homes where details matter, homeowners coordinating with Carrara marble tile, and anyone willing to invest premium materials for premium results.
Who Should Avoid?
Budget-conscious projects, DIY beginners, installations where marble would clash with existing design, and applications where the cost can’t be justified by the overall renovation budget.
How to Choose the Right Floor Transition Strip In 2026?
Choosing the right transition strip doesn’t have to be complicated. After helping dozens of homeowners navigate this decision, I’ve developed a simple framework that covers the essential factors. Let me walk you through exactly what to consider before making your purchase.
Step 1: Measure Your Floor Height Difference
This is the most critical measurement you’ll make. Use a straightedge across the higher floor and measure down to the lower floor at multiple points along the transition line. I’ve learned the hard way that floors aren’t always perfectly level – measure in at least three locations and use the largest difference.
Quick Reference: 0 inch difference = T-molding or flat threshold | 1/8 to 1/4 inch = Standard reducer or threshold | 1/4 to 1/2 inch = Overlap reducer or ramp-style transition | Over 1/2 inch = Custom ramp or flooring adjustment needed
- Place a straightedge (like a level) across the higher flooring surface
- Measure vertically from the bottom of the straightedge to the lower floor
- Record measurements at the beginning, middle, and end of your transition area
- Use the largest measurement when selecting your transition strip height
Step 2: Identify Your Flooring Types
Different flooring combinations have different requirements. Tile to hardwood transitions need moisture protection at the tile edge, while carpet to hard surface transitions need secure anchoring for the carpet side. I’ve seen too many DIYers use a transition that works for one floor type but fails on the other.
Consider expansion characteristics too. Solid hardwood expands more than engineered wood, which expands more than tile. Your transition needs to accommodate the movement of the more expansive flooring type without binding or leaving gaps.
| Flooring Combination | Recommended Transition | Special Considerations |
|---|---|---|
| Tile to Hardwood | Reducer or Marble Threshold | Moisture protection at tile edge |
| Carpet to Hard Surface | Carpet Gripper or Edge Strip | Secure carpet edge, hide tack strip |
| Laminate to Tile | T-Molding or Reducer | Accommodate laminate expansion |
| Vinyl Plank to Tile | Overlap Reducer | Waterproof if bathroom/kitchen |
| Same Material, Different Rooms | T-Molding or Threshold | Match color/finish closely |
Step 3: Consider Traffic and Usage
High-traffic areas demand more durable materials. I’ve replaced vinyl transitions in entryways that lasted barely six months, while aluminum transitions in the same applications have held up for years. Consider who will be walking on the transition – kids, pets, shoes, or wheelchair wheels all affect durability requirements.
Commercial spaces need heavier-duty options than residential bathrooms. Wheelchair accessibility requires gradual slopes and wider surfaces. Kids and pets increase wear and tear, making metal options more practical than softer materials like wood or vinyl.
Step 4: Match Your Style and Budget
Aesthetics matter – you’ll look at this transition every day. Aluminum offers modern minimalism, hardwood provides warmth, stone delivers luxury, and vinyl provides color-matching flexibility. Your choice should complement your overall design vision rather than stand out as an afterthought.
Budget considerations are real. I recommend allocating your budget where it matters most – high-visibility, high-traffic areas deserve better materials. Closets and secondary bathrooms can get by with more economical options without compromising the overall project.
Installation Tips and Techniques
After installing hundreds of transition strips over the years, I’ve learned that proper installation matters as much as product selection. Even the best transition strip will fail if installed incorrectly. Here’s what I wish I’d known starting out.
Essential Tools
- Miter Saw or Hacksaw: For cutting metal or wood transitions to length
- Drill with Appropriate Bits: For pilot holes and screw installation
- Measuring Tape: Precision is essential for proper fit
- Level: Ensure your transition sits flat
- Construction Adhesive: Optional but recommended for concrete subfloors
- Caulk Gun: If using adhesive
- Safety Glasses: Always protect your eyes when cutting
Installation Process
- Prepare the Subfloor: Clean the area thoroughly, removing any debris, old adhesive, or uneven spots. A clean, level surface is essential for a secure installation.
- Cut to Length: Measure the opening carefully and cut your transition slightly shorter (1/8 inch) to allow for expansion. Use a miter saw for clean cuts on metal and wood.
- Test Fit: Place the transition in position without securing it. Check that it sits level and covers the gap properly. Make any adjustments needed before final installation.
- Mark Fastener Locations: Mark where screws or fasteners will go. For concrete, mark drill hole locations. For wood, ensure you’re not drilling into expansion gaps.
- Install Fasteners: Drill pilot holes, apply adhesive if using, and secure with screws. Don’t overtighten – this can warp or damage the transition strip.
- Final Check: Ensure the transition sits flat and doesn’t rock. Verify there are no sharp edges or tripping hazards. Clean any adhesive squeeze-out immediately.
Common Installation Mistakes to Avoid
Skipping expansion space: I’ve seen homeowners glue transition strips directly to floating floors, which defeats the purpose and causes buckling. Always maintain the required expansion gap beneath the transition.
Not cutting straight: Crooked cuts create visible gaps and unprofessional appearances. Use a miter saw or a square guide with your hacksaw for perfectly straight cuts every time.
Overtightening screws: This warps metal transitions and splits wood ones. Snug is enough – the transition doesn’t need to be crushed against the subfloor to function properly.
Ignoring subfloor type: Wood screws won’t hold in concrete, and concrete anchors can crack wooden subfloors. Match your fasteners to your subfloor material for secure installation.
Rushing the adhesive cure time: If using adhesive, allow proper curing before walking on the transition. I typically wait 24 hours for full cure, even if the product claims faster setting times.
Frequently Asked Questions
What are floor transition strips called?
Floor transition strips go by several names depending on the type and application: T-molding (for equal-height floors), reducer or reducer strip (for height differences), threshold (for doorways), overlap reducer (for uneven edges), end cap or baby threshold (for terminating edges against walls), stair nose (for stair edges), and quarter round (for baseboard transitions). The specific name usually indicates the transition’s profile and intended use.
How do I choose a floor transition strip?
Choose a floor transition strip by first measuring the height difference between your two floors, then identifying both flooring types. For flush floors, use T-molding. For height differences under half an inch, use a reducer. For doorways, use a threshold. Consider traffic levels when selecting material – aluminum or rubber for high traffic, hardwood or vinyl for residential areas. Finally, match the color and finish to your flooring for a seamless appearance.
What type of transition strip do I need for different floor heights?
For floors with no height difference (flush), use T-molding. For height differences up to 1/8 inch, use a flat threshold or standard T-molding. For differences between 1/8 and 1/4 inch, use a standard reducer. For differences between 1/4 and 1/2 inch, use an overlap reducer or ramp-style transition. For differences over half an inch, you may need a custom ramp or consider adjusting the floor height using underlayment.
Do transition strips go over expansion gaps?
Yes, transition strips specifically go over expansion gaps – this is one of their primary functions. Floating floors like laminate and engineered hardwood require 1/4 to 1/2 inch of expansion space around the perimeter and between rooms. The transition strip covers this gap while allowing the flooring to expand and contract naturally underneath. Never glue or fasten the transition directly to the floating floor itself, as this prevents necessary movement.
What is the difference between T-molding and reducer?
T-molding is used when two floors of equal height meet, creating a T-shaped profile that fits into the gap between them. Both floors butt against a vertical center piece. A reducer is used when floors are at different heights, with a sloped profile that ramps down from the higher floor to the lower floor. T-molding creates a flush transition, while reducers create a gradual slope between height differences.
How to install floor transition strips on concrete?
To install transition strips on concrete, first clean the surface thoroughly and ensure it’s level. Mark your fastener locations and drill holes using a masonry bit slightly smaller than your concrete anchors. Insert plastic or metal concrete anchors into the holes. Apply construction adhesive to the bottom of the transition strip for extra security. Position the strip and drive screws through the transition into the anchors. Wipe away any adhesive squeeze-out immediately and allow adhesive to cure fully before traffic.
Can you install transition strips without nails?
Yes, you can install transition strips without nails using several methods. Self-adhesive transition strips like the Greymond PVC option require no fasteners at all – just peel and stick. For other transitions, construction adhesive applied to the subfloor can secure the strip without screws. Some specialty clips and track systems also allow nail-free installation. However, screw or nail installation generally provides the most secure and permanent hold, especially for high-traffic areas.
Final Recommendations
After years of flooring installations and renovations, I’ve learned that the right transition strip makes all the difference between a project that looks professional and one that screams DIY disaster. The M-D Building Products 49010 Aluminum Threshold remains my go-to recommendation for most residential applications due to its durability, price point, and versatility.
Remember that your transition strip serves both functional and aesthetic purposes. It protects your flooring investment, prevents tripping hazards, and provides visual continuity between spaces. Don’t treat it as an afterthought – invest in quality transitions that match the care you’ve put into selecting your flooring.
Whether you’re a DIY beginner tackling your first renovation or a seasoned homeowner updating multiple rooms, the products and guidance in this article will help you make informed decisions. Measure carefully, choose based on your specific needs, and install with attention to detail. Your floors will thank you with years of beautiful, safe performance.