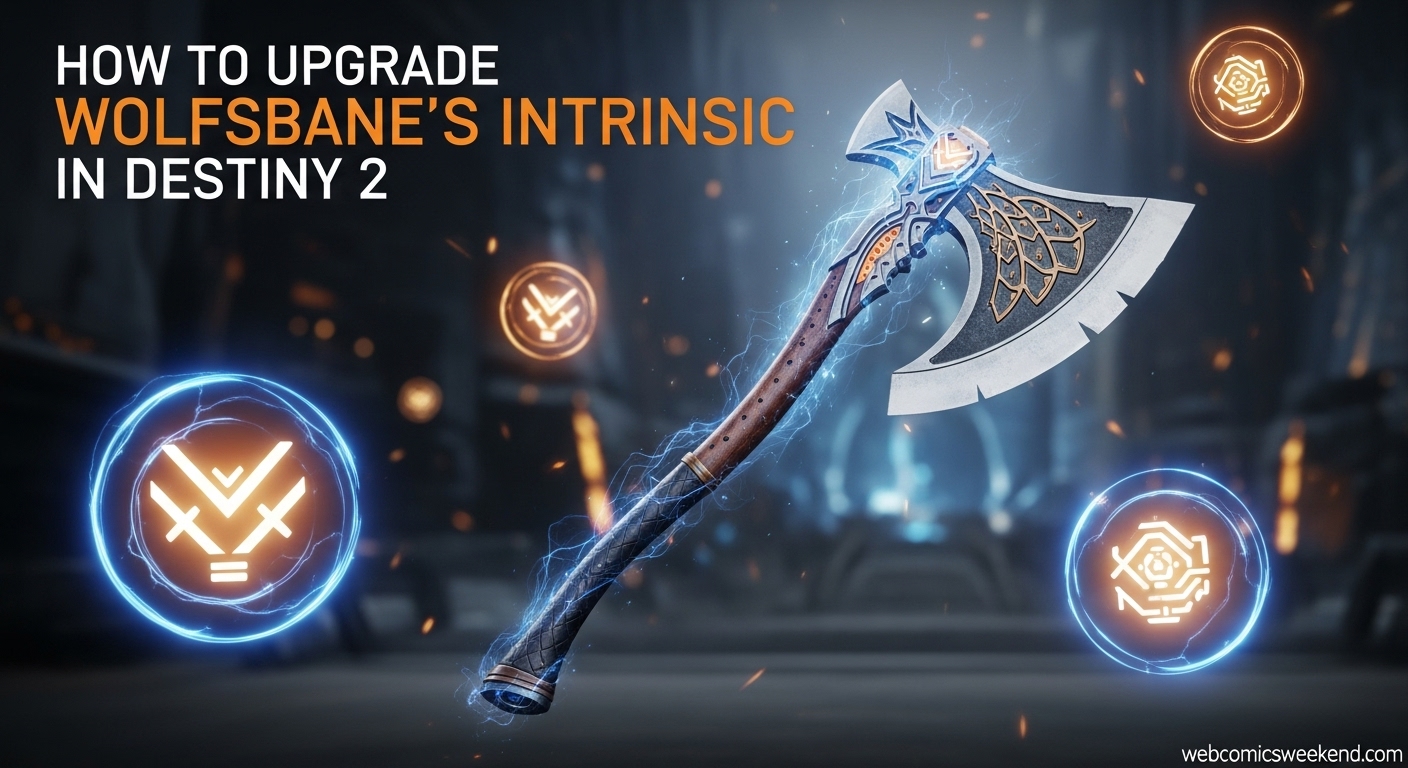
Hey there, fellow Guardian! If you’re anything like me, you’ve been absolutely thrilled with the new Wolfsbane Exotic axe from Destiny 2’s Ash and Iron update. I mean, who wouldn’t want to wield a massive two-handed axe that channels Solar energy and looks absolutely badass while doing it? But here’s the thing – getting the axe is just the beginning. To truly unlock its devastating potential, you need to upgrade its intrinsic perk, and let me tell you, it’s not as straightforward as you might think.
When I first got my hands on Wolfsbane, I was pumped to start slicing through enemies like butter. But I quickly realized that I was missing out on some serious power because I hadn’t upgraded the intrinsic yet. After hours of searching, multiple mission runs, and more than a few facepalms when I missed obvious clues, I’ve finally figured out the complete process. And I’m here to share everything I’ve learned so you can avoid the same mistakes I made.
What is Wolfsbane’s Intrinsic Perk?
Before we dive into the upgrade process, let’s talk about what we’re actually upgrading. Wolfsbane comes with an Exotic perk called “Resurgence Directive,” and let me tell you, it’s pretty sweet right out of the box. The perk makes your light attacks generate Sword energy and has a chance to spawn seeking Quicksilver nanites that heal you when they attach to enemies. Pretty cool, right?
But here’s where it gets really interesting – this perk can be upgraded four times total, all the way up to Resurgence Directive IV. Each upgrade increases your axe’s Impact, Stability, Guard Resistance, Ammo Capacity, Guard Endurance, and Ammo Generation. Trust me, the difference between the base version and the fully upgraded version is night and day. I’ve tested both extensively, and the upgraded version feels like a completely different weapon – more powerful, more responsive, and just overall more satisfying to use.
The Nano-Assault Exotic Trait
While we’re on the subject of Wolfsbane’s capabilities, I can’t help but gush about the Nano-Assault Exotic trait. This is what really sets the axe apart from other heavy weapons. The Quicksilver nanites that attach to you actually charge the blade itself. When you see that charge meter full, just press R1/RB to overclock those nanites, and watch the magic happen.
Once overclocked, your light attacks deal significantly increased damage to targets, and your fully charged heavy attacks create this absolutely insane flaming Quicksilver swarm-nado that just wrecks everything in its path. I’m not kidding when I say that I’ve cleared entire rooms of major enemies with just one well-timed heavy attack after overclocking. It’s one of the most satisfying abilities I’ve used in Destiny 2 in a long time.
Understanding the Upgrade Process
Now, let’s get down to business. Upgrading Wolfsbane’s intrinsic isn’t as simple as just using the weapon or completing a specific quest. Instead, you need to find and destroy specific Vex nodes hidden throughout the Heliostat Exotic mission. And here’s the kicker – you can only destroy these nodes with Wolfsbane itself. If you try to shoot them with any other weapon, you’ll just get an “Immune” message, which I learned the hard way after wasting precious ammo trying to shoot them with my favorite scout rifle.
There are three sets of Vex nodes, with three nodes in each set, for a total of nine nodes that you need to find and destroy. Each set corresponds to one intrinsic upgrade:
- First set (3 nodes): Unlocks Resurgence Directive II
- Second set (3 nodes): Unlocks Resurgence Directive III
- Third set (3 nodes): Unlocks Resurgence Directive IV
I’ve found that the order matters, and you need to complete them in sequence. You can’t just jump to the final boss room and try to get all the upgrades at once. Trust me, I tried, and it doesn’t work that way.
Solo vs. Fireteam Considerations
One thing that really confused me at first was how the node collection works in different group sizes. When I first attempted this solo, I had to destroy all nine Vex nodes myself to get all three upgrades. However, when I ran it with a full fireteam of three players, it seemed like each guardian only needed to break one set of shapes to get the intrinsic upgrades.
The math appears to be tied to the number of players who haven’t unlocked that particular intrinsic yet. In theory, with a full team, each player should only need to break one set of three symbols to get all three upgrades. But honestly, your mileage may vary on this. I’ve heard reports of some fireteams where everyone still had to break all the nodes, so it’s not entirely consistent.
My recommendation? If you’re running with a team, coordinate and make sure everyone breaks at least one set of nodes to be safe. It’s better to be thorough than to miss out on an upgrade because you assumed someone else would get it.
Preparation is Key
Before you even think about hunting for these Vex nodes, there are a couple of important prerequisites:
- You must have Wolfsbane first – This might seem obvious, but you can’t upgrade a weapon you don’t have. Complete the Heliostat Exotic mission at least once to acquire the axe.
- Complete the mission once before hunting nodes – I made the mistake of trying to find the nodes on my first run, and it just doesn’t work. You need to have completed the mission at least once before the nodes will appear for you.
- Bring Wolfsbane equipped – I can’t stress this enough. You need to have Wolfsbane equipped and ready to go when you reach each node location. Other weapons won’t work.
- Consider running on lower difficulty first – While you can find the nodes on any difficulty, I recommend running on Normal or lower difficulty your first time through. This lets you focus on finding the nodes without worrying about challenging enemies. Once you know where everything is, you can speedrun it on higher difficulties.
First Intrinsic Upgrade: Resurgence Directive II
Alright, let’s start with the first upgrade. The nodes for Resurgence Directive II are all diamond-shaped symbols, and they’re located in the early sections of the Heliostat mission, right after the first major encounter.
Location 1: Water Room Diamond
After you’ve destroyed the four security nodes at the beginning of the mission, you’ll drop down into an area filled with water. This is where your hunt begins. Look for a dimly lit alcove to the left of the main terminal. The diamond symbol is glowing pretty prominently, so it’s hard to miss once you know where to look.
When I first found this, I almost missed it because I was so focused on the main terminal and the correct exit. But if you take a moment to scan the room, you’ll see it glowing in that alcove on the far side of the room, directly opposite the exit you need to take.
Location 2: Following Section Diamond
Continue through the mission until you reach a section with an alcove that has a lamp slightly above you. When you get to this point, look to your left. Alternatively, if you jump across to the other side, you can turn right and see it from there.
I found this one tricky because it’s easy to get tunnel vision when you’re focused on progressing through the mission. The lamp catches your attention, but the diamond is off to the side. Take a moment to scan the area before moving on, or you might miss it like I did on my first few runs.
Location 3: Dark Corridor Diamond
The final diamond for this set is located in a dark corridor section. This one is particularly sneaky because it’s hidden behind a pipe, making it difficult to see if you don’t move around and check different angles.
To find it, go to the room with the long walkway in front of it, then look for an unlit nook below and to your right. The diamond is tucked away in there, behind that pipe I mentioned. I definitely walked past this one multiple times before I finally spotted it. The key is to move slowly and check every nook and cranny in this area.
Once you’ve destroyed all three diamonds, you’ll unlock Resurgence Directive II. You should get a notification, and you’ll notice your axe feels a bit more powerful already.
Second Intrinsic Upgrade: Resurgence Directive III
Now we’re moving on to the second set of nodes, which will unlock Resurgence Directive III. These nodes are located in the longer parkour section of the mission, and they have different shapes than the diamonds from the first set.
Location 4: Parkour Section First Symbol
After climbing on the elevator on the right side, you’ll reach an area with two Goblins shooting at you from a ledge up high. There’s a short, yellow walkway to their right. Look for the Vex symbol across from the Goblins, hidden behind a wall.
This one can be a bit tricky to spot because you’re likely focused on the enemies and the platforming challenge. But if you take a moment to scan the area across from the Goblins, you’ll see the symbol glowing behind that wall. I found it helpful to clear the enemies first so I could focus on finding the symbol without getting shot at.
Location 5 and 6: Parkour Section Remaining Symbols
The remaining two symbols in this set are much easier to find. They’re both on the other side of the room from the first symbol, and they’re very visible – right in your path as you progress through the section.
One of them is just off the beginning of this area, while the other isn’t too far ahead. Unlike some of the other symbols, these aren’t particularly hidden or tricky to spot. You’ll likely see them naturally as you move through the parkour section.
I found these two much easier to locate than the first one in this set, probably because they’re more out in the open. Just keep your eyes peeled as you move through the area, and you shouldn’t have any trouble spotting them.
Third Intrinsic Upgrade: Resurgence Directive IV
We’re now at the final set of nodes, which will unlock the ultimate version of Wolfsbane’s intrinsic: Resurgence Directive IV. These nodes are located in the boss room, which is divided into three main sections.
Location 7: Boss Room Back Left Square
From your spawn point in the boss room, one of the square-shaped symbols is located on the back left of the room. It’s pretty visible once you know where to look, but it’s easy to miss if you’re focused on the boss and the enemies.
I recommend taking a moment to scan the room before engaging the boss. The symbol will be glowing, so it should stand out against the darker environment. Just look to the back left corner, and you should spot it without too much trouble.
Location 8: Hacking Area Square
The second square symbol is located in the area where you summon the hacking Psion. Look for it floating above a computer terminal in that section.
This one can be a bit tricky because you’re likely focused on the hacking mechanic and the enemies that spawn during this phase. But if you take a moment to look up at the computer terminal, you’ll see the square symbol floating above it. I almost missed this one my first time through because I was so focused on completing the hack quickly.
Location 9: Final Wall Square
The final symbol is located to your left after breaking through the second wall with the Quicksilver Psion. This one is also quite visible once you know where to look.
I found this one easier to spot than some of the others, probably because it’s in a more open area and you’re likely to be scanning your surroundings after breaking through that wall. Just look to your left, and you should see the final square symbol waiting for you.
Once you’ve destroyed all three squares, you’ll unlock Resurgence Directive IV, the ultimate version of Wolfsbane’s intrinsic perk. Congratulations! Your axe is now fully upgraded and ready to wreak havoc on your enemies.
Wolfsbane Customization Options
One of the things I love most about Wolfsbane is the customization options available. Once you’ve unlocked all the intrinsic upgrades, you can really make this weapon your own. Here’s a breakdown of the different customization options available:
| Column 1 | Column 2 | Column 3 | Column 4 (Guard Socket) | Column 5 |
|---|---|---|---|---|
| Honed Edge | Jagged Edge | Nano-Assault Exotic Trait | Tenacious Handle | Attrition Orbs Refit |
| Tempered Edge | Enduring Blade | Rampager’s Handle | Relentless Strike Refit | |
| Hungry Edge | Unyielding Handle | Burning Ambition Refit | ||
| Subroutine: Recursion |
I’ve experimented with different combinations, and honestly, it really comes down to your personal playstyle. For more aggressive play, I like to combine Honed Edge with the Rampager’s Handle and Relentless Strike Refit. For more defensive play, Enduring Blade with the Unyielding Handle and Subroutine: Recursion works great.
Catalysts: Taking Wolfsbane to the Next Level
If you thought we were done with upgrades, think again! Wolfsbane also has four catalysts that can further enhance its capabilities. These are obtained by completing specific puzzles in the Heliostat Exotic mission on Master difficulty or higher.
Attrition Orbs Catalyst
The Attrition Orbs Catalyst causes dealing sustained damage to create an Orb of Power. To get this catalyst, you need to interact with a datapad and console at the beginning of the Heliostat Exotic mission on Master difficulty, then complete the mission.
I found this catalyst particularly useful for activities where I need to generate a lot of Orbs of Power for my team. It’s a great choice for group activities like raids or dungeons.
Relentless Strike Catalyst
The Relentless Strike Catalyst grants Sword ammo when you land three light-attack hits within a short time. This one is a bit more complex to obtain:
- Start Heliostat Exotic mission on Master difficulty or higher
- At the lower level of the shaft, locate the area where you can summon a Psion
- Interact with the right console
- Jump onto the elevator and enter the opened room to collect the Datapad
- Jump down and call the elevator by interacting with the left console
- Interact with the middle console
- Jump back on the elevator and go into the opened rooms again to insert the Datapad
- Complete the mission to receive the catalyst
This catalyst is fantastic for longer encounters where ammo management is crucial. I’ve found it incredibly useful in boss fights and high-level activities.
Burning Ambition Catalyst
The Burning Ambition Catalyst causes dealing sustained damage to scorch the target, and dealing damage to a scorched target inflicts more scorch. This creates a deadly chain reaction that can melt through even the toughest enemies.
The acquisition process for this catalyst involves finding specific datapads and consoles in the jumping puzzle section of the mission. It’s a bit involved, but definitely worth it for the damage potential.
Subroutine Recursion Catalyst
The Subroutine Recursion Catalyst makes Quicksilver nanites grant more health the greater your stacks of Nano-Assault are. Additionally, taking damage while Nano-Assault is active has a chance to generate nanites nearby.
This catalyst is all about survivability and sustainability. I love using it in activities where I know I’ll be taking a lot of damage, as it helps me stay in the fight longer without needing to retreat for health.
Tips for Efficient Node Hunting
After multiple runs through the Heliostat mission hunting for these nodes, I’ve picked up some tips that I think will help you:
- Take it slow – Don’t rush through the mission. The nodes are often hidden in corners or behind objects, so take your time to scan each area thoroughly.
- Use Wolfsbane’s light attack – I found that using light attacks is more efficient than heavy attacks for destroying the nodes. It’s faster and uses less ammo.
- Clear enemies first – In most cases, it’s easier to find the nodes if you clear the enemies in the area first. This lets you focus on searching without getting interrupted.
- Bring a friend – While you can do this solo, having a second set of eyes can make finding the nodes much easier. Plus, you can split up to cover more ground.
- Take screenshots – If you’re like me and might forget the exact locations, take screenshots of each node location. This will make future runs much faster.
- Listen for audio cues – The nodes make a distinct sound when you destroy them. If you hear that sound but don’t see a notification, you might have missed a node in that set.
Common Mistakes to Avoid
I made plenty of mistakes while figuring this out, so let me save you some trouble by highlighting the most common ones:
- Using the wrong weapon – I can’t tell you how many times I tried to shoot the nodes with other weapons before realizing they only respond to Wolfsbane. Always have Wolfsbane equipped when searching for nodes.
- Skipping nodes – It’s easy to get excited when you find one node and rush to the next area without checking for the others in the set. Make sure you find all three nodes in each set before moving on.
- Not completing the mission first – You need to complete the Heliostat mission at least once before the nodes will appear for you. Don’t waste time searching on your first run.
- Playing on too high difficulty – While you can find the nodes on any difficulty, higher difficulties mean more challenging enemies that can distract you from your search. Start with Normal difficulty until you know all the locations.
- Forgetting to upgrade – Once you’ve destroyed all the nodes, don’t forget to actually upgrade the weapon at the end of the mission. I’ve had friends who collected all the nodes but forgot to apply the upgrades.
The Payoff: Is It Worth It?
After all this effort, you might be wondering if upgrading Wolfsbane’s intrinsic is actually worth it. Let me tell you from personal experience: absolutely, yes.
The difference between the base version and the fully upgraded version is like night and day. The upgraded version feels more powerful, more responsive, and just overall more satisfying to use. I’ve used Wolfsbane in various activities – from strikes and Nightfalls to raids and dungeons – and the fully upgraded version consistently outperforms the base version.
The increased Impact means you’re dealing more damage with each swing, the improved Stability makes the weapon easier to control, and the enhanced Guard Resistance and Endurance mean you can block attacks more effectively. Plus, the increased Ammo Capacity and Generation means you spend less time worrying about running out of ammo and more time focusing on the fight.
But beyond the stats, there’s something incredibly satisfying about wielding a fully upgraded Exotic weapon. Knowing that you put in the effort to find all those hidden nodes and unlock the weapon’s full potential makes each kill feel more rewarding.
FAQ
How many Vex nodes do I need to find to fully upgrade Wolfsbane’s intrinsic?
You need to find and destroy a total of 9 Vex nodes, divided into 3 sets of 3 nodes each. Each set corresponds to one intrinsic upgrade level.
Can I destroy the Vex nodes with any weapon?
No, you can only destroy the Vex nodes using Wolfsbane itself. If you try to use any other weapon, you’ll get an “Immune” message.
Do I need to complete the Heliostat mission before I can find the Vex nodes?
Yes, you need to complete the Heliostat Exotic mission at least once before the Vex nodes will appear for you to find and destroy.
Can I get all the intrinsic upgrades in a single mission run?
Yes, you can find and destroy all 9 Vex nodes in a single run of the Heliostat mission, allowing you to unlock all three intrinsic upgrades at once.
What difficulty should I play on to find the Vex nodes?
You can find the Vex nodes on any difficulty, but I recommend starting with Normal difficulty so you can focus on finding the nodes without worrying about challenging enemies.
Do the Vex nodes respawn if I miss them?
Yes, the Vex nodes will respawn each time you run the Heliostat mission, so you can always go back and find any nodes you might have missed.
Can I get the intrinsic upgrades in a fireteam, or do I need to do it solo?
You can get the intrinsic upgrades in a fireteam. In fact, in a full fireteam, each player may only need to destroy one set of nodes to get all three upgrades, though this can vary.
What’s the difference between the intrinsic upgrades and the catalysts?
The intrinsic upgrades (Resurgence Directive II, III, and IV) enhance the weapon’s base stats like Impact, Stability, and Ammo Capacity. The catalysts provide additional unique effects like creating Orbs of Power or causing scorch damage.
Do I need to find the Vex nodes on Master difficulty to get the intrinsic upgrades?
No, you can find the Vex nodes on any difficulty. Master difficulty is only required for obtaining the catalysts, not the intrinsic upgrades.
How will I know when I’ve successfully unlocked an intrinsic upgrade?
You’ll receive a notification when you’ve destroyed all three nodes in a set, indicating that you’ve unlocked the corresponding intrinsic upgrade level.
Final Thoughts
Upgrading Wolfsbane’s intrinsic in Destiny 2 is definitely a process, but it’s one that’s well worth the effort. The weapon is already fantastic right out of the box, but with all three intrinsic upgrades, it becomes an absolute powerhouse that can handle anything the game throws at you.
I hope this guide has helped you understand the upgrade process and given you the confidence to tackle it yourself. Remember to take your time, explore thoroughly, and don’t get discouraged if you miss a node or two on your first try. Even I had to make multiple runs through the mission to find everything.
Now that you know how to upgrade Wolfsbane’s intrinsic, why not give it a try? Grab your axe, head into the Heliostat mission, and start hunting for those Vex nodes. Before you know it, you’ll be wielding a fully upgraded Wolfsbane that will make your enemies tremble.
Happy hunting, Guardian, and may your axe always strike true!