Let me tell you something – when I first got the Keeping the Memory quest from Celeste in ARC Raiders, I had no idea what I was getting myself into. I mean, sure, it sounded simple enough: find a missing helmet and return it to a memorial. But man, was I in for a surprise! After spending way too much time wandering around the Formicai Hills like a headless chicken, I finally figured it out. And now? I’m here to save you from that same frustration.
I’ve been playing ARC Raiders since launch day, and I’ve completed this quest multiple times across different characters. Trust me when I say that this guide will give you everything you need to knock out Keeping the Memory in record time. No more running around aimlessly, no more wondering if you’re in the right spot – just straight-up, no-nonsense directions from someone who’s been there, done that, and got the helmet to prove it.
What is the Keeping the Memory Quest?
Before we dive into the nitty-gritty of finding that elusive helmet, let me break down what this quest is all about. The Keeping the Memory quest is given by Celeste, one of the traders you’ll meet in Speranza. Now, I’ve got to be honest with you – Celeste is usually all business, but this quest hits different. There’s some real emotion behind it, which makes it one of the more meaningful quests in the game.
When you first talk to Celeste about this quest, she mentions something about losing her cool and the First Wave. It’s actually pretty touching once you get the full context. She’s not just sending you on another errand – she’s asking you to help honor someone who didn’t make it. That’s why I always make sure to complete this quest with the respect it deserves, even though it’s relatively simple compared to some of the other missions in ARC Raiders.
Quest Objectives
The Keeping the Memory quest breaks down into three main objectives that you need to complete in order:
- Reach the wreckage in the Formicai Hills
- Search for the missing helmet
- Return the helmet to the memorial
Simple, right? Well, don’t let the straightforward objectives fool you. I’ve seen plenty of players (myself included, I’ll admit) get stuck on that second step. The helmet has a nasty habit of blending into its surroundings, and if you don’t know exactly where to look, you could be searching for a while.
Why This Quest Matters?
Now, you might be thinking, “Why should I care about some random helmet quest when there are bigger fish to fry in ARC Raiders?” And honestly, that’s a fair question. But let me tell you why this quest is worth your time:
First off, the rewards are actually pretty decent for such a simple quest. You’ll get 5 Simple Gun Parts, 5 Duct Tape, and 5 Magnets. I don’t know about you, but I can never have enough crafting materials in this game. Those Simple Gun Parts alone make it worth the trip, especially if you’re trying to upgrade your weapons.
But more importantly, this quest is part of the larger story unfolding in ARC Raiders. Each quest you complete gives you more insight into the world and the characters who inhabit it. Plus, completing quests like this one helps you build reputation with the traders, which can unlock better gear and more lucrative missions down the line.
Preparing for the Quest
Before you head out to the Formicai Hills, there are a few things you should know to make your life easier. Trust me, I learned these lessons the hard way so you don’t have to.
Loadout Considerations
Here’s some good news right off the bat: you don’t need to extract anything to complete this quest. That means you can load in with a free loadout and not worry about losing any of your precious gear if things go sideways. I always recommend using a free loadout for quests like this because:
- You won’t lose any valuable equipment if you get eliminated
- You can focus entirely on the quest objectives without worrying about gathering resources
- It’s just less stressful overall, especially if you’re new to extraction games like ARC Raiders
That being said, you’ll still want to bring some basic gear to protect yourself. The Wreckage area can be pretty unpredictable, and you never know when you might run into hostile ARC machines or other players who aren’t feeling particularly friendly.
Recommended Gear
Based on my experience completing this quest multiple times, here’s what I’d recommend bringing:
| Gear Type | Recommendation | Why It’s Useful |
|---|---|---|
| Weapon | Any Assault Rifle | Good balance of damage and range for potential encounters |
| Shield | Basic Shield | You don’t need anything fancy, but some protection is nice |
| Healing | Medkits or Bandages | Just in case you take some damage along the way |
| Trinkets | Movement Speed Boost | Helps you get in and out quickly |
Remember, though – this isn’t a combat-focused quest, so don’t go overboard with your loadout. The goal is to get in, find the helmet, place it, and get out safely.
Best Time to Attempt
I’ve found that the best time to attempt this quest is during off-peak hours. The Wreckage area in Dam Battlegrounds can get pretty crowded since it’s also a popular spot for farming mushrooms and other resources. If you go during peak times, you might have to deal with other players who could either help you or, more likely, try to eliminate you.
Early morning or late at night (depending on your time zone) tends to be quieter. You’ll have a better chance of completing the quest without interruptions, which is always a plus in my book.
Getting to the Wreckage in Formicai Hills
Alright, let’s get to the meat of this guide – actually finding your way to the helmet. The first objective is to reach the wreckage in the Formicai Hills, and this is where a lot of players get confused. Don’t worry, though – I’ve got you covered.
Locating the Area on the Map
The Wreckage area is located in the Dam Battlegrounds map, specifically in the southern portion. When you first look at the map, it might not be immediately obvious where you need to go, so let me break it down for you:
- Open your map and fully zoom out
- Look for the Formicai Hills area – it’s on the bottom right side of the Dam Battlegrounds map
- Zoom in on the green portion of the map
- You should see “Wreckage” marked to the right side of the Scrap Yard
I know it sounds simple, but I can’t tell you how many times I’ve circled around the wrong area because I didn’t zoom in enough on the map. The key is to really zoom in close to see the location marker clearly.
Spawn Points and Routes
There are a few different spawn points that can work for reaching the Wreckage area, but I’ve found that some are definitely better than others. Here are my top recommendations:
Best Spawn Point: The one closest to the southern portion of the map. This will minimize your travel time and reduce the chances of running into trouble along the way.
Alternative Spawn: If the southern spawn isn’t available, any spawn on the right side of the map will work. You’ll just have a bit more ground to cover.
Avoid: Spawns on the left or northern parts of the map. These will require you to travel across the entire map, which is just asking for trouble in my experience.
What to Expect When You Arrive?
When you finally reach the Wreckage area, you’ll know it immediately. There’s a giant Derelict Baron Husk – basically a huge, destroyed ARC machine that looks like a spider – collapsed in the woods. This thing is impossible to miss, and it serves as your main landmark for the quest.
The area around the Baron Husk is relatively open, with some trees and vegetation. It’s not a particularly dangerous area in terms of ARC enemies, but you should still stay alert. I’ve had a few run-ins with scavenger drones and other mechanical nasties in this area, so it’s better to be safe than sorry.
One thing to keep in mind is that this area can be popular with other players, especially those farming mushrooms. I’ve had everything from peaceful encounters to outright firefights in this spot, so always be prepared for the unexpected.
Finding the Missing Helmet
Okay, this is the part where most players get stuck, and I totally get why. The helmet is hidden in a way that makes it blend in perfectly with its surroundings. But don’t worry – I’m going to tell you exactly where to look.
Exact Location of the Helmet
The helmet is hidden in a small bush or shrub just to the right of the Baron Husk wreckage. I know that sounds vague, so let me be more specific:
- Stand facing the giant Baron Husk wreckage
- Look to your right (the east side of the wreckage)
- You should see a small shrub or bush right in front of a large tree
- The helmet is hidden inside this shrub, partially obscured by the foliage
When you get close enough to the correct shrub, you’ll see a yellow interaction icon pop up. This is your clue that you’ve found the right spot. I can’t stress this enough – if you don’t see the yellow icon, you’re not in the right place. Keep looking around the right side of the Baron Husk until you find it.
Visual Cues to Look For
To make things even easier for you, here are some specific visual cues that will help you identify the correct location:
- Large Tree: There’s a big tree near the Baron Husk on the right side. The shrub with the helmet is right in front of this tree.
- Small Stone: Some guides mention a small stone near the shrub. While I haven’t always noticed this stone, it can be an additional landmark to help you pinpoint the exact location.
- Ground Cables: In some instances, I’ve seen cables or wires on the ground near the shrub. These can also serve as a visual reference point.
The key is to move slowly around the right side of the Baron Husk and keep your eyes peeled for that yellow interaction icon. It’s easy to miss if you’re moving too quickly or not paying close attention.
Common Mistakes to Avoid
I’ve seen players make the same mistakes over and over again when trying to find this helmet. Learn from their (and my) mistakes so you don’t waste your time:
Mistake #1: Looking in the Wrong Area Some players assume the helmet is actually inside the Baron Husk wreckage. It’s not. Don’t waste your time trying to climb inside or search the wreckage itself. The helmet is outside, in the shrub to the right.
Mistake #2: Not Getting Close Enough The interaction icon only appears when you’re very close to the correct shrub. If you’re standing too far back, you might miss it entirely. Get up close and personal with those shrubs!
Mistake #3: Searching During Combat If you’re in the middle of a fight with ARC machines or other players, you’re not going to be focused enough to find the helmet. Clear the area first, then take your time searching.
Mistake #4: Ignoring the Quest Marker Your quest marker will update and become more precise as you get closer to the helmet location. Pay attention to these updates – they’re there to help you!
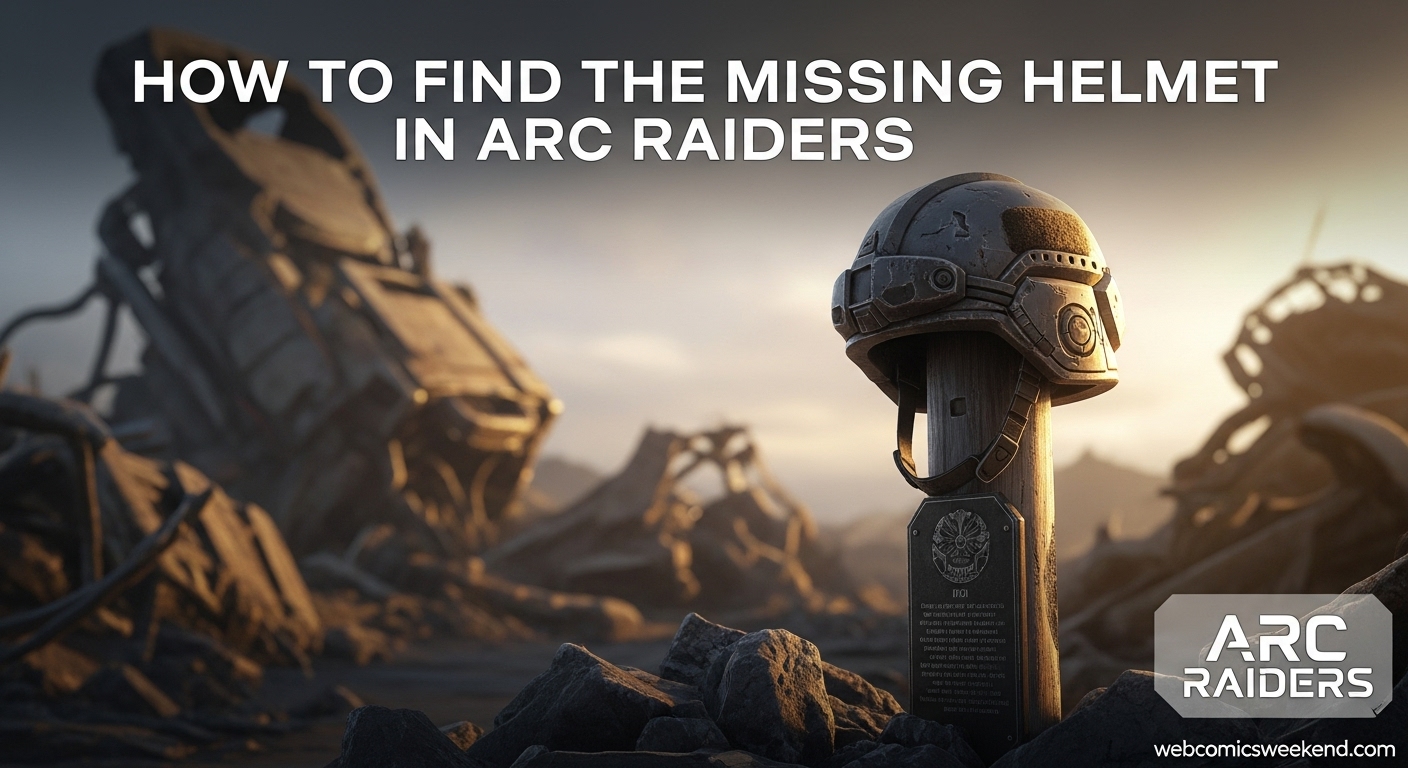
Placing the Helmet on the Memorial
Once you’ve finally found and picked up the helmet, you’re not done yet. The final step is to return it to the memorial, which is easier than it sounds but can still be confusing if you don’t know what to look for.
Locating the Memorial Pole
After picking up the helmet, you need to place it on a small memorial pole. Here’s how to find it:
- From the shrub where you found the helmet, look around for a small metal pole or bar sticking out of the ground
- When you approach the correct pole, you’ll see a blue holographic outline of a helmet appear above it
- This blue outline is your indicator that you’ve found the right place to put the helmet
The memorial pole is typically very close to where you found the helmet – usually just a few steps away. In my experience, it’s often right beside the shrub where the helmet was hidden.
How to Place the Helmet?
Placing the helmet is straightforward once you’ve found the memorial pole:
- Approach the pole with the blue holographic helmet outline
- You’ll get an interaction prompt to place the helmet
- Press the appropriate button/key to place the helmet
- Watch as your character places the helmet on the pole
And that’s it! Once you’ve placed the helmet, the quest will update and mark itself as completed. It’s a simple but meaningful moment, especially when you consider the story behind the quest.
Extracting Safely
Now that you’ve completed the quest objectives, it’s time to extract and return to Speranza to claim your rewards. The Wreckage area isn’t too far from several extraction points, but I have a favorite that I’d recommend:
Recommended Extraction Point: Red Lakes Balcony Lift to the northeast
This extraction point is relatively close to the Wreckage area, but there are a few things to keep in mind:
- ARC Patrols: This area tends to have ARC machines patrolling regularly. I’ve been ambushed more than once while trying to extract, so stay alert.
- Other Players: The Red Lakes Balcony Lift is a popular extraction point, which means you might encounter other players. Some might be friendly, others… not so much.
- Approach Carefully: Don’t just sprint to the extraction point. Take your time, scout the area, and make sure the coast is clear before making your move.
If the Red Lakes Balcony Lift looks too hot, there are other extraction points you can use, but they’ll require more travel time. I’d rather take a bit longer to extract safely than rush into a potential firefight.
Quest Rewards and Benefits
Alright, you’ve completed the quest and made it back to Speranza in one piece. Now it’s time to collect your rewards and see what all your hard work has earned you.
Immediate Rewards
For completing the Keeping the Memory quest, you’ll receive:
- 5x Simple Gun Parts: These are incredibly useful for weapon upgrades and crafting. I’m always running low on these, so getting five at once is a nice bonus.
- 5x Duct Tape: Another essential crafting material. You can never have too much duct tape in ARC Raiders – it’s used in all sorts of recipes and repairs.
- 5x Magnets: These might seem less exciting, but they’re actually quite valuable for certain crafting recipes and upgrades.
While these rewards might not seem as flashy as some other quest rewards, trust me when I say they’re all useful. Simple Gun Parts alone make this quest worth doing, especially if you’re trying to upgrade your arsenal.
Long-Term Benefits
Beyond the immediate rewards, completing the Keeping the Memory quest has some long-term benefits that are worth considering:
Reputation with Celeste: Each quest you complete for Celeste increases your reputation with her. Higher reputation can unlock better gear, more lucrative quests, and special dialogue options. I’ve found that building good relationships with all the traders in Speranza pays off in the long run.
Story Progression: This quest is part of the larger narrative unfolding in ARC Raiders. Completing it gives you more insight into the world, its history, and the characters who inhabit it. If you’re like me and enjoy the lore of the games you play, this is a significant benefit.
Map Knowledge: Even though this quest is relatively simple, going through it helps you become more familiar with the Dam Battlegrounds map. Better map knowledge means you’ll be more efficient in future missions, which can save you time and keep you alive.
Comparison to Other Quests
In the grand scheme of ARC Raiders quests, Keeping the Memory is definitely on the simpler side. It’s not as complex as quests like Medical Merchandise or Reduced to Rubble, which can have confusing objectives and multiple steps. However, I actually appreciate its simplicity. Sometimes it’s nice to have a straightforward quest that you can complete quickly without too much stress.
That being said, the rewards are comparable to other simple quests in the game. You’re not going to get legendary gear or massive amounts of resources, but you will get useful crafting materials that will help you in the long run.
Tips and Tricks for Success
I’ve completed this quest enough times to have picked up some tips and tricks that can make your life easier. These aren’t essential, but they can definitely help you complete the quest more efficiently and safely.
Speed Running the Quest
If you’re trying to complete this quest as quickly as possible (maybe you’re trying to knock out multiple quests in one run), here’s how I do it:
- Use a Free Loadout: As I mentioned earlier, you don’t need any special gear for this quest, so save your good equipment for missions where it matters.
- Spawn Close: Try to get a spawn point as close to the southern part of the map as possible. This will minimize your travel time.
- Go Directly to the Wreckage: Don’t get sidetracked by other points of interest or resource nodes. Stay focused on the objective.
- Know Exactly Where to Look: Now that you’ve read this guide, you know exactly where the helmet is. Head straight for the shrub on the right side of the Baron Husk.
- Extract Immediately: Once you’ve placed the helmet, don’t stick around. Head straight for your chosen extraction point.
Using this method, I can complete the entire quest in under 10 minutes, which is pretty efficient for ARC Raiders.
Safety First Approach
On the other hand, if you’re more concerned about safety than speed, here’s how I recommend approaching the quest:
- Bring Some Backup: While you don’t need heavy gear, having a decent weapon and shield can make a big difference if you run into trouble.
- Scout the Area: Before approaching the Wreckage, take some time to observe from a distance. Look for other players, ARC machines, or potential threats.
- Clear the Area: If there are any enemies in the vicinity, deal with them before starting your search for the helmet.
- Move Carefully: Don’t sprint around the area. Move slowly and deliberately, keeping an eye out for threats.
- Have an Escape Plan: Always know where your nearest extraction point is and have a route planned in case you need to make a quick exit.
This approach might take a bit longer, but it’s much safer, especially if you’re new to ARC Raiders or if you’re carrying valuable gear.
Common Problems and Solutions
Even with a guide, things can sometimes go wrong. Here are some common problems I’ve encountered (or heard about from other players) and how to solve them:
Problem: The Helmet Isn’t There Sometimes you’ll go to the right location, but the helmet won’t be there. This can happen if another player recently completed the quest and the item hasn’t respawned yet.
Solution: Wait a few minutes for the item to respawn, or try leaving the area and coming back. In my experience, quest items typically respawn within 5-10 minutes.
Problem: Can’t Find the Memorial Pole You’ve got the helmet, but you can’t find where to place it.
Solution: The memorial pole is very close to where you found the helmet. Look for a small metal pole with a blue holographic helmet outline above it. If you still can’t find it, try dropping the helmet and picking it up again – sometimes this can reset the quest markers.
Problem: Getting Ambushed at Extraction You’ve completed the quest, but you keep getting killed before you can extract.
Solution: Try using a different extraction point, or approach the area more carefully. Scout it out from a distance first, and consider using stealth to avoid detection.
Frequently Asked Questions
I’ve been playing ARC Raiders for a while now, and I’ve heard a lot of questions about the Keeping the Memory quest. Here are some of the most common ones, along with my answers based on personal experience.
How long does the Keeping the Memory quest take to complete?
From my experience, the Keeping the Memory quest typically takes between 10-20 minutes to complete, depending on your spawn point and whether you run into any complications along the way. If you’re speed running it and get a good spawn, you can probably do it in under 10 minutes. On the other hand, if you’re being cautious or run into other players, it might take closer to 20 minutes.
Can I complete the Keeping the Memory quest solo?
Absolutely! I’ve completed this quest solo multiple times, and it’s actually one of the better quests for solo players. The objectives are straightforward, you don’t need to extract any resources, and the area isn’t particularly dangerous in terms of ARC enemies. That being said, you should still be careful of other players, as they can be unpredictable regardless of whether you’re solo or in a group.
What happens if I die while doing the Keeping the Memory quest?
If you die while doing the Keeping the Memory quest, you’ll lose any progress you’ve made on that particular attempt. However, the quest itself will remain in your log, and you can try again on your next run. This is why I always recommend using a free loadout for this quest – if you die, you won’t lose any valuable gear.
Is the Keeping the Memory quest worth doing?
In my opinion, yes, it’s definitely worth doing. The rewards are useful, especially the Simple Gun Parts, and it’s a relatively quick and easy quest to complete. Plus, it’s part of the larger story, so if you’re interested in the lore of ARC Raiders, you’ll want to complete it. It’s not the most exciting quest in the game, but it’s a solid one to knock out when you have some spare time.
Can I do the Keeping the Memory quest multiple times?
Yes, you can complete the Keeping the Memory quest multiple times with different characters. However, you can only complete it once per character. Once you’ve completed it on a specific character, it won’t be available again for that character.
What level should I be before attempting the Keeping the Memory quest?
The Keeping the Memory quest doesn’t have any specific level requirements, and I’ve seen players complete it at various levels. That being said, I’d recommend being at least level 5 or so before attempting it, just so you have some basic gear and familiarity with the game mechanics. Lower-level players might struggle if they run into hostile ARC machines or other players.
Are there any prerequisites for the Keeping the Memory quest?
As far as I can tell, there aren’t any strict prerequisites for the Keeping the Memory quest. You don’t need to complete any other quests first, and you don’t need to have a certain level of reputation with Celeste. However, the quest might not appear immediately when you first start playing the game – I’ve found that it typically becomes available after you’ve completed a few other basic quests and have spent some time in Speranza.
Related Content
If you found this guide helpful, you might want to check out some of our other ARC Raiders content here on WebComicsWeekend.com. We’ve got a ton of guides and articles that can help you get the most out of your time in the game:
- Our Presence Up There Quest Guide – Another Celeste quest that’s a bit more complex but equally rewarding
- How to Upgrade Your Workshop in ARC Raiders – Everything you need to know about finding Laboratory Reagents and upgrading your base
- Finding Toasters in ARC Raiders – Yes, you read that right. Toasters are actually important in this game, and we’ll show you why
- Communication Hideout Quest Guide – A guide to another Shani quest that can be tricky if you don’t know what you’re doing
- Troubleshooting ARC Raiders Login Errors – If you’re having trouble getting into the game, this guide has got you covered
We’re constantly adding new content, so be sure to bookmark our site and check back regularly for the latest ARC Raiders guides, tips, and tricks.
Final Thoughts
The Keeping the Memory quest might not be the most exciting or challenging quest in ARC Raiders, but it’s definitely one worth doing. It’s straightforward, the rewards are useful, and it adds a nice touch of story to the game. Plus, now that you’ve got this guide, you should be able to complete it quickly and efficiently.
I hope this guide has been helpful for you. I’ve tried to include everything I’ve learned from completing this quest multiple times, so you can benefit from my experience (and my mistakes). If you have any questions or if there’s anything I missed, feel free to drop a comment below. I’m always happy to help fellow Raiders out.
Remember, the key to success in ARC Raiders is preparation, patience, and persistence. Don’t get discouraged if things don’t go perfectly the first time – that’s part of the fun of extraction games. Learn from your mistakes, adapt your strategies, and most importantly, have fun out there.
Good luck finding that helmet, and I’ll see you in the wastes!
P.S. If you found this guide helpful, do me a favor and share it with your fellow Raiders. The more of us who know the ropes, the better we’ll all be at surviving and thriving in the world of ARC Raiders. And hey, if you see me out there in the Wreckage area, feel free to say hi – I’m always happy to team up with fellow readers!