Let me tell you something – when I first stumbled upon the Lost in Transmission quest in ARC Raiders, I had no idea what I was getting myself into. I mean, sure, it sounded simple enough: “Go to the Control Tower, climb to the top, and establish a connection.” But as anyone who’s played this game knows, nothing in ARC Raiders is ever that straightforward, especially when you’re dealing with Shani’s quests.
I’ve spent countless hours grinding through this quest, dying more times than I’d like to admit, and learning all the little tricks that make the difference between success and another frustrating trip back to Speranza empty-handed. So grab a seat, and let me walk you through everything I’ve learned about completing Lost in Transmission like a pro.
What Exactly Is the Lost in Transmission Quest?
Before we dive into the nitty-gritty details, let’s get on the same page about what this quest actually is. Lost in Transmission is one of Shani’s late-game quests in ARC Raiders, and let me tell you, it’s not something you want to tackle when you’re just starting out.
The quest giver, Shani, is that eagle-eyed head of security for Speranza who always seems to have contingency plans for her contingency plans. She’s the resident ARC expert, and when she gives you a quest, you know it’s going to be important – and probably pretty challenging too.
The Quest Objectives (The Simple Version)
At first glance, the objectives seem pretty straightforward:
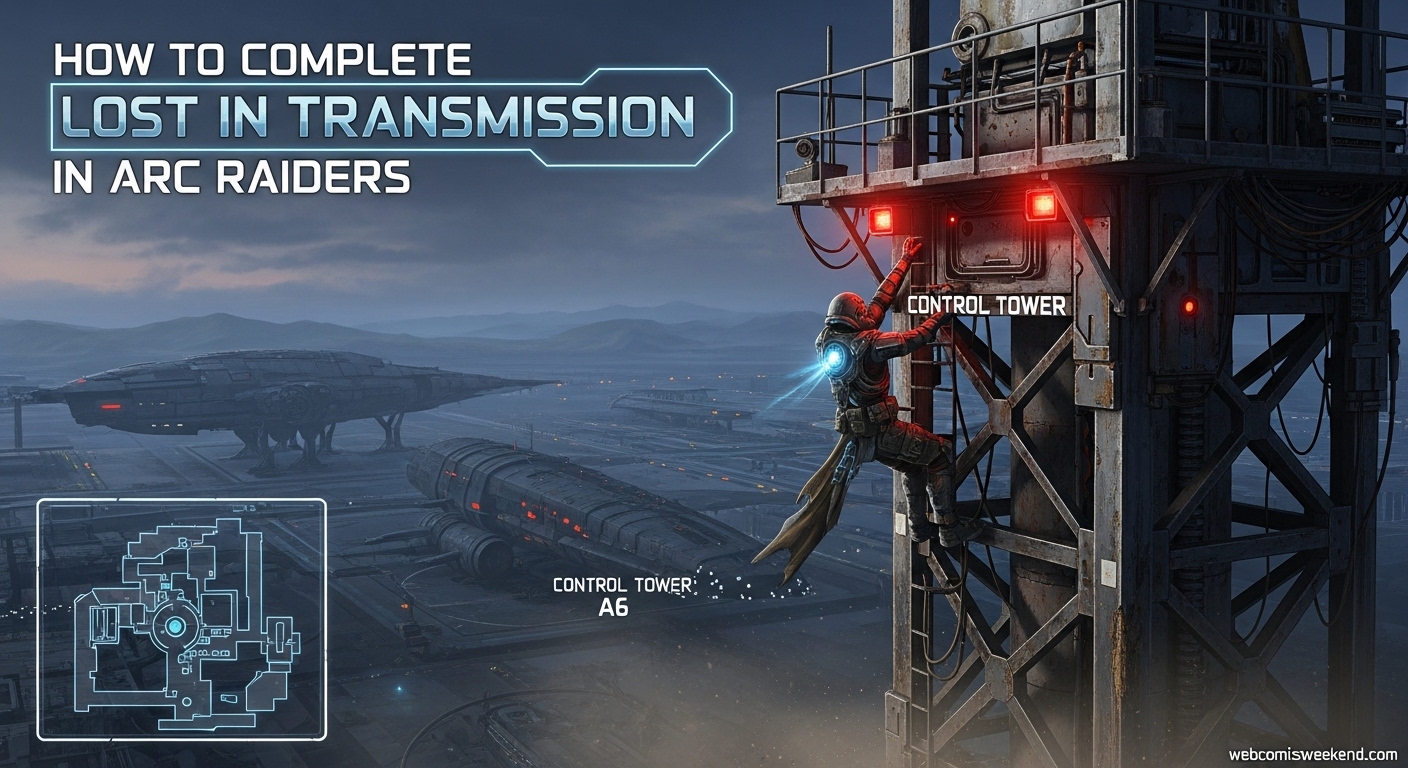
- In one round, visit the Control Tower A6
- Reach the top of Control Tower A6
- Establish a connection from the terminal in Control Tower A6
But here’s the kicker that tripped me up multiple times: you have to complete ALL of these objectives in a single run. No extracting early, no dying and coming back – it’s all or nothing. And trust me, nothing feels worse than getting to the top of that tower only to get wiped out by some ARC enemies right before you can hit that terminal.
The Biggest Challenge: Getting That Damn Spaceport Control Tower Key
Okay, let’s talk about the elephant in the room – the Spaceport Control Tower Key. This is, without a doubt, the most frustrating part of the entire quest, and I spent days trying to figure out the best way to get my hands on one.
What the Key Does and Why You Need It?
The Spaceport Control Tower Key is exactly what it sounds like – it unlocks the door inside Control Tower A6 that gives you access to the zipline leading to the top. Without this key, you can stare at that tower all day long, but you’re not getting anywhere near the terminal.
Where to Find the Key (Based on My Experience)
Now, here’s where things get interesting. The key is a random drop, which means there’s no guaranteed spawn location. However, after running this quest more times than I can count, I’ve noticed some patterns and locations where the key seems to drop more frequently.
Dam Battlegrounds – Your Best Bet
In my experience, the Dam Battlegrounds map is by far the most reliable place to find the Spaceport Control Tower Key. Specifically, I’ve had the most luck in these areas:
Ruby Residence: This building in the northeast section of Dam Battlegrounds has been a goldmine for me. I’d say about 40% of the keys I’ve found came from here. The building has plenty of cabinets and drawers to loot, and for some reason, the key spawn rate seems higher here than anywhere else.
Pale Apartments: Another solid choice, especially if you’re just starting your search. The apartments have multiple floors with lots of containers to check, and I’ve found several keys here over the course of my grinding.
Research and Administration Building: This one’s a bit riskier since it tends to be more populated with other players (and therefore more contested), but the payoff can be worth it. I’ve found some of my best loot here, including multiple Spaceport Control Tower Keys.
Pro Tips for Key Hunting
Let me share some strategies I’ve developed specifically for hunting this elusive key:
- Play During Off-Peak Hours: I’ve found that I have much better luck finding keys when there are fewer players on the server. Early morning or late night sessions have been my most productive.
- Focus on Residential Areas: The key seems to spawn more frequently in areas with lots of residential containers – dressers, cabinets, nightstands, that sort of thing. Don’t waste your time on industrial containers.
- Bring a Looting Build: When I’m specifically key hunting, I switch to a build focused on looting speed and inventory space. More containers looted per minute means better chances of finding that key.
- Check Every Container: I know it’s tedious, but I’ve found keys in the most random containers – including ones I almost skipped because they looked “too obvious.” Leave no stone unturned.
- Use Audio Cues: The key makes a distinct sound when you pick it up. After a while, you’ll start recognizing it, and believe me, that sound is music to your ears.
Once You Have the Key: Preparing for the Tower Run
Congratulations! You’ve got the key. Now what? Well, don’t get too excited just yet – getting the key was only half the battle. Now you need to actually complete the quest, and that requires some serious preparation.
Safe Pocket Is Your Best Friend
Here’s a mistake I made early on that cost me multiple keys: not putting them in my Safe Pocket. The Safe Pocket is a special inventory slot that protects your items even if you get knocked out or killed before extracting. Trust me, there’s nothing worse than finally getting a key, only to lose it because some other player decided your face looked better with their bullets in it.
Always, ALWAYS put your Spaceport Control Tower Key in your Safe Pocket as soon as you find it. I’ve made this a habit, and it’s saved me countless headaches.
Loadout Considerations
When I’m preparing for a Control Tower run, I switch up my loadout significantly. This isn’t your average loot run – you’re going to a known hotspot, and you need to be prepared for anything.
Weapon Loadout
Based on my experiences, here’s what I recommend:
Primary Weapon – Mid to Long Range: You’ll want something that can reach out and touch enemies from a distance. I’ve had great success with:
- Marksman rifles for precision shots
- Battle rifles for versatility
- Designated marksman rifles (DMRs) for that sweet spot between range and firepower
Secondary Weapon – Close Quarters: Once you’re inside that tower, things can get tight and personal. I always bring:
- A submachine gun for close-quarters combat
- Or a shotgun if you’re feeling brave and want maximum stopping power
Sidearm: Never underestimate a good sidearm. I keep a reliable pistol as my last resort, and it’s saved me more times than I can count.
Armor and Equipment
For armor, I go with a balanced setup – enough protection to survive a few hits, but not so much that I’m moving like a turtle. Mobility is key when you’re trying to make a quick escape or dodge incoming fire.
I also make sure to bring:
- Plenty of medical supplies (you’ll need them)
- Ammo for all my weapons (running out mid-fight is not fun)
- Some grenades for crowd control
- A deployable cover for when things get really hairy
The Control Tower A6 Location and Approach
Now let’s talk about where you’re actually going. Control Tower A6 is located right in the middle of the Spaceport map, which is the third map you unlock in ARC Raiders.
Why This Location Is Problematic?
I need to be honest with you – Control Tower A6 is a hotspot. And I don’t mean that in a good way. This is one of the most contested areas in the entire game, especially on weekends when more players are online. Everyone knows about this tower, and everyone wants what’s inside – including the high-tier loot that spawns there.
Timing Your Approach
Through trial and error, I’ve learned that timing is everything when approaching Control Tower A6. Here are my strategies:
Early Round Approach: If you can get there right when the match starts, you might beat the rush. The downside is that you’ll have less time to prepare and might run into better-equipped players who also had the same idea.
Mid-Round Timing: This is my preferred approach. By the middle of the round, some of the initial chaos has died down, and you might catch other players off-guard as they’re extracting or moving to other objectives.
Late Round Push: Risky, but sometimes effective. If you wait until most players have extracted, you might have the place to yourself. The danger is that the remaining players are often the most skilled and best-equipped.
Stealth vs. Aggression
I’ve tried both approaches, and honestly, it depends on the situation:
Stealth Approach: Move carefully, use cover, avoid unnecessary engagements. This works well when the area is heavily contested and you’re outmatched.
Aggressive Approach: Go in fast and hard, clear out any threats quickly. This is better when you’re well-equipped and confident in your combat skills.
Personally, I prefer a balanced approach – stealthy when I need to be, but ready to fight when the situation demands it.
Inside the Tower: Step-by-Step Walkthrough
Alright, you’ve got your key, you’re geared up, and you’ve made it to Control Tower A6. Now comes the moment of truth. Let me walk you through exactly what to do once you’re inside.
Step 1: Entering the Tower
When you approach Control Tower A6, you’ll see the main entrance on the ground floor. This is where you need to go. Don’t try to be clever and look for alternative entrances – I’ve tried, and they either don’t exist or are dead ends.
Once you’re at the main entrance, you’ll see a metal door that requires the Spaceport Control Tower Key. This is it – the moment you’ve been preparing for. Use the key, and the door will open, revealing the zipline that takes you to the top.
Step 2: The Zipline Ride
The zipline is actually pretty straightforward – just hop on and ride it up. However, I’ve learned to be cautious during this part. You’re exposed and vulnerable while on the zipline, so I always:
- Check the area above me before getting on
- Be ready to jump off if I start taking fire
- Have my weapon ready as soon as I reach the top
Step 3: The Control Room
When you reach the top, you’ll find yourself in the main control room. The terminal you need to interact with is located to the left as you enter. It’s usually pretty obvious – it’s the big computer console with all the screens and blinking lights.
But here’s where things can get tricky. This area is often guarded by ARC enemies, and sometimes other players who had the same idea as you. I always:
- Clear the room systematically before approaching the terminal
- Check corners and hiding spots
- Listen for movement or enemy sounds
- Have an escape route planned
Step 4: Establishing the Connection
This is the final step, and it’s crucial that you get it right. When you interact with the terminal, you’ll need to hold the interact button to start transmitting the signal and establish the network connection.
Critical Warning: If you take damage or move out of the interaction radius during this process, it will interrupt the connection, and you’ll have to start over. I’ve had this happen to me multiple times, and it’s incredibly frustrating.
To avoid this, I recommend:
- Clearing all threats in the immediate area before starting
- Using deployable cover if you have it
- Having teammates watch your back if you’re playing in a group
- Being prepared to fight while maintaining the connection
Combat Strategies for the Control Tower
Let’s talk about what to do when things inevitably go wrong (because they always do in ARC Raiders). The Control Tower, especially the upper levels, can be a combat nightmare if you’re not prepared.
Dealing with ARC Enemies
The ARC enemies in this area are no joke. From my experience, you’ll typically encounter:
Wasps: These flying annoyances can be deadly if you let them swarm you. I prioritize taking them out first with my mid-range weapon.
Hornets: Bigger, tougher, and more dangerous than Wasps. I save my heavier firepower for these guys.
Snitches: These scouts can call in reinforcements if you don’t take them out quickly. I always make them a priority target.
Player Combat Considerations
Let’s be real – sometimes the biggest threat isn’t the ARC enemies, it’s other players. The Control Tower is a high-value target, and other players will be looking to take you out and claim your loot.
Sound Discipline: I’ve learned that making too much noise is a death sentence. Use suppressed weapons when possible, and avoid unnecessary firefights that can attract attention.
Positioning: Always have cover nearby, and try to control the choke points. The upper levels of the Control Tower have some good defensive positions if you know where to look.
Escape Routes: Before engaging in any fight, I always identify at least two escape routes. Getting cornered in this tower is a quick way to end your run.
Extracting and Claiming Your Reward
Assuming you’ve successfully established the connection (congratulations, by the way!), now you need to extract and claim your reward from Shani.
Extraction Strategy
The tower might be secure for now, but that can change in an instant. I don’t linger any longer than necessary once I’ve completed the objective. My extraction strategy usually involves:
- Moving quickly but cautiously away from the tower
- Using cover and staying alert for threats
- Heading to the nearest extraction point
- Being extra vigilant during the extraction process itself (many players get ambushed right as they’re extracting)
The Reward: Snap Hook
Once you make it back to Speranza, head over to Shani to claim your reward. For completing the Lost in Transmission quest, you’ll receive:
1x Snap Hook
Now, I know what you’re thinking – “Just one Snap Hook? After all that work?” And honestly, I felt the same way the first time I completed this quest. But let me tell you, the Snap Hook is actually more valuable than it might seem at first glance. It’s a useful traversal tool that can help you reach otherwise inaccessible areas, and it comes in handy for other quests and exploration.
2026 Advanced Tips and Tricks
Alright, so you’ve got the basics down. But if you want to really master this quest and complete it consistently, here are some advanced tips I’ve picked up through my many, many attempts.
Team Coordination (If Playing with Others)
If you’re not going solo, team coordination can make this quest significantly easier. Here’s how I approach it with my squad:
Role Assignment: I always assign specific roles – one person on point, one watching the rear, one dedicated to terminal interaction, and others providing overwatch.
Communication: Constant communication is key. I call out enemy positions, resource locations, and any potential threats I spot.
Covering Fire: When someone is interacting with the terminal, the rest of the team provides covering fire and watches all approaches.
Solo Play Strategies
For my fellow solo players out there, I feel your pain. This quest is significantly more challenging alone, but it’s definitely doable. Here are my solo-specific strategies:
Patience is Everything: I take my time, move slowly, and never rush into situations I’m not sure about.
Use the Environment: I’ve learned to use every piece of cover, every corner, and every environmental feature to my advantage.
Know When to Retreat: Sometimes the smartest move is to disengage and live to fight another day. I’ve learned to recognize when I’m outmatched and when to cut my losses.
Resource Management
Proper resource management can make or break your Control Tower run. Here’s what I’ve learned:
Ammo Conservation: I make every shot count and avoid wasting ammo on unnecessary targets.
Medical Supplies: I keep a close eye on my health and use medical supplies strategically, not just whenever I take a little damage.
Utility Items: I save my grenades, deployable cover, and other utility items for critical moments when they can make the biggest difference.
Common Mistakes to Avoid
Let me save you some frustration by sharing the most common mistakes I see players (and myself, early on) make when attempting this quest.
Mistake #1: Not Checking the Area Before Entering
I can’t tell you how many times I’ve rushed into the Control Tower without properly scouting the area first, only to get ambushed by enemies or other players. Always take a few minutes to observe the area and plan your approach.
Mistake #2: Ignoring Audio Cues
The audio in ARC Raiders is incredibly informative if you know what to listen for. I’ve learned to recognize the sounds of different enemies, weapon fire, and player movements. Ignoring these audio cues is a recipe for disaster.
Mistake #3: Poor Inventory Management
Bringing the wrong gear or running out of critical supplies at the worst possible moment has cost me more successful runs than I’d like to admit. Plan your loadout carefully and manage your resources throughout the run.
Mistake #4: Getting Greedy
The Control Tower has some great loot, and I’ve been tempted to stick around and grab everything after completing the objective. This greed has gotten me killed more times than I can count. Complete the quest, grab what you can quickly, and get out.
Frequently Asked Questions
How long does it typically take to complete Lost in Transmission?
From my experience, a successful run usually takes me anywhere from 20-40 minutes, depending on how contested the area is and how lucky I get with the key spawn. However, I’ve had runs that took much longer due to having to wait for the area to clear out or having to make multiple attempts.
Can I complete Lost in Transmission solo, or do I need a team?
Absolutely! I’ve completed this quest solo multiple times. It’s definitely more challenging alone, but it’s very doable if you’re patient, well-prepared, and smart about your approach. In fact, I sometimes prefer going solo because it means I don’t have to worry about coordinating with teammates.
What happens if I die after establishing the connection but before extracting?
Unfortunately, if you die after establishing the connection but before extracting, you’ll fail the quest and have to start over. The connection establishment only counts if you successfully extract afterward. This is why I always recommend clearing the area thoroughly before attempting to extract.
Is the Spaceport Control Tower Key consumed when I use it?
No, the key isn’t consumed when you use it to open the door in Control Tower A6. This means you can potentially complete the quest multiple times if you find multiple keys, though the quest itself only needs to be completed once for the reward.
What’s the best time of day to attempt this quest?
Based on my experience, early morning (6-9 AM server time) tends to be the best time to attempt this quest. There are typically fewer players online during these hours, which means less competition for the Control Tower and fewer hostile encounters. Late night sessions (11 PM – 2 AM) can also be good for the same reason.
Can I complete other objectives while working on Lost in Transmission?
Absolutely! I often combine this quest with other objectives in the Spaceport area to maximize my efficiency. Just be careful not to take on too much at once, as it can increase the risk of failing the quest.
Final Thoughts
Look, I’m not going to lie to you – the Lost in Transmission quest in ARC Raiders is challenging. It’s frustrating, it’s time-consuming, and it will test your patience like few other quests in the game. But there’s something incredibly satisfying about finally completing it after multiple attempts.
When I first started this quest, I was ready to give up after my fifth failed attempt. But something kept me coming back – maybe it was the challenge, maybe it was the promise of that Snap Hook, or maybe it was just sheer stubbornness. Whatever it was, I’m glad I stuck with it.
The feeling of finally reaching the top of that tower, establishing that connection, and making it back to Speranza to claim my reward was one of the most satisfying gaming experiences I’ve had in a long time. And now, having completed it multiple times, I can confidently say that I’ve mastered this quest.
So take it from someone who’s been there, done that, and got the Snap Hook to prove it – you can complete this quest. It might take you a few tries, you might get frustrated, and you might want to throw your controller across the room a time or two. But trust me, it’s worth it.
Good luck out there, Raider. I’ll see you on the Spaceport.
P.S. If you found this guide helpful, do me a favor and bookmark it for future reference. And if you have any tips or tricks that I missed, drop them in the comments below – I’m always looking to improve my strategies!