Let me tell you something – when I first jumped into the Locked Gate event in ARC Raiders, I had absolutely no clue what I was doing. I ran around like a headless chicken for 20 minutes before I finally figured out the whole system. But hey, that’s why I’m here today – to save you from the same headache and give you the complete lowdown on how to crush this event like a pro.
The Locked Gate event dropped with the North Line update back in November 2026, and let me tell you, it’s been a game-changer for us raiders. I’ve spent countless hours in this event, learned all the tricks, and I’m ready to share everything I’ve discovered. So grab your gear, and let’s dive into this comprehensive guide that’ll have you unlocking that gate and grabbing the loot in no time.
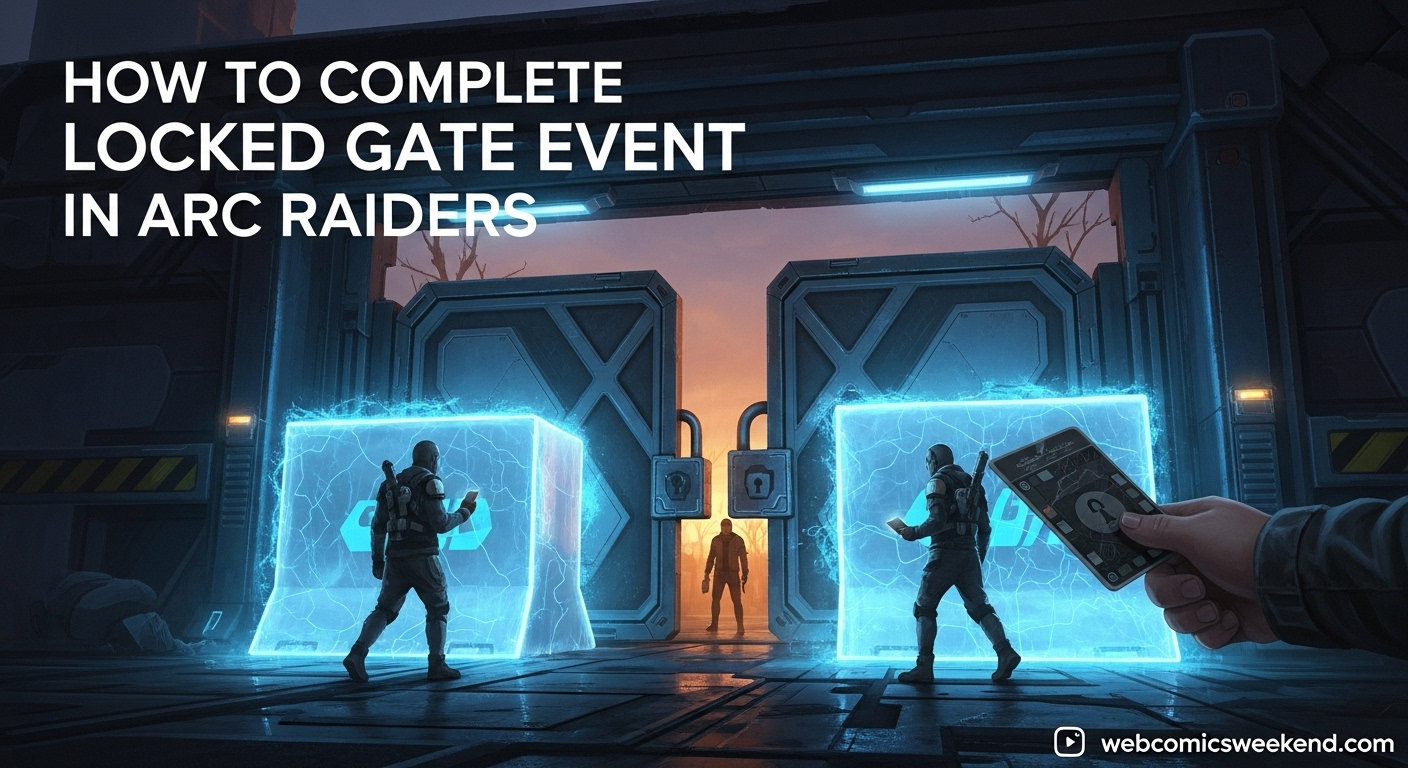
What Exactly Is the Locked Gate Event?
Picture this: you’re dropping into The Blue Gate map, but something’s different. The usual entry points are sealed, the underground tunnels are blocked off, and there’s this massive locked gate right in the center that’s just begging to be opened. That’s the Locked Gate event in a nutshell.
From what I’ve gathered through my runs, some clandestine group has activated the emergency shutdown protocol, and it’s up to us raiders to override it. The whole thing feels like something straight out of a sci-fi movie, and honestly? It’s one of the most exciting events I’ve played in ARC Raiders.
Here’s the deal with this event:
- Map: Only available on The Blue Gate
- Duration: 40 minutes (double the usual time)
- Trials Multiplier: 2X (meaning double the progress)
- Special Restrictions: No Raider Hatches, no underground tunnels, fewer Return Points
I remember my first time seeing the “Locked Gate” modifier pop up in the lobby. I was both excited and nervous – excited because it meant something new and challenging, nervous because I had no idea what I was getting myself into. But now? I get pumped every time I see it, because I know exactly how to handle it.
The Big Picture: Understanding Your Mission
Before we dive into the nitty-gritty details, let me break down exactly what you need to accomplish. The Locked Gate event is essentially a two-phase mission:
Phase 1: Collect the Security Codes You need to find 4 security codes scattered across the map. These aren’t just lying around in the open – you’ll need to search specific locations and loot containers to find them.
Phase 2: Unlock the Gate Once you have all 4 codes, head back to the Gate Control Room, input them, and watch as the central gate at Checkpoint opens up to reveal some sweet loot.
Sounds simple enough, right? Well, here’s where it gets interesting. You’re not the only one looking for these codes. Every other raider in the match is hunting for the same things, and trust me, not all of them are friendly. I’ve had more than a few firefights break out over who gets to the codes first.
Phase 1: Hunting Down Those Security Codes
Alright, let’s get into the meat of this guide. The first phase is all about finding those 4 security codes, and I’m going to break this down for you step by step.
Step 1: Locate the Gate Control Room
Before you even think about searching for codes, you need to know where to look. Head to the Gate Control Room inside the Warehouse Complex. This is your mission control for the entire event.
The Warehouse Complex is pretty easy to spot – it’s right in the middle of the map, between the central and northern areas. The Control Room itself is in a blue building that sits on top of the Checkpoint gate structure. You can’t miss it, especially since it’s marked as a medium loot area with yellow borders on your map.
When I first started, I wasted so much time running around the wrong buildings. Let me save you that frustration – look for the building with multiple computer consoles inside. That’s your Control Room.
Step 2: Identify Your Target Locations
Once you’re inside the Control Room, interact with the four computer systems. Each one will show you the location of a security code. Here’s the crucial part – these locations can vary between matches, so you always need to check the computers first.
However, based on my experience, the codes are usually found at these four POIs:
| Location Name | Description | Difficulty Level | Special Notes |
|---|---|---|---|
| Raider’s Refuge | Medium loot area | Easy | Usually has 1-2 enemies |
| Pilgrim’s Peak | High loot area | Hard | Protected by 2 Rocketeers |
| Reinforced Reception | Medium loot area | Medium | Multiple containers to search |
| Ancient Fort | High loot area | Hard | Often crowded with other players |
I’ve learned that Pilgrim’s Peak is usually the most dangerous spot. Those Rocketeers can really mess you up if you’re not prepared. I always make sure I’m fully geared before heading there.
Step 3: The Search Strategy
Now comes the fun part – actually finding those codes. Here’s what I’ve learned from dozens of runs:
The codes spawn in random containers at each location. This means you need to be thorough in your search. I’m talking about checking:
- Supply crates
- Weapon lockers
- Electronic cabinets
- Storage containers
- Any interactable container you can find
My personal strategy is to start with the easier locations first. I usually hit up Raider’s Refuge and Reinforced Reception before moving on to the more challenging spots. This way, I can potentially get 2-3 codes before other players even reach the harder areas.
Pro tip: Move quickly but carefully. The longer you take, the more likely other players are to find the codes first. I’ve lost count of how many times I’ve arrived at a location only to find another raider already there, searching the same containers.
Phase 2: Unlocking the Gate and Claiming Your Rewards
Okay, so you’ve managed to collect all 4 security codes. Congratulations! But you’re not done yet. Now comes the second phase, and in my opinion, this is where things get really intense.
Step 1: Return to the Gate Control Room
With all 4 codes in hand, head back to the Gate Control Room in the Warehouse Complex. This is where you’ll need to input each code into its corresponding computer console.
The consoles are pretty easy to identify – they have white key icons on them, matching the security codes you collected. I always get a little rush of excitement when I’m approaching the Control Room with all 4 codes, knowing I’m about to unlock something special.
Step 2: Input the Codes
Here’s something I learned the hard way: you need to input each code into the correct console. The game makes this pretty intuitive – each console corresponds to one of the locations where you found the codes.
I’ve seen so many players (myself included, early on) try to put codes into the wrong consoles. It doesn’t work, and it just wastes precious time. Make sure you’re matching the right code to the right console.
Once you or someone else inputs the fourth and final code, you’ll hear this satisfying mechanical sound, and the central gate at Checkpoint will begin to open. That’s when the real fun begins.
Step 3: The Loot Rush
The moment that gate opens, all bets are off. Every raider in the vicinity is going to make a dash for the newly opened area, and you need to be ready.
Here’s what I’ve found inside the locked area:
- High-tier weapons and attachments
- Rare crafting materials
- Special event-exclusive items
- Large quantities of currency
But here’s the catch – the loot isn’t always as amazing as you might hope. I’ve had runs where I found incredible gear, and others where it was pretty standard Blue Gate loot. The key is to manage your expectations while still being excited about the possibilities.
Advanced Strategies for Success
Now that you know the basics, let me share some advanced strategies I’ve developed through my many runs. These are the things that separate the amateurs from the pros.
Teamwork vs. Going Solo
I’ve tried both approaches, and let me tell you – teamwork makes the dream work in this event. When I play with a squad, we can divide and conquer, each taking a different POI to search for codes. We can cover more ground faster and watch each other’s backs.
However, I also enjoy the challenge of going solo. There’s something thrilling about being the lone wolf, outsmarting other players, and completing the event on your own. If you’re going solo, here are my tips:
- Stick to the edges of the map
- Avoid firefights unless absolutely necessary
- Use stealth to your advantage
- Be prepared to extract with codes if things get too hot
Loadout Recommendations
Your gear can make or break your success in this event. Based on my experience, here’s what works best:
| Loadout Type | Primary Weapon | Secondary Weapon | Equipment | Playstyle |
|---|---|---|---|---|
| Balanced | Assault Rifle | SMG | Medkit, Armor | All-around |
| Aggressive | Shotgun | Pistol | Armor, Grenades | Close combat |
| Stealth | Sniper Rifle | Silenced Pistol | Medkit, Smoke | Long range |
| Support | LMG | Pistol | Medkit, Ammo | Team player |
I personally prefer the balanced loadout. It gives me flexibility to handle any situation I might encounter. The assault rifle is great for medium-range engagements, while the SMG is perfect for those close-quarters battles inside buildings.
Timing Your Runs
I’ve noticed that the time of day affects how many players are in the Locked Gate event. Here’s what I’ve found:
- Peak hours (6-10 PM): More players, more competition, but also more chances for teamwork
- Off-peak hours (2-6 AM): Fewer players, easier to complete solo, but less chaotic fun
- Weekend mornings: Moderate players, good balance of challenge and opportunity
My personal favorite time to play is weekend mornings. There are enough players to make it interesting, but not so many that it becomes a constant firefight.
2026 Common Mistakes to Avoid
I’ve made pretty much every mistake possible in this event, so let me save you some trouble by sharing what NOT to do.
Mistake #1: Ignoring the Control Room First
When I first started, I would just run to the POIs without checking the Control Room first. Big mistake! You need to know exactly which locations to search, or you’ll waste time checking the wrong places.
Always hit the Control Room first to identify your target locations. It takes 2 minutes and can save you 20 minutes of frustration.
Mistake #2: Fighting Over Every Code
I used to get into firefights over every single code I found. Sometimes it’s worth it, but other times? Not so much. I’ve learned to pick my battles.
If another player finds a code and I’m low on health or ammo, I’ll let them have it and move to the next location. It’s better to live to fight another day than to die over one code and lose everything.
Mistake #3: Not Preparing for the Gate Area
The biggest mistake I see players make is not being prepared for the final gate area. They spend all their resources getting the codes, then have nothing left when the gate opens.
Always save some health, ammo, and armor for the final push. The moment that gate opens, you want to be ready to claim your reward, not scrambling to find supplies.
Rewards and Benefits
Let’s talk about why you should even bother with this event. Is it worth the effort? Based on my experience, absolutely.
Standard Rewards
Here’s what you can typically expect to find:
- Weapons: High-tier, often with special attachments
- Materials: Rare crafting components
- Currency: Substantial amounts for your next gear upgrade
- Cosmetics: Event-exclusive items (sometimes)
The 2X Trials Multiplier
This is, in my opinion, the best part of the Locked Gate event. The 2X Trials multiplier means you’re making double progress toward your seasonal goals. I’ve completed weeks worth of progress in just a few successful runs.
If you’re trying to level up your season pass or complete specific challenges, this event is your best friend. I always prioritize playing when this event is active because of the efficiency gains.
The Experience
Beyond the tangible rewards, there’s something special about the Locked Gate event. The tension of searching for codes, the excitement of finding them, the rush of unlocking the gate – it all combines to create an unforgettable gaming experience.
I’ve had some of my most memorable ARC Raiders moments during this event. Whether it’s teaming up with random players to complete it together, or winning an intense firefight over the last code, these are the stories I tell my gaming friends about.
FAQ: Your Burning Questions Answered
I’ve been playing this event since it launched, and I’ve heard every question imaginable. Let me answer the most common ones I’ve seen.
How often does the Locked Gate event appear?
The Locked Gate event is a random map condition, so there’s no set schedule. From my experience, it seems to appear roughly once every 4-6 map rotations. I’ve found that playing during peak hours increases your chances of seeing it, but that’s just anecdotal.
Can I extract with the security codes?
Yes, you can! I’ve had to do this a few times when things got too intense. If you extract with one or more security codes, you’ll keep them for your next match. This can actually be a smart strategy if you’re overwhelmed – extract with what you have, then requeue and finish the job.
Is the loot inside the gate worth it?
This is a tough one. In my experience, it’s about 70% worth it. Sometimes you’ll find incredible gear that makes the whole effort worthwhile. Other times, it’s pretty standard stuff. I’d say the real value comes from the 2X Trials multiplier and the overall experience.
What happens if another player inputs the codes before me?
The gate opens for everyone in the match once all four codes are input, regardless of who actually found or input them. I’ve been in situations where I found 3 codes, another player found the last one, and we both benefited from the gate opening. It’s actually a pretty cool community aspect of the event.
Can I complete this event solo?
Absolutely! I’ve completed it solo multiple times. It’s definitely more challenging, but also more rewarding. The key is to be smart about when to engage and when to avoid conflict. Stealth is your best friend when going solo.
Are there any hidden secrets or Easter eggs?
I’m always on the lookout for these, but so far, I haven’t found any confirmed Easter eggs specifically related to the Locked Gate event. However, I did notice some interesting lore terminals in the Control Room that hint at larger story elements. Keep your eyes peeled!
Final Thoughts
After spending dozens of hours in the Locked Gate event, I can confidently say it’s one of the best additions to ARC Raiders in recent memory. It’s challenging, rewarding, and just plain fun.
I remember when I first started – I was frustrated, confused, and ready to give up. But now? I get excited every time I see that “Locked Gate” modifier pop up. It’s become one of my favorite parts of the game.
The key to success, like most things in gaming, is practice and patience. Don’t get discouraged if your first few attempts don’t go perfectly. Learn from each run, adapt your strategy, and most importantly – have fun with it.
Whether you’re a seasoned veteran or a newcomer to ARC Raiders, the Locked Gate event has something to offer. The thrill of the hunt, the satisfaction of completion, and the rewards that await make it an experience you won’t want to miss.
So what are you waiting for? Get out there, find those codes, unlock that gate, and claim your rewards. I’ll see you on the battlefield!
Remember to bookmark this guide for future reference – the Locked Gate event isn’t going anywhere, and you’ll want to come back to these tips and strategies as you continue to improve.
Happy raiding, and may your loot be epic!