I remember when I first stumbled upon the Echoes of Victory Ridge quest in ARC Raiders. Like many of you, I was scratching my head trying to figure out exactly where to go and what to do. If you’re in the same boat, don’t worry—I’ve got your back! After spending hours perfecting this quest and learning from my mistakes, I’m going to walk you through everything you need to know to complete Echoes of Victory Ridge without breaking a sweat.
What You Need to Know Before Starting?
Before we dive into the nitty-gritty details, let me share something crucial I learned the hard way: this quest is only available after you’ve completed Celeste’s previous quest, “Keeping The Memory Alive.” I made the mistake of trying to jump right into Echoes of Victory Ridge without finishing the prerequisite, and let me tell you, it was frustrating realizing I had to go back and complete another quest first.
The quest takes place entirely in the Dam Battlegrounds, which is actually one of my favorite maps in ARC Raiders. It’s got that perfect mix of open spaces and tight corridors that makes for exciting gameplay. But enough about that—let’s get you prepared for what’s ahead.
Essential Preparation: Don’t Skip This!
I can’t stress this enough: bring a loadout with a Safe Pocket augment. I learned this lesson after dying during my first attempt and losing Major Aiva’s Patch. Trust me, there’s nothing worse than spending all that time finding the quest item only to lose it because you got a little too greedy with some ARC patrols. The Safe Pocket will ensure that even if you go down, you’ll still have the quest item when you extract.
Here’s what I recommend bringing:
- Safe Pocket augment (non-negotiable!)
- Medium to long-range weapon (you’ll need it for extraction)
- Health items (the extraction area can get hairy)
- Armor (those ARC love to swarm when you’re trying to leave)
Step 1: Getting to Victory Ridge
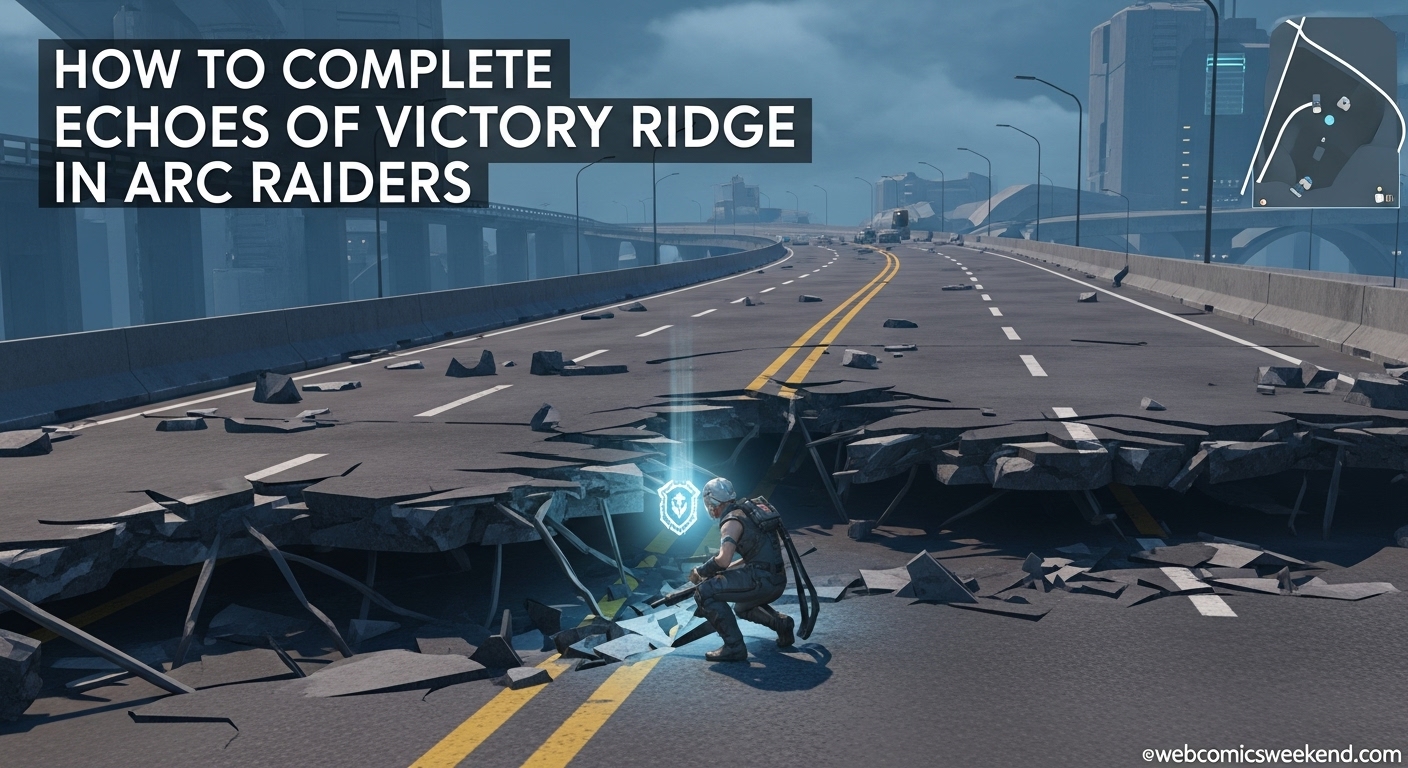
Alright, let’s get to the main event. Your first objective is to “Reach Victory Ridge,” which sounds straightforward enough, but the game’s map can be a bit confusing if you don’t know what you’re looking for.
Victory Ridge is located in the northern portion of the Dam Battlegrounds map. When you’re looking at your map, you want to find the area marked as West Broken Bridge. This is actually the same area where you disarmed that EMP device during the “Straight Record” quest, so if you’ve done that one, you’re already familiar with the territory.
I found it helpful to zoom in on the map and look for the text “West Broken Bridge”—that’s exactly where you need to go. The area is generally pretty safe, but I still recommend keeping your head on a swivel. You never know when other Raiders might show up, and they could be friendly… or not. I’ve had both experiences, so it’s better to be prepared.
Navigation Tips I Wish I Knew
When I first started this quest, I wasted so much time wandering around the northern part of the map. Let me save you that frustration:
- Spawn near the north if possible—it’ll cut your travel time significantly
- Follow the main road that runs along the northern edge of the map
- Look for the distinctive broken bridge structure—you can’t miss it once you know what you’re looking for
- Avoid the center of the map unless you want unnecessary fights with ARC
The journey from Pattern House to West Broken Bridge should take you about 5-10 minutes if you’re moving efficiently. I usually take my time and loot along the way, but if you’re just trying to complete the quest quickly, you can bee-line it straight to the objective.
Step 2: Finding the Hideout Under the Broken Highway
This is where things get interesting, and honestly, where most people get stuck. I know I did! Your objective will update to “Retrieve the battle plans from the hideout under the broken highway,” but the game doesn’t exactly give you a flashing arrow pointing to the exact location.
Let me break this down for you based on my experience:
The Exact Location
When you arrive at West Broken Bridge, you’ll see a lot of broken highway sections scattered around. You need to find the specific section that’s just south of the first ‘B’ in “West Broken Bridge” on your map. I know that sounds confusing, but once you’re there, you’ll understand what I mean.
Here are the visual markers I look for every time:
- Several destroyed vehicles (cars and trucks)
- Rusted barrels clustered together
- A blue tarp hanging from the debris that creates a makeshift tent
- The distinctive slanted debris that you can crawl under
My Pro Tip for Spotting the Hideout
I discovered something that made finding this location so much easier: approach from the north and look south. For some reason, the entrance to the hideout is much more visible when you’re standing on the northern side of the POI and looking back toward the debris. I spent probably 20 minutes crawling around every piece of broken highway before I figured this out!
When you’re in the right spot, you’ll see a small metal box on the ground that looks similar to the ones you deliver to Field Depots. The difference? This one will have a yellow interaction prompt glowing around it. That’s your cue that you’ve found the right spot.
What to Do When You Find the Box?
Once you interact with the box, it’ll open and drop Major Aiva’s Patch. This is the quest item you’ve been looking for! Now, remember what I told you about the Safe Pocket? This is where it becomes crucial. Immediately open your inventory and move Major Aiva’s Patch to your Safe Pocket slot.
I made the mistake of just leaving it in my regular inventory once, and when I got ambushed by a patrol of ARC, I lost it. Don’t be like me—use that Safe Pocket!
Step 3: Extracting and Completing the Quest
You’ve got the quest item, and now you need to get back to Speranza in one piece. This part can actually be trickier than finding the item itself, especially if you’ve attracted attention from ARC or other players.
Best Extraction Routes
Based on my experience, here are the best extraction options from West Broken Bridge:
- North Complex Elevator (my preferred choice)
- Head east from the quest location
- Be prepared for ARC patrols—they love this area
- Call the elevator and retreat to cover if you draw attention
- This extraction point is usually less contested by players
- Swamp Hatch (good alternative)
- Head southeast from your location
- Generally fewer ARC patrols
- Can be more popular with other players
- Shorter travel time if you’re in a hurry
- Generator Hall Lifts (if you’re feeling brave)
- These are further away but often less busy
- Require more travel time through potentially dangerous areas
- Good option if you want to avoid player confrontations
My Extraction Strategy
I’ve developed a pretty solid routine for extracting with quest items that’s worked for me every time:
- Call the extraction point immediately when you arrive in the area
- Find good cover nearby where you can watch the approach paths
- Wait for the extraction to become available while keeping an eye out for threats
- Move quickly but carefully to the extraction point when it’s ready
- Don’t stop to fight unless absolutely necessary—your priority is getting out with the quest item
The Rewards: Is It Worth It?
After all that work, you’re probably wondering what you get for completing Echoes of Victory Ridge. Let me tell you, the rewards are actually pretty decent!
Here’s what I received when I completed the quest:
- 6x Crude Explosives (great for crafting and combat)
- 2x Processors (essential for high-tier Augments)
- 1x Music Box (worth 5,000 credits!)
The Music Box alone makes this quest worth doing in my opinion. Five thousand credits can go a long way toward upgrading your gear or buying new equipment. Plus, those Processors are always in demand for crafting the better Augments.
The Bonus: A Special Cutscene
One thing I wasn’t expecting when I completed this quest was a special cutscene between Celeste and Tian Wen. It’s always cool when you get extra story content, and this one actually adds some nice context to the world of ARC Raiders. I won’t spoil it for you, but let’s just say it gives you more insight into what’s really going on in Speranza.
2026 Common Problems and How to Solve Them
I’ve helped several friends complete this quest, and I’ve noticed some common issues that keep coming up. Let me address these so you don’t run into the same problems.
Problem: “I Can’t Find the Hideout!”
This is by far the most common issue I hear. If you’re having trouble finding the hideout under the broken highway, try these steps:
- Make sure you’re at West Broken Bridge (not East Broken Bridge)
- Look for the blue tarp—it’s the most distinctive visual marker
- Approach from the north and look south at the debris
- Check for the rusted barrels—they’re usually right near the entrance
- Look for the yellow interaction prompt on the metal box
Problem: “I Lost the Quest Item!”
This happened to me more times than I’d like to admit. If you lose Major Aiva’s Patch:
- Check if you have a Safe Pocket—the item might be there
- Return to the hideout location—sometimes the item respawns
- Start a new match—you’ll need to find the item again
- Remember to use Safe Pocket next time!
Problem: “I Can’t Extract!”
Extraction can be tricky, especially if you’ve attracted attention. Here’s what I do:
- Choose a less popular extraction point (North Complex Elevator is usually good)
- Clear the area of threats before calling extraction
- Have an escape route planned in case you need to retreat
- Don’t be greedy—if you have the quest item, get out!
Advanced Tips for Speed Runners
If you’re like me and you love optimizing your gameplay, here are some advanced tips I’ve picked up for completing this quest quickly:
Loadout Optimization
- Light armor for faster movement
- Silenced weapons to avoid drawing unnecessary attention
- Movement speed augments to get around the map faster
- Safe Pocket (still essential, even for speed runs)
Route Planning
- Spawn near the north if possible
- Follow the main roads rather than cutting through terrain
- Avoid combat unless absolutely necessary
- Know your extraction route before you even pick up the quest item
Time-Saving Tricks
- Memorize the exact location of the hideout
- Call extraction before you even pick up the item (if you’re confident)
- Use vehicles when available for faster travel
- Extract as soon as you have the item—don’t stick around to loot
Frequently Asked Questions
How long does this quest take to complete?
From my experience, if you know exactly where to go, you can complete this quest in about 15-20 minutes. If you’re learning the location for the first time, budget 30-45 minutes.
Do I need to complete this quest in one match?
Yes, you need to find Major Aiva’s Patch and extract with it in the same match. You can’t save progress and come back later.
What happens if I die after picking up the quest item?
If you have a Safe Pocket, you’ll keep the item and can extract normally. If not, you’ll lose the item and need to find it again.
Can I complete this quest solo?
Absolutely! I’ve completed this quest multiple times solo. In fact, I find it easier to do alone since I don’t have to coordinate with anyone else.
Is this quest repeatable?
Yes, you can complete Echoes of Victory Ridge multiple times, but you’ll only receive the rewards the first time you complete it.
What level should I be before attempting this quest?
I recommend being at least level 10-15 before attempting this quest, mainly so you have access to better equipment and augments.
Can other players steal the quest item?
No, quest items are unique to each player. Even if another player is doing the same quest, they’ll get their own instance of Major Aiva’s Patch.
What’s the best time to attempt this quest?
I find that early morning or late at night (server time) is best, as there are typically fewer players online, meaning less competition and fewer potential PvP encounters.
Final Thoughts
Echoes of Victory Ridge might seem intimidating at first, but once you know where to go and what to do, it’s actually one of the more straightforward quests in ARC Raiders. I hope my guide helps you complete it without the frustration I went through when I first attempted it.
Remember to use that Safe Pocket, take your time to learn the location, and don’t be afraid to extract as soon as you have the quest item. The rewards are definitely worth the effort, especially those Processors for crafting high-tier Augments.
If you found this guide helpful, make sure to check out our other ARC Raiders guides for more tips and tricks. And if you have any questions or want to share your own experience with this quest, drop a comment below!
Happy raiding, and I’ll see you in Speranza!
Want more ARC Raiders content? Check out our complete quest list and beginner’s guide to become the ultimate Raider!