I’ve spent countless hours diving into the world of ARC Raiders, and let me tell you, the Digging Up Dirt quest is one of those missions that seems simple at first but can really trip you up if you don’t know exactly what you’re doing. When I first tackled this quest, I must have circled the Santa Maria Houses for what felt like an eternity before finally figuring out the right approach.
Today, I’m going to share everything I’ve learned about completing this quest efficiently, so you don’t have to waste time like I did. Whether you’re a seasoned raider or just starting your journey in the Buried City, this guide will get you through Digging Up Dirt without breaking a sweat.
What is the Digging Up Dirt Quest?
Before we dive into the nitty-gritty, let me break down what this quest is all about. Digging Up Dirt is one of the many quests you’ll receive from Celeste, one of the key characters in ARC Raiders. She’s basically your go-to person for all things reconnaissance and intelligence gathering in this post-apocalyptic world.
The quest itself sounds straightforward on paper: find a dead drop in the Santa Maria Houses and retrieve whatever information or items are stashed there. But as I discovered during my first attempt, getting to that dead drop is anything but simple. The game developers did a great job making this quest challenging by changing the access route from the beta version to the full release.
Quest Overview:
- Quest Giver: Celeste
- Location: Santa Maria Houses, Old Town, Buried City
- Main Objective: Locate and interact with the dead drop
- Rewards: 2x Advanced Electrical Components, 4x Speaker Component
- Difficulty: Medium (due to enemy presence and tricky navigation)
Why This Quest Can Be Tricky?
I want to take a moment to explain why so many players struggle with this quest. When I was researching for this guide, I noticed that the beta version of ARC Raiders had a much simpler route to the dead drop. There was a window that led directly to the courtyard where the dead drop was located. Easy peasy, right?
Well, the developers decided to make things more interesting in the full version. That direct window access? Gone. Poof. No longer available. I learned this the hard way when I kept trying to access the same window I’d seen in older YouTube videos, only to find it sealed shut. Talk about frustrating!
The new route requires more parkour skills, better spatial awareness, and a willingness to explore vertical spaces. Plus, the Santa Maria Houses area is crawling with ARC machines – those mechanical nightmares that make your life miserable in the best way possible.
Preparing for the Quest: What You Need to Know?
Before you even think about heading to the Santa Maria Houses, let me share some crucial preparation tips I’ve learned through trial and error.
Loadout Considerations
Here’s something I wish someone had told me before my first attempt: you don’t need to extract to complete this quest. That’s right! You can run this quest with a free loadout and still get credit for completing it. I can’t tell you how much stress this knowledge would have saved me early on.
However, if you’re like me and prefer to be well-prepared, here’s what I recommend bringing:
| Loadout Type | Pros | Cons | My Recommendation |
|---|---|---|---|
| Free Loadout | No loss if you die, quick access | Limited gear options | Best for beginners – I use this 90% of the time |
| Light Loadout | Good mobility, some decent gear | Still risky if you die | Good if you’re comfortable with combat |
| Heavy Loadout | Maximum firepower, best survival | Painful to lose if you die | Only if you’re very confident in your skills |
Essential Items to Bring
Based on my experiences, here are the must-have items for this quest:
- Medkits – Trust me, you’ll need them
- Ammo – Plenty of it, especially for taking out those pesky Hornets
- Lockpicks – While not essential for this specific quest, they’re handy for other loot opportunities
- Flashlight or Night Vision – The interior can be dark and disorienting
Enemy Types to Expect
I’ve run this quest probably a dozen times now, and I’ve encountered pretty much every type of ARC machine in the Santa Maria Houses area. Here’s what you should prepare for:
| Enemy Type | Danger Level | Behavior | My Tips |
|---|---|---|---|
| Hornets | Medium | Fast, aggressive, aerial | Take them out quickly before they swarm you |
| Fireballs | Medium-High | Explosive attacks, ground-based | Keep your distance, use cover |
| Pops | Low | Small, annoying, numerous | Area damage works best |
| Sentinel Turret | High | Stationary but deadly | Priority target – take it out first |
| Bastions | Very High | Heavy armor, powerful attacks | Avoid if possible, or use heavy weapons |
Step-by-Step Guide: Reaching Santa Maria Houses
Alright, let’s get to the main event. I’m going to walk you through exactly how I complete this quest every time, with all the tips and tricks I’ve picked up along the way.
Step 1: Getting to the Right Location
First things first – you need to reach the Santa Maria Houses in the Old Town district of Buried City. From what I’ve observed, this area is located in the central region of the map, right next to Plaza Roza. If you’re familiar with the Buried City map, it’s pretty hard to miss.
Pro tip: Before you even leave the safe zone, open your map and mark the Santa Maria Houses location. This simple step has saved me so much time and confusion, especially when I’m running low on time or trying to avoid other players.
Step 2: The Approach Strategy
When I first started playing, I made the mistake of approaching Santa Maria Houses directly from the ground level. Big mistake! The area is heavily guarded, and you’ll attract attention from every ARC machine in the vicinity.
Here’s my tried-and-true approach strategy:
- Use the northern buildings as cover – I always approach from the north, using the buildings there as both cover and vantage points.
- Stick to the rooftops – Once you’re in the area, stay on the rooftops as much as possible. You’ll have better visibility and can plan your route more effectively.
- Identify the yellow bell tower – This is your landmark. The Santa Maria Houses have a distinctive yellow bell tower on top. When you see this, you know you’re in the right place.
Step 3: Getting Inside – The Tricky Part
This is where most players get stuck, and I was no exception. The main entrance to Santa Maria Houses is sealed, so you need to find an alternative way in. Here’s exactly how I do it:
- Reach the rooftops of the buildings north of Santa Maria Houses – I usually start by climbing the northernmost buildings and working my way south.
- Face south toward the yellow bell tower – Get your bearings and identify your target building.
- Follow the metal walkway to your right – There’s a metal walkway that leads toward the yellow building, but here’s the key: don’t follow it all the way.
- Climb up to the pink building on your left – This is the crucial step that took me forever to figure out. Instead of continuing toward the yellow building, climb up to the adjacent pink building.
- Look for the vent opening – Once you’re on the pink building’s roof, you should see a vent opening. This is your way in.
I remember the first time I found this vent – it was like discovering a hidden treasure! The game doesn’t really point it out to you, so you have to be observant.
Step 4: Navigating the Interior
Once you’re inside through the vent, you’ll drop into what I can only describe as an attic area. From here, the path becomes more linear, but there are still some important things to know:
- Watch out for Fireballs – I’ve learned the hard way that there are usually two Fireballs roaming this area. Take them out quickly or sneak past them if you can.
- Use the zipline – You’ll see a zipline that leads down to the next level. Don’t hesitate – take it! This is the fastest way down.
- Navigate through the building – The interior layout is fairly linear, so just keep moving forward, clearing rooms as you go.
Finding the Dead Drop: The Moment of Truth
After all that work getting inside, you’re finally ready to find the dead drop. This is the part I was most excited about during my first run, and I have to say, it didn’t disappoint.
Locating the Courtyard
The dead drop is located in a courtyard area, but here’s something important I learned: it’s not an outdoor courtyard like you might expect. It’s actually an interior courtyard – a large, open room inside the building.
When I first heard “courtyard,” I pictured an outdoor area with plants and benches. Nope! This is a sandy, open room with a fountain in the center. Keep that in mind so you don’t get confused like I did.
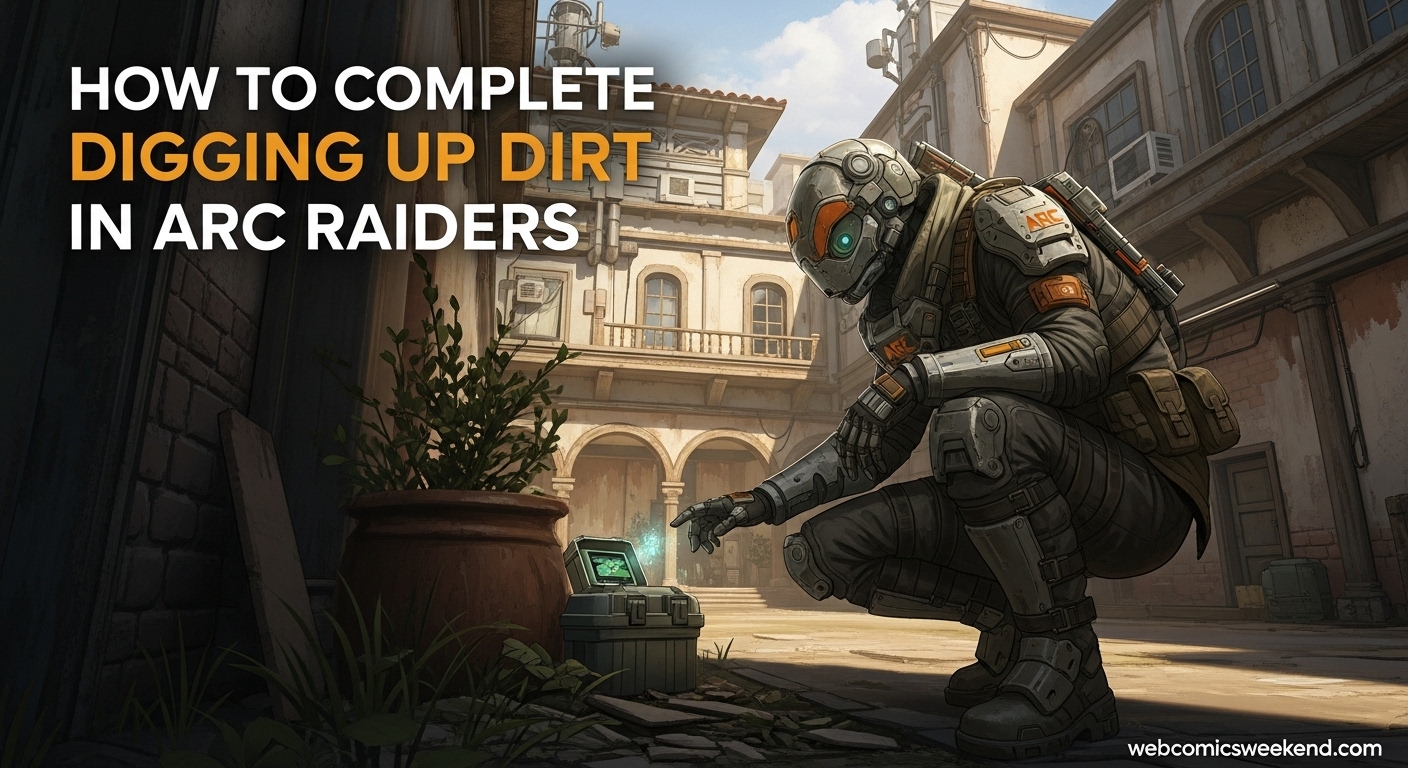
The Dead Drop Location
Once you reach the large, open room filled with sand, you’ll see the dead drop right in the center. It appears as a white cylindrical structure jutting out of the sand in what looks like a fountain or basin.
Here’s exactly what to do:
- Clear the area of enemies – I always make sure the room is clear before approaching the dead drop. There’s nothing worse than getting ambushed while trying to complete the objective.
- Approach the dead drop – Walk up to the white cylindrical structure.
- Interact with it – Simply press the interact button to search the dead drop.
And that’s it! You’ve completed the main objective. I remember feeling such a sense of relief the first time I successfully interacted with that dead drop. All that preparation and navigation had finally paid off.
Post-Completion: What to Do Next
Now that you’ve found and searched the dead drop, you have a few options for what to do next. Let me share my recommendations based on my experiences.
Option 1: Immediate Extraction
If you’re like me and prefer to play it safe, you might want to extract immediately after completing the objective. The good news is that there are extraction points nearby:
- Eastern Station Evac – This is the closest extraction point, located just three buildings across from Santa Maria Houses.
- Southern Station – Also within reasonable distance if you prefer this route.
I usually go for Eastern Station since it’s closer, but sometimes I’ll head to Southern Station if there’s too much activity in the eastern part of the map.
Option 2: Additional Looting
If you’re feeling brave (or greedy, like I often am), you might want to do some additional looting before extracting. The Santa Maria Houses area is rich with resources, and I’ve found some really useful items here:
- Advanced Electrical Components – Always useful for upgrades
- Speaker Components – Needed for various quests and crafting
- Rare weapons and attachments – I’ve found some great gear here
- Medical supplies – Never hurts to stock up
Just remember that the longer you stay, the higher the risk of encountering more ARC machines or other players. I’ve had some amazing loot runs here, but I’ve also lost some good gear when I got too greedy.
Option 3: Return to Celeste
Once you’ve extracted (or even if you die after completing the objective), head back to Speranza and speak with Celeste to officially complete the quest and claim your rewards.
Rewards Breakdown
Let me talk about the rewards for a moment, because they’re actually pretty decent for what’s involved in this quest.
Guaranteed Rewards
Upon completing Digging Up Dirt, you’ll receive:
- 2x Advanced Electrical Components – These are high-tier crafting materials that I’m always happy to get. They’re used for advanced weapon modifications and equipment upgrades.
- 4x Speaker Component – While these might sound mundane, they’re actually quite valuable. I’ve needed them for several other quests and crafting recipes.
Potential Additional Rewards
Beyond the guaranteed rewards, I’ve often found additional valuable items during my runs:
- Rare weapon attachments – I’ve found some really good scope and grip attachments here
- Medical supplies – Always useful
- Ammunition – Especially the rare types
- Cosmetic items – Occasionally, I’ll find some cool cosmetic pieces
Common Problems and Solutions
Based on my experiences and what I’ve seen from other players, here are some common issues people face with this quest and how I’ve learned to overcome them.
Problem: Can’t Find the Entrance
I’ve seen so many players get stuck on this, and I was definitely one of them. The main entrance is sealed, and the game doesn’t do a great job of pointing you to the alternative route.
My Solution:
- Look for the pink building adjacent to Santa Maria Houses
- Climb to the roof and find the vent opening
- Don’t try to enter from ground level – it’s a waste of time
Problem: Too Many Enemies
The Santa Maria Houses area can be overwhelming with the number of ARC machines, especially if you’re not prepared.
My Solution:
- Use a free loadout to minimize risk
- Take out enemies methodically – start with the biggest threats first
- Use the environment for cover and strategic positioning
- Don’t be afraid to retreat and regroup if needed
Problem: Can’t Find the Dead Drop
Even after getting inside, some players struggle to locate the actual dead drop.
My Solution:
- Look for the large, open room filled with sand
- The dead drop is in the center, in what looks like a fountain
- It appears as a white cylindrical structure
- If you see a fountain-like feature in a sandy room, you’re in the right place
Advanced Tips and Strategies
Now that I’ve covered the basics, let me share some advanced strategies I’ve developed through my many runs of this quest.
Speed Running the Quest
If you’re like me and sometimes just want to get quests done quickly, here’s my speed-running strategy:
- Use a free loadout – No risk, all reward
- Go directly to the northern approach – Don’t waste time exploring other areas
- Ignore minor enemies – Unless they’re directly in your path, just run past them
- Extract immediately – Once the objective is complete, get out
Using this method, I can complete Digging Up Dirt in under 10 minutes if everything goes smoothly.
Stealth Approach
For those times when I want to play it extra safe, I use a stealth approach:
- Come prepared with stealth-enhancing gear – If you’re not using a free loadout
- Move slowly and deliberately – Rushing will attract attention
- Use cover effectively – Stay behind objects and move from cover to cover
- Take out enemies silently – Use silenced weapons or melee attacks when possible
Group Strategy
If you’re running with a team (which I highly recommend for this quest), here’s how we usually approach it:
- Designate roles – One person scouts ahead, others provide cover
- Coordinate your approach – Everyone should enter through the same route
- Cover all angles – Once inside, make sure you’re watching all potential enemy approaches
- Extract together – Much safer to extract as a group
Frequently Asked Questions
I’ve compiled some of the most common questions I’ve seen about this quest, along with my answers based on personal experience.
Do I need to extract to complete the quest?
No, you don’t! This was a game-changer for me when I learned it. You can complete the objective and die, and you’ll still get credit for the quest. Just make sure you interact with the dead drop before going down.
What’s the best loadout for this quest?
Honestly, I recommend using a free loadout 90% of the time. The risk of losing good gear just isn’t worth it for this quest. However, if you insist on using your own gear, I’d suggest a medium loadout with good mobility and decent firepower.
How many enemies should I expect?
It varies, but I usually encounter 5-10 ARC machines in the Santa Maria Houses area. The most common ones are Hornets and Fireballs, but I’ve also seen Sentinel Turrets and even Bastions on particularly difficult runs.
Can I complete this quest solo?
Absolutely! I’ve completed it solo many times. It’s definitely more challenging than running with a group, but it’s very doable if you’re careful and follow the strategies I’ve outlined.
What’s the fastest way to complete this quest?
For speed, I recommend the northern approach I described earlier, using a free loadout, and extracting immediately after completing the objective. I’ve done it in under 10 minutes using this method.
Are there any secrets or easter eggs in this area?
While I haven’t found any major easter eggs specifically related to this quest, the Santa Maria Houses area is rich with environmental storytelling. I always take a moment to look around and appreciate the details the developers have included.
Final Thoughts
Digging Up Dirt might seem like just another quest in ARC Raiders, but I’ve found it to be one of the more memorable ones due to its challenging navigation and the satisfaction of finally reaching that elusive dead drop.
What I love most about this quest is how it rewards exploration and creative thinking. The developers did a great job redesigning it from the beta to make it more challenging and rewarding. Every time I complete it, I feel like I’ve accomplished something meaningful.
I hope this guide helps you complete Digging Up Dirt with less frustration than I experienced during my first attempts. Remember to be patient, stay aware of your surroundings, and don’t be afraid to try different approaches if one isn’t working.
Happy raiding, and may your loot be plentiful and your deaths be few!
Don’t forget to bookmark this page for future reference! I’ll be updating it as new strategies and information become available. And if you found this guide helpful, consider sharing it with your fellow raiders – we’re all in this post-apocalyptic mess together!