Hey there, fellow Raiders! If you’re anything like me, you’ve probably been tearing your hair out trying to complete the Broken Monument quest in ARC Raiders. I mean, who hasn’t spent hours wandering around the Scrap Yard looking for that elusive compass or tape? Well, I’m here to tell you that I’ve been through the grind, tested every possible route, and finally cracked the code on this tricky quest.
When I first stumbled upon this quest from Tian Wen, I thought it would be a walk in the park. Boy, was I wrong! After three failed attempts and countless hours of frustration, I decided to document everything I learned to help you avoid the same mistakes. Trust me, by the end of this guide, you’ll be completing this quest like a pro and wondering why you ever found it difficult in the first place.
What Makes the Broken Monument Quest So Tricky?
Let me break it down for you. The Broken Monument quest isn’t your average run-of-the-mill mission. It’s one of those quests that separates the casual players from the dedicated Raiders. Here’s why it’s such a pain in the neck:
- You need to complete all objectives in a single raid – No pressure, right?
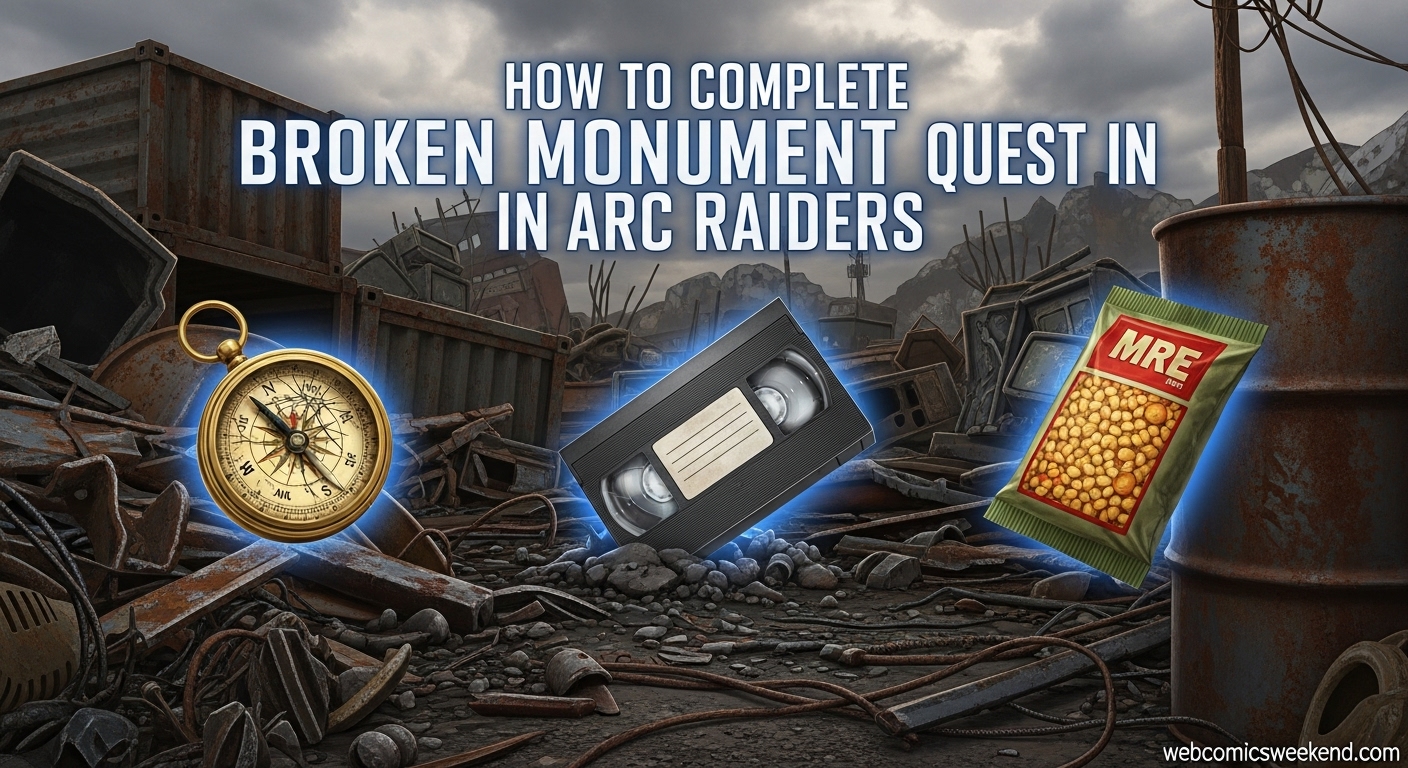
- Three specific items to find – Compass, Video Tape, and Rations
- All items are hidden in the Scrap Yard – Which is basically a maze of metal and confusion
- You must extract with ALL items – Lose one, and you’re back to square one
- Enemy Raiders and ARC threats – Because why not make it more challenging?
I remember my first attempt like it was yesterday. I spent 45 minutes searching for the compass, only to get taken out by a Raider right as I found it. Talk about frustrating! But don’t worry, I’ve learned from those mistakes, and I’m going to share every tip and trick I’ve discovered.
Understanding the Quest Objectives
Before we dive into the nitty-gritty details, let’s get crystal clear on what we’re trying to accomplish. The Broken Monument quest comes with seven specific objectives that you need to complete in order:
- Reach the hallowed grounds by the Scrap Yard
- Search for a compass near the broken-down vehicles
- Search for the video tape near the cylindrical containers
- Search for the old field rations in the Raider camp
- Deliver the First Wave Tape to Tian Wen
- Deliver the First Wave Compass to Tian Wen
- Deliver the First Wave Rations to Tian Wen
Now, here’s the thing that took me way too long to figure out: objectives 5-7 automatically complete once you successfully extract with all three items. So really, your main focus should be on finding those three items and getting out alive. Simple, right? Well, it is once you know where to look!
Preparing for the Quest: What I Learned the Hard Way?
Look, I’m not going to sugarcoat it – you need to come prepared for this quest. After several failed attempts, I’ve developed a solid preparation routine that I swear by. Here’s what I recommend bringing with you:
Essential Loadout Items
| Item Type | Recommendation | Why It’s Important |
|---|---|---|
| Weapons | Medium to Long Range | Scrap Yard has open areas |
| Armor | Medium or Heavy | You’ll encounter enemies |
| Augment | Looting Mk. 3 | Gives you 3 safe pockets |
| Healing Items | At least 3 medkits | Better safe than sorry |
| Utility | Raider’s Hatch Key | Alternative extraction route |
When I first started this quest, I made the mistake of going in light because I wanted to move quickly. Big mistake! I got wrecked by the first group of Raiders I encountered. Now, I always make sure I’m properly equipped before heading into the Scrap Yard.
Pro Tips for Preparation
- Bring the Looting Mk. 3 augment – This is a game-changer! It gives you three safe pockets, meaning if you die, you won’t lose the items you’ve stored in them. Trust me, this has saved my quest progress more times than I can count.
- Scout the area first – I like to do a quick recon run without engaging enemies to get familiar with the layout
- Play during off-peak hours – Fewer players mean fewer interruptions
- Bring a friend – Having backup makes everything easier, though it’s totally doable solo
The Complete Scrap Yard Navigation Guide
Alright, let’s get to the meat and potatoes of this guide. The Scrap Yard is where all the magic (and frustration) happens. After countless hours exploring every nook and cranny of this area, I’ve mapped out the most efficient route for collecting all three items.
Scrap Yard Overview
The Scrap Yard is located in the southeast part of the Dam Battlegrounds map. It’s easy to spot once you know what you’re looking for – just look for the area filled with broken-down vehicles, metal containers, and general chaos. Here’s how I break it down:
| Area | Key Features | What to Expect |
|---|---|---|
| South Section | Broken vehicles, tires, spherical tank | Compass location |
| Central Area | Cylindrical containers, metal tubing | Video tape location |
| North Section | Raider camp, bus-shaped container | Rations location |
My Proven Route for Maximum Efficiency
I’ve tried every possible route through the Scrap Yard, and I’ve found that starting from the south and working your way north is by far the most efficient approach. Here’s my step-by-step route that I’ve perfected over multiple runs:
Step 1: Reaching the Hallowed Grounds
First things first, you need to reach the hallowed grounds by the Scrap Yard. This objective typically completes automatically when you enter the south end of the Scrap Yard area. I’ve found that the best entry point is from the south, near where you’ll see all the ruined vehicles and tires scattered about.
Pro Tip: When I’m approaching the Scrap Yard, I like to hang back and observe for a minute or two. Check for any enemy Raiders or ARC threats that might be lurking around. It’s better to spend an extra minute scouting than to get ambushed right as you’re starting your item collection.
Step 2: Finding the First Wave Compass
Okay, this is where things get interesting. The compass is by far the trickiest item to find, and I’m not just saying that – every guide I’ve read agrees on this point. Here’s exactly where I’ve found it every single time:
Location: South end of the Scrap Yard, between broken-down vehicles Landmarks: Look for the tires on the ground and the big spherical tank Directions:
- Go to the south end of the Scrap Yard by the tires
- Face north toward the spherical tank
- You’ll see two paths – one going right, one going left
- Instead of taking either path, hop over the ruined vehicles between them
- Look for a yellow-marked box hidden in the middle
I can’t tell you how many times I ran right past this spot! The box is cleverly concealed between the vehicles, and if you’re not looking for it specifically, you’ll miss it every time. When I finally found it, I literally facepalmed at how obvious it was in hindsight.
Important Note: When you search the box, make sure to actually pick up the compass! I can’t tell you how many times I’ve searched a box, thought I was done, only to realize later that I never actually grabbed the item. The game doesn’t automatically put it in your inventory – you have to manually pick it up.
Step 3: Locating the First Wave Video Tape
Once you’ve got the compass secured, it’s time to go after the video tape. From the compass location, head north slightly, keeping an eye out for large cylindrical containers. Here’s where I’ve consistently found the tape:
Location: Central area of the Scrap Yard Landmarks: Two large aluminum-looking cylinders resting on their sides Directions:
- From the compass location, take the right path going north
- Pass the big spherical tank
- Continue along this path, watching your right side
- Look for two large cylindrical containers on the ground
- The yellow-marked box with the tape is in front of the first cylinder
What I love about this location is that it’s actually pretty straightforward once you know what you’re looking for. The cylinders are hard to miss, and the box is usually right out in the open. I’ve found this item on my first try every time since I learned the exact location.
Step 4: Securing the Old Field Rations
Last but certainly not least, we have the rations. This one’s actually pretty easy to find once you know where to look. From the video tape location, continue heading north until you reach the Raider camp area.
Location: North section of the Scrap Yard, Raider camp Landmarks: Old Raider camp trailer or bus-shaped container Directions:
- From the video tape location, continue heading north
- Look for an old Raider camp structure (it looks like a bus-shaped container)
- Enter the structure
- Look for a yellow-marked box against the left wall inside
- Search the box to grab the rations
I’ve found that the rations are usually the easiest to locate, probably because the Raider camp is such a distinctive landmark. When I’m doing this quest, I typically save this one for last since it’s the most straightforward to find.
Extraction Strategies That Actually Work
Alright, so you’ve got all three items – congratulations! But you’re not done yet. Now comes the most nerve-wracking part: getting out alive with all your loot. I’ve learned this lesson the hard way more times than I care to admit.
Primary Extraction Route: Red Lakes Balcony Lift
My go-to extraction point is the Red Lakes Balcony Lift, located to the northeast of the Scrap Yard. Here’s why I prefer this route:
- Relatively close to the Scrap Yard – Less travel time means less exposure to danger
- Usually less crowded – Fewer players mean fewer potential conflicts
- Good visibility – You can scout the area before making your approach
My Extraction Strategy:
- After collecting all three items, I take a moment to assess my surroundings
- I move cautiously toward the northeast, using cover whenever possible
- I stop frequently to listen for enemy movement or ARC threats
- When I’m close to the extraction point, I scout the area thoroughly
- Once I’m sure it’s clear, I make a run for it
Alternative Extraction: Raider’s Hatch
If you brought a Raider’s Hatch Key (which I highly recommend), you have another option. The hatch extraction is usually safer but requires the key. Here’s when I use this option:
- When the area is heavily contested – Fewer players use the hatch
- When I’m low on health or resources – It’s generally a safer extraction
- When I want to avoid confrontation – Sometimes stealth is the best strategy
Pro Extraction Tips I’ve Learned
- Use your safe pockets wisely – If you have the Looting Mk. 3 augment, store your most valuable items in the safe pockets
- Don’t rush – I know it’s tempting to make a run for it, but patience pays off
- Listen carefully – Sound cues are your best friend in this game
- Have an escape route planned – Always know where you’re going if things go south
Common Mistakes I’ve Made (And How to Avoid Them)
I’ll be honest with you – I’ve made pretty much every mistake possible while doing this quest. But hey, that’s how you learn, right? Let me save you some frustration by sharing the most common pitfalls I’ve encountered.
Mistake #1: Not Picking Up Items After Searching
This is probably the most common mistake I see players make, and I’m guilty of it too! You search the box, see the item, and assume it’s automatically in your inventory. Nope! You have to manually pick it up. I’ve lost count of how many times I’ve searched a box, moved on, and then realized later that I never actually grabbed the item.
How to avoid: Always double-check your inventory after searching a box. Make sure the item is actually there before moving on.
Mistake #2: Rushing Through the Area
When I first started this quest, I was in such a hurry to get it done that I would rush through the Scrap Yard like a madman. Big mistake! Rushing makes you careless, and carelessness gets you killed in this game.
How to avoid: Take your time, move methodically, and always be aware of your surroundings. It’s better to spend an extra few minutes being cautious than to lose all your progress.
Mistake #3: Ignoring Enemy Threats
I used to think I could just ignore enemy Raiders and ARC threats if I was quick enough. Let me tell you, that’s a recipe for disaster. I’ve been taken out more times than I can count by enemies I thought I could just run past.
How to avoid: Treat every enemy as a potential threat. Either avoid them entirely or deal with them properly. Don’t assume you can just outrun everything.
Mistake #4: Not Using Safe Pockets
Before I discovered the Looting Mk. 3 augment, I would carry all my items in regular pockets. When I died (which happened often), I would lose everything and have to start over. It was incredibly frustrating!
How to avoid: If you have access to the Looting Mk. 3 augment, use it! Store your quest items in the safe pockets so you don’t lose them if you die.
Advanced Tips for Experienced Raiders
If you’ve been playing ARC Raiders for a while and you’re looking to optimize your Broken Monument quest runs, I’ve got some advanced tips that I’ve picked up through extensive trial and error.
Route Optimization
After dozens of runs, I’ve optimized my route to minimize travel time and maximize efficiency. Here’s my current route:
- Enter from the south – This puts you closest to the compass
- Grab the compass first – It’s the hardest to find, so get it out of the way
- Move to the video tape – Short distance from the compass
- Finish with the rations – Easiest to find, good to end on
- Extract northeast – Most direct route to safety
This route typically takes me 15-20 minutes from start to finish, assuming I don’t run into too much resistance.
Loadout Optimization
I’ve experimented with various loadouts, and here’s what I’ve found works best for this specific quest:
| Loadout Slot | My Recommendation | Alternative Options |
|---|---|---|
| Primary Weapon | Medium-range rifle | SMG for close quarters |
| Secondary Weapon | Pistol or sidearm | Anything with ammo |
| Armor | Medium armor | Heavy if you can move well |
| Augment | Looting Mk. 3 | Any safe pocket augment |
| Utility | Medkits, ammo | Grenades for crowd control |
Stealth Approaches
Sometimes, the best approach is to avoid conflict altogether. I’ve developed several stealth techniques that work well in the Scrap Yard:
- Use cover effectively – The Scrap Yard is full of metal containers and vehicles that provide excellent cover
- Move during lulls – Watch enemy patrol patterns and move when they’re looking away
- Crouch walk when necessary – It’s slower but much quieter
- Use distractions – If you have grenades or other items that can create noise, use them to draw enemies away from your path
Rewards and Why It’s Worth the Effort?
After all this talk about how challenging the Broken Monument quest is, you might be wondering if it’s even worth the effort. Let me tell you – absolutely! The rewards are definitely worth the trouble.
Quest Rewards
When you finally complete this quest and return to Tian Wen, you’ll receive:
- Arpeggio I – A valuable weapon attachment
- Compensator II – Another useful weapon mod
- Medium Ammo x80 – Always handy for future raids
But honestly, the real reward is the satisfaction of finally completing this notoriously tricky quest. I remember the first time I successfully extracted with all three items – I was literally jumping up and down in my chair!
Long-Term Benefits
Beyond the immediate rewards, completing the Broken Monument quest unlocks additional content and opportunities:
- Increased reputation with Tian Wen – Opens up more lucrative quests
- Better understanding of the Scrap Yard layout – Invaluable for future runs
- Improved navigation skills – The Scrap Yard is a complex area, and mastering it pays dividends
- Bragging rights – Let’s be honest, completing this quest is something to be proud of!
Frequently Asked Questions
I’ve been answering questions about this quest from fellow Raiders for weeks now. Here are some of the most common questions I get, along with my detailed answers.
How long does the Broken Monument quest typically take?
From my experience, a successful run usually takes between 15-30 minutes, depending on how much resistance you encounter and how familiar you are with the area. My personal best is around 12 minutes, but that was on a perfect run with no enemy interference.
Can I complete this quest solo, or do I need a team?
Absolutely can be completed solo! In fact, I’ve completed it solo more times than with a team. The key is preparation and patience. Having a team can make it easier, but it’s totally doable by yourself if you’re careful and methodical.
What happens if I die after collecting some items?
This depends on whether you’re using safe pockets. If you have the Looting Mk. 3 augment and you’ve stored items in your safe pockets, you’ll keep those items even if you die. However, any items in regular pockets will be lost. If you don’t have safe pockets, you’ll lose everything and have to start over.
Are the item locations always the same?
Yes, the item locations are consistent across all runs. The compass is always between the broken vehicles in the south, the video tape is always by the cylindrical containers in the central area, and the rations are always in the Raider camp to the north. This consistency is actually helpful once you learn the locations.
What’s the best time to attempt this quest?
I’ve found that off-peak hours are best for this quest. Fewer players mean less competition and fewer potential conflicts. Early morning or late night times tend to be quieter, making it easier to focus on the objectives without worrying about other players.
Can I use vehicles to move between locations?
While there are vehicles in the Scrap Yard area, I generally don’t recommend using them for this quest. They’re noisy and can attract unwanted attention. It’s usually better to move on foot, using cover and staying quiet.
Final Thoughts and Personal Experience
After spending countless hours on the Broken Monument quest, I can honestly say that it’s one of the most challenging but rewarding quests in ARC Raiders. I’ve learned so much about the game, the maps, and my own playstyle through this quest.
When I look back at my first few attempts, I can’t help but laugh at how clueless I was. I was running around like a headless chicken, completely missing the obvious item locations and getting taken out by enemies I should have avoided. But each failure taught me something new, and eventually, I developed the strategies I’ve shared with you today.
What I love most about this quest is how it forces you to really learn the Scrap Yard area. Before attempting this quest, I used to treat the Scrap Yard as just another location on the map. Now, I know every nook and cranny, every hiding spot, every potential threat location. That knowledge has been invaluable in other quests and raids.
The sense of accomplishment I felt when I finally completed this quest for the first time was incredible. All that frustration, all those failed attempts, all that learning – it all paid off in that moment when I successfully extracted with all three items.
Your Turn to Conquer the Broken Monument
Alright, fellow Raiders, now it’s your turn! I’ve shared everything I’ve learned about the Broken Monument quest – from preparation to execution to extraction. I’ve given you the exact locations, the best routes, the pro tips, and the common mistakes to avoid.
The question is: are you ready to take on the challenge?
Remember, preparation is key. Make sure you have the right loadout, take your time, and stay alert. Use the safe pockets if you have them, and don’t be afraid to take it slow and steady.
I know it can be frustrating at times – trust me, I’ve been there. But the feeling of accomplishment when you finally complete this quest is worth every bit of effort. And hey, if you get stuck or have questions, feel free to reach out. We’re all in this together, and the Raider community is always happy to help fellow players.
Now gear up, head to the Scrap Yard, and show that Broken Monument quest who’s boss! I’ll see you on the extraction point, Raiders!
Want more ARC Raiders guides and tips? Check out our other gaming guides for more strategies, walkthroughs, and pro tips to help you dominate in ARC Raiders and other popular games!
Found this guide helpful? Bookmark it for future reference and share it with your fellow Raiders who might be struggling with this quest. Together, we can conquer any challenge ARC Raiders throws our way!