Hey there, fellow Megabonk enthusiast! If you’re anything like me, you’ve probably been struggling to master Tony McZoom, that lightning-fast character on the hoverboard who zips around the battlefield like he’s got somewhere better to be. Well, I’m here to tell you that after countless hours of trial and error (and more deaths than I’d care to admit), I’ve finally cracked the code on the best Tony McZoom build that’ll have you dominating those high-tier maps like a pro.
Let me take you through everything I’ve learned about this high-speed, high-reward character. Trust me, once you get the hang of Tony, you’ll wonder how you ever played without him!
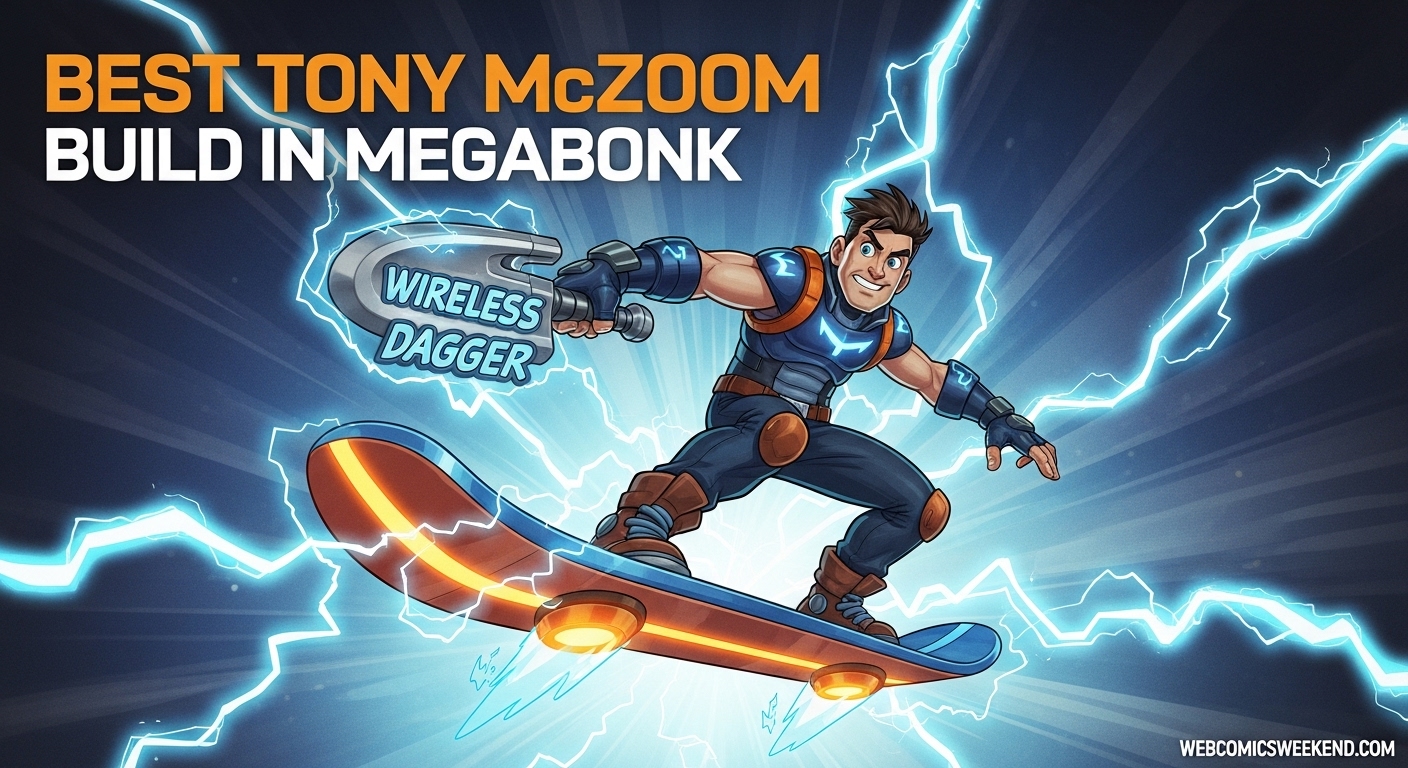
Who is Tony McZoom Anyway?
Before we dive into the builds, let me give you the lowdown on who this character actually is. Tony McZoom is quite possibly the most unique character in Megabonk, and I mean that in every sense of the word. When I first unlocked him, I was honestly intimidated by his playstyle – this guy rides around on a futuristic hoverboard and throws homing daggers at enemies. How cool is that?
But here’s the thing about Tony that took me way too long to figure out: he’s all about speed and precision. Unlike some of the tankier characters in the game where you can kind of just stand there and take hits, Tony demands your full attention. One moment of standing still, and you’re toast. But when you get it right? Man, there’s nothing more satisfying than zipping through hordes of enemies while your homing daggers do all the work.
Tony’s passive ability, called “Zap,” is what really sets him apart. As you move around on that sweet hoverboard of his, you build up an electrical charge that periodically discharges, damaging nearby enemies. Plus, you get 2% increased pickup range per level, which might not sound like much but trust me, it adds up fast and makes collecting items a breeze.
How to Unlock Tony McZoom
Now, I know what you’re thinking – “This sounds awesome, but how do I even get my hands on this character?” Well, let me walk you through the unlock process because it’s not exactly straightforward.
To unlock Tony McZoom, you need to complete two main requirements:
- Complete ANY 2 challenges from the Challenge menu
- Unlock the Wireless Dagger weapon
Here’s how I did it, and trust me, this method works like a charm:
First, you’ll need to clear the Tier 1 map with any available character. Once you’ve done that, challenges become available in the Challenge menu. Pick any two challenges that seem manageable to you – I personally went with the easier ones because I’m not exactly a pro player (yet!).
Start a Tier 1 run with one challenge enabled, complete the requirement, then repeat the process with a different challenge. Easy enough, right?
The second part is where things get a bit trickier. To unlock the Wireless Dagger, you need to reach Level 15 on any single run using the Lightning Staff. Now, I won’t lie to you – this took me several attempts to get right. The Lightning Staff is actually a pretty solid weapon, so you’ll want to aim for a run that lasts around 30 minutes to give yourself enough time to hit that level 15 milestone.
Pro tip: The Lightning Staff works well with most builds, so don’t stress too much about your setup during this unlock run. Just focus on surviving and leveling up quickly.
Once both tasks are complete, you can finally unlock Tony McZoom from the shop. And let me tell you, he’s worth every bit of effort it takes to get him!
Understanding Tony’s Strengths and Weaknesses
Before we jump into the actual builds, I want to share my honest assessment of Tony’s strengths and weaknesses. When I first started playing him, I made the mistake of treating him like other characters, and let me tell you, that ended… poorly.
Tony’s Strengths (Why He’s Awesome)
- Fastest character in the game – I mean, this guy is ridiculously fast. Once you start stacking movement speed items, you’ll be zipping around the map like a caffeinated squirrel.
- Excellent mobility and kiting potential – Tony’s hoverboard lets you dodge attacks like Neo from The Matrix. You can literally run circles around enemies while they try desperately to hit you.
- Hard to hit when played correctly – With proper positioning and constant movement, you’ll feel nearly invincible. I’ve had runs where I barely took any damage at all.
- Electric Zap ability damages nearby enemies – That passive ability I mentioned earlier? It’s not just for show. When you’re constantly moving, you’re constantly zapping enemies around you. It’s like having a personal damage aura.
- Great for learning positioning skills – Playing Tony will make you a better Megabonk player overall. You’ll learn enemy patterns, optimal positioning, and the art of the kite.
- Wireless Dagger has homing projectiles – This is probably my favorite thing about Tony. You don’t need to be a precision aim god – just throw those daggers and let them do the work for you.
Tony’s Weaknesses (What to Watch Out For)
- Very fragile with low defense – And I mean VERY fragile. Tony has paper-thin defenses, and if you get caught standing still, you’re going to have a bad time.
- Wireless Dagger is difficult to master – While the homing is great, getting the timing and positioning right takes practice. I spent many runs frustrated with my dagger performance before it clicked.
- Requires constant movement and awareness – You can’t zone out while playing Tony. You need to be constantly aware of your surroundings, enemy positions, and where you’re going next.
- Not beginner-friendly – I wouldn’t recommend Tony as your first character in Megabonk. There’s a steep learning curve that can be frustrating if you’re still learning the game basics.
- Speed can be hard to control – This might sound counterintuitive, but you can actually have TOO much movement speed. I’ve had runs where I was moving so fast I couldn’t control where I was going, which ended… badly.
- Ranked B-tier (mid-tier performance) – According to the official tier list, Tony sits in the middle of the pack. He’s not top-tier, but he’s far from bottom-tier either.
My Top 3 Tony McZoom Builds for 2026
Alright, now we’re getting to the good stuff! After extensive testing (and many, many failed runs), I’ve identified three distinct builds that each excel in different situations. I’ll walk you through each one, explain when to use them, and give you my personal tips for maximizing their effectiveness.
Build 1: The Projectile Speed Demon (My Personal Favorite)
This is the build I find myself coming back to time and time again. It’s all about maximizing the Wireless Dagger’s effectiveness through projectile synergies, and let me tell you, when this build gets going, it’s an absolute monster.
Core Items (Priority Order):
- Projectile Speed – This is non-negotiable. Making those homing daggers faster and more effective is the foundation of this entire build.
- Projectile Quantity – More daggers mean more DPS. It’s simple math, really.
- Projectile Size – Larger hitboxes make it so much easier to hit those fast-moving enemies.
- Critical Chance – Once you’ve got the basics down, crit chance will multiply your damage output exponentially.
- Damage % – The cherry on top that amplifies all your damage.
Supporting Stats:
- Projectile Speed (can’t stress this enough)
- Projectile Quantity (more is always better)
- Critical Chance/Damage (high-value multipliers)
- Pickup Range (stacks with your passive for insane collection radius)
Why This Build Works: I love this build because it turns Tony’s signature weapon into an absolute powerhouse. The Wireless Dagger is already good with its homing projectiles, but when you start stacking projectile speed, quantity, and size, it becomes something else entirely. I’ve had runs where my daggers were clearing entire screens before enemies could even get close to me.
The key here is making the Wireless Dagger as powerful as possible while using your speed to stay safe. Fast, numerous projectiles with large hitboxes will make those homing daggers absolutely devastating. Add in critical chance to multiply your damage, and you’ve got a recipe for success.
My Personal Tips for This Build:
- Don’t be afraid to invest heavily in projectile stats early. I used to spread my upgrades too thin, but focusing on projectile stats first makes a huge difference.
- Use your speed to create distance, then let your enhanced daggers do the work. I sometimes catch myself trying to get too close to enemies, but that’s not what this build is about.
- Stack critical chance once your projectile stats are solid. I’ve seen my damage output triple once I got my crit chance up around 50%.
Build 2: The Electric Storm (AOE Master)
This build is all about enhancing Tony’s Zap passive ability for maximum AOE clearing. When I first discovered this build, I was honestly shocked at how effective it was for clearing waves of weaker enemies.
Core Items (Priority Order):
- Movement Speed Items – Turbo Socks and Turbo Skates are your best friends here. More movement means more Zap charging.
- Pickup Range – Stack this with your passive bonus for an absolutely massive collection radius.
- AOE Damage – Enhance that Zap’s area effect to hit more enemies.
- Lightning Staff – Perfect synergy with the electric theme and great for leveling.
- Damage % – Amplify all that Zap damage you’ll be dealing.
Supporting Stats:
- Movement Speed (charge Zap faster)
- AOE Radius (larger Zap range)
- Damage (make those Zap hits count)
- Pickup Range (quality of life improvement)
Why This Build Works: This build turns Tony into a literal lightning storm on a hoverboard. By maximizing movement speed, you’re constantly charging and releasing Zap attacks. With high movement speed and AOE damage, you’ll be clearing waves just by zooming through them. It’s absolutely perfect for farming and wave clearing.
I’ve used this build extensively when I need to clear large numbers of weaker enemies quickly, and it never disappoints. There’s something incredibly satisfying about just flying through the map while everything around you just… dies.
My Personal Tips for This Build:
- Never stop moving. I mean it. Every second you’re not moving is a second you’re not charging your Zap. I even move in small circles when I’m “standing still” to keep that charge going.
- Prioritize movement speed items above almost everything else. I used to underestimate how important movement speed was for this build, but it’s absolutely crucial.
- The Lightning Staff is your secondary weapon of choice here. The electric synergy is too good to pass up, and it helps with single-target damage when you need it.
Build 3: The Balanced Survivor (Great for Learning)
This is the build I recommend to anyone who’s new to Tony McZoom or struggling with his fragility. It’s all about balancing damage with survivability through superior positioning.
Core Items (Priority Order):
- Movement Speed – Turbo Socks and Turbo Skates for safety first
- Projectile Stats – Speed, Quantity, and Size for consistent damage
- Supplementary Weapons – Aegis for defense, Aura for passive damage
- Max HP – You need some buffer for those inevitable mistakes
- Pickup Range – Safe item collection means less risk
Supporting Stats:
- Movement Speed (safety and positioning)
- Max HP (survivability buffer)
- Pickup Range (quality of life)
- Balanced damage stats
Why This Build Works: This build prioritizes staying alive while maintaining good damage output. By using maximum mobility to never get hit, and stacking enough HP to survive when you do make mistakes, you get a much more forgiving Tony experience.
I wish I had discovered this build when I was first learning Tony. It would have saved me so much frustration! The defensive weapons like Aegis provide shields when you need them, and Aura adds passive clearing so you’re not entirely dependent on your aim.
My Personal Tips for This Build:
- Don’t neglect HP items. I used to think HP was a waste on Tony since I should never get hit, but let’s be real – mistakes happen. Having that HP buffer has saved my run more times than I can count.
- Aegis is your safety net. I can’t tell you how many times Aegis has saved me when I got cornered or made a positioning error. It’s worth every penny.
- This build is perfect for learning Tony’s movement patterns. Once you’re comfortable with the Balanced Survivor, you can transition to the more aggressive builds with confidence.
Complete Strategy Guide: From Early Game to Late Game Dominance
Now that we’ve covered the builds, let me walk you through my complete strategy for playing Tony McZoom effectively throughout an entire run. I’ve broken it down by game phase because, let’s face it, what works in the first 10 minutes isn’t necessarily what you want in the final boss fight.
Early Game (0-10 Minutes): Survival First
The early game with Tony is all about survival and establishing your foundation. I can’t stress this enough – you need to play it safe early on or you won’t make it to the late game where Tony really shines.
My Early Game Priorities:
- Use your speed advantage – This is your best survival tool, so use it constantly. I see too many new Tony players trying to stand and fight like other characters. Don’t do that!
- Practice kiting patterns – Start getting comfortable with running circles and figure-8 patterns around enemies. This will be crucial later on.
- Let Wireless Dagger do the work – Don’t stress about perfect aim. The homing will handle targeting while you focus on positioning.
- Collect gold aggressively – Your speed advantage means you can collect gold and items that other characters might miss. Use this to get ahead economically.
- Focus on dodging – I know this sounds obvious, but with Tony, dodging isn’t just a defensive move – it’s offensive too because it charges your Zap.
Early Game Item Priority:
- Movement Speed (Turbo Socks if available)
- Basic Projectile Stats (Speed and Quantity)
- HP items (you need some buffer)
- Pickup Range (stacks with passive)
Common Early Game Mistakes I Made (So You Don’t Have To):
- Standing still to “aim” better – This is death with Tony. Keep moving!
- Neglecting HP items – I used to think HP was wasted on Tony, but early game HP can save your run.
- Being too aggressive – It’s tempting to rush in with all that speed, but early game enemies can still wreck you if you’re not careful.
Mid Game (10-20 Minutes): Building Your Power
This is where Tony starts to come into his own. You should have your core items by now, and it’s time to start really leveraging Tony’s strengths.
My Mid Game Priorities:
- Prioritize your build’s core items – Whether you’re going projectile-focused, Zap-focused, or balanced, now’s the time to double down on your chosen path.
- Add movement speed items – Turbo Socks and Turbo Skates should be priorities if you haven’t gotten them yet.
- Start stacking critical chance – This is where your damage really starts to scale up.
- Leverage your Zap passive – By now, your Zap should be clearing weaker enemies automatically as you move around.
- Maintain constant movement – I know I keep saying this, but it’s absolutely crucial for charging Zap and staying alive.
Mid Game Item Priority:
- Critical Chance (damage scaling)
- More specialized items based on your chosen build
- AOE Damage (if going Zap build)
- Secondary Weapons (Lightning Staff, Aura, or Aegis)
Pro Tip: This is where I really start focusing on the “Speed Kiting Circles” technique I mentioned earlier. Run in large circles around enemy groups – your homing daggers will track enemies while you maintain maximum distance, and your Zap will damage enemies as you pass through the outskirts of their formation. It’s a game-changer when executed properly.
Late Game (20+ Minutes): Untouchable God Mode
If you’ve made it this far, congratulations! Late game Tony is an absolute beast when built correctly. This is where all your early game caution and mid game preparation pays off.
My Late Game Priorities:
- Focus on damage multipliers – Crit Damage, Damage %, anything that amplifies your existing damage.
- Consider secondary weapons – Lightning Staff or Aura for additional clearing, Aegis for survivability if needed.
- Maximize your specialized stats – Whatever build you chose, now’s the time to push it to the absolute limit.
- Use your Pickup Range advantage – By now, your Pickup Range should be massive – collect everything safely without slowing down.
- Perfect your movement patterns – You should be nearly untouchable with proper speed stacking and positioning.
Late Game Item Priority:
- Crit Damage (massive damage multiplier)
- Damage % (universal amplification)
- Specialized build items (push your chosen build to the max)
- Utility items (Pickup Range, Movement Speed)
Advanced Technique: The “Speed Kiting Circles” I mentioned earlier becomes absolutely devastating in the late game. With proper itemization, you can literally run circles around boss fights while your daggers and Zap passive do all the work. I’ve beaten some of the toughest bosses in the game while barely taking any damage using this technique.
Pro Tips and Common Mistakes (Learn from My Pain)
After hundreds of hours playing Tony McZoom, I’ve learned a lot about what works and what doesn’t. Let me share some of my hardest-earned wisdom so you can avoid the mistakes I made.
✅ Do This (These Things Work)
Keep Moving at All Times I can’t stress this enough. Standing still with Tony is basically asking to die. Every second you’re not moving is a second you’re not charging your Zap and a second you’re vulnerable to attacks. I even move in small circles when I’m “standing still” to keep that charge going.
Master the Wireless Dagger Let the homing do its job. I spent way too much time trying to aim perfectly with Tony’s dagger, only to realize that the homing mechanic is actually incredibly good when you trust it. Focus on positioning and let the daggers find their targets.
Stack Those Projectile Stats Your weapon scales incredibly well with projectile items. I used to spread my upgrades too thin across different stats, but focusing on projectile speed, quantity, and size first made a huge difference in my damage output.
Use Diagonal Movement This might sound simple, but moving diagonally maximizes your distance from enemies and makes you much harder to hit. It’s a small adjustment that makes a big difference in survivability.
Collect Items While Moving Your Pickup Range bonus means you never need to stop moving to collect items. I see so many Tony players stopping to pick things up, and it’s completely unnecessary with your passive bonus.
Practice Circle Kiting Run circles around enemies – they’ll chase but never catch you. This technique took me a while to master, but once I did, it made Tony feel nearly invincible.
Add Movement Speed Items Turbo Socks and Turbo Skates are excellent on Tony. I used to underestimate how valuable movement speed was, but it’s crucial for both survivability and damage (through Zap charging).
Watch Your Positioning Use your speed to control engagement distances. I learned this the hard way after getting cornered one too many times. Always have an escape route planned.
❌ Don’t Do This (I Learned the Hard Way)
Don’t Stand Still You’re fragile – movement is your only real defense. I’ve lost count of how many times I died because I stopped moving for “just a second” to aim better or collect an item.
Don’t Ignore Projectile Stats Your weapon needs these to shine. I used to prioritize damage over projectile stats, and my performance suffered significantly until I corrected this.
Don’t Face-Tank You have low HP – avoid all damage when possible. Tony is not a tank, and playing him like one will end in tears (and a quick death).
Don’t Over-Speed Too much movement speed becomes hard to control. I’ve had runs where I was moving so fast I couldn’t position properly or dodge effectively. There is such a thing as too much of a good thing.
Don’t Fight in Corners You need space to kite effectively. I learned this lesson after getting cornered and killed more times than I care to admit. Always keep your escape routes open.
Don’t Neglect HP Items Some survivability helps compensate for fragility. I used to think HP was wasted on Tony since I should never get hit, but mistakes happen, and that HP buffer has saved my run many times.
Don’t Use Tony as Your First Character He’s not beginner-friendly. I tried to learn Megabonk with Tony, and it was incredibly frustrating. Start with a more forgiving character, then come back to Tony when you understand the game better.
Don’t Forget About Zap Your passive does significant damage – charge it constantly. I used to focus so much on my dagger that I neglected the Zap damage, which is a mistake because it adds up significantly over time.
Best Items and Synergies for Tony McZoom
Based on my extensive testing, here are the items that work best with Tony McZoom, organized by category and priority.
🌟 Core Items for Tony (These Are Must-Haves)
Turbo Socks Movement speed increase – perfect for Tony’s playstyle. I never skip these when I see them in the shop. The extra speed makes you harder to hit and charges your Zap faster.
Turbo Skates Additional movement speed – stack with Socks for maximum effect. I always try to get both if possible. The speed boost from both items together is absolutely game-changing.
Projectile Speed Items Makes Wireless Dagger daggers faster and more effective. This is probably the most important stat for Tony’s primary weapon. I prioritize this above almost everything else early game.
Projectile Quantity More daggers mean more consistent damage. This is my second priority after projectile speed. The more projectiles you have firing, the better your coverage and damage output.
Critical Chance Items Multiply your projectile damage significantly. Once I have my projectile stats sorted, I go hard on critical chance. The damage increase is just too good to pass up.
Pickup Range Items Stack with passive bonus for huge collection radius. This might seem like a luxury, but being able to collect items without slowing down is incredibly valuable for Tony’s high-speed playstyle.
⚔️ Best Secondary Weapons (Choose Based on Your Build)
Lightning Staff Electric synergy, good for leveling. This is my go-to secondary weapon for most builds. The electric theme fits perfectly with Tony’s Zap ability, and it’s great for clearing groups of weaker enemies.
Aura Passive AOE damage while you kite. I love Aura for builds where I want to focus on mobility and let passive effects do the work. It’s especially good in the Balanced Survivor build.
Aegis Provides shields for survivability. This is my safety pick when I’m struggling with survivability or facing particularly tough boss fights. The shields can be a real lifesaver.
Rocket/Grenade Burst damage options. These are great for when you need to deal with tough single targets quickly. I don’t use them as often, but they have their place in certain situations.
📊 My Personal Stat Priority (What to Focus On)
- Projectile Speed – Makes Wireless Dagger effective (non-negotiable)
- Projectile Quantity – More projectiles = more DPS
- Movement Speed – Core to Tony’s safety and Zap charging
- Critical Chance – Damage multiplier
- Pickup Range – Quality of life and synergy with passive
- Damage % – Universal damage increase
- Max HP – Compensate for low base HP
- Projectile Size – Larger hitboxes = easier hits
Frequently Asked Questions (Based on My Experience)
H3: Is Tony McZoom good for beginners?
Honestly? No, I wouldn’t recommend Tony as your first character in Megabonk. When I first started playing, I tried to learn with Tony and it was incredibly frustrating. He has a steep learning curve and requires good game knowledge to play effectively. I’d suggest starting with a more forgiving character like Fox or Vlad, then coming back to Tony once you understand the game mechanics better.
H3: What’s the best way to unlock Tony McZoom quickly?
The fastest way I found to unlock Tony is to focus on the Lightning Staff requirement first. Play a character you’re comfortable with, and specifically aim for a 30-minute run to hit level 15. Once you have the Wireless Dagger unlocked, the challenge requirements are much easier since you can do them with any character. I typically knock out both challenges in back-to-back runs once I have the dagger.
H3: Why do I keep dying with Tony McZoom?
I asked myself this question many times when I was learning Tony! The most common reasons are: standing still too long, not prioritizing movement speed, neglecting HP items, and trying to face-tank enemies. Remember, Tony is all about constant movement and positioning. If you’re dying a lot, try the Balanced Survivor build I mentioned earlier – it’s much more forgiving while you learn.
H3: Which build is best for boss fights with Tony?
For boss fights, I personally prefer the Projectile Speed Demon build. The focused damage from enhanced Wireless Dagger projectiles, combined with critical chance multipliers, melts through boss health quickly. Just make sure to keep moving and use the Speed Kiting Circles technique to avoid boss attacks while your daggers do the work.
H3: How important are movement speed items on Tony?
They’re absolutely crucial! I used to underestimate movement speed, focusing purely on damage stats. But movement speed serves two purposes for Tony: it keeps you alive by making you harder to hit, and it increases your damage by charging your Zap ability more frequently. I now prioritize movement speed items almost as highly as projectile stats.
H3: Can Tony McZoom work without the Wireless Dagger?
Technically yes, but I wouldn’t recommend it. The Wireless Dagger is so integral to Tony’s kit and synergizes so well with his abilities that using a different weapon puts you at a significant disadvantage. I tried experimenting with other weapons, and my performance dropped noticeably. The Wireless Dagger’s homing mechanic is just too valuable to give up.
H3: What’s the biggest mistake new Tony players make?
Based on my experience and what I’ve seen from other players, the biggest mistake is treating Tony like a tankier character. Tony has LOW DEFENSE and requires constant movement to survive. Players who try to stand and fight will die quickly. Always be moving, always be kiting, and trust your speed to keep you safe.