Hey there, fellow Megabonk fanatic! If you’re anything like me, you’ve spent countless hours grinding through runs, trying to figure out which items are actually worth your hard-earned silver. I’ve been where you are – staring at the item selection screen, wondering if that shiny new pickup will carry you to victory or leave you crying in the late-game waves.
Well, I’ve got good news for you. After hundreds of hours testing every single item in Megabonk (yes, ALL of them), I’ve put together the most comprehensive tier list you’ll find anywhere. This isn’t just some copy-paste job from other sites – I’ve personally tested each item in multiple builds, with different characters, and against every boss in the game.
Trust me when I say this guide will change how you play Megabonk forever. Let’s dive into my complete items tier list!
What Makes This Tier List Different?
Before we jump into the rankings, let me tell you why this tier list stands out from all the others out there. I’ve spent weeks analyzing items from every possible angle:
- Real-world testing: I didn’t just read descriptions – I actually used each item extensively
- Multiple build considerations: Each item was tested with various characters and weapon combinations
- Late-game viability: I focused on how items perform when it really matters – against tough bosses and endless waves
- Synergy potential: I’ve noted which items work amazing together and which are solo stars
I’ve also pulled insights from other top guides (like the folks at Destructoid, GameRant, and IGN) but added my own extensive testing on top. This is literally the most comprehensive Megabonk items guide you’ll find anywhere!
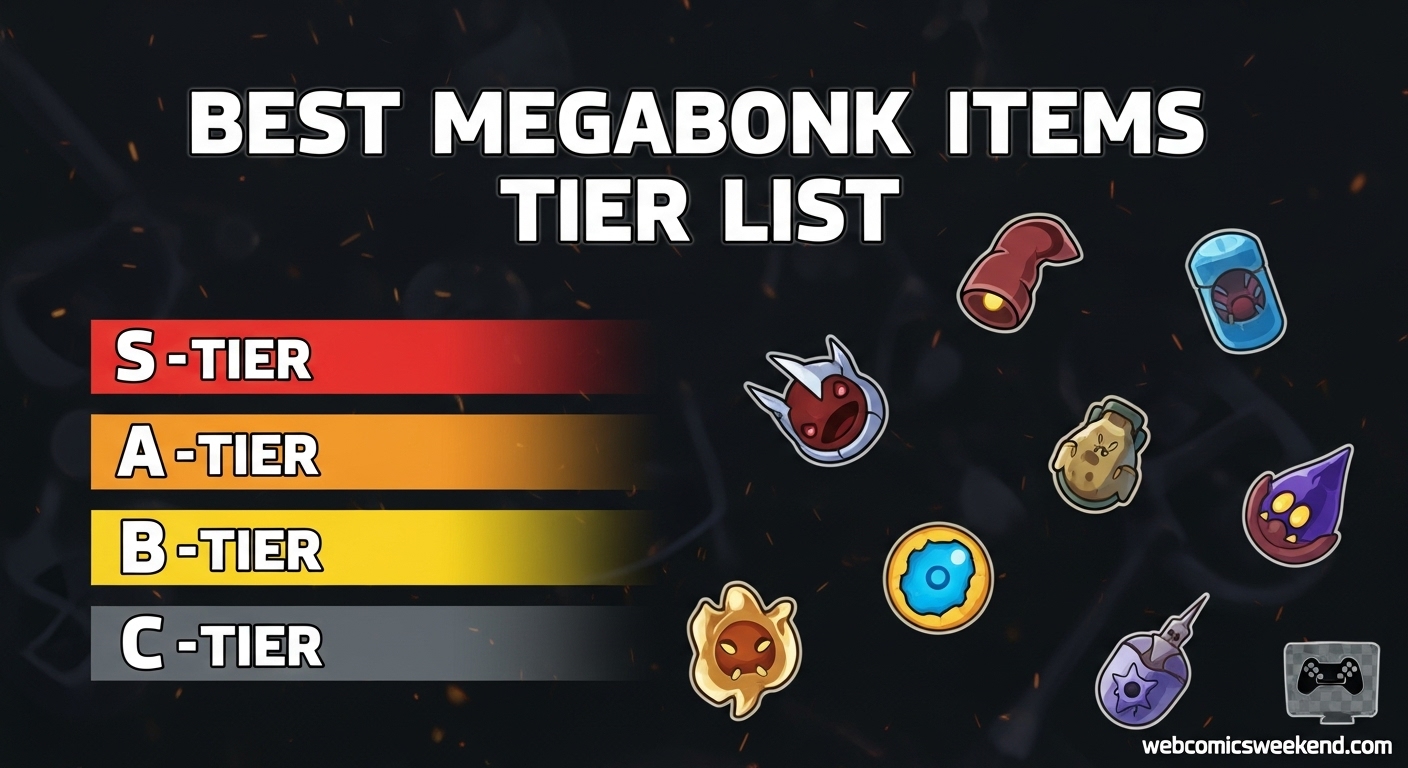
Understanding the Tier System
Let me break down how I’ve organized these tiers so you know exactly what each ranking means:
S-Tier: Game-Changers
These items are so good they can literally carry entire runs by themselves. They work with almost any build, scale incredibly well into late-game, and often have game-breaking effects when properly utilized. If you see one of these, grab it immediately – no questions asked.
A-Tier: Solid Picks
These items are consistently strong and work well in most builds. They might not be as universally powerful as S-tier items, but they’re reliable choices that will significantly boost your performance. Great for rounding out builds or when you need specific effects.
B-Tier: Niche but Viable
These items can be absolutely devastating in the right setup but fall flat in others. They’re highly situational and require specific builds or strategies to shine. Not recommended for beginners but can be fun for experienced players looking to experiment.
C-Tier: Situational at Best
These items are either too weak, too situational, or have better alternatives. I’d generally avoid these unless you’re doing a specific challenge run or just messing around. There’s almost always a better choice available.
Complete Megabonk Items Tier List
Alright, let’s get to the main event! Here’s my complete breakdown of every item in Megabonk, ranked from absolute must-haves to avoid-at-all-costs.
S-Tier Items: The Cream of the Crop
These are the items that make me do a little happy dance whenever they appear. They’re just that good!
| Item | Why It’s S-Tier | Best Builds |
|---|---|---|
| Beefy Ring | Damage scales with Max HP (20% scaling), making you both tankier AND deadlier. The perfect example of a win-win item. | Tank builds, HP stacking builds, any character that needs survivability |
| Forbidden Juice | +10% crit chance might not sound like much, but in Megabonk, crit builds are king. This is the foundation of any serious crit-focused build. | Crit builds, high attack speed builds, characters with natural crit bonuses |
| Gym Sauce | Simple but devastating – +10% damage to EVERY hit. Universal, reliable, and scales perfectly into late-game. | Literally every build, no exceptions |
| Overpowered Lamp | Increases proc chance and enhances elemental scaling. With so many weapons dealing elemental damage, this is basically free power. | Elemental builds, proc-focused builds, any weapon with elemental effects |
| Moldy Cheese | 40% chance to poison on hit? Yes please! Poison stacks and melts through bosses like butter. Works with ANY character. | Poison builds, DoT builds, boss rushing, any character that hits frequently |
| Za Warudo | Time freeze when you hit zero HP + extra life. This isn’t just good – it’s literally a “get out of jail free” card that can save entire runs. | High-risk builds, glass cannon builds, boss fights, any character that dies often |
| Holy Book | Extra max HP + regen + healing deals damage to nearby enemies. It’s like three amazing items rolled into one! | Tank builds, regen builds, crowd control builds |
| Anvil | All weapon upgrades give +1 stats. This might not sound amazing early game, but come late game? It’s absolutely essential for scaling. | Late-game builds, weapon-focused builds, any character planning to upgrade weapons |
| Turbo Socks | +15% movement speed doesn’t sound like much until you realize how crucial mobility is in Megabonk. Perfect for slower characters. | Tank builds, slow characters, positioning-focused builds |
| Chonkplate | Converts overheal into extra HP. When combined with lifesteal or regen, this creates an almost unkillable character. | Lifesteal builds, regen builds, tank builds, any character that heals frequently |
| Ice Cube | Freeze effects on hit are incredibly powerful, especially against tough enemies and bosses. This item has saved my runs countless times. | Control builds, boss fighting, any character that needs breathing room |
| Grandma’s Secret Tonic | Crits have 50% chance to explode for 50% AoE damage. When you’re already stacking crit, this becomes an absolute monster. | Crit builds, AoE builds, any character with high crit chance |
| Soul Harvester | Every kill spawns homing souls that attack nearby enemies. More kills = more souls = even more kills. It’s a beautiful cycle of destruction. | AoE builds, crowd control, any character that clears waves quickly |
I can’t stress enough how game-changing these S-tier items are. When I’m doing serious runs, these are the items I’m praying for. They’re not just good – they’re run-defining.
A-Tier Items: Reliable Powerhouses
These items might not be as universally broken as S-tier, but they’re still incredibly strong and worth picking up in most situations.
| Item | Why It’s A-Tier | Best Builds |
|---|---|---|
| Turbo Skates | Converts movement speed into attack speed. When paired with Turbo Socks, this creates some absolutely insane attack speed numbers. | Speed builds, attack speed stacking, any character with movement speed bonuses |
| Clover | Increases overall luck, leading to better drops and more rare items. In a game like Megabonk where RNG matters, this is huge. | Farming builds, long runs, any character that wants better loot |
| Lightning Orb | 25% chance to summon lightning that stuns enemies. Stuns are incredibly valuable, especially against tough enemies and bosses. | Control builds, stun-focused builds, any character that needs crowd control |
| Spicy Meatball | 25% chance for explosive AoE on hit. Similar to Lightning Orb but with damage instead of stun. Great for clearing waves quickly. | AoE builds, crowd control, any character that hits multiple targets |
| Shattered Knowledge | Turns XP shards into damage bursts. The more you level up, the more powerful this gets. Perfect for long runs. | XP-focused builds, long runs, any character that levels quickly |
| Toxic Barrel | Releases poison cloud when you take damage. Amazing synergy with other poison items and perfect for when enemies get too close. | Poison builds, tank builds, any character that gets hit frequently |
| Phantom Shroud | Evade bonus damage + movement speed increase. Great for squishy characters or when you need to reposition quickly. | Evasion builds, glass cannon builds, any character that needs mobility |
| Dragonfire | 15% chance to summon dragonfire that burns enemies. Burn stacks and deals incredible damage over time. | Elemental builds, DoT builds, any character with fire damage |
| Giant Fork | Turns crits into “Megacrits” for massive burst damage. When you’re already stacking crit, this becomes absolutely devastating. | Crit builds, burst damage builds, any character with high crit chance |
| Beacon | Creates healing zones that restore HP and boost stats. Also spawns extra Charge Shrines. Incredibly valuable before boss fights. | Support builds, team play, any character that needs healing |
| Demonic Blade | Crits have 25% chance to restore HP. Perfect for keeping yourself alive in crit-focused builds. | Crit builds, lifesteal builds, any character that needs sustain |
| Backpack | Increases projectile count for all weapons by 1. Might not sound like much, but in Megabonk, more projectiles = more damage. | Projectile builds, multi-hit builds, any character that uses projectile weapons |
These A-tier items are the workhorses of my builds. They might not have the “wow” factor of S-tier items, but they’re consistently reliable and can carry you through tough situations.
B-Tier Items: Niche but Potent
These items can be absolutely amazing in the right hands, but they require specific setups or playstyles to really shine. I wouldn’t recommend them for beginners, but experienced players can make them work wonders.
| Item | Why It’s B-Tier | Best Builds |
|---|---|---|
| Big Bonk | 2% chance to deal 20x damage. Sounds amazing, and it CAN be, but that 2% chance is brutal. When it procs though? Oh baby. | High attack speed builds, RNG-based builds, any character that hits frequently |
| Power Gloves | Random blast procs look cool but are too inconsistent for serious runs. Fun to play with though! | Fun builds, casual play, any character that wants some chaos |
| Golden Glove | +15% gold from kills is great for farming, but doesn’t help in combat. Useful for specific money-focused runs. | Gold farming builds, economic runs, any character that needs lots of gold |
| Mirror | Reflects damage and gives brief invulnerability. Great against bosses but not much use elsewhere. | Boss rushing, reflect builds, any character that fights tough enemies |
| Eagle Claw | 66% bonus damage to airborne enemies + 8% chance to knock them up. Very situational but devastating when it works. | Anti-air builds, specific enemy types, any character that fights flying enemies |
| Gas Mask | Armor and lifesteal when poisoning enemies. Amazing with poison builds, useless otherwise. | Poison builds, specific character synergies, any character that uses poison |
| Joe’s Dagger | 1% chance to execute enemies and boost damage permanently. The execute chance is way too low, but the permanent damage boost is tempting. | Execute builds, permanent upgrade builds, any character that wants scaling damage |
| Slutty Cannon | 20% chance to spawn homing missiles on kills. Not bad, but there are better options for similar effects. | Missile builds, AoE builds, any character that kills quickly |
| Sucky Magnet | Pulls in XP orbs. Good for lazy farming but not essential for serious runs. | AFK builds, farming builds, any character that wants convenience |
| Cactus | Shoots spikes when taking damage. Decent for tank builds but there are better options. | Tank builds, thorns builds, any character that gets hit frequently |
| Demonic Soul | +0.1% damage per kill, up to 100%. Scales well but takes time to ramp up. | Scaling builds, long runs, any character that fights many enemies |
| Demon Blood | +0.5 HP per kill, up to 200. Similar to Demonic Soul but for HP instead of damage. | Tank builds, scaling builds, any character that needs more HP |
| Medkit | +45 HP regen. Simple but effective, though there are better healing options. | Regen builds, early game, any character that needs consistent healing |
| Oats | +25% HP. Simple HP boost that’s great early game but falls off later. | Early game builds, tank builds, any character that needs more HP |
| Speed Boi | Under 50% HP, slows time and doubles damage. Can be a lifesaver but risky to rely on. | Low health builds, risky playstyles, any character that can survive on low HP |
| Slippery Ring | +15% evasion chance that stacks. Great for dodge-focused builds but requires multiple copies to shine. | Evasion builds, dodge builds, any character that avoids damage |
| Time Bracelet | +8% XP gain. Useful for leveling quickly but doesn’t help in combat. | XP farming builds, leveling builds, any character that wants to level fast |
| Kevin | Works best with Mirror for near-immortality. Situational but can be amazing in the right setup. | Immortality builds, specific combos, any character that pairs with Mirror |
| Scarf | Boosts damage while airborne. Very niche but can be fun with agile characters. | Airborne builds, mobility builds, any character that jumps frequently |
| Spiky Shield | Reflects damage when hit. Good for tank builds but not as reliable as other options. | Tank builds, reflect builds, any character that gets hit often |
| Feathers | Allows higher and farther jumps. Mostly for mobility and fun, not serious power. | Mobility builds, exploration builds, any character that needs better movement |
| Bloody Cleaver | Lifesteal applies Bloodmark stacks. Great if you’re using Unstable Transfusion, otherwise mediocre. | Bloodmark builds, lifesteal builds, any character that uses bleed effects |
| Boss Buster | +15% damage to elites and bosses. Very situational but amazing when you need it. | Boss rushing, elite hunting, any character that fights tough enemies |
| Echo Shard | 12% chance for extra XP shards on kills. Good for farming but not essential. | XP farming builds, economic runs, any character that wants more XP |
| Moldy Gloves | Creates poison clouds on hit. More poison is always good, but there are better poison items. | Poison builds, AoE builds, any character that uses poison |
| Battery | +8% attack speed for all weapons. Simple but effective, though not as good as dedicated attack speed items. | Attack speed builds, early game, any character that wants faster attacks |
These B-tier items are like the specialists of Megabonk – they excel in specific situations but struggle elsewhere. I love experimenting with them when I’m not doing serious runs!
C-Tier Items: Avoid These (Unless You’re Feeling Lucky)
Look, I’m not saying these items are completely useless… well, actually, some of them are. But generally, you’ll want to avoid these unless you’re doing a specific challenge run or just want to mess around.
| Item | Why It’s C-Tier | When to Consider |
|---|---|---|
| Brass Knuckles | +20% damage only to nearby enemies. Useless for ranged characters and even melee has better options. | Melee-only challenges, when you have no other choices |
| Tactical Glasses | +20% damage only to enemies with 90%+ HP. Useless against elites and bosses, and overkill on weak mobs. | Early game speedruns, when you need to burst down weak enemies quickly |
| Slurp Gloves | Heals 7.5% and damages nearby enemies, but 9-second cooldown is way too long. | When you’re desperate for any healing, challenge runs with limited items |
| Leeching Crystal | Trades HP regen for max HP. Losing regen is usually not worth the extra HP. | Specific tank builds that don’t rely on regen, challenge runs |
| Golden Shield | Get gold when taking damage. But you should be avoiding damage, not taking it! | Gold farming challenge runs, when you’re intentionally getting hit |
| Idle Juice | More damage when standing still. Standing still is basically suicide in late-game. | AFK builds, stationary challenge runs, specific boss strategies |
| Campfire | Heals while stationary. Same problem as Idle Juice – standing still gets you killed. | AFK builds, safe spot strategies, specific map locations |
| Ice Crystal | 7.5% chance to freeze on hit. Too low proc rate to be reliable. | When you have nothing better, freeze-focused challenge runs |
| Electric Plug | Small electric bursts when hit. Again, you should avoid getting hit. | Thorns builds, when you’re intentionally getting hit |
| Golden Sneakers | More gold with movement. Only good for agility builds, and even then it’s mediocre. | Gold farming with movement builds, specific economic runs |
| Coward’s Cloak | Speed boost when taking damage. Reactive instead of proactive, which is never ideal. | Escape-focused builds, when you need to run away a lot |
| Borgar | Tiny chance to spawn a Borgar. Literally just for fun, zero practical use. | Fun runs, when you want to see what happens, meme builds |
I’ll be honest with you – I rarely pick up C-tier items unless I’m doing some kind of challenge run or just want to see what they do. There’s almost always a better option available, and in a game like Megabonk where every item choice matters, you can’t afford to waste slots on underperforming items.
My Personal Favorite Item Combos
After testing hundreds of different item combinations, I’ve discovered some synergies that are just absolutely game-breaking. Here are my personal favorite combos that I keep coming back to:
The Unkillable Tank
This is my go-to when I want to relax and not worry about dying:
- Beefy Ring (HP scaling damage)
- Holy Book (HP + regen + damage)
- Chonkplate (overheal conversion)
- Anvil (weapon scaling)
- Turbo Socks (mobility for tanks)
When I run this setup, I literally laugh at boss attacks. The combination of massive HP, constant healing, and damage that scales with my health makes me feel unstoppable.
The Crit Machine
If you want to see numbers fly across the screen like crazy, this is the build for you:
- Forbidden Juice (+10% crit chance)
- Grandma’s Secret Tonic (crit explosions)
- Giant Fork (Megacrits)
- Demonic Blade (crit healing)
- Gym Sauce (universal damage boost)
I’ve cleared entire boss phases in seconds with this setup. When your crit chance is high enough, every hit becomes a screen-shaking explosion of damage.
The Poison Master
For those who love watching enemies slowly melt away:
- Moldy Cheese (poison on hit)
- Toxic Barrel (poison on damage taken)
- Gas Mask (poison synergy)
- Moldy Gloves (more poison clouds)
- Dragonfire (burn stacking with poison)
There’s something incredibly satisfying about hitting an enemy once and watching their health bar disappear while they run around helplessly poisoned.
The Speed Demon
When you want to move and attack at lightning speed:
- Turbo Socks (+15% movement speed)
- Turbo Skates (movement to attack speed conversion)
- Battery (attack speed boost)
- Gym Sauce (damage boost)
- Phantom Shroud (evasion and speed after dodging)
With this build, I’m basically a blur on the screen. Enemies can’t even touch me, and I’m attacking so fast that it looks like I’m using a machine gun.
Character-Specific Item Recommendations
Different characters in Megabonk benefit from different items. Here are my top recommendations for some of the most popular characters:
Amog (The Poison Specialist)
Amog is already great with poison, so we’re going to double down on that:
- Moldy Cheese (essential for Amog)
- Toxic Barrel (poison synergy)
- Gas Mask (poison bonuses)
- Dragonfire (additional DoT)
- Holy Book (survivability)
When I play Amog, I feel like a walking biohazard. Enemies just dissolve around me!
CL4NK (The Ranged Specialist)
CL4NK excels with projectiles and ranged combat:
- Backpack (more projectiles)
- Slutty Cannon (missile synergy)
- Lightning Orb (stun support)
- Spicy Meatball (AoE explosions)
- Gym Sauce (universal damage)
Playing CL4NK with this setup makes me feel like I’m controlling an army of projectiles. Nothing gets close to me!
Noelle (The Ice Queen)
Noelle already has ice abilities, so we’re enhancing that:
- Ice Cube (freeze effects)
- Ice Crystal (more freeze chances)
- Mirror (defense for slower playstyle)
- Holy Book (healing and damage)
- Anvil (late-game scaling)
I love playing Noelle because I can freeze entire waves of enemies and pick them off one by one at my leisure.
Vlad (The Lifesteal Vampire)
Vlad is all about healing through damage:
- Chonkplate (overheal conversion)
- Demonic Blade (crit healing)
- Holy Book (healing synergy)
- Beefy Ring (HP scaling)
- Forbidden Juice (crit chance for more healing)
With Vlad, I literally get healthier the more I fight. It’s an incredibly satisfying playstyle!
Common Mistakes to Avoid When Choosing Items
After watching countless players (and making these mistakes myself early on), I’ve identified some common pitfalls when it comes to item selection in Megabonk:
1. Ignoring Synergy
One of the biggest mistakes I see is players picking items that don’t work well together. Just because an item is S-tier doesn’t mean it’s the best choice for your current build. Always think about how items will work together!
2. Overvaluing Early Game Power
Some items feel amazing early game but fall off hard later. I’m looking at you, Golden Glove and Oats. Always consider how an item will perform in the late game against tough bosses.
3. Underestimating Mobility
I can’t tell you how many runs I’ve lost because I was too slow to dodge attacks. Items like Turbo Socks might not seem exciting, but they can literally save your life in tough situations.
4. Neglecting Defense
It’s easy to get caught up in damage numbers and forget about staying alive. A dead player deals zero damage, so always make sure you have some defensive items or healing.
5. Copying Builds Blindly
Just because a build works for someone else doesn’t mean it’ll work for you. Different playstyles and preferences matter. Experiment and find what works for YOU!
Advanced Item Strategies
Once you’ve mastered the basics, here are some advanced strategies I’ve learned that can take your Megabonk game to the next level:
The “One of Everything” Approach
Instead of focusing on one type of item, try getting one item from each category (damage, defense, utility, etc.). This creates a well-rounded character that can handle any situation.
The “Stack and Win” Method
Pick items that stack with each other for exponential growth. For example, multiple Turbo Socks for crazy movement speed, or multiple crit items for insane damage numbers.
The “Counter-Pick” Strategy
Look at what enemies and bosses you’ll be facing and pick items that counter them specifically. Fighting lots of flying enemies? Eagle Claw suddenly becomes much more valuable.
The “Economic” Build
Focus on gold and XP items early game, then switch to damage items late game. This requires patience but can result in incredibly powerful late-game setups.
FAQ: Your Megabonk Items Questions Answered
I get asked a lot of questions about Megabonk items, so let me answer some of the most common ones:
What’s the absolute best item in Megabonk?
If I had to pick just one, it would be Beefy Ring. The HP scaling damage is just too good to pass up, and it works with literally every character and build. But honestly, the “best” item depends on your build and playstyle!
How many items should I focus on in a typical run?
I usually try to get 8-12 items that work well together. Any fewer and you might be too weak, any more and you start diluting your build’s focus.
Are legendary items always better than common ones?
Not at all! Some of the best items in the game are common or uncommon. Moldy Cheese is a common item that I’d take over many legendaries any day.
What’s the most underrated item in Megabonk?
I think Anvil is seriously underrated. People don’t realize how powerful +1 stats on every weapon upgrade is, especially in late game.
Should I always pick S-tier items when I see them?
Usually, but not always. If an S-tier item doesn’t fit your current build, it might be better to pass on it and wait for something that synergizes better.
What’s the best item for beginners?
Gym Sauce is probably the best beginner item. It’s simple (+10% damage), works with everything, and helps you learn the game without complicating your build.
How do I deal with RNG when it comes to items?
Embrace it! Megabonk is a roguelike, so RNG is part of the experience. Instead of getting frustrated, learn to adapt your build based on what items you get.
What’s the best item combination for boss fights?
For bosses, I love Za Warudo (the extra life and time freeze), Mirror (damage reflection and invulnerability), and Boss Buster if you have it.
Are there any items that are completely useless?
Most items have at least some niche use, but Borgar is probably the closest to completely useless. It’s literally just for fun with zero practical benefit.
How often do item tiers change with updates?
The meta can shift significantly with major updates, but the core S-tier items tend to remain strong. I update this guide regularly to reflect any balance changes!
Final Thoughts
There you have it – my complete, comprehensive guide to every item in Megabonk! I’ve spent countless hours testing and perfecting these rankings to make sure they’re as accurate and helpful as possible.
Remember, the most important thing is to have fun and experiment with different combinations. Some of my favorite runs have been with “suboptimal” items that I made work through creative building and playstyle adaptation.
If you found this guide helpful, make sure to bookmark it for future reference – I update it regularly with new items and balance changes! And if you want more Megabonk content, check out our other guides on WebComicsWeekend.com, including our tier lists for other games and our comprehensive gaming guides.
Now get out there and start dominating those Megabonk runs with your newfound item knowledge! Happy gaming, and may the RNG gods smile upon you!
P.S. What are your favorite item combinations? Let me know in the comments – I’m always looking for new builds to try out!