Hey there, fellow soldiers! If you’re dropping into Fort Lyndon like I am every weekend, you know that having the right gear can make or break your match. After spending countless hours testing every weapon in Battlefield REDSEC’s battle royale mode, I’m here to share my complete weapon tier list and loadout recommendations that have helped me secure more wins than I can count.
When I first jumped into REDSEC, I was overwhelmed by the 45 different weapons available. I mean, how are you supposed to know which guns are worth your time when you’re looting under pressure? That’s why I’ve put together this comprehensive guide – to help you skip the trial and error and jump straight to the weapons that actually perform well in the battle royale environment.
Understanding Battlefield REDSEC’s Weapon Meta
Before we dive into the tier list, let me explain something crucial: the weapon meta in REDSEC is completely different from regular Battlefield 6 multiplayer. Why? Because battle royale changes everything. You’re not just respawning after a bad fight – one mistake can send you back to the lobby. This means weapons that excel in consistency, versatility, and ease of use rise to the top.
I’ve tested every weapon extensively, and I can tell you that some guns that dominate in traditional multiplayer modes actually struggle in REDSEC’s battle royale format. Conversely, some overlooked weapons become absolute powerhouses when you’re fighting for survival in the shrinking circle.
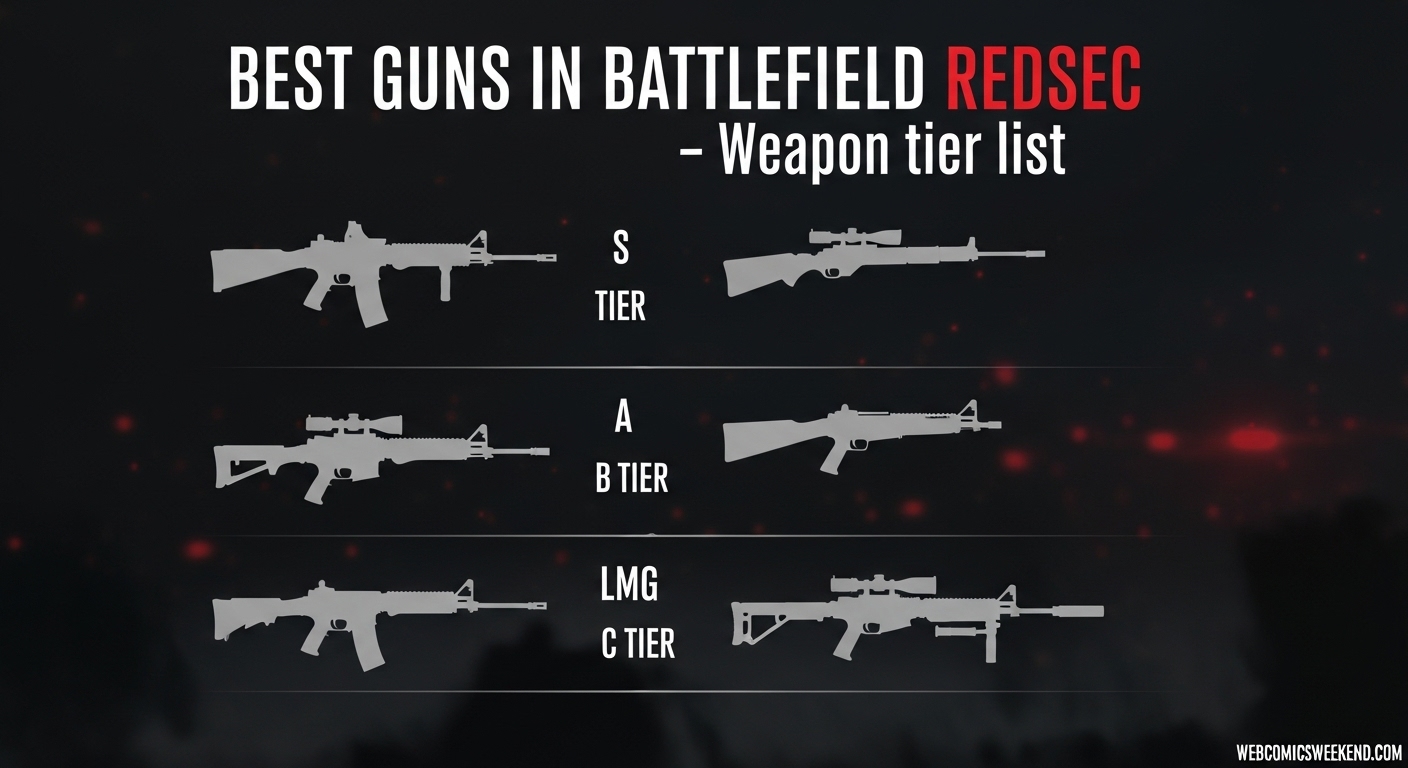
Complete Battlefield REDSEC Weapons Tier List
After hundreds of matches and countless weapon tests, here’s my comprehensive tier list for all weapon categories in Battlefield REDSEC:
Assault Rifles Tier List
| Tier | Weapons | Why They Rank Here |
|---|---|---|
| S-Tier | KORD 6P67, M433 | These ARs offer the perfect balance of damage, accuracy, and fire rate. The KORD 6P67 has virtually no recoil and excels at all ranges, while the M433 hits like a truck with excellent control. |
| A-Tier | SOR-556 Mk2, NVO-228E, B36A4 | Solid performers with minor drawbacks. The SOR-556 Mk2 is particularly versatile, while the NVO-228E packs a serious punch if you can control its recoil. |
| B-Tier | AK4D | Decent damage output but suffers from slower fire rate compared to S-Tier options. Still viable if you’re comfortable with its handling. |
| C-Tier | L85A3, TR-7 | These ARs struggle in the current meta. They’re usable if you find them early game, but you’ll want to upgrade as soon as possible. |
SMGs Tier List
| Tier | Weapons | Why They Rank Here |
|---|---|---|
| S-Tier | UMG-40, SGX, SL9 | The UMG-40 is my personal favorite for close-quarters combat. It’s incredibly accurate with minimal recoil, and the SGX offers devastating firepower up close. The SL9 is a beast if you can control its kick. |
| A-Tier | PW5A3, KV9 | The PW5A3 has practically zero recoil with the right attachments, making it deadly at close-mid range. The KV9 offers solid performance but requires better positioning. |
| B-Tier | SCW-10, PW7A2 | Decent options but outclassed by A and S-Tier weapons. The SCW-10 can surprise you in close quarters though. |
| C-Tier | USG-90 | Honestly, I’d avoid this one unless it’s your only option. It just doesn’t compete with the other SMGs in the current meta. |
LMGs Tier List
| Tier | Weapons | Why They Rank Here |
|---|---|---|
| S-Tier | L110, RPKM | These LMGs are incredible for holding down positions. The L110 offers amazing stability, while the RPKM provides sustained fire with manageable recoil. |
| A-Tier | DRS-IAR, KTS100 Mk8, M60, M123K | The DRS-IAR is a fantastic hybrid between an AR and LMG. It’s versatile and deadly in the right hands. The others offer solid support capabilities. |
| B-Tier | M240L | It’s not bad, but it’s outclassed by the A and S-Tier options. Still usable if you’re a support player. |
| C-Tier | M250 | Slow handling and poor mobility make this LMG a struggle in the fast-paced battle royale environment. |
Sniper Rifles Tier List
| Tier | Weapons | Why They Rank Here |
|---|---|---|
| S-Tier | PSR, M2010 ESR | The PSR is arguably the strongest weapon in REDSEC, dealing 100 damage per shot. The M2010 ESR offers similar power with better handling. Both are one-shot kill machines to the head. |
| A-Tier | SV-98 | A solid sniper option that’s easier to handle than the S-Tier choices but doesn’t hit quite as hard. |
| B-Tier | Mini Scout | Decent for quick scoping but lacks the one-shot potential of higher-tier snipers. |
DMRs Tier List
| Tier | Weapons | Why They Rank Here |
|---|---|---|
| S-Tier | SVK-8.6 | This DMR is a monster, dealing 66 damage per shot. Two clean hits will drop most targets, making it incredibly rewarding in skilled hands. |
| A-Tier | SVDM, M39 EMR | Both deal 40 damage per shot with good accuracy. The SVDM is particularly well-balanced for mid-range engagements. |
| B-Tier | LMR27 | Shoots fast but deals less damage, forcing multiple hits to secure kills. It’s okay for support players but lacks punch. |
Carbines Tier List
| Tier | Weapons | Why They Rank Here |
|---|---|---|
| S-Tier | M4A1, QBZ-192 | These carbines offer the perfect balance of speed and control. They’re quick to aim and deadly in close to mid-range fights. |
| A-Tier | SG-554R, AK-205 | Solid options that pack power but need better recoil control to unlock their potential. |
| B-Tier | M277, GRTZ-BC, M417 A2 | Fine for casual play but can’t keep up with the top guns in constant fights. |
| C-Tier | SOR-300SC | Honestly, I’d pass on this one unless you have no other choice. |
Top Meta Loadouts for Battlefield REDSEC
Now that you know which weapons to look for, let me share my favorite loadouts that have been dominating the meta in March. These are the builds I personally use when I’m serious about securing a win.
1. KORD 6P67 Assault Rifle Loadout
This is my go-to loadout when I want a versatile weapon that can handle any situation. The KORD 6P67 is incredibly consistent and has carried me through countless final circles.
Recommended Attachments:
- Muzzle: Flash Hider – Keeps you hidden on the minimap while reducing muzzle flash
- Barrel: 415mm Fluted – Improves ADS accuracy and transition speed
- Underbarrel: Folding Vertical – Reduces recoil for better control
- Magazine: 30rnd Fast Mag – Faster reloads can save your life
- Ammo: Lightweight – Improves ADS movement speed
- Scope: SU-230 LPVO – Variable zoom for versatility at all ranges
Why this works: This loadout turns the KORD 6P67 into a laser beam. I’ve found that the combination of the Flash Hider and Folding Vertical grip makes this weapon incredibly stable, even during full-auto fire. The SU-230 LPVO scope gives you the flexibility to engage targets at any distance, making it perfect for the varied engagements you’ll face in REDSEC.
2. UMG-40 SMG Loadout
When I’m playing aggressively or expect close-quarters combat, this UMG-40 loadout never lets me down. It’s an absolute beast in buildings and tight spaces.
Recommended Attachments:
- Muzzle: Standard Suppressor – Keeps you off the minimap
- Barrel: 200mm Custom H – Increases projectile velocity and ADS speed
- Right Accessory: 5 MW Red – Improves hip-fire accuracy for close fights
- Underbarrel: Alloy Vertical – Reduces recoil without downsides
- Magazine: 30rnd Fast Mag – Quick reloads are crucial
- Ammo: Hollow Point – Increases headshot damage
- Scope: Mini Flex 1.00X – Clear sight picture for close range
Why this works: The UMG-40 with this loadout becomes a close-range monster. I’ve melted entire squads with this setup in building fights. The Hollow Point ammo combined with the weapon’s already impressive damage means you’re dropping enemies with just a few well-placed shots. The suppressor keeps you stealthy, allowing you to pick off enemies without revealing your position.
3. PSR Sniper Rifle Loadout
For those long-range engagements and when you want to control sightlines, this PSR loadout is unmatched. There’s nothing more satisfying than one-shotting enemies from across the map.
Recommended Attachments:
- Muzzle: Long Suppressor – Keeps you hidden while improving bullet velocity
- Barrel: 27″ MK22 – Maximizes range and accuracy
- Left Accessory: Range Finder – Essential for long-distance shots
- Underbarrel: Full Angled – Improves stability for follow-up shots
- Magazine: 7 RND Magazine – Standard capacity for this powerhouse
- Ammunition: Match Grade – Improves bullet velocity and accuracy
- Scope: S-VPS 6.00X – Perfect magnification for long-range engagements
- Optic Accessory: Anti-Glare Coating – Prevents scope glare from giving away your position
Why this works: This loadout maximizes the PSR’s already incredible range and accuracy. I’ve used this setup to single-handedly win matches by controlling key sightlines and picking off enemies before they even knew what hit them. The Match Grade ammunition ensures your bullets travel true, while the Anti-Glare Coating keeps you hidden from enemy snipers.
4. DRS-IAR LMG Loadout
When I need to hold down a position or provide suppressive fire for my squad, this DRS-IAR loadout is my choice. It’s incredibly versatile and can handle most situations effectively.
Recommended Attachments:
- Muzzle: Flash Hider – Reduces muzzle flash and keeps you hidden
- Barrel: 20″ SDM-R – Improves long-range control and accuracy
- Underbarrel: Bipod – Essential for reducing recoil when deployed
- Magazine: 30rnd Fast Mag – Balances ammo capacity with reload speed
- Top Accessory: 5 MW Red – Improves hip-fire accuracy
- Ammo: Hollow Point – Increases headshot damage
- Scope: Mini Flex 1.00x – Clear sight picture for mid-range engagements
- Ergonomics: Match Trigger – Improves accuracy during sustained fire
Why this works: The DRS-IAR with this loadout becomes a hybrid between an assault rifle and LMG, offering the best of both worlds. I’ve found that the Bipod is crucial – when deployed, this weapon becomes incredibly stable and accurate. It’s perfect for holding down buildings or suppressing enemy movements while your squad repositions.
5. SVK-8.6 DMR Loadout
For players who like precision and consistency, this SVK-8.6 loadout is devastating. It’s particularly effective in mid-range engagements where you need to land consistent shots.
Recommended Attachments:
- Muzzle: Standard Suppressor – Keeps you off the minimap
- Barrel: 620MM Classic – Maximizes range and accuracy
- Magazine: 20 RND Magazine – Good capacity for sustained fire
- Ammunition: FMJ – Reliable all-around performance
- Ergonomics: Improved Match Catch – Improves control during sustained fire
- Scope: R4T 2.00X – Perfect magnification for mid-range engagements
Why this works: The SVK-8.6 with this loadout becomes a mid-range powerhouse. I’ve used this setup to dominate in areas where traditional assault rifles struggle. The 66 damage per shot means you’re dropping enemies quickly, and the 20-round magazine gives you plenty of room for error. It’s particularly effective when paired with a close-range secondary for those inevitable building fights.
Class-Specific Loadout Recommendations
In Battlefield REDSEC, your class choice matters, and each class has specific weapons that synergize best with their abilities and playstyle. Here are my recommendations for each class:
Assault Class Loadout
The Assault class is perfect for aggressive players who like to push objectives and create new paths on the battlefield. Here’s my recommended loadout:
| Category | Choice | Why I Recommend It |
|---|---|---|
| Primary Weapon | KORD 6P67 | Versatile and deadly at all ranges |
| Secondary Weapon | M45A1 | Reliable sidearm for close-quarters backup |
| Gadget 1 | M87A1 | Excellent for taking down vehicles and fortified positions |
| Gadget 2 | High Explosive Launcher | Perfect for clearing rooms and destroying cover |
| Throwable | Frag Grenade | Versatile option for various combat situations |
Playstyle Tips: When I play Assault, I focus on being the tip of the spear. Use your gadgets to create new paths and surprise enemies. The KORD 6P67 will serve you well in most engagements, but don’t be afraid to switch to your sidearm in tight spaces. Your explosives are crucial for breaking through enemy defenses.
Engineer Class Loadout
The Engineer class is essential for dealing with vehicles, especially since REDSEC features tanks that can dominate the battlefield if left unchecked.
| Category | Choice | Why I Recommend It |
|---|---|---|
| Primary Weapon | SCW-10 | Solid damage output and good versatility |
| Secondary Weapon | M45A1 | Reliable backup for close-quarters combat |
| Gadget 1 | MAS 148 or RPG-7V2 | Essential for taking down vehicles |
| Gadget 2 | AV Mine | Great for setting up defensive positions |
| Throwable | Frag Grenade | Versatile option for various situations |
Playstyle Tips: As an Engineer, your primary responsibility is vehicle destruction. I always keep an eye out for enemy tanks and position myself where I can get good angles on them. The SCW-10 is a solid primary weapon, but don’t hesitate to switch to an LMG if you’re more comfortable with them for general combat.
Support Class Loadout
The Support class is crucial for team survival, providing ammo and armor to keep your squad in the fight. Here’s my recommended setup:
| Category | Choice | Why I Recommend It |
|---|---|---|
| Primary Weapon | SCW-10 | Good balance of damage and control |
| Secondary Weapon | P18 | Lightweight sidearm that won’t slow you down |
| Gadget 1 | Defibrillator | Can revive downed teammates |
| Gadget 2 | Grenade Intercept System | Excellent for protecting your squad from explosives |
| Throwable | Smoke Grenade | Perfect for creating cover and reviving teammates safely |
Playstyle Tips: When I play Support, I stick close to my squad and focus on keeping them supplied and protected. Your LMG proficiency means you should be laying down suppressive fire to control enemy movements. The Defibrillator can be a game-changer in squad fights, so don’t be afraid to push into dangerous situations to revive teammates.
Recon Class Loadout
The Recon class excels at long-range engagements and gathering intelligence for your team. Here’s my recommended loadout:
| Category | Choice | Why I Recommend It |
|---|---|---|
| Primary Weapon | M2010 ESR | Devastating long-range precision |
| Secondary Weapon | M45A1 | Reliable sidearm for close-quarters backup |
| Gadget 1 | C4 Explosives | Great for destroying vehicles and setting traps |
| Gadget 2 | AP Mine | Excellent for protecting your sniper position |
| Throwable | Frag Grenade or Proximity Detector | Frag for offense, Proximity Detector for defense |
Playstyle Tips: As a Recon player, I focus on finding high-ground positions with good sightlines. Your primary job is to scout enemies and mark them for your team while picking off targets from a distance. The M2010 ESR is perfect for this role, but remember to stay mobile and change positions frequently to avoid being counter-sniped.
Advanced Tips for Weapon Mastery
Having the right weapons and loadouts is only half the battle. Here are some advanced tips I’ve learned through hundreds of hours in REDSEC:
1. Attachment Synergy
Don’t just slap on the “best” attachments individually – think about how they work together. For example, if you’re using a suppressor that reduces hip-fire accuracy, pair it with a laser sight that improves hip-fire accuracy to cancel out the drawback. I’ve found that thinking about attachment combinations rather than individual pieces has dramatically improved my weapon performance.
2. Range Awareness
Different weapons excel at different ranges. I always assess the engagement distance before choosing my approach. If I’m using an SMG and spot an enemy at long range, I’ll either close the distance quickly or use cover to reposition rather than taking a fight I’m likely to lose. Conversely, if I’m using a sniper rifle and enemies push close, I’ll switch to my sidearm or fall back to a better position.
3. Recoil Control
Mastering recoil control is essential in REDSEC. I recommend spending time in the firing range to learn each weapon’s recoil pattern. For automatic weapons, I’ve found that short, controlled bursts are often more effective than holding down the trigger, especially at medium to long ranges.
4. Positioning Over Power
I’ve won countless fights against players with better weapons simply because I had better positioning. Always use cover, high ground, and flanking routes to your advantage. A well-positioned player with a B-Tier weapon will often beat a poorly positioned player with an S-Tier weapon.
5. Audio Awareness
Sound is crucial in REDSEC. I always play with a good headset and pay attention to footsteps, weapon sounds, and vehicle movements. This audio information often gives me the split-second advantage I need to win engagements.
Common Mistakes to Avoid
Through my experience, I’ve identified several common mistakes that players make with their weapon choices and loadouts:
1. Overlooking the Minimap
I see too many players ignoring the minimap and getting caught out of position. Always keep an eye on it to track enemy movements and the circle collapse. This information should influence your weapon choices and positioning.
2. Neglecting Sidearms
Your sidearm is more important than you think. I’ve saved myself countless times by quickly switching to my pistol when my primary weapon runs dry or when I’m caught in a close-quarters situation with a long-range weapon.
3. Attachment Point Hoarding
Don’t save your attachment points for later – use them to improve your current weapon. I’ve made the mistake of hoarding points only to be eliminated before I could use them. It’s better to have a well-equipped weapon now than a perfectly equipped weapon later.
4. Ignoring the Circle
The shrinking circle is the most dangerous enemy in REDSEC. I’ve seen too many players focus on fights only to be eliminated by the wall of fire. Always prioritize positioning relative to the circle over chasing kills.
5. Playing Too Aggressively
While aggression can be rewarded, playing too aggressively will get you eliminated quickly. I’ve learned to balance aggression with patience, knowing when to push and when to hold back. This approach has significantly improved my survival rate and win percentage.
FAQ: Battlefield REDSEC Weapons and Loadouts
What’s the overall best weapon in Battlefield REDSEC?
Based on my extensive testing, the PSR sniper rifle is arguably the strongest weapon in REDSEC due to its 100 damage per shot and incredible accuracy. However, the “best” weapon really depends on your playstyle and the situation. For all-around versatility, I’d recommend the KORD 6P67 assault rifle.
How do I get custom weapon drops in REDSEC?
You can get custom weapon drops in two ways: either by finding them as they periodically land around the map during matches, or by earning them through completing missions that your squad activates. I always keep an eye out for these drops as they can provide a significant advantage.
Are weapons restricted to specific classes in REDSEC?
No, weapons aren’t restricted to specific classes in REDSEC, just like in BF6. However, each class specializes in different weapons and performs better with certain types. I recommend using weapons that synergize with your class’s abilities and playstyle.
What attachments should I prioritize in REDSEC?
I always prioritize attachments that improve accuracy and reduce recoil first, followed by those that increase damage output or improve handling. The exact priority depends on the weapon and your playstyle, but generally, muzzle and barrel attachments offer the most significant performance improvements.
How often does the weapon meta change in REDSEC?
The weapon meta can change with each update or season. Based on my experience, major balance updates typically occur every 4-6 weeks, but smaller adjustments can happen more frequently. I recommend staying updated with patch notes and being ready to adapt your loadouts accordingly.
Should I use shotguns in REDSEC?
Honestly, I generally avoid shotguns in REDSEC unless I have no other choice. They’re extremely situational and struggle outside of very close range. In most cases, you’re better off with a good SMG or assault rifle that can handle a variety of engagement distances.
What’s the best way to practice with new weapons?
I recommend spending time in the firing range to get familiar with new weapons before taking them into live matches. Practice controlling recoil, getting comfortable with the iron sights or optics, and learning the effective range of each weapon. This practice has significantly improved my performance with unfamiliar weapons.
How important is weapon mastery in REDSEC?
Weapon mastery is quite important as it unlocks better attachments and improves your familiarity with the weapon. I’ve found that sticking with a few weapons and mastering them thoroughly is more effective than trying to use every weapon you find.
Conclusion
There you have it – my comprehensive guide to the best guns and loadouts in Battlefield REDSEC. I’ve spent countless hours testing every weapon and loadout combination to bring you this information, and I’m confident that following these recommendations will significantly improve your performance in the battle royale.
Remember, the key to success in REDSEC isn’t just having the best weapons – it’s about using them effectively, positioning yourself wisely, and adapting to the ever-changing battlefield conditions. I’ve seen players with “inferior” weapons outperform those with the best loadouts simply because they made better decisions and used their equipment more effectively.
As the meta evolves with future updates, I’ll be sure to keep this guide updated with the latest information. For now, grab your favorite loadout, drop into Fort Lyndon, and start dominating the competition. And hey, if you see me in-game, don’t hesitate to say hi – maybe we can squad up and secure some wins together!
Happy hunting, soldiers, and I’ll see you on the battlefield!
Looking for more gaming content? Check out our other articles on Helldivers 2 patch notes and Plants vs Brainrots card guide for more gaming strategies and tips!