Hey there, fellow Valley adventurers! If you’re anything like me, you’ve been absolutely hooked on Disney Dreamlight Valley’s latest content, and let me tell you – the Return to Beast’s Castle update has been a game-changer! But I’ll be honest with you, when I first encountered that pesky flying painting during “The Haunting of Beast’s Castle” quest, I was completely stumped. I spent what felt like hours running around those dark castle halls like a headless chicken, trying to catch this elusive piece of magical artwork.
Well, I’m here to save you from that same frustration! After countless attempts (and maybe a few choice words muttered at my screen), I’ve mastered the art of catching this flying painting, and I’m going to share everything I’ve learned with you. Trust me, once you know the secrets, it’s actually pretty straightforward – and honestly, pretty cool once you get the hang of it!
What Exactly Is This Flying Painting Anyway?
Before we dive into the nitty-gritty of how to catch it, let me explain what we’re dealing with here. The flying painting is part of “The Haunting of Beast’s Castle” quest, which is the first Realm Quest you’ll encounter in the Return to Beast’s Castle update. This isn’t just some random decorative item – it’s actually crucial for progressing the questline and eventually unlocking Lumiere and Cogsworth as villagers in your valley.
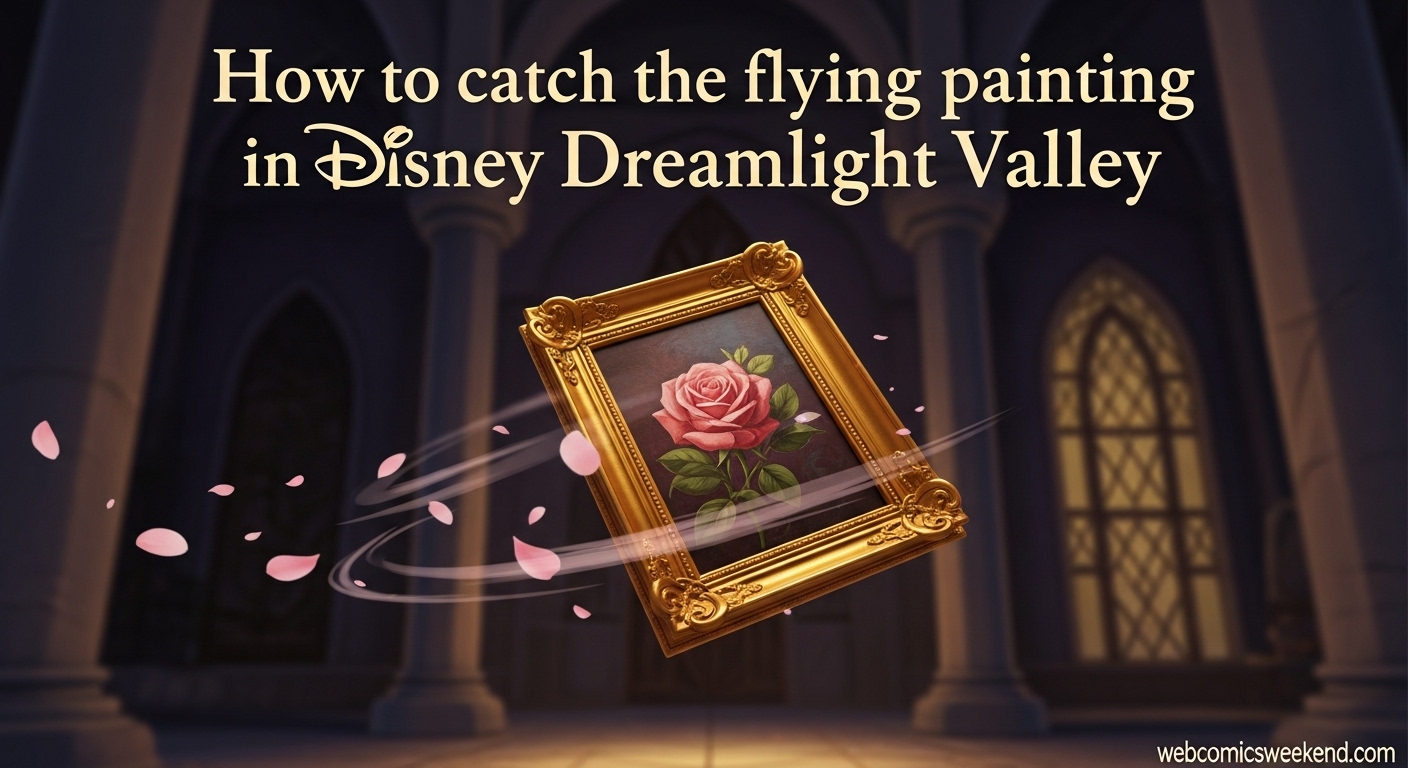
The painting itself is described as “a gold-framed picture of a rose that used to hang in the Beast’s Castle, but recently it started flying around in a most alarming way.” And let me tell you, “alarming” is putting it mildly! This thing zips around the castle like it’s got somewhere important to be, and if you’re not prepared, it’ll leave you in the dust.
Getting Started: Prerequisites for the Quest
Now, before you can even think about catching this flying painting, you need to make sure you’ve got access to the quest and have completed the necessary prerequisites. Let me break this down for you:
- You need to have progressed far enough in the game to receive the letter from the Beast in your mailbox
- Access to the Beauty and the Beast Realm – this is on the third floor of the Dream Castle
- Completion of the initial quest steps – finding Lumiere, gathering fireplace fuel ingredients, and lighting the fireplace
I remember when I first started this quest, I was so excited to get back to Beast’s Castle that I almost skipped some important steps. Don’t be like me! Make sure you’ve properly lit the fireplace and spoken to Lumiere before attempting to catch the painting. Trust me, it’ll save you a lot of confusion later.
The Flying Painting’s Route: Where to Find It?
Okay, here’s where things get interesting. The flying painting isn’t just randomly flying around the castle – oh no, that would be too easy! Instead, it follows a very specific circular looping route. Once I figured this out, catching it became so much easier. Let me walk you through its exact path:
Complete Flight Path Table
| Location | Description | Best Spot to Wait |
|---|---|---|
| Castle Hallways | Main corridors connecting different areas | Near the grand staircase |
| Beast’s Private Room | The Beast’s personal chambers | Just outside the doorway |
| Secret Passage | Hidden storage area near the library | At the bottom of wooden stairs |
| Library | The castle’s main library room | Next to the fireplace |
| Back to Hallways | Returns to main corridors | Near the piano hall entrance |
What’s really cool (and honestly, a bit creepy) is how the painting just keeps looping this route endlessly. When I first discovered this, I felt like such an idiot for all that time I spent chasing it around like a maniac. The key insight here? You don’t chase the painting – you let the painting come to you!
Visual Cues: What to Look For?
Now, you might be thinking, “But the castle is so dark! How am I supposed to see this thing?” And honestly, that’s a valid concern. The Haunting of Beast’s Castle quest takes place in some pretty dim lighting, which makes spotting the flying painting challenging at first. But don’t worry – there are some very distinct visual cues that make it easier to spot once you know what you’re looking for.
Key Visual Indicators
- Sparkling Glow – The painting emits a noticeable sparkle effect that catches the light
- Pink Rose Petals – Little pink petals float around the painting as it moves
- White Swirling Wind – There’s a subtle wind effect swirling around the frame
- Gold Frame – The painting itself has a distinctive gold frame that stands out
When I first started looking for the painting, I was focusing too much on trying to see the actual rose image. Big mistake! The rose is actually pretty hard to make out when the painting is moving quickly. Instead, I learned to look for those sparkles and pink petals – they’re much easier to spot in the dark castle environment.
My Pro Strategy: How to Actually Catch the Flying Painting?
Alright, here’s the moment you’ve been waiting for – my step-by-step strategy for catching that elusive flying painting. I’m going to share with you the exact method that worked for me after multiple failed attempts.
Step 1: Choose Your Waiting Spot Wisely
Instead of running around like I did initially (seriously, my character must have gotten some serious exercise), pick one strategic spot along the painting’s route and wait there. My personal favorite spot is near the top of the staircase in the main hallway. Why? Because it’s a central point where the painting passes by regularly, and you’ve got good visibility in multiple directions.
Step 2: Be Patient and Observant
This is where I struggled the most at first. I’m naturally an impatient person, and standing around waiting felt like torture. But here’s the thing – the painting WILL come to you if you’re in the right spot. Use this time to slowly rotate your camera around, keeping an eye out for those visual cues I mentioned earlier.
Step 3: Get Ready to Interact
When you spot the painting approaching, get ready! The interact button will appear automatically when you’re close enough. Remember, the button varies by platform:
- PC: Left mouse click or E key
- PlayStation: X button
- Xbox: A button
- Nintendo Switch: B button
Step 4: Time Your Move Perfectly
Here’s a little trick I discovered: the painting moves at a fairly consistent speed, so you can actually time your approach. Don’t wait until it’s right on top of you – start moving toward it when it’s a few feet away. This gives you enough time to close the distance without missing your chance.
Step 5: Don’t Give Up!
If you miss it the first time (and honestly, you probably will), don’t get discouraged! The painting will come around again in its loop. Just take a deep breath, maybe grab a snack, and get ready for the next pass.
The Food Trick: Game-Changer for Catching the Painting
I almost forgot to mention this, but it’s such an important tip that I need to share it with you. The painting moves pretty quickly, and sometimes your character’s normal movement speed just isn’t enough to catch it, especially if you’re a bit slow on the draw like I am.
The solution? Eat some food before attempting to catch the painting!
Any stamina-restoring food will give you a temporary movement speed boost, which can make all the difference when you’re trying to close that final gap between you and the painting. I usually keep some simple fruit or cooked meals in my inventory specifically for this purpose.
Recommended Foods for Speed Boost
| Food Item | Speed Boost Duration | Easy to Make? |
|---|---|---|
| Apple | Short | Yes (forageable) |
| Banana | Short | Yes (forageable) |
| Grapes | Short | Yes (forageable) |
| Fruit Salad | Medium | Yes (1x Apple, 1x Banana, 1x Grape) |
| Bouillabaisse | Long | No (requires multiple ingredients) |
When I’m preparing to catch the painting, I usually grab a fruit salad – it’s easy to make, gives a decent speed boost, and I almost always have the ingredients on hand. Plus, it’s much more efficient than running around trying to catch the painting multiple times without any boost.
What Happens After You Catch the Painting?
So you’ve finally caught the flying painting – congratulations! But you’re not done yet. Now you need to complete the next part of the quest, which involves finding a place to display the painting.
Where to Display the Flying Painting
After catching the painting, you need to take it to a specific location in the castle. Head down the staircase and into the hall with the grand piano (this is near the entrance to the Beauty and the Beast Realm). You’ll find a spot on the wall behind the grand piano where you can display the painting.
When I first did this, I was so focused on catching the painting that I completely forgot about this step and spent another 20 minutes running around trying to figure out what to do next. Don’t be like me – remember that the piano hall is your destination!
The Mysterious Aftermath
Here’s where things get really interesting. Once you place the painting on the wall, something strange happens – two mysterious items appear on the ground:
- Domestic Manual Page 1
- Enigmatic Box
Pick up both of these items and head back to speak with Lumiere in the library. He’ll explain that these strange occurrences might be because of a ghost, and you’ll need to find three keys to open the Enigmatic Box in future quests.
Common Problems and Solutions
Let me share some of the issues I ran into while trying to catch the flying painting, and how I solved them. Maybe you’re experiencing some of these same problems!
Problem 1: “I Can’t See the Painting Anywhere!”
This was probably my biggest frustration. The castle is so dark, and sometimes the painting just seems to disappear. Here’s what I learned:
Solution: Make sure you’re actually in the right part of the quest. You need to have already lit the fireplace and spoken to Lumiere about the strange happenings in the castle. If you haven’t done that yet, the painting won’t appear. Also, try standing completely still in one of the locations along its route and slowly rotating your camera – sometimes it’s moving too fast to see if you’re also moving.
Problem 2: “The Painting Moves Too Fast!”
I totally get this. The first few times I tried to catch it, I felt like I was playing a game of tag with someone who had rocket boots.
Solution: This is where the food trick really comes in handy. Also, try to anticipate where the painting is going to be rather than just reacting to where it is. Since it follows the same route every time, you can learn its pattern and position yourself accordingly.
Problem 3: “I Keep Missing the Interact Button!”
This happened to me more times than I’d like to admit. I’d get right up to the painting, but by the time I pressed the button, it was already gone.
Solution: Start moving toward the painting earlier than you think you need to. The interact button has a bit of range, so you don’t need to be touching the painting exactly. Also, make sure you’re not trying to do anything else at the same time – focus solely on catching the painting.
Advanced Tips for the Perfectionists
If you’re like me and you want to not just complete the quest but master it, here are some advanced tips I’ve discovered:
Learn the Exact Timing
After catching the painting multiple times (yes, I did it extra times just to perfect my technique), I’ve learned that it follows a very consistent timing pattern. From any given point in its route, it takes approximately 45-60 seconds to complete a full loop. This means if you miss it, you know exactly how long you need to wait before it comes around again.
Optimize Your Camera Angles
I found that certain camera angles make it much easier to spot the painting. Try positioning your camera so you’re looking down hallways rather than across them. This gives you better depth perception and makes it easier to judge when to start moving toward the painting.
Use Sound Cues
This is something I discovered by accident – the painting actually makes a subtle whooshing sound as it moves! If you listen carefully, you can often hear it approaching before you can see it. This is especially helpful in the darker areas of the castle.
Why This Quest Matters for the Bigger PictureHow to catch the flying painting in Disney Dreamlight Valley
You might be wondering why you’re going through all this trouble for a flying painting. Well, let me tell you – this quest is actually super important for the bigger picture in Disney Dreamlight Valley.
Catching the flying painting is just one step in “The Haunting of Beast’s Castle” quest, which is the first of several Realm Quests in the Return to Beast’s Castle update. Completing these quests is essential for:
- Unlocking Lumiere and Cogsworth as villagers in your valley
- Progressing the overall story of the Beauty and the Beast realm
- Accessing new areas and features within the castle
- Earning unique rewards and achievements
When I finally completed all the Beast’s Castle quests and welcomed Lumiere and Cogsworth to my valley, it felt so rewarding! All that frustration with the flying painting was totally worth it in the end.
My Personal Experience and Final Thoughts
Let me wrap this up by sharing a bit about my personal journey with this quest. When I first started playing the Return to Beast’s Castle update, I was so excited to explore the castle again. But when I got to the flying painting part, I have to admit – I was ready to throw in the towel.
I spent at least an hour that first day just running around, trying to catch this thing. I was getting more and more frustrated, and I actually considered looking up if there was some kind of bug or glitch preventing me from catching it. But then I decided to take a step back and really think about what I was doing wrong.
That’s when I had my “aha!” moment – I realized I was overcomplicating things. Instead of chasing the painting, I should let it come to me. Once I changed my approach and started using the strategies I’ve shared with you here, I caught the painting on my very next try.
Looking back, I’m almost glad I had that struggle because it taught me to be more observant and patient in the game. Sometimes the best approach isn’t the most obvious one, and that’s a lesson that applies to both Disney Dreamlight Valley and life in general!
FAQ: Your Burning Questions Answered
I know you probably still have some questions about catching the flying painting, so let me answer the most common ones I’ve seen from other players:
How long does it take to catch the flying painting?
Honestly, it depends on your approach. If you’re running around chasing it like I did at first, it could take hours! But if you use the strategies I’ve outlined here – picking a good spot, being patient, and using food for a speed boost – you should be able to catch it within 5-10 minutes, max.
Can I catch the flying painting more than once?
Technically, yes – the painting will continue flying around even after you’ve caught it for the quest. But you only need to catch it once to progress the quest. I’ve caught it a few extra times just for practice, and it’s actually kind of fun once you know what you’re doing!
What happens if I can’t find the painting at all?
First, make sure you’ve completed all the prerequisite steps in the quest. You need to have lit the fireplace and spoken to Lumiere about the strange happenings. If you’ve done all that and still can’t find it, try restarting the game or checking if there are any updates available. Sometimes a quick game restart can fix visibility issues.
Is there a specific time of day that makes it easier to catch?
Not really – the painting follows the same route regardless of the in-game time. However, I personally find it easier to see during the “day” parts of the game cycle when the castle isn’t quite as dark. But this is just a personal preference – the strategy works the same regardless of time.
Can I catch the painting with friends in multiplayer mode?
Great question! Yes, you can catch the painting in multiplayer mode, and actually, having friends can make it easier. You can position yourselves at different points along the painting’s route and coordinate to catch it more quickly. Just make sure everyone knows the plan so you don’t end up getting in each other’s way!
Ready to Catch That Painting?
Well, there you have it – everything you need to know about catching the flying painting in Disney Dreamlight Valley! I hope this guide helps you avoid the frustration I went through and lets you enjoy this cool quest to its fullest.
Remember, the key is patience and strategy, not speed and chaos. Pick your spot, wait for the painting to come to you, and be ready to interact when it gets close. And don’t forget to eat some food for that speed boost – it really does make a difference!
If you found this guide helpful, make sure to bookmark it for future reference, and feel free to share it with any friends who might be struggling with the same quest. And if you’re looking for more Disney Dreamlight Valley tips and tricks, be sure to check out our other guides on solving the Potion Brewer’s House puzzle and tackling the Ghostly Fox Critter puzzle.
Happy gaming, and may your painting-catching adventures be successful and frustration-free! Catch you in the valley! 🎮✨