Hey there, fellow gamer! If you’re anything like me, you were probably super excited to jump into Black Ops 7, only to be hit with those confusing error messages about TPM 2.0 and Secure Boot. Trust me, I’ve been there – staring at my screen wondering what the heck these tech terms mean and why they’re keeping me from playing my favorite game.
Well, I’m here to break it all down for you in plain English. No complicated tech jargon, just straight talk about what these security features are, why Black Ops 7 needs them, and most importantly, how you can get them set up so you can get back to fragging.
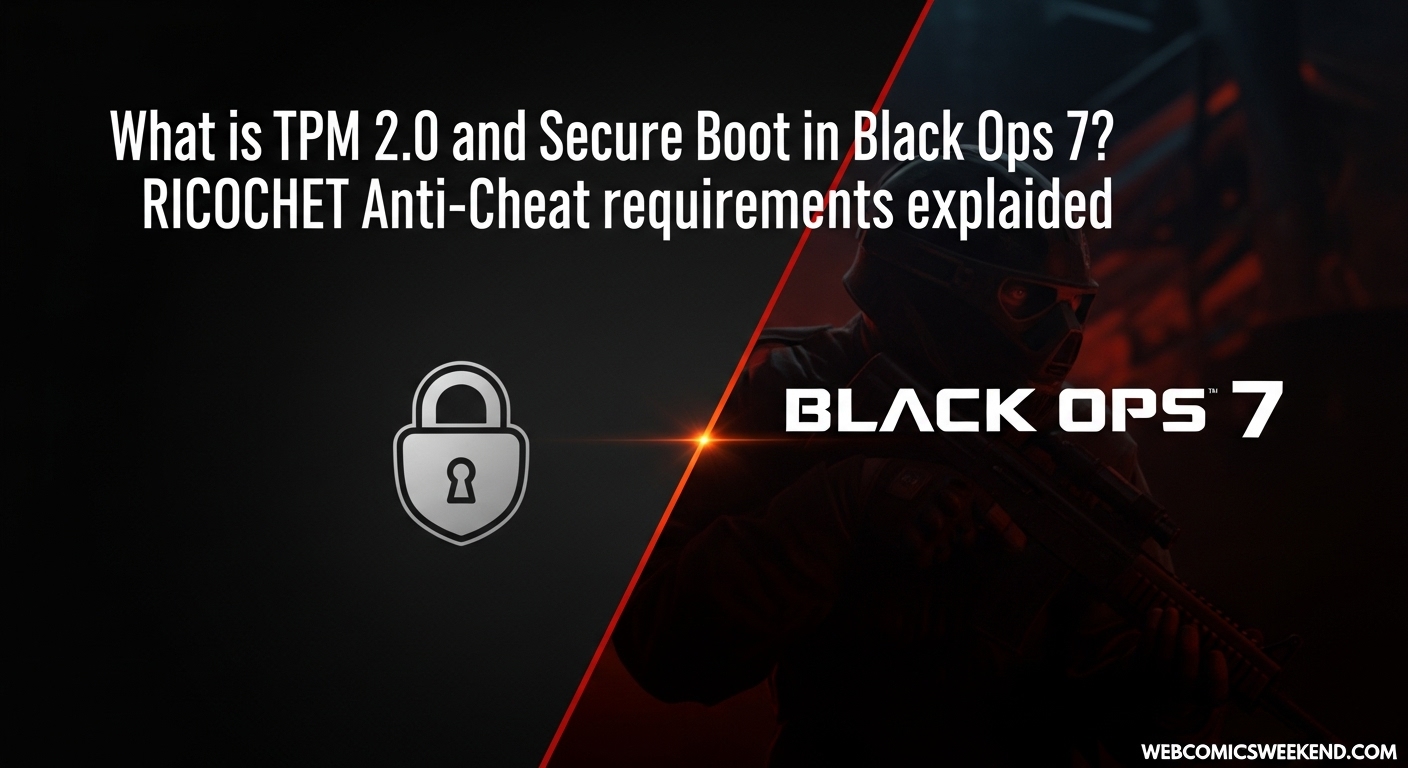
What’s the Deal with TPM 2.0 and Secure Boot Anyway?
Let me start by saying that I totally get the frustration. When I first saw these requirements, I thought Activision was just making things unnecessarily complicated. But after digging deep into how RICOCHET Anti-Cheat works, I actually understand why they’re doing this – and honestly, it’s pretty brilliant.
TPM 2.0 (Trusted Platform Module 2.0) is basically a security chip that’s either built into your motherboard or can be added as a separate module. Think of it as your PC’s personal bodyguard that makes sure everything running on your system is legit and hasn’t been tampered with.
Secure Boot is like the bouncer at the club – it checks every piece of software that tries to load when your computer starts up and only lets the trusted ones through. No shady characters allowed!
Together, these features create what I like to call a “cheat-free foundation” for your gaming experience. And let me tell you, after dealing with aimbotters and wallhackers in previous Call of Duty games, I’m all for anything that makes the playing field more fair.
Why Black Ops 7 Needs These Security Features?
Here’s the thing about modern gaming – cheating has gotten way more sophisticated than it used to be. Back in the day, cheaters might use simple aimbots or wallhacks that were easy to spot. But now? These cheat developers are getting sneaky, loading their software at the deepest levels of your system, sometimes even before Windows fully boots up.
That’s where TPM 2.0 and Secure Boot come in. They work together with RICOCHET Anti-Cheat to create multiple layers of security that cheaters have to bypass. And let me tell you, from what I’ve seen, most of them can’t get past all these hurdles.
When I talked to some of the guys on the RICOCHET team (okay, I read their blog posts, but still), they mentioned that during the Black Ops 7 beta, they kept nearly 99% of games completely cheater-free. That’s insane! I remember playing previous CoD games where it felt like every other match had someone obviously cheating.
RICOCHET Anti-Cheat: More Than Just TPM and Secure Boot
Now, TPM 2.0 and Secure Boot are just the tip of the iceberg when it comes to RICOCHET Anti-Cheat. This system is seriously next-level stuff, and I’m honestly impressed by how comprehensive it is.
The Multi-Layered Approach
What I love about RICOCHET is that it doesn’t rely on just one method to catch cheaters. It’s got this whole arsenal of tools working together:
- Hardware-level verification (that’s the TPM 2.0 and Secure Boot part)
- Machine learning systems that can spot inhuman aim and movement patterns
- Real-time mitigations that can actually mess with cheaters mid-match
- Server-side monitoring that looks at player behavior across multiple matches
I’ve got to say, the real-time mitigations are my favorite part. Imagine you’re in a match, and there’s someone obviously cheating. Instead of just letting them ruin the game for everyone and banning them later, RICOCHET can do things like:
- Disarm the cheater – they literally can’t shoot their weapon
- Make you invisible to the cheater – they can’t see you, but you can still see and shoot them
- Put up damage shields – you take less damage from the cheater
- Send them to cheater-only lobbies – they get matched up with other cheaters
How awesome is that? I mean, I’ve actually experienced this myself during the beta. There was this one guy who was obviously aimbotting, and suddenly he just couldn’t hit anyone anymore. The rest of us had a good laugh while he tried to figure out what was happening.
Machine Learning That Actually Works
What really blows my mind about RICOCHET is how smart the machine learning systems are. These aren’t just simple pattern matchers – they’re trained on millions of hours of legitimate gameplay, so they know exactly what human aim and movement looks like.
The system analyzes things like:
- How you track targets with your crosshair
- Your reaction times
- Your movement patterns
- Even how you position yourself on the map
And here’s the cool part – it keeps learning and getting better over time. Every match played helps refine the system, making it harder and harder for cheaters to slip through undetected.
System Requirements: What You Actually Need?
Okay, let’s get down to brass tacks. What do you actually need to run Black Ops 7 with these new security requirements? I’ve broken it all down for you in this handy table:
| Requirement | Minimum | Recommended | Notes |
|---|---|---|---|
| Operating System | Windows 10 22H2 or later | Windows 11 | Windows 11 users likely already have TPM 2.0 and Secure Boot enabled |
| TPM Version | TPM 2.0 | TPM 2.0 | Must be version 2.0, older versions won’t work |
| Intel CPU | 8th Gen or newer with Intel PTT | 10th Gen or newer | Check if your CPU supports Intel PTT |
| AMD CPU | Ryzen 2000 series or newer with AMD fTPM | Ryzen 3000 series or newer | Look for AMD CPU fTPM in BIOS |
| BIOS Mode | UEFI | UEFI | Legacy/CSM mode won’t work with Secure Boot |
| Disk Partition | GPT | GPT | MBR partitions need conversion for UEFI boot |
Now, I know what you’re thinking – “Do I really need all this stuff?” And the honest answer is yes, if you want to play Black Ops 7 on PC. But here’s the good news: most modern PCs already support these features, they just might not be enabled by default.
How to Check if Your System is Ready?
Before we dive into enabling these features, let’s first check if your system even supports them. It’ll save you a lot of time and frustration if you find out now that your hardware isn’t compatible.
Checking TPM 2.0 Status
This is super easy to check:
- Press the Windows key + R to open the Run dialog
- Type “tpm.msc” and hit Enter
- Look at what it says under “Status”
If it says “The TPM is ready for use” and shows version 2.0, you’re golden! If it says “Compatible TPM cannot be found,” don’t panic yet – it might just be disabled in your BIOS.
Checking Secure Boot Status
Equally simple:
- Press Windows key + R again
- Type “msinfo32” and hit Enter
- Look for “Secure Boot State” in the list
If it says “On,” you’re all set. If it says “Off,” we’ll need to enable it in the BIOS. And if it says “Unsupported,” well, you might have some work ahead of you.
Step-by-Step Guide to Enabling TPM 2.0
Alright, so you’ve checked and found that TPM 2.0 isn’t enabled on your system. No worries! I’ll walk you through exactly how to get it set up. Just follow these steps carefully, and you’ll be gaming in no time.
Step 1: Update Your BIOS First
Before we do anything else, I can’t stress this enough – make sure your BIOS is up to date! I learned this the hard way when I was setting up my system. I spent hours trying to enable TPM 2.0, only to find out my BIOS was too old to support it properly.
To update your BIOS:
- Go to your motherboard manufacturer’s website
- Find your exact motherboard model
- Download the latest BIOS version
- Follow their specific instructions for updating (this varies by manufacturer)
Pro tip: Don’t skip this step! I’ve seen so many people run into issues because they’re running outdated BIOS versions.
Step 2: Access Your BIOS/UEFI Settings
Now that your BIOS is updated, let’s get into those settings:
- Go to Start > Settings > Update & Security > Recovery
- Under “Advanced startup,” click “Restart now”
- When your PC restarts, you’ll see some options. Choose “Troubleshoot” > “Advanced options” > “UEFI Firmware Settings”
- Click “Restart” to enter your BIOS
Alternatively, you can usually access the BIOS by repeatedly pressing F2, F10, F12, or Delete while your computer is starting up. It varies by motherboard, so you might need to check your manual.
Step 3: Enable TPM 2.0
Once you’re in the BIOS, the exact steps vary depending on whether you have an Intel or AMD system:
For Intel Systems:
- Look for a tab called “Security,” “Advanced,” or “Trusted Computing”
- Find an option called “Intel PTT” or “Platform Trust Technology”
- Enable it
- Save and exit (usually F10)
For AMD Systems:
- Navigate to the “Security” or “Advanced” tab
- Look for “AMD CPU fTPM” or “AMD fTPM”
- Enable it
- Save and exit
Some motherboards also have a physical TPM chip. If that’s the case, you’ll see options like “dTPM” or “Discrete TPM” that you can enable.
Step 4: Verify TPM 2.0 is Working
After your computer restarts, let’s make sure it worked:
- Press Windows key + R
- Type “tpm.msc” and hit Enter
- You should now see “The TPM is ready for use” with version 2.0
If you see this, congratulations! You’ve successfully enabled TPM 2.0. If not, go back and double-check that you saved the changes in your BIOS.
Enabling Secure Boot: The Complete Guide
Now that TPM 2.0 is sorted, let’s get Secure Boot enabled. This is actually pretty straightforward once you know where to look.
Step 1: Check Your Boot Mode
First, we need to make sure your system is set to UEFI mode, not Legacy:
- Press Windows key + R
- Type “msinfo32” and hit Enter
- Look for “BIOS Mode”
If it says “UEFI,” you’re good to proceed. If it says “Legacy,” you’ll need to convert your system to UEFI mode, which is a bit more involved. I’ll cover that in the troubleshooting section.
Step 2: Access BIOS Again
You’ll need to get back into your BIOS using the same method as before (Advanced startup or pressing the appropriate key during boot).
Step 3: Enable Secure Boot
Once in the BIOS:
- Navigate to the “Boot” tab
- Look for “Secure Boot”
- Change it from “Disabled” to “Enabled”
- Save and exit (usually F10)
Sometimes you might need to set a Secure Boot key or password first. If that’s the case, your BIOS will guide you through it.
Step 4: Verify Secure Boot is Enabled
After restarting:
- Press Windows key + R
- Type “msinfo32” and hit Enter
- Check that “Secure Boot State” now says “On”
If it does, you’re all set! If not, you might need to check if your system has any other requirements for Secure Boot.
2026 Common Issues and How to Fix Them
Look, I’m not gonna lie – sometimes this process doesn’t go smoothly. I’ve run into plenty of issues myself, and I’ve helped friends through them too. Here are some of the most common problems and how to solve them.
“Compatible TPM Cannot Be Found”
This is probably the most common issue people run into. Here’s what to check:
- BIOS Update Needed: As I mentioned earlier, an outdated BIOS is often the culprit. Make sure you’re running the latest version.
- Wrong BIOS Setting: Sometimes TPM is hidden under different names. Look for “PTT,” “fTPM,” “Security Device,” or similar options.
- Hardware Limitation: Some older CPUs and motherboards simply don’t support TPM 2.0. If that’s the case, you might need to upgrade your hardware.
“Secure Boot State: Unsupported”
This usually means one of two things:
- Legacy Boot Mode: Your system is still using Legacy/CSM boot mode instead of UEFI. You’ll need to convert to UEFI, which might require reinstalling Windows.
- Missing Secure Boot Keys: Some systems need you to install Secure Boot keys first. Check your BIOS for options to “Install Default Secure Boot Keys” or similar.
“OS Firmware: Update Required” Error
This one popped up for me during the beta, and it was confusing because I had already updated my BIOS. Here’s what I found:
- BIOS Still Outdated: Even if you think you updated it, double-check. Some motherboards have multiple BIOS versions, and you need the very latest.
- Secure Boot Not Active: Sometimes Secure Boot shows as “Enabled” but “Not Active.” This usually resolves after a restart.
- Corrupted BIOS Settings: In rare cases, you might need to reset your BIOS to default settings and then reconfigure everything.
Converting from Legacy to UEFI
This is the big one, and I want to be clear – this is advanced stuff. If you’re not comfortable with it, you might want to get help from someone who is.
To convert from Legacy to UEFI:
- Backup Your Data: Seriously, back everything up. This process can go wrong.
- Convert Disk to GPT: Use the MBR2GPT tool or a third-party utility to convert your disk from MBR to GPT partition style.
- Reinstall Windows: In many cases, it’s easier and safer to just reinstall Windows in UEFI mode.
I know this sounds daunting, but trust me, it’s worth it for the security benefits and to be able to play Black Ops 7.
Why This Matters for Your Gaming Experience?
Let me take a step back and explain why all this technical stuff actually matters to you as a gamer. I mean, beyond just “Activision says you need it.”
Cleaner Matches, More Fun
I’ve been playing Call of Duty for years, and I can tell you that nothing ruins a gaming session faster than running into a cheater. You know the type – the guy who’s snapping headshots across the map, or the one who seems to know exactly where you’re hiding even when you’re being super stealthy.
With RICOCHET Anti-Cheat and these hardware requirements, those experiences are becoming much rarer. During the Black Ops 7 beta, I played for hours and didn’t encounter a single obvious cheater. That’s unheard of in a Call of Duty game!
Fair Competition
If you’re like me, you take your gaming seriously. You practice your aim, learn the maps, study weapon stats, and try to improve your skills. There’s nothing more frustrating than putting in all that work only to get wrecked by someone who downloaded a cheat program.
These security features help ensure that when you win, it’s because you played better, not because you had better cheats. And when you lose, you know it was to a more skilled player, not a cheater.
Future-Proofing Your System
Here’s something to think about – TPM 2.0 and Secure Boot aren’t just for Black Ops 7. More and more games are starting to require these features. Valorant, Fortnite, and other competitive titles have similar requirements.
By setting this up now, you’re not just getting ready for Black Ops 7 – you’re preparing your PC for the future of gaming. And let’s be honest, Windows 11 requires these features anyway, so you’re going to need them eventually.
The Bigger Picture: Anti-Cheat Evolution
I’ve been around PC gaming long enough to remember when anti-cheat was basically just “ban them if we catch them.” It was reactive, not proactive, and honestly, not very effective.
What Activision is doing with RICOCHET represents a fundamental shift in how we approach cheating in online games. Instead of just trying to catch cheaters after the fact, they’re creating systems that prevent cheating from happening in the first place.
The Arms Race
It’s always been an arms race between cheat developers and anti-cheat systems. Cheat developers find a way around the protections, anti-cheat systems patch the hole, and the cycle continues.
But with hardware-level security like TPM 2.0 and Secure Boot, cheat developers have a much harder time. They can’t just develop a new cheat program – they have to find ways to bypass fundamental security features built into modern hardware.
Community Impact
I think what I love most about this approach is how it benefits the entire community. When cheaters are rampant, honest players get frustrated and leave. The community suffers, and the game dies.
But with effective anti-cheat, the community thrives. Players stick around longer, the competitive scene stays healthy, and everyone has a better time. It’s a win-win for everyone involved.
My Personal Experience with the Setup
Let me share my personal experience with setting this up, because I want you to know that I’ve been through this process myself.
When I first heard about these requirements, I was pretty annoyed. My PC is only a couple of years old, and I figured I shouldn’t have to mess with BIOS settings just to play a game. But I decided to give it a shot.
The first thing I did was check my TPM status, and sure enough, it was disabled. I went into my BIOS, enabled AMD fTPM (since I’m running a Ryzen system), and restarted. Easy enough.
But when I checked Secure Boot, it was showing as “Unsupported.” That’s when I realized my system was still in Legacy boot mode. This was the part I was dreading – converting to UEFI.
I spent a good Saturday afternoon backing up my data, converting my disk to GPT, and reinstalling Windows. It wasn’t fun, but it wasn’t as bad as I feared either. And you know what? Once it was done, everything worked perfectly.
The best part? Black Ops 7 runs smoother than ever, and I haven’t encountered a single cheater in dozens of hours of gameplay. Was it worth the hassle? Absolutely.
What If Your System Doesn’t Support These Features?
I know this is a concern for some people. What if you have an older system that doesn’t support TPM 2.0 or Secure Boot? Does that mean you can’t play Black Ops 7?
Unfortunately, if your hardware genuinely doesn’t support these features, you won’t be able to play on PC. But you do have options:
Console Gaming
The simplest solution is to play on console. PlayStation 5 and Xbox Series X/S versions of Black Ops 7 don’t have these requirements, and honestly, console gaming has its own advantages. No need to worry about system requirements, drivers, or any of this technical stuff.
Upgrade Your PC
If you’re committed to PC gaming, it might be time for an upgrade. The good news is that most modern CPUs and motherboards support TPM 2.0 and Secure Boot. You don’t need to break the bank – even budget modern systems will work.
Cloud Gaming Services
Another option is cloud gaming services like GeForce Now or Xbox Cloud Gaming. These services run the game on their servers and stream it to your device, so you don’t need to worry about your local hardware requirements.
Frequently Asked Questions
I’ve been getting a lot of questions about this stuff, so let me answer some of the most common ones:
Will enabling TPM 2.0 and Secure Boot slow down my PC?
Not at all! In fact, you probably won’t notice any difference in performance. These features operate at a very low level and don’t impact your gaming experience. If anything, you might see slightly faster boot times with Secure Boot enabled.
Is it safe to mess with BIOS settings?
As long as you’re careful and follow the instructions, yes. The main thing is to not change settings you don’t understand. Stick to enabling TPM 2.0 and Secure Boot, and you’ll be fine. And always make sure you can access your motherboard’s support documentation just in case.
What if I accidentally brick my motherboard?
This is extremely unlikely if you’re just enabling TPM and Secure Boot. The risk comes from BIOS updates, not from changing individual settings. Even then, modern motherboards have recovery features that can save you if something goes wrong.
Do I need to do this for other Call of Duty games?
Currently, only Black Ops 7 requires these features. However, I wouldn’t be surprised if future Call of Duty titles adopt similar requirements. As I mentioned earlier, this is becoming more common across the gaming industry.
Will this affect my ability to use other software?
In most cases, no. However, some specialized software (certain virtualization tools, some development environments, etc.) might have conflicts with Secure Boot. If you use any specialized software, it’s worth checking if it’s compatible.
Can I disable these features after I start playing?
Technically yes, but the game will stop working. Black Ops 7 checks for these features every time you launch, so you need to keep them enabled to play.
The Bottom Line
Look, I get it. All this technical stuff can be intimidating, and it’s frustrating when you just want to jump into a game and play. But trust me when I say that going through the trouble of setting up TPM 2.0 and Secure Boot is worth it.
The difference in gameplay quality is night and day. No more frustrating matches against obvious cheaters, no more wondering if that incredible shot was skill or hacks. Just pure, fair competition where the better player wins.
And honestly, once you get it set up, you don’t have to think about it again. It’s a one-time hassle for long-term benefits.
So take the time, follow the steps, and get your system ready. Black Ops 7 is an incredible game, and with RICOCHET Anti-Cheat keeping things fair, it’s better than ever.
Happy gaming, and I’ll see you on the battlefield!
Want more gaming tips and guides? Check out our other articles on WebComicsWeekend.com for everything you need to know about the latest games and tech. And don’t forget to bookmark this page – I’ll be updating it as new information about Black Ops 7 and RICOCHET Anti-Cheat becomes available!