Let me tell you something – when I first jumped into RV There Yet, I had no idea how crucial engine maintenance would be to my survival. I mean, there I was, having a blast driving through Mabutts Valley with my friends, when suddenly that dreaded “Check Engine” light popped up. My RV started sputtering, and before I knew it, we were stranded in the middle of nowhere with bears circling our camp. Talk about a buzzkill!
But here’s the thing – after countless hours playing this game and actually working on real RVs in my spare time, I’ve learned that engine oil isn’t just some random item you pick up. It’s literally the lifeblood of your vehicle, whether you’re navigating virtual terrain or actual highways. Today, I’m going to share everything I’ve learned about using engine oil and repairing engines in both RV There Yet and real-life RV maintenance.
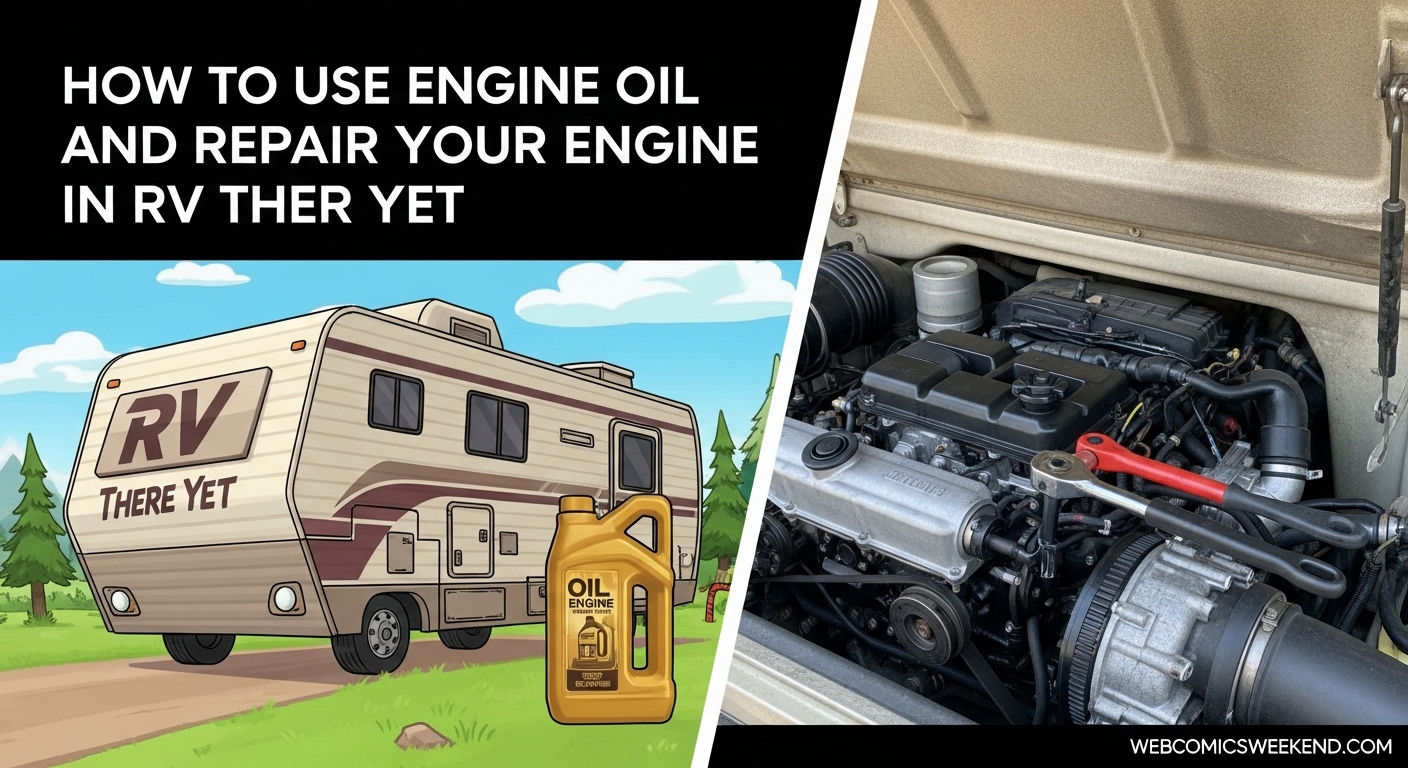
Understanding RV There Yet: More Than Just a Game
Before we dive into the nitty-gritty of engine repair, let me give you some context about RV There Yet. This isn’t just another casual driving game – it’s a physics-based co-op adventure that throws you and your friends into the most chaotic road trip imaginable. You’re trying to get your RV back home after a camping trip, but the roads are blocked, forcing you to take some seriously off-the-beaten-path routes.
What makes this game special is how it blends realistic vehicle mechanics with absolutely insane situations. One minute you’re carefully navigating a narrow bridge, the next you’re being chased by a bear while your RV is literally falling apart at the seams. And through all this chaos, your engine’s condition can make or break your entire journey.
The Game Mechanic: Engine Oil in RV There Yet
Where to Find the Engine in RV There Yet
I remember my first time trying to repair the engine in RV There Yet – I spent like 20 minutes running around the outside of the RV looking for an engine compartment. Talk about feeling stupid! Here’s the deal: the engine in RV There Yet is actually inside the RV, not accessible from the outside.
Specifically, you need to go to the back of the RV’s interior and look under the bed. There’s a small hatch on the floor that you can open to access the engine. This design choice actually makes sense when you think about it – it forces players to work together, with someone needing to stay inside to handle repairs while others navigate or deal with external threats.
Finding and Using Motor Oil
Motor Oil is the key item you’ll need for engine repairs in RV There Yet. Here’s what I’ve learned about finding and using it effectively:
Where to Find Motor Oil:
- You can usually find your first bottle of Motor Oil right at the starting campsite near the tent
- Additional bottles spawn at various campsites and exploration areas throughout the map
- I always recommend grabbing at least 2-3 bottles before heading out on long journeys
How to Use Motor Oil:
- Make sure you have at least one bottle of Motor Oil in your inventory
- Enter the RV and head to the back where the bed is located
- Open the hatch under the bed to access the engine compartment
- Equip the Motor Oil bottle from your inventory
- Aim at the engine and press the interaction button (left mouse button on PC)
- Watch as the oil gets poured into the engine and the “Check Engine” warning disappears
Pro Tip: Sometimes one bottle isn’t enough if your engine damage is severe. I learned this the hard way when I tried to cross a river and ended up nearly destroying my engine. Now I always carry at least 3-4 bottles of oil for those really rough sections.
When Engine Repairs Are Necessary
The “Check Engine” alert in RV There Yet isn’t just for show – it’s a critical warning that your engine oil is running low and your RV is at risk of breaking down completely. Here are the main causes of engine damage I’ve encountered:
- Collisions: Hitting rocks, trees, or other obstacles
- Rough Terrain: Driving through particularly bumpy or steep areas
- Falls: Dropping off cliffs or steep inclines (I’m guilty of this one more times than I’d like to admit)
- General Neglect: Just like in real life, ignoring maintenance leads to bigger problems
If you keep driving with a damaged engine, you’re asking for trouble. The engine can fail completely, forcing you to restart from the last checkpoint. Trust me, there’s nothing worse than losing an hour of progress because you ignored that warning light.
Maintenance Tips for RV There Yet
After playing this game extensively, I’ve developed some strategies to keep my engine running smoothly:
Always Carry Extra Oil: I never leave camp without at least 2-3 bottles of Motor Oil. You never know when you’ll hit a rough patch that really beats up your engine.
Stop When Safe: When that “Check Engine” light comes on, don’t wait until you’re in a dangerous spot to pull over. Find a safe area as soon as possible and make the repair.
Store Oil Properly: Keep your Motor Oil bottles inside the RV in cabinets or on shelves. I once lost a bottle because it rolled out the door during a particularly bumpy section – not fun!
Team Communication: If you’re playing co-op, have one person monitor the engine status while others focus on driving or navigation. Good communication can prevent a lot of engine-related disasters.
Drive Smart: I know it’s tempting to take those crazy shortcuts and jumps, but they really do accelerate engine wear. Sometimes the slower, safer route is worth it in the long run.
Real-World RV Engine Maintenance: Beyond the Game
Now, let’s talk about the real deal – actual RV engine maintenance. While RV There Yet does a great job of simulating some aspects of vehicle maintenance, real-world RV care is a whole different ballgame. I’ve spent years working on RVs, and I can tell you that proper engine maintenance is absolutely crucial for keeping your home-on-wheels running smoothly.
Understanding Your RV Engine
First things first – RV engines come in different flavors, and knowing what you’re working with is essential:
Gasoline Engines: Most Class A and Class C motorhomes use gasoline engines, typically ranging from V8 to V10 configurations. These are similar to what you’d find in large trucks or SUVs, but they’re built to handle the extra weight of an RV.
Diesel Engines: Found in many Class A motorhomes (especially “diesel pushers”), diesel engines offer more torque and better fuel efficiency for heavy vehicles. They’re built to last longer but require different maintenance procedures.
Engine Location: This is a big one! In many motorhomes, especially diesel pushers, the engine is located in the rear of the vehicle. This means accessing it for maintenance can be quite different from your typical car engine.
When to Change Your RV Engine Oil
Unlike in RV There Yet where you just pour oil in when the warning light comes on, real-world RV oil changes follow a more structured schedule. Here’s what I’ve learned:
Mileage Intervals:
- Conventional Oil: Every 3,000 to 5,000 miles
- Synthetic Oil: Every 10,000 to 15,000 miles
- Annual Changes: Even if you don’t hit the mileage, change your oil at least once a year
Why Annual Changes Matter: RVs often sit for long periods, and this sitting can be harder on the oil than actual driving. Oil degrades over time, even when the vehicle isn’t in use.
Special Considerations: If you frequently drive in extreme conditions (very hot or cold weather, dusty environments, or towing heavy loads), you might need to change your oil more frequently.
DIY RV Oil Change: Step-by-Step Guide
Changing your RV’s oil yourself can save you a significant amount of money, but it’s not as simple as in the game. Here’s my comprehensive guide:
What You’ll Need
Tools and Supplies:
- Proper type and amount of engine oil (check your owner’s manual)
- Correct oil filter for your RV model
- Socket set with the right size for your drain plug
- Oil filter wrench
- Large oil drain container (RVs hold a lot more oil than cars!)
- Wheel chocks
- Tiered ramps (for better access)
- Funnel
- Shop towels or rags
- Work light
- Gloves
Safety First:
- Always work on a level surface
- Use wheel chocks to prevent rolling
- Let the engine cool slightly (warm but not hot)
- Wear protective gloves and eyewear
The Oil Change Process
Step 1: Preparation Drive your front tires onto tiered ramps for easier access to the oil pan. Chock the rear wheels securely and engage the parking brake. Position your oil drain container under the drain plug.
Step 2: Access the Oil Fill Cap Open the hood and clean the oil fill cap area before removing it. This prevents dirt and debris from falling into the engine. Remove the cap and set it aside in a safe place.
Step 3: Drain the Old Oil Use the proper socket to remove the oil drain plug. Be careful – the oil will be warm! Let it drain completely into your container. This might take a while since RVs hold more oil than regular vehicles.
Step 4: Replace the Oil Filter Use an oil filter wrench to remove the old filter. Clean the mating surface where the filter sits. Make sure the old filter’s rubber gasket comes off with it – leaving it behind is a common mistake that can cause leaks.
Step 5: Install New Filter Lubricate the new filter’s rubber gasket with a small amount of clean oil. Screw it on until it stops, then give it an additional quarter-turn. Don’t overtighten!
Step 6: Replace Drain Plug Put the drain plug back in and torque it to the manufacturer’s specifications. Don’t forget the washer if your RV uses one.
Step 7: Add Fresh Oil Use a funnel to add the recommended amount of fresh oil through the fill hole. RVs typically need 12-28 quarts, depending on the engine size.
Step 8: Check Oil Level Pull the dipstick, wipe it clean, reinsert it, and check the level. Add more oil if needed, but don’t overfill!
Step 9: Start Engine and Check for Leaks Start the engine and let it run for 2-3 minutes. Check carefully for any leaks around the filter and drain plug.
Step 10: Final Check Turn off the engine and wait a minute or two, then check the oil level again. Top off if needed.
Step 11: Clean Up and Document Dispose of the used oil and filter properly (most auto parts stores will take them). Note the date and mileage on a sticker for your windshield.
Common RV Engine Issues and Troubleshooting
Just like in RV There Yet, real RVs can develop engine problems. Here are the most common issues I’ve encountered and how to address them:
Engine Overheating
Symptoms: Temperature gauge in the red zone, steam from engine compartment, loss of power
Causes: Low coolant, faulty thermostat, clogged radiator, water pump failure
What to Do:
- Pull over immediately and let the engine cool
- Check coolant levels and top off if needed
- Look for visible leaks
- If overheating persists, seek professional help
Decreased Fuel Efficiency
Symptoms: Suddenly getting worse gas mileage, engine running rough
Causes: Clogged air filter, worn spark plugs, fuel system issues, dirty injectors
Solutions:
- Replace air filter regularly
- Check and replace spark plugs if needed
- Use fuel injector cleaner
- Have fuel system professionally inspected
Fluid Leaks
Symptoms: Puddles under your RV, low fluid levels, warning lights
Common Leaks:
- Oil: Black or brown puddles, often from oil pan or valve cover gaskets
- Coolant: Green, orange, or pink puddles, sweet smell
- Transmission Fluid: Red puddles, often from transmission pan or lines
Action: Address leaks immediately – small leaks can lead to big problems!
Frequent Stalling
Symptoms: Engine cuts out, especially when idling or accelerating
Causes: Fuel pump issues, dirty injectors, ignition system problems, sensor failures
Solutions:
- Clean fuel injectors
- Check ignition components
- Have fuel system professionally diagnosed
Unusual Noises
Common Noises and What They Mean:
- Knocking: Could indicate serious engine problems (pistons, connecting rods)
- Squealing: Often worn belts or faulty bearings
- Grinding: Could be starter motor or alternator issues
Action: Don’t ignore unusual noises – they’re often early warning signs of bigger problems!
RV Engine Maintenance Schedule
Keeping your RV engine healthy requires regular maintenance. Here’s the schedule I follow:
Monthly Checks
- Check oil level
- Inspect belts and hoses for cracks or wear
- Check coolant level
- Look for any fluid leaks
- Test battery charge
Every 3,000-5,000 Miles (or 3-6 Months)
- Change engine oil and filter
- Check and top off all fluids
- Inspect air filter
- Check tire pressure and condition
Annual Maintenance
- Complete oil and filter change
- Replace air filter
- Check and replace fuel filter if needed
- Inspect and replace spark plugs (gasoline engines)
- Check all belts and hoses
- Test battery and clean terminals
- Inspect cooling system
Every 2-3 Years
- Flush and replace coolant
- Replace belts and hoses as needed
- Complete brake system inspection
- Transmission service (if applicable)
When to Call a Professional
While I’m a big fan of DIY maintenance, there are times when you need to call in the pros. Here’s when I recommend seeking professional help:
- Persistent overheating issues
- Major fluid leaks you can’t identify or fix
- Strange engine noises that don’t go away
- Check engine light that stays on after basic troubleshooting
- Any issue you’re not comfortable handling yourself
Remember, RV engines are expensive to replace – often $15,000-$25,000 or more! It’s better to pay for professional diagnosis than to risk catastrophic engine failure.
Comparing Game vs. Reality: What RV There Yet Gets Right (and Wrong)
After spending countless hours playing RV There Yet and working on real RVs, I’ve noticed some interesting similarities and differences:
What the Game Gets Right
Engine Maintenance is Crucial: Just like in real life, ignoring engine problems in RV There Yet leads to breakdowns. The game does a great job of teaching players that preventive maintenance matters.
Teamwork Makes the Difference: In both the game and real RV life, having help makes maintenance and repairs much easier. The game’s co-op mechanics reflect this reality well.
Rough Terrain Takes Its Toll: Driving through challenging terrain really does beat up your vehicle, both in the game and in real life.
Where the Game Differs from Reality
Simplicity of Repairs: In RV There Yet, you just pour oil in and everything’s fixed. Real RV engine repairs are much more complex and often require professional diagnosis.
Engine Access: While the game’s under-the-bed engine access is clever, real RV engines are typically accessed from the front or rear of the vehicle, not through interior hatches.
Damage Types: The game simplifies engine damage to a single “Check Engine” warning. Real RVs can have dozens of different specific issues that require different solutions.
Essential Tools for RV Engine Maintenance
Whether you’re a weekend warrior or full-time RVer, having the right tools makes all the difference. Here’s my essential toolkit:
Basic Tools Every RV Owner Should Have
- Complete socket set (both metric and standard)
- Oil filter wrench
- Funnel (RV-sized!)
- Oil drain pan (large capacity)
- Wheel chocks
- Tire pressure gauge
- Multimeter for electrical testing
- Work light or flashlight
- Basic hand tools (pliers, screwdrivers, etc.)
Advanced Tools for Serious DIYers
- Code reader for check engine lights
- Compression tester
- Cooling system pressure tester
- Torque wrench
- Brake bleeder kit
- Grease gun for chassis lubrication
Safety Equipment
- Safety glasses
- Work gloves
- Fire extinguisher (rated for vehicle fires)
- First aid kit
- Reflective triangles or flares
Cost Considerations: DIY vs. Professional Service
One of the biggest questions RV owners face is whether to do maintenance themselves or pay for professional service. Here’s my breakdown:
DIY Oil Change Costs
- Oil: $40-80 (depending on type and quantity)
- Filter: $15-30
- Disposal fees: $5-10
- Total: $60-120
Professional Oil Change Costs
- Gas RV: $170-200+
- Diesel RV: $330-400+
- Additional services: Often includes fluid checks, chassis lubrication, etc.
When DIY Makes Sense
- You have the necessary tools and space
- You’re comfortable working on engines
- You want to save money
- You enjoy the hands-on aspect
When Professional Service is Better
- You’re not confident in your abilities
- Your RV is still under warranty
- You don’t have proper tools or space
- The issue is complex or potentially dangerous
Environmental Considerations
Proper disposal of used oil and other fluids is crucial for protecting our environment. Here’s what I do:
Used Oil:
- Store in clean, sealed containers
- Take to auto parts stores or recycling centers
- Never dump on the ground or in waterways
Used Filters:
- Drain completely before disposal
- Many auto parts stores accept used filters
- Check local regulations for proper disposal
Other Fluids:
- Coolant, transmission fluid, and brake fluid all require special disposal
- Contact local waste management for guidance
- Never mix different types of fluids
Future-Proofing Your RV Engine
Want to extend the life of your RV engine? Here are my top tips:
Regular Maintenance is Non-Negotiable
I can’t stress this enough – following a regular maintenance schedule is the single best thing you can do for your RV engine.
Use Quality Products
Don’t cheap out on oil, filters, or other fluids. Quality products make a real difference in engine longevity.
Drive Smart
- Avoid rapid acceleration and hard braking
- Don’t overload your RV
- Use proper gears for hills and terrain
- Allow the engine to warm up before driving hard
Keep Detailed Records
Maintain a log of all maintenance, repairs, and oil changes. This helps you stay on schedule and can be valuable if you ever sell your RV.
Listen to Your Engine
Pay attention to unusual sounds, smells, or performance changes. Early detection of problems can prevent major repairs down the road.
Conclusion: Game Skills Meet Real-World Knowledge
Whether you’re navigating the virtual roads of Mabutts Valley in RV There Yet or cruising down actual highways in your RV, understanding engine oil and maintenance is absolutely essential. The game does a fantastic job of introducing players to the concept that vehicles need care and attention, even if it simplifies the process for gameplay purposes.
What I love most about RV There Yet is how it gets people thinking about vehicle maintenance in a fun, engaging way. And who knows? Maybe the skills you learn keeping your virtual RV running will inspire you to take better care of your real vehicle too.
Remember, whether you’re pouring virtual oil into a game engine or changing the oil in your actual RV, the principle is the same: take care of your engine, and it will take care of you. Happy travels, both virtual and real!
FAQ
Q: How often should I change my RV’s oil?
A: For conventional oil, change every 3,000-5,000 miles or annually. For synthetic oil, you can go 10,000-15,000 miles. Always check your owner’s manual for specific recommendations.
Q: Can I use car engine oil in my RV?
A: It depends on your RV’s engine. Many RVs use standard automotive engines, so regular car oil may work. However, always check your owner’s manual for the recommended oil type and viscosity.
Q: How much oil does an RV engine typically hold?
A: RV engines hold significantly more oil than cars – typically 12-28 quarts depending on the engine size and type. Diesel engines often hold even more.
Q: Is it worth changing my RV oil myself?
A: If you have the tools, space, and confidence, DIY oil changes can save you $100-300 per service. However, if you’re not comfortable working on engines, professional service is worth the peace of mind.
Q: What happens if I ignore the “Check Engine” light in RV There Yet?
A: Your engine will eventually fail completely, forcing you to restart from the last checkpoint. It’s always better to repair the engine as soon as the warning appears.
Q: Where can I find Motor Oil in RV There Yet?
A: You can find Motor Oil bottles at the starting campsite near the tent, and additional bottles spawn at various campsites and exploration areas throughout the map.
Q: How do I access the engine in RV There Yet?
A: The engine is located under the bed at the back of the RV’s interior. Open the hatch in the floor to access the engine compartment.
Q: What are the most common causes of RV engine failure?
A: The most common causes include lack of regular oil changes, overheating, ignored fluid leaks, and driving with damaged components. Regular maintenance can prevent most of these issues.
Q: Can I use synthetic oil in my older RV?
A: Yes, and in many cases, synthetic oil is actually better for older engines as it provides better protection and can help reduce oil consumption. However, consult your owner’s manual first.
Q: How do I dispose of used RV oil properly?
A: Store used oil in clean, sealed containers and take them to auto parts stores, recycling centers, or hazardous waste facilities. Never dump oil on the ground or in waterways.
Looking for more RV There Yet tips? Check out our RV There Yet beginner guide and Antidotes and EpiPens survival guide for more game strategies!
For more gaming content and guides, visit our gaming section regularly for the latest tips and tricks.