Hey there, fellow forest survivor! If you’re anything like me, you’ve probably spent countless nights in this mysterious Roblox world, wondering which class is truly worth your hard-earned gems. I’ve been where you are – staring at that class menu, diamonds burning a hole in your virtual pocket, trying to decide where to invest.
After surviving over 1,000 nights across multiple playthroughs and testing every single class extensively, I’m here to share everything I’ve learned. This isn’t just another basic class list – this is the definitive guide that will help you make the right choice for your playstyle, whether you’re flying solo or rolling with a full squad.
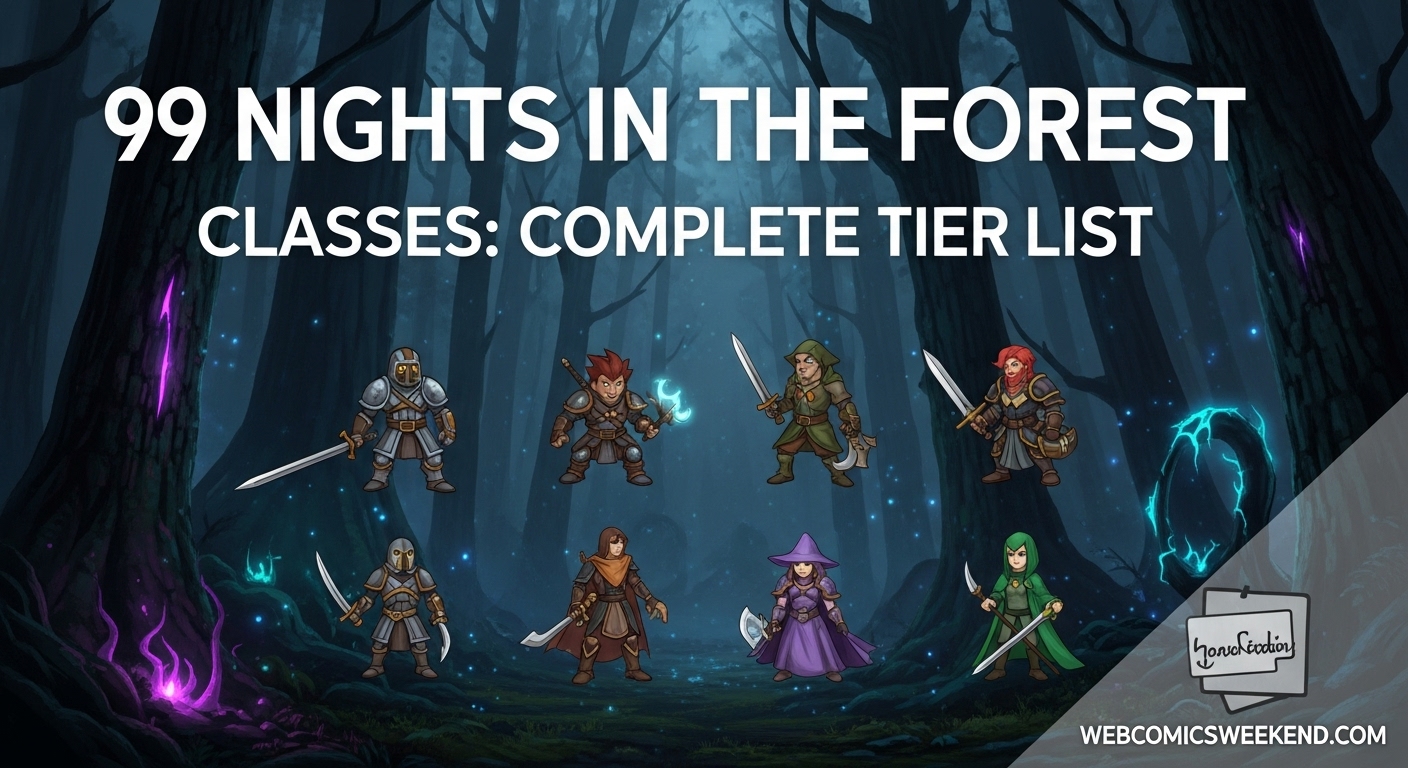
What Are Classes in 99 Nights in the Forest?
Before we dive into the nitty-gritty, let me break down what classes actually do in this game. Classes are essentially character builds that give you unique starting equipment, special perks, and progression paths. They’re not just cosmetic – they fundamentally change how you play the game.
When I first started playing, I made the mistake of thinking classes were just about starting items. Boy, was I wrong! Each class comes with three levels of perks that unlock as you play, and these can make or break your survival strategy. Some classes are absolute game-changers, while others… well, let’s just say they’re better left for when you’re feeling adventurous.
How to Unlock Classes?
You can’t just pick any class right off the bat. Classes are unlocked using Diamonds, which are the premium currency in 99 Nights in the Forest. Here’s how you can get your hands on these precious gems:
- Inputting codes in the shop menu (these are regularly updated by developers)
- Completing badges and redeeming them from the experience lobby
- Surviving milestones – specifically 50 and 99 nights in a single run
- Conquering the Cultist Stronghold on the outskirts of the forest
- Finding them randomly in chests throughout the map
Pro tip: Don’t spend your Diamonds willy-nilly! I learned this the hard way early on. Some classes cost as little as 10 Diamonds, while the premium ones will set you back 600 Diamonds. That’s a massive investment, so you want to make sure you’re getting your money’s worth.
The Ultimate Class Tier List
After countless hours of testing and analyzing data from multiple sources, I’ve created what I believe is the most accurate and useful tier list for 99 Nights in the Forest classes. This isn’t just based on theory – it’s based on real gameplay experience across different scenarios.
S+ Tier: The Absolute Best
These classes are game-changers. If you can afford them, they’re worth every diamond and will significantly improve your survival chances.
| Class | Cost | Starting Equipment | Why It’s S+ Tier |
|---|---|---|---|
| Cyborg | 600 Diamonds | Laser Cannon, Alien Armour | The ultimate combat machine. Kills restore alien tech energy, making you self-sufficient in long fights. |
| Big Game Hunter | 600 Diamonds | Rifle, 12 Rifle Ammo | Permanent stat boosts from animal pelts. Insane late-game potential. |
| Assassin | 500 Diamonds | Katana, 120 Throwing Knives | Incredible mobility with crit chance. Perfect for speed runs and exploration. |
| Fire Bandit | 200 Diamonds | Infernal Crossbow, Wildfire Potion | Infinite ammo potential and auto-cooking. Amazing value for cost. |
| Alien | 100 Diamonds | Raygun | Excellent night vision and movement speed. Great for both exploration and combat. |
| Poison Master | 200 Diamonds | Blow Pipe, Poison Armor | Poison spreading effects make crowd control effortless. |
S Tier: Excellent Choices
These classes are fantastic and will serve you well in most situations. They might not be quite as broken as the S+ tier, but they’re still top-tier picks.
| Class | Cost | Starting Equipment | Why It’s S Tier |
|---|---|---|---|
| Necromancer | 600 Diamonds | Cultist Staff | Army of undead summons. Late-game powerhouse with up to 6 cultists. |
| Pyromaniac | 600 Diamonds | Flamethrower | Auto-cooking and speed boosts from burning enemies. Great for clearing areas. |
| Brawler | 100 Diamonds | Leather Body | Massive HP boost and melee damage. Can’t use ranged weapons but dominates up close. |
| Beastmaster | 400 Diamonds | Good Taming Flute | Summon wolves and alpha wolves. Pet-based combat is surprisingly effective. |
| Zookeeper | 70 Diamonds | Taming Whistle | Enhanced taming capabilities. Great with the recent taming updates. |
A Tier: Solid Performers
These classes are good and will definitely help you survive, but they’re not quite at the same level as the S-tier classes. Still worth considering if they fit your playstyle.
| Class | Cost | Starting Equipment | Why It’s A Tier |
|---|---|---|---|
| Lumberjack | 70 Diamonds | Good Axe | Excellent resource gathering. Bonus logs and saplings make base-building easier. |
| Blacksmith | 200 Diamonds | Hammer | Advanced crafting capabilities. Extra scraps from grinder are invaluable. |
| Chef | 150 Diamonds | Chef’s Station Blueprint, Recipe Book | Powerful food buffs. Unique recipes provide huge team benefits. |
| Berserker | 100 Diamonds | Med Kit | Auto-revive and damage scaling with low health. High risk, high reward. |
| Gambler | 55 Diamonds | Random Starter Item | Chest manipulation can be incredibly lucky or unlucky. Fun but inconsistent. |
| Ranger | 70 Diamonds | Flashlight, Revolver, 18 Ammo | Solid ranged combat. Ammo refund chance helps sustainability. |
| Support | 45 Diamonds | Bandage | Excellent for team play. Bonding mechanic provides unique team synergy. |
B Tier: Decent but Outclassed
These classes aren’t bad by any means, but they’re generally outperformed by higher-tier classes. They might be worth considering for specific situations or if you’re playing with a coordinated team.
| Class | Cost | Starting Equipment | Why It’s B Tier |
|---|---|---|---|
| Farmer | 80 Diamonds | Watering Can | Useful for taming with the recent updates, but niche otherwise. |
| Medic | 40 Diamonds | 2 Bandages | Great for team revives, but less useful for solo play. |
| Hunter | 40 Diamonds | 2 Bear Traps | Decent for early game hunting, but perks aren’t game-changing. |
| Base Defender | 40 Diamonds | 2 Defense Blueprints | Good for base-focused strategies, but situational. |
| Fisherman | 50 Diamonds | Fishing Rod | Specialized for fishing, but very niche outside of that. |
| Scavenger | 25 Diamonds | None | Early game sack space is nice, but quickly outclassed. |
| Undead | 100 Diamonds | Bandage | Interesting revival mechanics, but inconsistent and expensive for what it offers. |
C Tier: Not Worth Your Diamonds
I hate to be harsh, but these classes are generally not worth investing your hard-earned diamonds in. They either have very weak perks or are completely outclassed by other classes.
| Class | Cost | Starting Equipment | Why It’s C Tier |
|---|---|---|---|
| Cook | 40 Diamonds | Seasoning | Basically a worse version of Chef. Perks are too minor. |
| Decorator | 40 Diamonds | Hammer | Purely cosmetic focus. Doesn’t help with survival at all. |
| Camper | 10 Diamonds | Flashlight | The cheapest class for a reason. Perks are barely noticeable. |
Detailed Class Breakdown
Now let me dive deep into each class, explaining exactly what they do, their progression requirements, and my personal experiences with them.
S+ Tier Classes in Detail
Cyborg (600 Diamonds)
Starting Equipment: Laser Cannon, Alien Armour
Level 1 Perk: Excellent visibility at night, Alien tech overheating causes damage and temporarily lowers armor
Level 2 Perk: Alien tech deals increased damage
Level 3 Perk: Kills restore some alien tech energy
Level Requirements:
- Level 2: Damage multiple targets with one shot (50), Get kills with alien tech (200)
- Level 3: Damage multiple targets with one shot (100), Get kills with alien tech (350)
My Experience: The Cyborg is, without a doubt, the most powerful class in the game. When I first unlocked it, I couldn’t believe how much easier the game became. The Level 3 perk is what makes it truly broken – being able to restore your alien tech energy with kills means you never run out of ammo for your laser weapons. It’s expensive at 600 diamonds, but if you can afford it, it’s absolutely worth every single gem.
Best For: Solo players, late-game runs, combat-focused players
Big Game Hunter (600 Diamonds)
Starting Equipment: Rifle, 12 Rifle Ammo
Level 1 Perk: Consumes animal pelts to gain permanent bonuses
Level 2 Perk: Higher pelt drop rate
Level 3 Perk: Consume infinite amount of mammoth tusks to permanently gain health
Level Requirements:
- Level 2: Kill wolves (70), Use animal pelts (50)
- Level 3: Kill wolves (150), Use animal pelts (100)
My Experience: The Big Game Hunter is all about that late-game scaling. When I first started using it, I didn’t think much of it, but once I started collecting those permanent bonuses from animal pelts, I realized how powerful it could be. By the time I reached the later nights, my character was significantly stronger than when I started. The mammoth tusk consumption for permanent health is just icing on the cake.
Best For: Long survival runs, players who enjoy hunting, late-game focused players
Assassin (500 Diamonds)
Starting Equipment: Katana, 120 Throwing Knives
Level 1 Perk: +10% sprint speed, -15% HP, +5% chance Throwing Knives spawn in chests
Level 2 Perk: First hit has a chance to critically strike
Level 3 Perk: +10% chance Throwing Knives spawn in chests
Level Requirements:
- Level 2: Kills with no damage taken (100), Studs travelled (2,500)
- Level 3: Kills with no damage taken (250), Studs travelled (10,000)
My Experience: The Assassin is my go-to class for speed runs and exploration. That extra sprint speed might not sound like much, but when you’re trying to cover ground quickly or escape from dangerous situations, it makes a world of difference. The critical strike chance on the first hit is also surprisingly effective. I’ve taken down tough enemies in a single hit thanks to this perk.
Best For: Speed runners, exploration-focused players, players who enjoy high-risk, high-reward gameplay
Fire Bandit (200 Diamonds)
Starting Equipment: Infernal Crossbow, Wildfire Potion
Level 1 Perk: Starts with Infernal Crossbow and Wildfire potion
Level 2 Perk: Other tools have a chance to set enemies on fire
Level 3 Perk: +10% chance to get a Wildfire potion from chests
Level Requirements:
- Level 2: Kill enemies with fire (100), Set enemies on fire (200)
- Level 3: Kill enemies with fire (250), Set enemies on fire (500)
My Experience: The Fire Bandit is probably the best value class in the game. For only 200 diamonds, you get a class that can compete with the 600 diamond classes. The Infernal Crossbow is already great, but when you add in the chance for other tools to set enemies on fire and the potential for infinite Wildfire potions, you have a recipe for success. Plus, the auto-cooking feature means you never have to worry about food.
Best For: Players on a budget, fire-focused combat, team support with cooking
Alien (100 Diamonds)
Starting Equipment: Raygun
Level 1 Perk: Excellent visibility at night, Sprint slower when alien tech is overheating
Level 2 Perk: Alien tech recharges faster
Level 3 Perk: Sprint faster when alien tech is at full charge
Level Requirements:
- Level 2: Get kills with alien tech (150)
- Level 3: Get kills with alien tech (300)
My Experience: The Alien class is incredibly versatile. The night vision alone makes it worth considering, but when you add in the movement speed bonuses and the fact that you start with a Raygun, it becomes a steal at only 100 diamonds. I love using this class for exploration because I can move quickly and see perfectly at night. The alien tech mechanics take some getting used to, but once you master them, you’re nearly unstoppable.
Best For: Exploration, night operations, players who want a good balance of combat and utility
Poison Master (200 Diamonds)
Starting Equipment: Blow Pipe, Poison Armor
Level 1 Perk: Poison effects are stronger
Level 2 Perk: 25% chance for enemies to spread their poison on death
Level 3 Perk: Attacks deal increased damage to enemies afflicted with poison
Level Requirements:
- Level 2: Kill enemies that are poisoned (100)
- Level 3: Kill enemies that are poisoned (250)
My Experience: The Poison Master is all about that sweet, sweet area of effect damage. When I first tried it, I didn’t expect much, but seeing poison spread from enemy to enemy is incredibly satisfying. The Level 3 perk, which increases damage to poisoned enemies, turns this from a decent class into a crowd-clearing machine. It’s especially effective against groups of weaker enemies.
Best For: Crowd control, area denial, players who enjoy damage-over-time effects
S Tier Classes in Detail
Necromancer (600 Diamonds)
Starting Equipment: Cultist Staff
Level 1 Perk: Collect souls from dead cultists, Use staff to consume souls and resurrect cultists, Can have up to 6 summons
Level 2 Perk: Resurrected cultists deal greater damage
Level 3 Perk: Better night vision the more cultists you have
Level Requirements:
- Level 2: Deal damage with pets/summons (5,000), Resurrect Cultists (100)
- Level 3: Deal damage with pets/summons (5,000), Resurrect Cultists (200)
My Experience: The Necromancer is a late-game powerhouse. Early on, it can feel a bit weak, but once you start building up your army of cultists, it becomes incredibly powerful. I’ve had runs where I had 6 cultists following me around, basically doing all the work for me. The night vision bonus with more cultists is also a nice touch that makes it more viable for night operations.
Best For: Late-game runs, players who enjoy minion-based gameplay, crowd control
Pyromaniac (600 Diamonds)
Starting Equipment: Flamethrower
Level 1 Perk: Reload flamethrower with fuel canisters and oil barrels, Food is auto-cooked on drop
Level 2 Perk: Fuel canisters and oil barrels restore more fuel
Level 3 Perk: Move faster for every burning enemy
Level Requirements:
- Level 2: Kill enemies with fire (150)
- Level 3: Kill enemies with fire (400)
My Experience: The Pyromaniac is pure chaos in the best way possible. There’s something incredibly satisfying about setting everything on fire and watching it burn. The auto-cooking feature is great for convenience, and the speed boost from burning enemies makes it surprisingly mobile. However, I will say that it’s been somewhat outclassed by the Fire Bandit since that class was added, as the Fire Bandit offers similar benefits for a much lower cost.
Best For: Players who enjoy fire-based gameplay, area clearing, convenience-focused players
Brawler (100 Diamonds)
Starting Equipment: Leather Body
Level 1 Perk: Can’t use ranged weapons, +40% HP, +30% more damage with melee weapons
Level 2 Perk: +10% health regeneration, regenerates sooner after taking damage
Level 3 Perk: +5% chance to block incoming damage
Level Requirements:
- Level 2: Receive melee attacks (200), Attack with melee (350)
- Level 3: Regenerate HP (5,000), Attack with melee (600)
My Experience: The Brawler is exactly what it sounds like – a class that excels at getting up close and personal. When I first tried it, I was skeptical about not being able to use ranged weapons, but the massive HP boost and increased melee damage more than make up for it. The health regeneration and chance to block damage make it surprisingly survivable. It’s especially effective in the Cultist Stronghold where you’re often fighting in close quarters anyway.
Best For: Melee-focused players, close-quarters combat, Cultist Stronghold runs
Beastmaster (400 Diamonds)
Starting Equipment: Good Taming Flute
Level 1 Perk: Summon wolves with 3 steak, Starts with 3 steak, Can have up to 5 pets
Level 2 Perk: Tamed wolves run faster while attacking
Level 3 Perk: First wolf summoned is an alpha wolf
Level Requirements:
- Level 2: Deal damage with pets/summons (5,000), Summon wolves (50)
- Level 3: Deal damage with pets/summons (15,000), Summon wolves (50)
My Experience: The Beastmaster is a lot of fun, especially with the recent taming updates. Being able to summon wolves and have them fight alongside you adds a whole new dimension to the gameplay. The alpha wolf you get at Level 3 is particularly impressive – it’s significantly stronger than regular wolves and can really turn the tide in tough fights. It’s expensive at 400 diamonds, but if you enjoy pet-based gameplay, it’s worth it.
Best For: Pet-based gameplay, summon-focused players, players who enjoy the taming mechanic
Zookeeper (70 Diamonds)
Starting Equipment: Taming Whistle
Level 1 Perk: Taming whistle levels faster, Can have 3 tamed animals regardless of flute level
Level 2 Perk: Feeding tamed animals restores more of their health
Level 3 Perk: Require 1 less step to tame an animal
Level Requirements:
- Level 2: Tame animals (30)
- Level 3: Tame animals (60)
My Experience: The Zookeeper is a more budget-friendly version of the Beastmaster, focusing more on the taming aspect rather than summoning. With the recent taming updates, this class has become much more viable. Being able to have 3 tamed animals right from the start is great, and the reduced taming steps at Level 3 makes it much easier to build up your animal army. It’s a solid choice for players who enjoy the taming mechanic but don’t want to spend 400 diamonds on the Beastmaster.
Best For: Taming-focused players, budget-friendly pet gameplay, players who want to try the taming mechanic
Best Classes for Different Playstyles
Not everyone plays the same way, and that’s okay! Here are my recommendations for different playstyles and situations:
Best Classes for Solo Players
When you’re flying solo, you need classes that can handle everything on their own. Here are my top picks:
- Cyborg – The ultimate solo class. Self-sufficient with energy restoration and excellent combat capabilities.
- Alien – Great mobility and night vision make it perfect for solo exploration.
- Big Game Hunter – The permanent stat bonuses mean you get stronger as you progress, which is perfect for long solo runs.
Best Classes for Team Play
When you’re playing with friends, coordination and synergy become important:
- Support – The bonding mechanic is incredibly powerful in team settings.
- Medic – Faster revives can save your team in tough situations.
- Chef – The food buffs benefit the entire team.
- Lumberjack – Extra resources help the whole team build up faster.
Best Classes for Beginners
If you’re just starting out, you want something forgiving and straightforward:
- Scavenger – Cheap and the extra sack space is invaluable when you’re learning.
- Lumberjack – The resource gathering bonuses help you build up faster.
- Alien – The night vision and movement speed are great for learning the maps.
Best Classes for Late Game
When you’re aiming for those 99+ night survival runs, you need something that scales well:
- Big Game Hunter – The permanent stat bonuses keep getting better.
- Cyborg – Consistent performance throughout the entire run.
- Necromancer – Starts weak but becomes incredibly powerful late game.
Class Progression and Leveling Tips
Getting the most out of your class means understanding how to level it up effectively. Here are some tips I’ve learned from countless hours of gameplay:
General Leveling Tips
- Focus on one class at a time – Don’t try to level multiple classes simultaneously. You’ll make much faster progress if you concentrate on one.
- Plan your route – Look at the requirements for the next level and plan your gameplay accordingly. Need to kill animals? Head to areas where they spawn frequently.
- Team up for requirements – Some requirements are much easier to complete in a team. Reviving other players, for example, goes much faster when you have teammates who actually need reviving.
- Use the right tools – Make sure you’re using the weapons and items that count toward your class requirements.
Specific Class Leveling Strategies
For Combat Classes (Assassin, Brawler, Cyborg)
- Focus on areas with high enemy density
- Use weapons that count toward your requirements
- Don’t be afraid to take risks for those “no damage taken” kills
For Resource Classes (Lumberjack, Blacksmith, Farmer)
- Plan efficient gathering routes
- Focus on areas rich in your target resource
- Consider playing during quieter times when resources are more abundant
For Support Classes (Medic, Support, Chef)
- Play with teammates whenever possible
- Let your team know you’re working on specific requirements
- Position yourself to be helpful while still working on your goals
Frequently Asked Questions
What’s the absolute best class in 99 Nights in the Forest?
Based on my extensive testing, the Cyborg is currently the best overall class. Its ability to restore alien tech energy with kills makes it incredibly self-sufficient, and it excels in both solo and team play. However, the “best” class really depends on your playstyle and what you enjoy doing in the game.
Which class gives the best value for diamonds?
The Fire Bandit offers incredible value at only 200 diamonds. It provides benefits comparable to much more expensive classes, including infinite ammo potential and auto-cooking. For budget-conscious players, it’s hard to beat.
Are there any classes that are completely not worth buying?
Unfortunately, yes. The Camper, Decorator, and Cook classes are generally not worth your diamonds. Their perks are too weak or too niche to justify the investment, even at their low costs.
What’s the best class for solo survival?
For solo play, I recommend the Cyborg or Alien. Both offer excellent self-sufficiency with the Cyborg being more combat-focused and the Alien being more exploration-focused. The Big Game Hunter is also great for long solo runs due to its permanent stat bonuses.
Which class is best for team play?
The Support class shines in team settings with its bonding mechanic, but the Medic and Chef are also excellent choices for team support. For a balanced team composition, you’ll want a mix of combat classes and support classes.
How do I get diamonds quickly?
The fastest ways to get diamonds are:
- Inputting active codes (check regularly for new ones)
- Surviving 50 and 99 nights in a single run
- Completing badges and achievements
- Conquering the Cultist Stronghold
Can I change my class after selecting one?
Yes! You can change your class at any time from the Class menu in the lobby. However, you’ll need to pay the diamond cost again for the new class, so choose wisely.
Do class perks stack if I have multiple classes?
No, class perks don’t stack. You can only have one class active at a time, so you’ll only benefit from that class’s perks and starting equipment.
Final Thoughts and Recommendations
After spending countless hours with every class in 99 Nights in the Forest, I can confidently say that there’s no single “best” class for everyone. The right choice depends on your playstyle, your goals, and what you find fun in the game.
If I had to give one piece of advice to new players, it would be this: Start with the Scavenger or Lumberjack to get a feel for the game, then save up for either the Alien or Fire Bandit as your first major investment. These classes offer excellent value and will help you progress much faster.
For experienced players looking to optimize, the Cyborg and Big Game Hunter are your endgame goals. They’re expensive, but they’re worth every diamond for the massive advantages they provide.
Remember, the most important thing is to have fun! Don’t get too caught up in tier lists and meta choices. If you enjoy playing as a certain class, even if it’s not top-tier, that’s what matters most.
Bookmark this guide and check back regularly for updates as new classes are added and the meta evolves. The developers are constantly adding new content, and I’ll be here to keep you informed about all the latest changes and strategies!